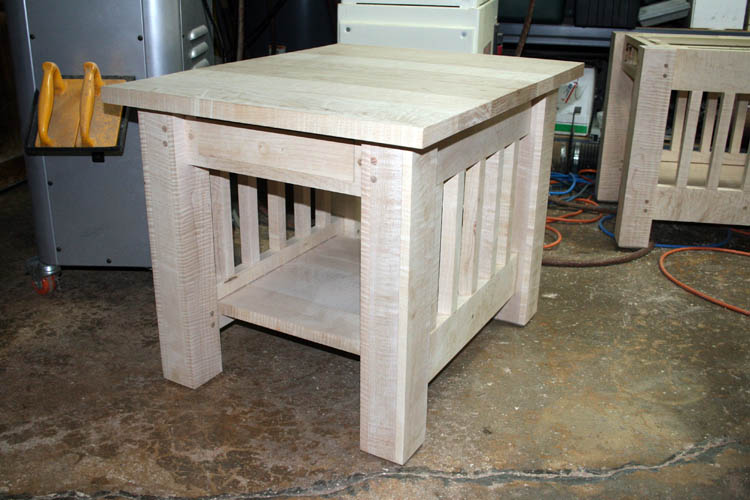
CURLY MAPLE END TABLES - MISSION STYLEI
finished the curly maple coffee table on 05-24-18 and very pleased with the
results and time to start rounding up additional curly maple wood for the
end tables. I plan to use 1 inch thick curly maple for the top and
aprons and will use 15/16 or less thickness for the small shelf that adds
support to the lower legs and for storage.
The end tables will be basically a carbon copy of the coffee table except
for the length and the height. My initial size in mind will be 22
inches width, 27 inches length and 21 inches height and the legs will be 3
+- inches square; still a brutish
design as our Son
Bill, Jr. calls such.
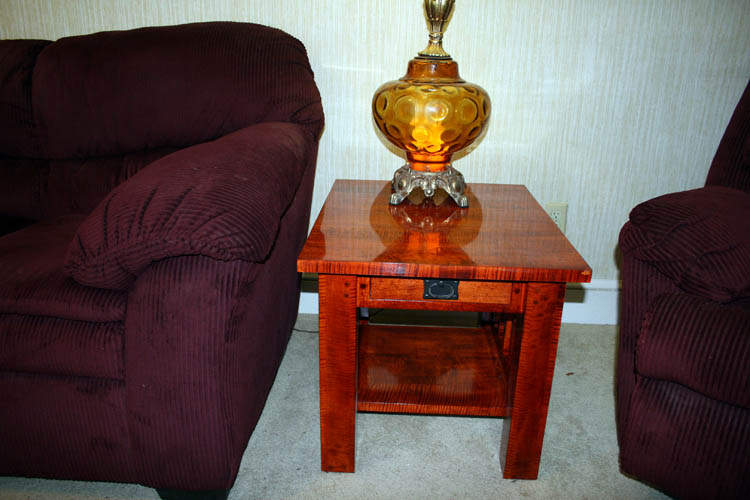
COMPLETED END TABLES
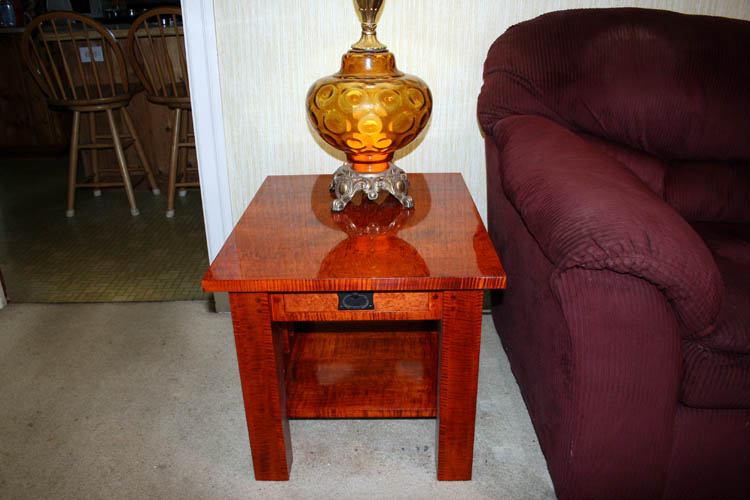
Obtained a decent mirror finish to the end table tops.
This has been a fun project and I am now surrounded by curly
maple wood including my Porter Custom Made
Resophonic Guitar and have God's Holy Word
aka Bibles in a curly maple
serving tray within arms reach, but most importantly,
God's Holy Word dwells within my
soul, spirit and body!
NOTE: I finally located and ordered mission style drawer pulls via
the internet small enough for
the end table and coffee table drawers and will replace the custom made walnut drawer pulls
when they arrive. Swapped out the black walnut drawer pulls with the
mission style drawer pulls on 05-20-19 and the end tables and coffee table
is period correct now.
Web page updated by Bill aka Mickey Porter on 05-09-19, 05-13-19 and
05-20-19.
PERSONAL SAFETY AND LIABILITY ISSUES
My goal will be to keep
Safety paramount because hand and power tools can
do serious bodily harm and death if not used properly, therefore these pages
are solely for entertainment purposes only from a personal
liability standpoint. Please read the
Legal Stuff
page for additional information concerning liability issues before going
any further. Safety glasses and hearing protection is a must although
I do forgo the hearing protection many times; my bad!
MATERIALS
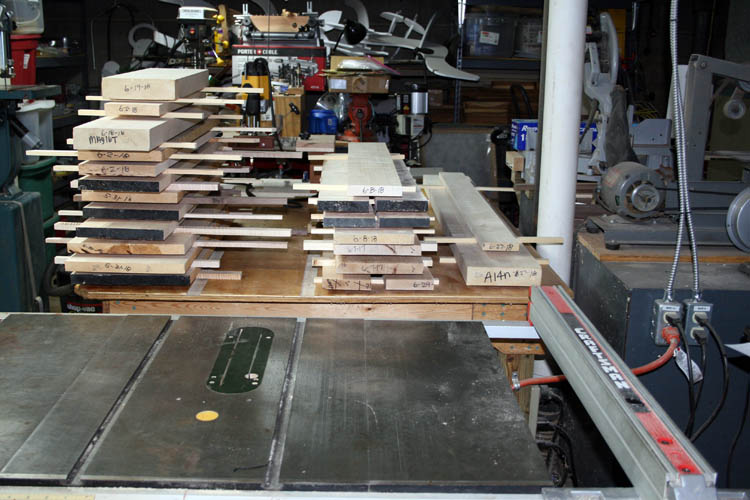
I have an assortment of curly maple boards ranging from 1 inch thickness
down to 3/4 inch thickness, however I do not have enough 1 inch thick boards
for the top and aprons. I ordered half dozen boards from Dustin
Hensley of Gray, Kentucky and will try and find some 8/4 aka 2 inch
thick curly maple boards for making the legs which will be laminated as the
coffee table
legs. As soon as Dustin has additional curly maple boards in stock, I
will order enough to complete this project.
When said boards arrive, I will place them on stickers and allow to
acclimate to my basement garage woodworking shop humidity conditions before
processing them.
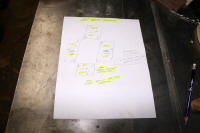
INFORMAL DRAWING OF END TABLES

I have a folder with the material purchases and like the curly maple
coffee table,
the material cost is expensive, but will be worth the cost and is a labor of
love.
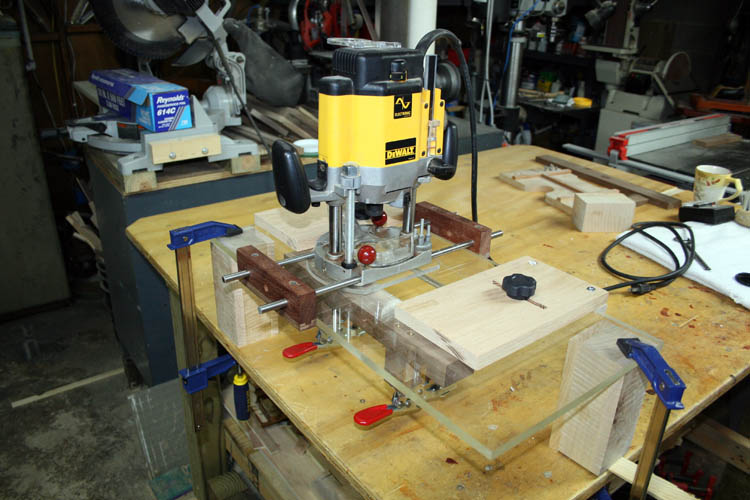
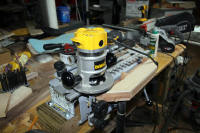
MORTISE WITH THE PLUNGE ROUTER
I plan to use one of my DeWalt 3HP plunge routers with a 1/2 inch diameter solid
carbide spiral
up-cut router bit x 2 inch cutting length to make the mortise slots and will use
edge guides on the sides
and figure out any easy way to control the length of the mortise slot.
I have such a fixture, but it is dedicated for another purpose and will
leave that fixture alone. Making custom jigs and fixtures seems to be part of
my metal working and woodworking DNA, and I enjoy making jigs and fixtures and
figuring out how to do things as much as doing the projects themselves.
I no doubt, will make an adjustable mortise slot jig which acts as a fixture
as well using 1/2 inch thick
Plexiglas that will work for different
applications as well.
NOTE: I completed my
mortise jig based on a
design
by router guru
Pat Warner of Escondido, CA. Pat
passed away on July 28, 2017. I had the pleasure of meeting Pat Warner
in March 2008 while
visiting with our Son Bill, Jr. and his
family in Vista, CA.
Web page updated by Bill aka Mickey Porter on 05-27-18 and 05-20-18.
Mortise Jig with base added on 05-21-18. Ready for usage.
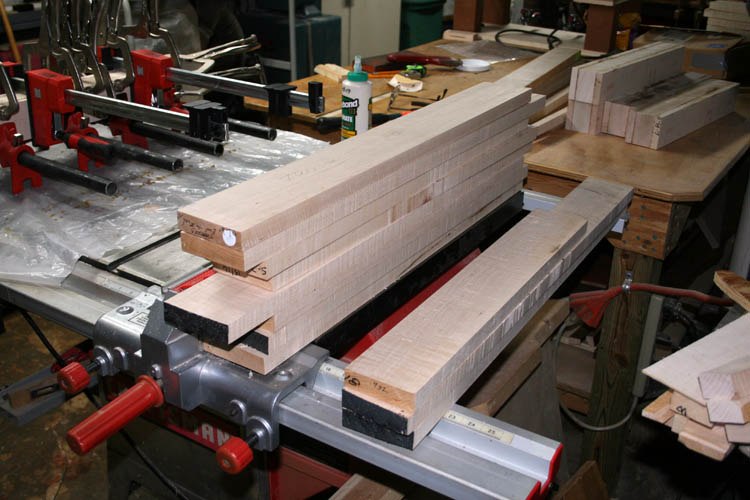
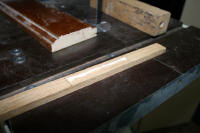
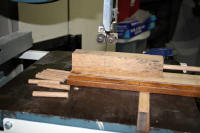
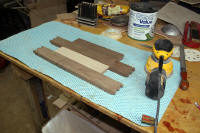
CURLY MAPLE ON STICKERS
I received some curly maple 1 inch and 15/16 boards from Dustin Hensley
this afternoon (05-21-18) and placed them on stickers in the basement
woodworking shop to acclimate to local humidity conditions. The past
couple weeks has been damp and humid and will let the boards chill out for a
few weeks to a month or more. My moisture meter is showing the
moisture content between 10 to 12 percent at this time. In the meantime, I took two of my 10 inch table saw blades
to a nearby facility that manufacturers all types of band saw blades and
sharpens various types of saw blades as well. The curly maple coffee
table took a toll on dulling the carbide tipped saw blades. I will no
doubt cut a slot in the opposite side of my home made zero insert for the
rip saw blade since there is now a good amount of clearance between the
blade and the insert due to having the blade sharpened at least three times
and normal wear and tear brought about by usage.
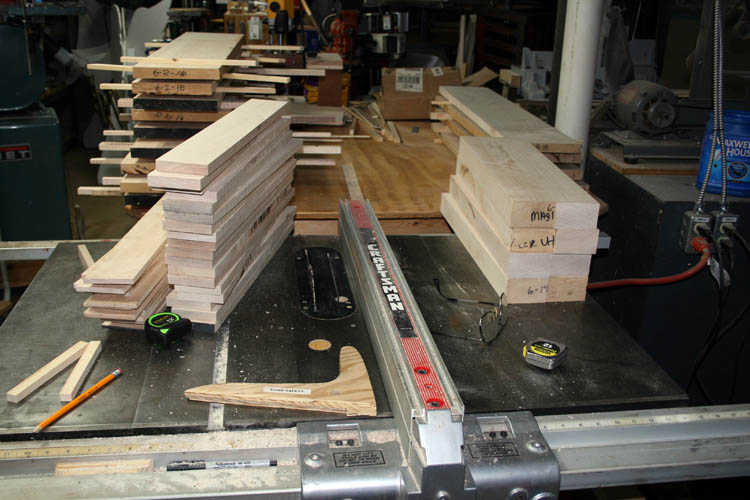
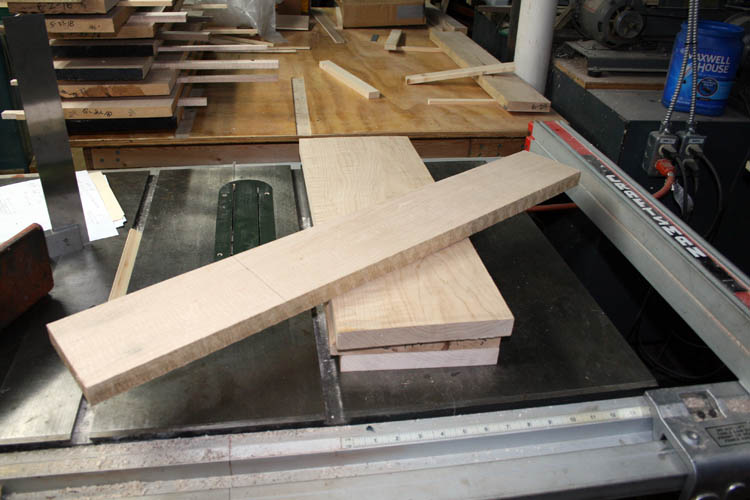
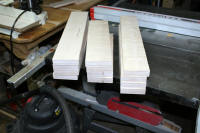
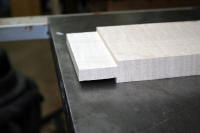
Some of the above boards are between 10 to 11 inches wide and will rip them to
around 4 to 5 inches, glue up using biscuit joinery to keep them flat.
I had one piece of wood around 9 inches in width from a few years ago that
had a warp in it, of which I will be able to use a portion of it.
I received my last piece of curly maple ordered on 06-27-18 and believe I
have enough wood to complete the two end tables. I plan to let the
wood dry an additional month and might even wait until fall of the year
before starting construction on the end tables.
Web page updated by Bill aka Mickey Porter on 05-31-18 and 06-29-18.
END TABLES STILL ON THE BACK BURNER
Today is December 14, 2018 and still have the end tables on the back
burner. Yard projects and our annual Big Game Hunting season edged out
the end tables and hopefully around the first of the year will get started
on them, the Lord willing of course.
Web page updated by Bill aka Mickey Porter on 12-14-18.
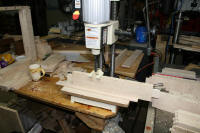
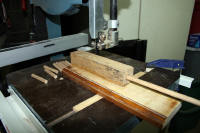
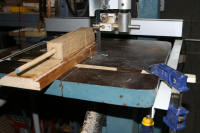
END TABLES ON THE FRONT BURNER
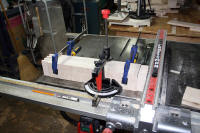
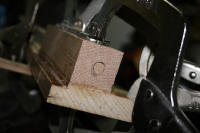
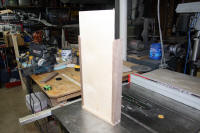
Today is January 15, 2019 and started a few days ago preparing the legs
getting them ready for a glue-up since I plan to use a brutish 3 inch square
straight leg as with the curly maple end table. The legs will consist
of a center core of around 1 7/8 inch thickness +- and will be 3 inches
square.
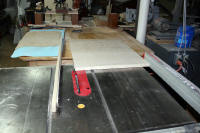
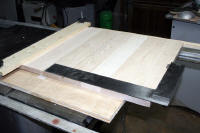
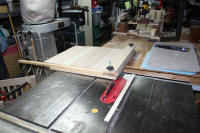
I used the planer to get the 8/4 sawed curly maple boards to the same
thickness; squared one edge using the jointer/planer and ripped the boards
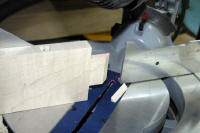
to 3 inch width on the table saw. The legs were cut to 20 inches in
length using the compound miter saw.
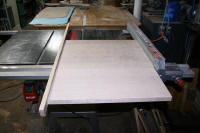
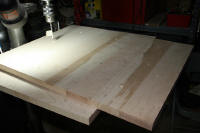
As evidenced by the above pix, I eliminated the center row of curly maple
on the outfeed/work table and the 8/4 stock. I also used some curly
maple that I had stored in the rear of the shop that was purchased a few
years ago.
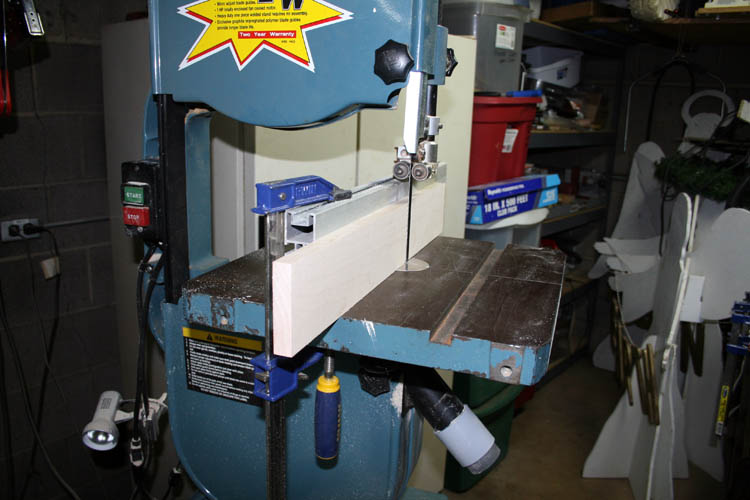
BAND SAW RE-SAWING
The band saw that I currently have is an older Jet 14 inch model that was
practically worn out when I made the trade for it, but it was still
operational. I certainly did come up short on that trade having to
replace the rubber
tires on the wheels on 05-23-16. I also added a set of
Carter blade guides above and below the table which is much better than the
original factory friction side blade synthetic inserts.
I had two years of Industrial Arts aka shop class at the Wadesboro High
School around 1962-1963 and our shop teacher was David Kephart who was a
Master Craftsman who taught us wood working skills. Most of the
equipment was set-up and maintained by Mr. Kephart and such equipment is
dangerous if safety precautions are not followed all the time.
With that said, band saws can be a hassle sometimes for re-sawing to get
a good parallel cut even using wider blades. The Jet 14 inch model band saw I have, does not
have an adjustable fence and over the years have clamped a piece of wood
and/or metal strip to use as a fence when re-sawing. Band saw blade
drift is common for a band saw that isn't properly set-up. When
properly set-up, the fence should be parallel to the slot in the band saw
table, however many times I have had to off-set the fence at a slight angle
in order to produce a parallel cut when ripping wide aka tall boards on end,
not realizing the culprit that caused such blade drift.
I have always been taught and per manufacturers equipment instructions,
the band saw blade should be tracked in the center of the wheel. This
is the number one cause of band saw drift. The gullet of the band saw
blade should be adjusted to the center of the wheel. When the band saw
blade is centered on the wheel, the teeth of the blade
does not have any support from the upper wheel rubber
tire and allows the blade to drift since the blade teeth are free floating
so to speak.
A few days ago, I did a search on YouTube and found a
video by
Alex
Snodgrass of Carter Tools detailing how to set up a band saw for resawing
which stated the gullet of the
blade should be centered on the wheel, along with adjusting the side
bearings, upper rear bearing and blade tension.
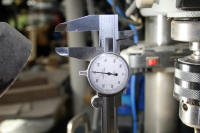
To make a long story short; I followed the instructions given by Alex
Snodgrass and placed a temporary fence on the band saw table parallel with
the table slot and was able to re-saw 3 inch x 15/16 boards on end to a
thickness of 5/8 inch thickness without any drift whatsoever. Most of
the boards thickness end to end was between .001 to .005 inches verified
with a Brown and Sharpe dial caliper which is
awesome!
I was totally amazed at the accuracy of the re-sawing operation; smooth
cutting without any blade binding or drift of the blade.
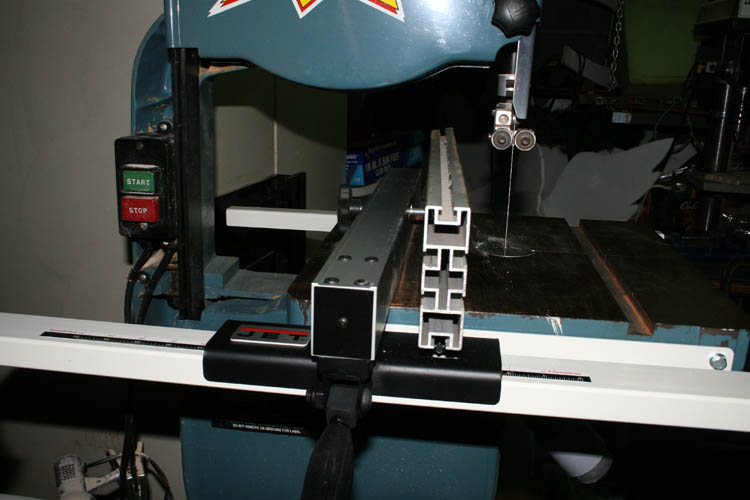
INSTALLED JET ADJUSTABLE FENCE
After re-sawing the above boards, I decided to order a Jet adjustable
fence model # 714101 and installed and set it up on 01-17-19. I was
able to attach the above extruded aluminum bar, dimensions being 1.125 x 4 x
22 inches to the Jet adjustable fence by using a T-nut that fit inside one
of the T
slot tracks in the aluminum bar. There was an elongated slot in the
Jet fence which was perfectly in line to match the existing extruded T slot in
the aluminum bar.
The front rail that the contains the fence attachment has some
adjustment in the bolt slots that are in the angle that attaches to the band
saw table by two bolts.
My complaint is that the angle bar for the front of the table and the
rear of the table is about 1/8 inch (front) in thickness and 3/32 in
thickness for the rear angle bar, but it seems to be doing what it is supposed to do.
I guess I am more use to an "overkill"
on engineering and would have the angle about 3/16 to 1/4 inch in thickness!
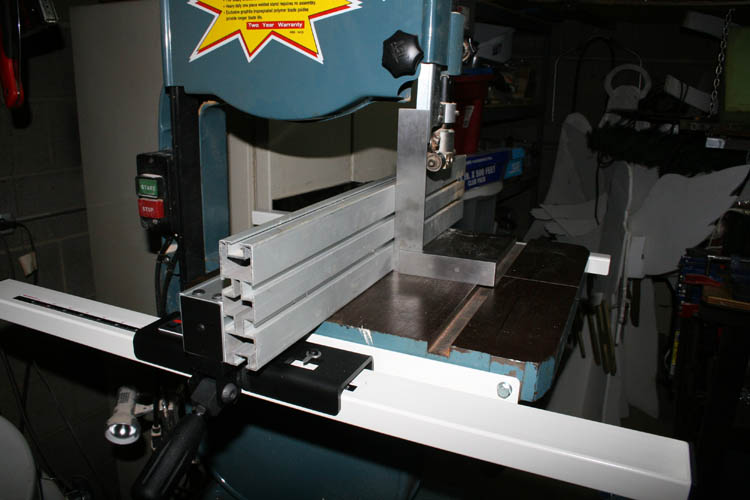
One good feature of the adjustable fence; you can remove the fence from
the table top by raising the lock down lever upwards, raising the rear of
the fence
upward and forward to disengage it from the front angle member of the fence from the
table rear angle bar. The attached rails do not interfere with regular band
sawing when the fence is removed.
Personally, this fence is under engineered in my humble opinion!
Kreg makes a rip fence that is far sturdier than this Jet model fence.
The band saw table must be at a ninety (90) degree angle to the band saw
blade and has a ninety (90) degree stop bolt/nut underneath the table that you can adjust the table angle
and return back to zero. Most band saws have a calibrated scale
attached to the trunnion, it will get you in the ball park so to speak. The
Starrett machinists square is about as accurate a tool you can have for
setting such
adjustments.
There is a rule attached to the forward rail and a pointer, of which you
can calibrate, however the added thickness of the additional vertical
aluminum fence member must be taken into consideration. When
re-sawing, you want the vertical fence support to be about the same height
of the board you are re-sawing and keep the board parallel against the
vertical fence support for maximum accuracy.
Web page updated by Bill aka Mickey Porter on 01-17-19.
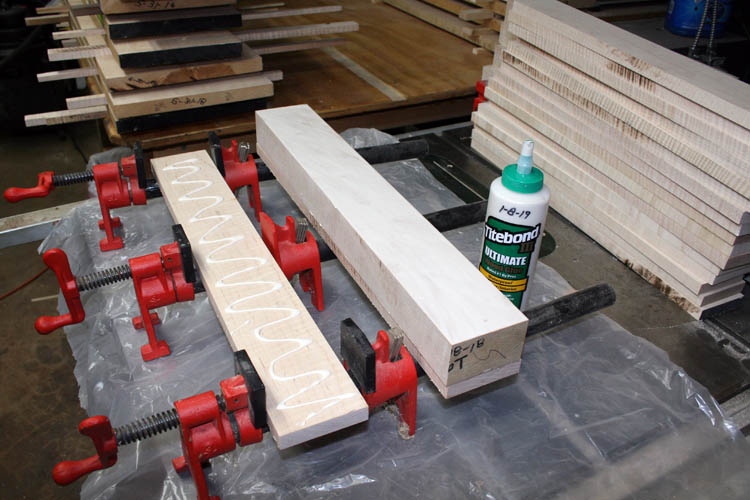
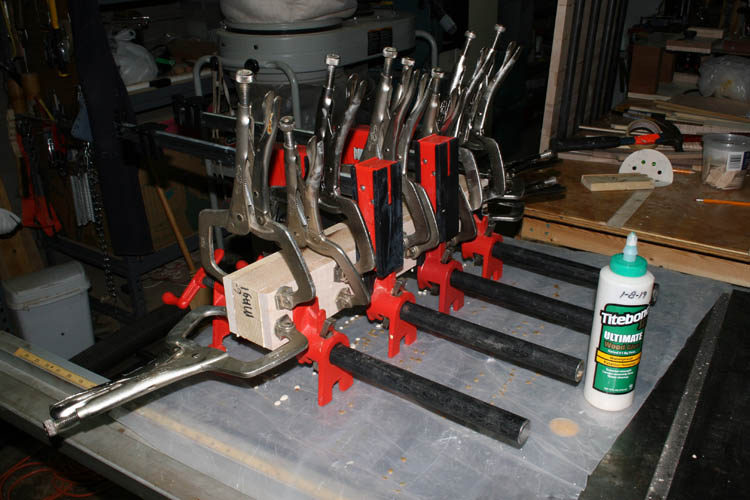
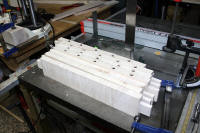
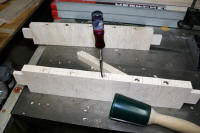
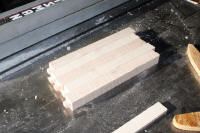
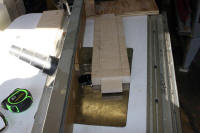
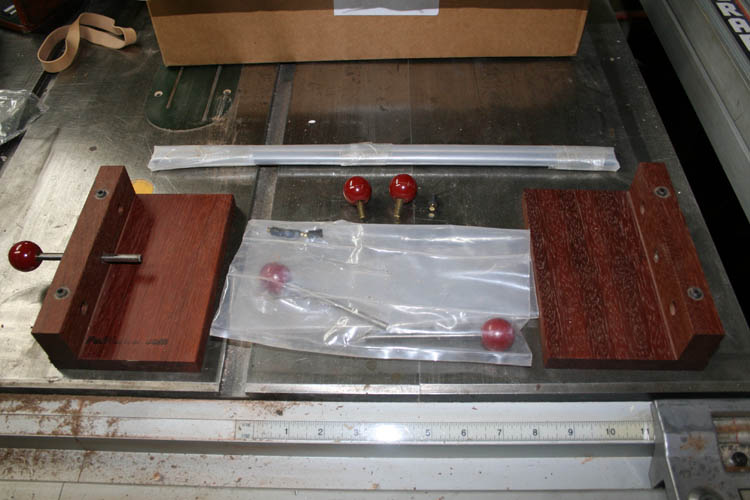
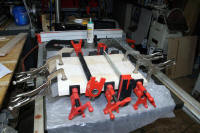
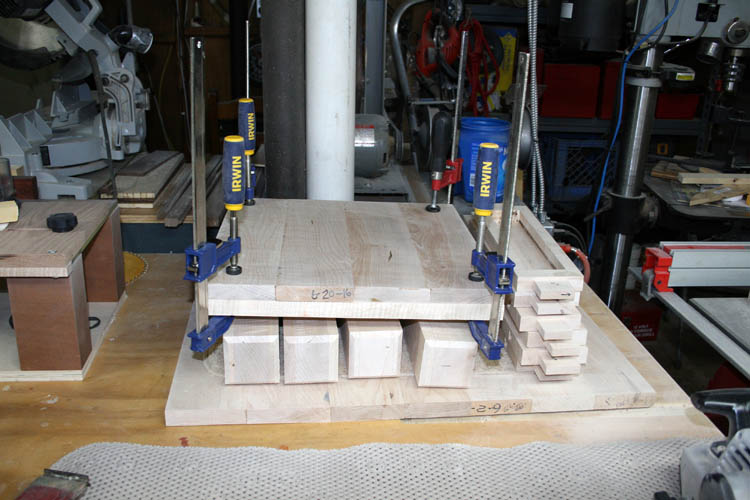
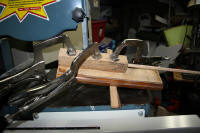
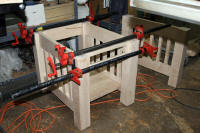
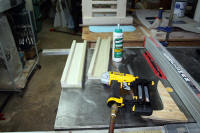
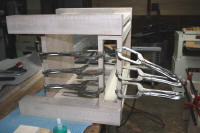
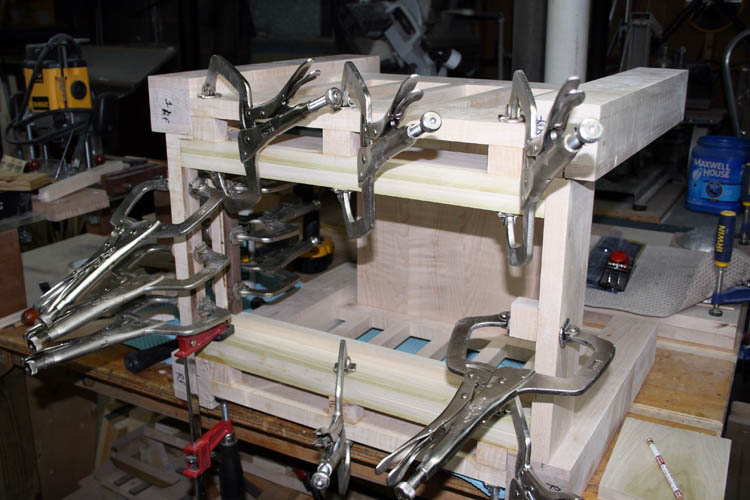
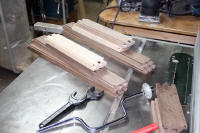
LEG GLUE UP
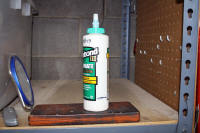
I have a 2 1/2 inch wide Speedball Deluxe Soft Rubber
Brayer roller to
use as a glue spreader on order to help spread a
thin coat of Titebond III Ultimate glue onto the laminated legs. In
the past, I have simply used a thin piece of material to accomplish
spreading the glue, but wanted to try something a little better, hopefully
that is. I normally apply far too much glue with a good portion being
squeezed out by the clamping operation to clean up later.
I glued only one leg up, although I could have used my longer Bessey pipe
clamps and ganged several of the legs for a glue up, but not in any
particular hurry.
I used a finger to spread the glue out. As annotated above, I have
a rubber glue spreader on order.
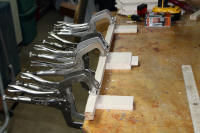
Only seven (7) more legs to go! Those Irvin 11-SP Vise-Grip Clamps
are getting a workout for sure!
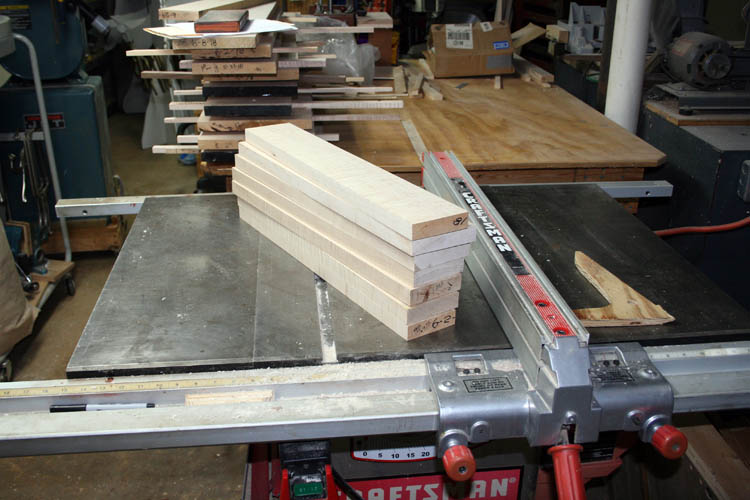
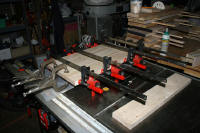
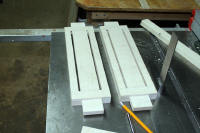
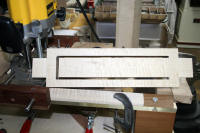
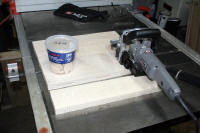
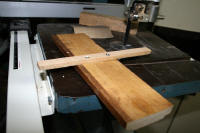
END TABLE TOP
I sorted through the curly maple boards and segregated the ones that were
close to an inch in thickness; used my dial caliper to ascertain each board
thickness. I have enough 1 inch thick boards to do only one end table
top. I have a fair amount of curly maple that is between .960 to 982
in thickness and will run them through the plainer to obtain a constant
thickness.
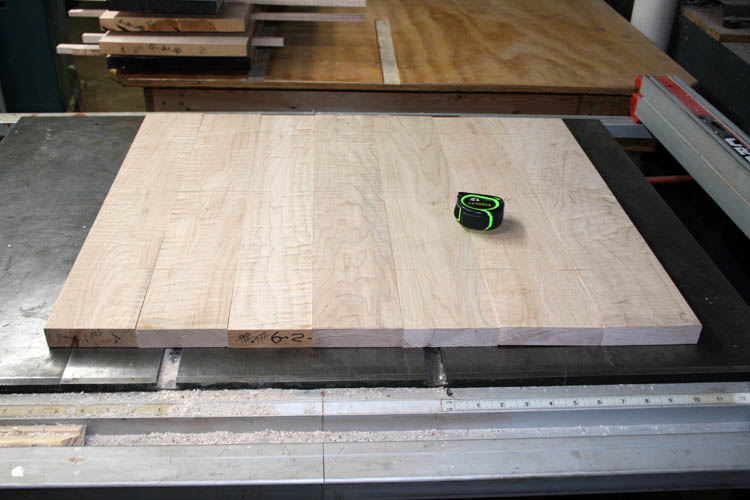
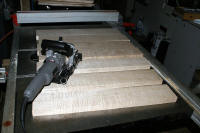
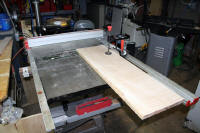
I used the table saw, miter saw and jointer to rip the wider boards to
prevent any possible cupping or bowing of the wood. The finished end table top
will be 22 x 27 inches x 1 inch +-.
The above boards were ripped and jointed to around four (4) inches +- in
width.
The curly maple doesn't have the best figure, but should pop out when stain
is applied.
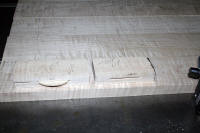
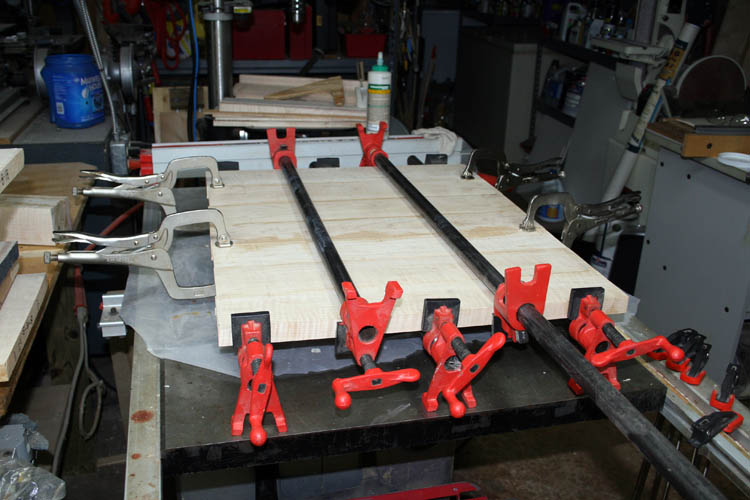
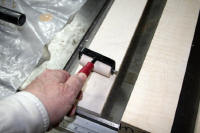
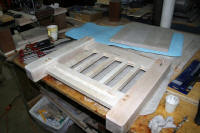
BISCUITS PLEASE - NO BUTTER OR JELLY
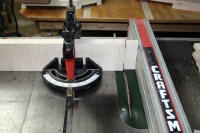
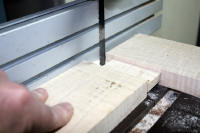
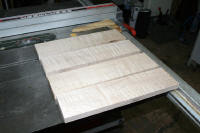
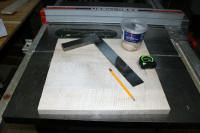
I set the Porter-Cable biscuit jointer for # 20 biscuits and marked the
layout for the biscuits. The biscuits will help keep the boards height
fairly flush and really don't need the biscuits for strength. The
second board from the right has a little twist in it, but should straighten
out during the glue up.

Click on below thumbnail pixs for a larger screen view:

I marked the boards where the biscuits will go and will route a cavity
for them tomorrow, the Lord willing of course.
I will use my shop vacuum attached to the exhaust port on the biscuit
jointer to remove the
sawdust from the tool. The dust collection bag that comes with the tool doesn't work
worth a flip.
I believe I will wait until I receive the glue spreader before I do any
more glue ups on the end table legs. Since the biscuits are for alignment of the boards only
and not for strength, I will not add glue to the biscuits or the biscuit
slots.
NOTE: Without glue applied to the biscuits, the alignment
was not as perfect as I would have liked, therefore the next glue segment of
the end table top, I will apply glue to the biscuits since the biscuits will
swell some when the glue is applied and self align the boards much better.
Web page updated by Bill aka Mickey Porter on 01-15-19 and 01-17-19.
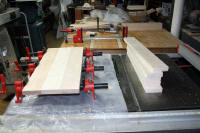
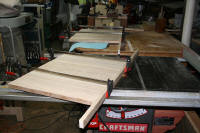
TABLE TOP GLUE-UP CONTINUED
I glued another three (3) boards together using the biscuits and will glue
the two segments together along with one other board using my longer bar
clamps when the glue dries.
If I were on production and/or in some kind of hurry, all the boards could
be glued together at one time, but with the fast setting Titebond glue, you
run the risk of the glue setting up too fast before the clamp up is done.
I believe Titebond claims the open working time is around 20 minutes, but I
apparently work far too slow......grin if you must!
Web page updated by Bill aka Mickey Porter on 01-19-19.
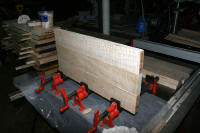
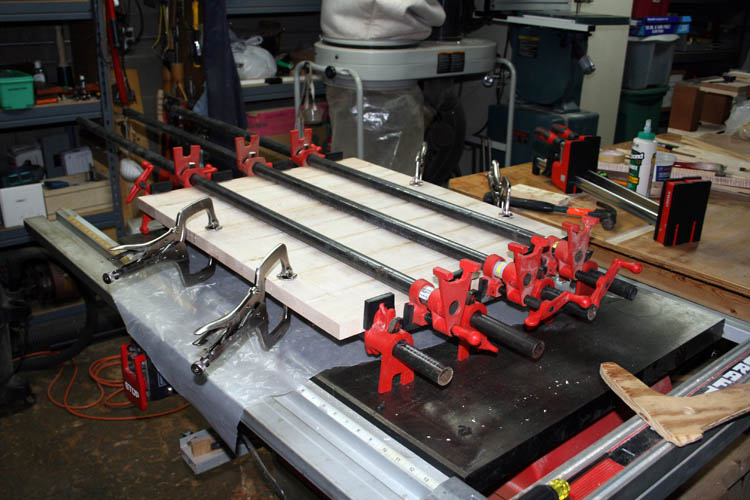
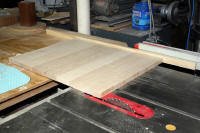
FIRST TABLE TOP GLUE-UP FINISHED
I glued the sections of the table top together and used biscuits with
glue to help align the sections together since there were at least .012
thickness difference in a few of the boards. The belt sander and
orbital sanders will be used to level the top ready for the final finished
cut to length and width.
In the mean time, I will sort through the curly maple boards and select
them for grain and thickness. Curly maple is very prone to chip out
when running through the planer even with a sharp set of knifes. No
more woodworking than I do, I just can't make myself mentally justify
getting a spiral cutting head for the planer, but that option is not ruled
out entirely. A thickness belt sanding machine would be the ticket,
but again, that is another high dollar item for sure, therefore working with
what equipment I have!
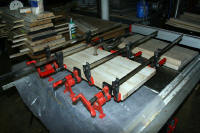
SECOND TABLE TOP GLUE-UP STARTED
I sorted through the curly maple boards on hand and found enough that was
approximately .960 +- inches in thickness; ripped them to around 3.5 inches
in width. I used the table saw, jointer and miter saw to get them
ready for the biscuit slots.
After marking the layout for the biscuits, I routed slots into the boards
and didn't have to change any setting on the Porter-Cable biscuit jointer.
I glued three (3) boards and will do several glue-up as noted above over
several days and let the top cure out until I get ready to start belt
sanding it.


Click on the above thumbnail pixs for a larger screen view.
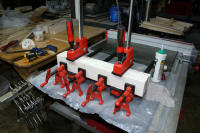
SECOND TABLE TOP GLUE-UP FINISHED
The second table top glue-up was finished and started back gluing one leg
at a time. I don't have enough shorter clamps to glue more than one
leg at a time and in no hurry to complete this project.
Web page updated by Bill aka Mickey Porter on 01-21-19 and 01-26-19.
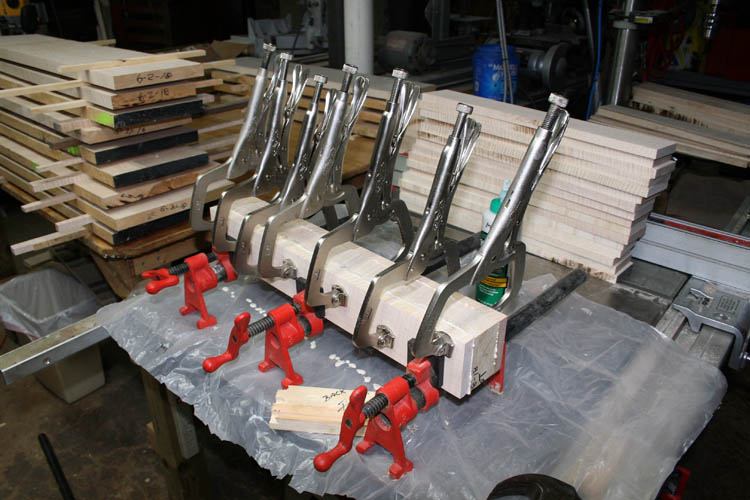
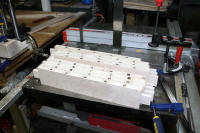
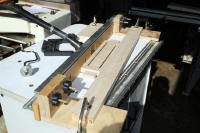
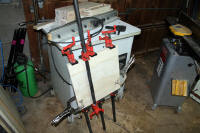
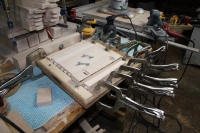
LEG GLUE-UP CONTINUES
I received the 2 1/2 inch wide Speedball Deluxe Soft Rubber Brayer roller
to use as a glue spreader and also a pair of Bessey KRE3518 K Body Revo
parallel clamps. I used the parallel clamps to keep all three members
of the leg in position while applying the other clamping devices.
The rubber roller used as a glue spreader worked very efficient and
evenly spread the glue.
The clamps continue to get a good workout....only five (5) more legs to
go. I used the Bessey parallel clamps initially to align the
laminations flush and after getting the pipe clamps tightened, removed the
parallel clamps from their vertical orientation and continued to apply
clamps for a tight fitting joint. The parallel clamps apply pressure
over their entire 3 3/4 inch face, whereas the Bessey pipe clamps have a
somewhat limited pressure area and works much better for gluing up panels
such as the end table tops.
After all the legs are glued up, I will use the jointer and planer to get
them squared up and ready for their final length adjustment and start the
mortises in them using the plunge router and mortise fixture.
Web page updated by Bill aka Mickey Porter on 01-27-19.
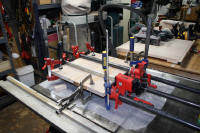
USING SPEEDBALL RUBBER ROLLER & PARALLEL CLAMPS

As stated above, the Bessey parallel clamps worked great in keeping the
laminations flush and in line. Once glue is applied to the members,
without some means to keep them aligned while applying clamping pressure,
the laminations will wander all over the place.
When the parallel clamps are in place, pressure is applied from the bar
clamps, then the parallel clamps are removed and the parallel clamps used as
needed. There are optional methods used to help keep gluing members in
place such as applying salt, of which I have never used that technique.
Back in my music instrument making days, small spikes were used between
gluing members, but that works where the spikes will be hidden and no danger
of cutting into them.
I believe this is enough pictures of gluing up the legs and will post
pixs when I final trim and square all eight of them up.
Web published update by Bill aka Mickey Porter on 01-28-19.
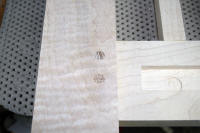
UPPER AND LOWER RAILS AKA APRON
Yesterday, I sorted through the curly maple I have on hand and found the
boards that were between .982 and .950 +- inches in thickness. I
ripped enough for eight (8) pieces for the top rails aka aprons that was 4
inches wide and four pieces 3.5 inches in width for the bottom rails.
I ran all the pieces through the planer and got them the same thickness,
somewhere close to .950 +- inches. The apron aka rail thickness is
critical since each finished length will have a tenon cut on them using the
table saw and a Delta Tenoning jig for a 1/2 inch wide mortise. The
tenon length will probably be 1.5 inches in length for the 3 +- inch square
legs.
Rule of thumb for a tenon is: It should be 1/3 to 1/2 the thickness
of the apron. The tenon length should be 1/2 to 3/4 the thickness of
the leg.
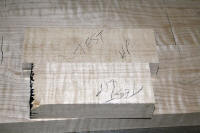
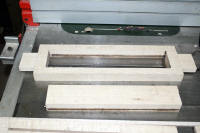
Below pix of what curly maple I have left and might come up short since I
have a lower shelf on each end table. The lower shelf will require a
glue up as well.
The board in the above pix to the left is a piece of ply and not curly
maple.
Web published update by Bill aka Mickey Porter on 01-29-19.
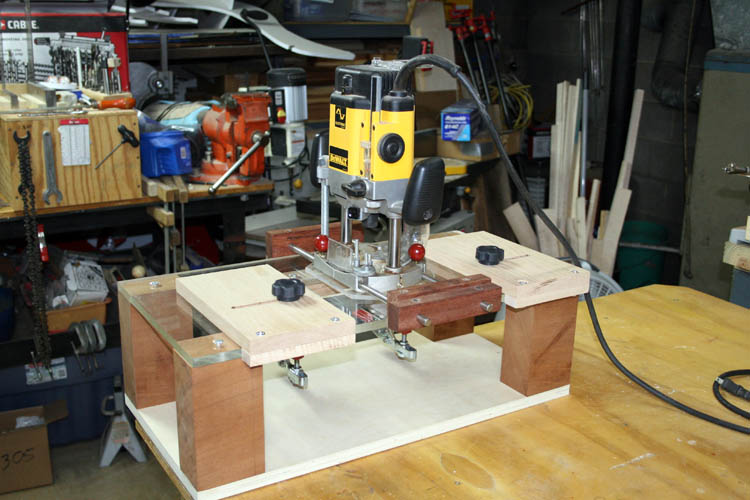
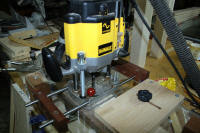
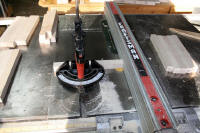
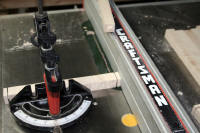
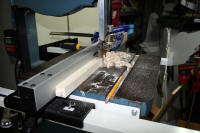
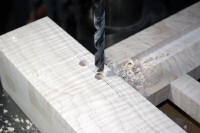
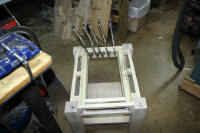
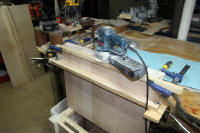
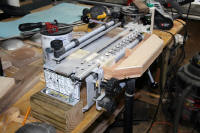
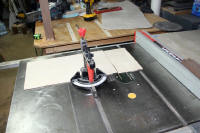
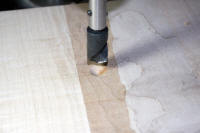
ROUTING MORTISE IN LEG MEMBERS
I finished up the leg glue ups, squaring them up and cutting to their
final length of 19 3/4 inches.
I set the stops on the router mortise fixture and one of the end stops
did not have enough adjustment, therefore I used C clamps to set it into
position for a centered 2 3/8 inch length mortise 1.5 inches in depth and
1/2 inches wide. The router bit I used is made by Whiteside here in NC
and is a three fluted solid carbide up spiral 1/2 inch in diameter with a 2
inch cutting flutes x 4 inches in length. As luck goes sometimes, I
installed the bit in the DeWalt 3 horsepower plunge router and didn't
tighten the collet but finger tight and you guessed it! As soon as I
had the router away from the table to check the depth setting, the router
bit dropped from the router collet and landed on the concrete floor right on
the cutting end. It was dull for sure and didn't want to plunge cut
easily without a lot of force, however it cut fine once it was plunged into
the material. I will have the tip sharpened as soon as possible.
Click on the below thumbnail pixs for a larger screen view:


All the mortises were routed and I have a few options for the tenons.
Since routing mortises, the ends are rounded and you can square end ends
using a chisel or leave as is. On the tenons, you can round the ends
with a little extra work or simply cut the tenons to the length of the
mortise minus where the radius starts. Glue strength on a mortise is
not on the ends since you are dealing with end grain and glue does not hold
well on end grain versus the sides of the mortise and tenon joinery.
I might set up the mortise machine just for squaring off the ends of the
mortise, but that sounds like double work for sure. The jury is still
out.
The reason I elected to use the routed mortise was because the mortise
machine with the 1/2 inch wide chisel takes a humongous amount of effort to
start the mortise in the hard curly maple wood.
Web posted updates by Bill aka Mickey Porter on 02-03-19.
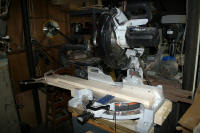
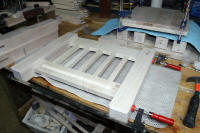
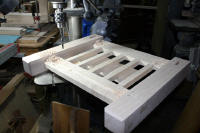
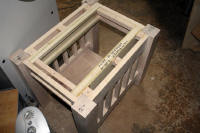
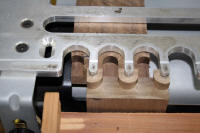
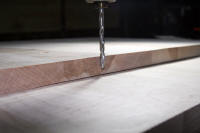
TENONS AND MORE MORTISES
I cut all the side and front aprons to length using the miter saw and
used the table saw, tenon jig and band saw to finish off the cheek cut on
the tenons.
I used the Shop Fox mortise machine to make a 1/2 inch width mortise
about 3/8 inch deep in the side upper and lower aprons for the upright
square posts to fit into. Those upright posts are more for looks than
adding any integrity to the overall end table. There is five (5)
upright posts in side of the end table which requires 20 mortises per end
table.
Click on the thumbnail pixs for a larger screen view:


Since the tenon lengths were all the same, I ganged at least four units
clamped together and sawed them to save some time and energy; remember
"Work Smarter, Not Harder."
The Delta Universal Tenoning Jig is a must if you
are doing a lot of tenons. This jig is stable, accurate and easy to
adjust.
I used a scrap piece of material from the aprons to adjust the
tenon jig and table saw for the required cuts. When using the tenon
jig, your material has to be the same thickness, otherwise your tenon
thickness will vary and not a good thing!
I spent a lot of time with the 1/2 chisel squaring
the ends of the mortises made by the Shop Fox mortise machine. I
should have cut the mortise at least 1/2 inch deep, but went only 3/8 inch
deep which caused a good amount of chisel time. The Lord willing, I
will finish with the chisel tomorrow.
The band saw with the 1/2 inch wide 4 teeth per
inch blade with adjustable fence and rear stop set, makes it a breeze to cut
the cheek portion off the tenons with excellent precision.
The end of the tenons on the upper aprons will be
cut at a forty-five (45) degree angle and/or shortened since they are 1.5
inches in length and the legs are 3 +- inches square.
Web page updated by Bill aka Mickey Porter on
02-04-19.
FINISHED UP MORTISES
After a workout with the 1/2 inch wide chisel
yesterday, I decided to use the Shop Fox mortise machine and cut the
mortises about 1/4 inch deeper in the side upper and lower aprons to
eliminate the extra chisel work. I also finished up the upright rails,
cutting the cheek portion with the bandsaw that was still set-up from the
day before.
Click on the thumbnail pixs for a larger screen
view:

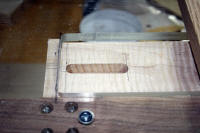
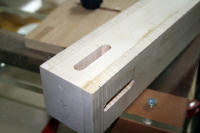
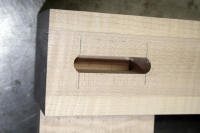
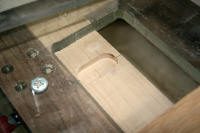
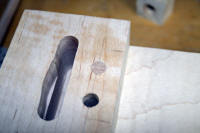
FRONT APRON CUT-OUT FOR DRAWER
During the coffee table construction, I used the
Shop Fox mortise machine to do the cut out for the drawers to fit and
that was too much mortise work with the mortise machine since it takes a
good amount of force to start the mortise. Also, there was a
tremendous amount of labor to clean up the connecting mortise cuts using a
file, rasp and small sanding block; all hand work and labor intensive.
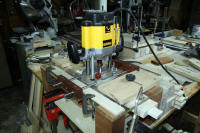
I decided to use the router table and do a blind
through mortise for the longitudinal cuts on the front aprons, of which a blind
mortise is definitely not one of my favorite routing techniques, but you see
it in use very much on YouTube videos and woodworking shows.
BLIND THROUGH TYPE MORTISE
My router guru mentor,
Pat Warner, deceased, was
not an advocate of the blind through type mortise either, because unless your work is
prevented from shifting side to side, you run the risk of personal injury
and at the least damaging your work piece. Blind comes into usage
because you cannot see your router bit until it comes through the cut-out
you are producing. Also, if you do a climb cut
by bringing the material toward you instead of pushing your work piece into
the router bit, it will try to sling the work piece into orbit if not
properly secured!
I placed a start and stop block at the end of the
work piece to control the length of the mortise. The router fence was
set to give me 3/4 inch of wood to surround the drawer front and wanted 1
inch of material on each end of the drawer apron.
I did multiple passes to cut through the thickness
of the apron for the drawer cut-out. As with blind routing a mortise,
you ease the work piece down onto the spinning router bit and this is where
the heroics come into play. You could start the router without the bit
cutting into the work piece and simply raise the router upwards, but my
router lift height adjustment is from the top of the router table and not
accessible with the work piece in position, therefore that option is out.
I clamped a longitudinal guide against the side of the work
piece and it is trapped between the router fence which takes the side to
side play out of the picture so to speak. You could use the slotted finger
type fence, but it is designed to be somewhat flexible and would cause a
problem and bind if you returned the board back to the start of the mortise.
Click on the thumbnail pixs for a larger screen
view:

Since the drawer is one of the focal points on the
end tables, I wanted to have as accurate a cut-out for the drawer as
possible without a lot of filing and sanding to true the opening. Last
year on the curly maple coffee table, I used the Shop Fox mortise machine to do the
entire cut-out for the three drawer openings in the apron which entailed a
huge amount of filing and sanding to true the edges as stated above.
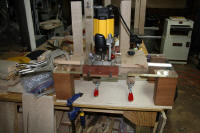
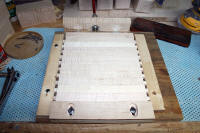
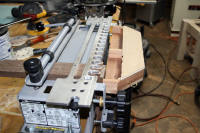
MORTISE JIG USAGE AGAIN
I decided to use my mortise fixture and was hoping
either a 1/4 or 7/32 solid carbide bit has long enough cutting flutes and
long enough shank to extend through the mortise fixture of which after
checking they did.
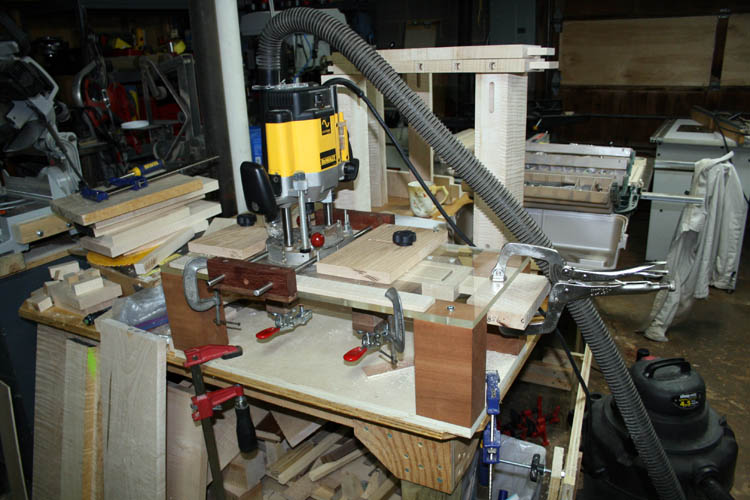
The mortise jig has the plunge router base captured between
longitudinal stops and lateral stops, only allowing the router to travel in a
lateral direction by removing tension from the red round knobs that locks
the router base onto the 3/8 inch diameter guide rods.
Once the apron was secured to the base of the mortise fixture and the
router bit aligned with the edge of the desired cut, a stop was clamped into
place with the Erwin SP11 vise-grip clamp which has flat bottom swivel
member to keep from marring whatever you are clamping.
The two red handled DeStaCo 225-U toggle clamps are permanently attached
to the fixture on the bottom and was originally set with wooden spacers for
3 +- inch thick stock. I used a couple 15/16 boards and a shim to get
enough clamping pressure for the 15/16 inch thick board aka apron being
routed.
I believe a couple small bar clamps would be easier to use to secure
square stock
material to mortise fixture, especially when using various thickness
materials to mortise than the fixed position DeStaCo 234-U toggle clamps
which requires spacers between the clamp base and the parallel wood guide
used also as a support base for the DeStaCo toggle clamps. The DeStaCo
toggle clamps are a must when mortising thin and wide boards.
The only disadvantage I see using the DeStaCo 225-U toggle clamps is
their limited clamp adjustment range, of which spacer blocks and appropriate
length screws have to be used when going from something like the three (3)
inch square legs to a one (1) inch board thickness. However, it
doesn't take too long to make the adjustment. Pat Warner's mortise jig
design is at the top of the list in my humble opinion for accurate precision
mortises if you do your part in the set up and wood preparation.
The two smaller aluminum C clamps are used to secure the lateral movement
of the router base and a piece of wood is used on the opposite side cut to
the proper width to act as a lateral stop on the other side of the router
base.
PAT WARNER ROUTER EDGE GUIDES
NOTE: I was going through a box from
Pat Warner that is
probably ten (10) years old that had an extra set of edge guides, two (2)
3/8 inch diameter x 18 inch length stainless steel guide rods, lateral
adjustment screws and several brass tipped 1/4 x 20 set screws. I
remember using one of the lateral adjustment screws on a turkey box call jig
operation and will rig the adjustment screws on this jig in the future.
It amazes me the accuracy that Pat Warner could perform with a router table and
drill press!
The red round knobs with the longer screw can be used to adjust the
lateral movement of the router and for fine tuning said adjustment.
Web page updated by Bill aka Mickey Porter on 03-13-19.
Once all the stops were set, the router was turned on and the router bit
plunged into the material and took four or five passes to cut through the
apron connecting the two other routed slots using the router table.
In all, there are five stops set for the apron and I finished one of them
before retiring for today.


Our Lord willing of course, I will finish the other apron tomorrow, cut a
forty-five (45) angle on each leg that contacts the floor using the miter
saw and start a glue up on the lower shelf for each end table. I am
running short on curly maple wood since there was a lot of waste cutting all
the members, but will use the scrap aka unallocated wood for other future
projects such as wooden boxes, etc.
I have a good amount of boards that are 3 inch wide and about 3/8 inch
thick I could glue up for one end table shelf and laminate to a substrate to
give me at least 3/4 inch thick shelf and have the ends showing with a full
thickness of curly maple wood. The shelf will fit into a mortise on
each side lower apron as the design of the
curly maple
coffee table.
Web page updated by Bill aka Mickey Porter on
02-05-19.
MORE BISCUITS PLEASE
I cut a forty-five (45) degree bevel on each lower
leg and finished up the last route cut for the second apron for the drawer.
I fit together one end table side members and the
upper apron and got a measurement for the shelf and it came out to 16 inches
length and 15 3/4 inch width which allows for at least 3/8 inch depth
mortise in the bottom apron.
I checked what curly maple wood I have left and had
enough to complete the shelf for both end tables. I cut it very close
on this project as far as the curly maple usage and glad I had several wide
boards left over from the curly maple coffee table.
The boards were cut to rough length, giving me at
least 1/2 inch extra to final square up and cut to the exact length. I
used the table saw and jointer to get a good tight fit and then used the
Porter-Cable biscuit jointer to cut the biscuits for the first shelf.
I will glue only three boards with the biscuits and
glue the last board in a separate gluing operation, since I have messed up
before taking too long to apply the glue and get the clamps in place.
I don't have much extra wood, therefore I am extremely cautious.
Click on the below thumbnail pixs for a larger
screen view:


I plan to kick back the rest of the day, the Lord willing of course and
maybe carry some shelled corn to my deer feeding station in hopes to keep
the deer coming in while "groceries" are pretty scarce for big game at this
time of the year along with small game as well.
Tomorrow, I will route the slots for the biscuits for the second end
table shelf and do the final glue-up on the first shelf.
Web page updated by Bill aka Mickey Porter on 02-06-19.
SHELF GLUE-UP CONTINUES
After my daily Bible reading/study this morning, I glued the final board
to the first end table shelf. I routed biscuit slots on the second end
table shelf boards and got three of them glued. I will finish the
final glue-up tomorrow on the second shelf.
I am moving like Grandma's Molasses on a cold winter morning on this
project, whereas retirement brings about that wonderful relaxed laid back
atmosphere and no use to get in a hurry unless you are walking across a
pasture and that ole herd bull or lead cow heads your way at a gallop. Then it is time to make
some heel dust quickly; been there, done that......grin if you must!

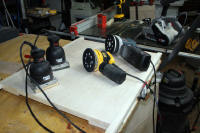
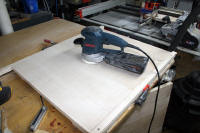
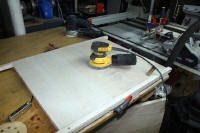
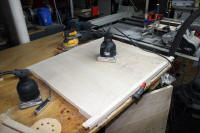
SANDING END TABLE TOPS
I checked the two end table tops that have been curing out since the 26th
of last month and noticed both have some upward bow, however they should
flatten out once secured to the end table frame which means I cannot spray
the tops and frames separate. To keep the tops flat while sanding, I
made a straight edge from scrap material and glued several cheats that will
attach to the end table top from the bottom with dry wall screws. This
will also give me about an inch of extra material at the ends of the top to
keep the sanding belt from thinning the edge of the end table top which is
easy to do if you are not careful.
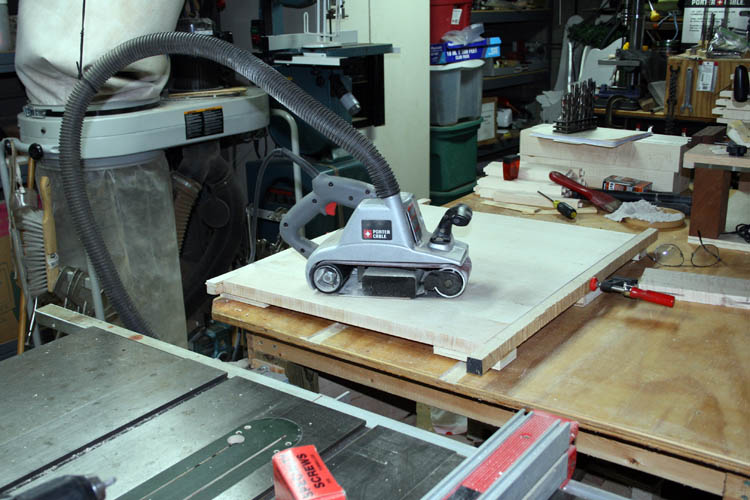
I will start sanding on the end table tops, starting out with
the 4 x 24 inch belt sander, switch to the orbital disc sanders and finish up with the Porter-Cable palm
sanders. A thickness double drum sanding machine would be great for this,
but I can't justify or rationalize about 3K dollars for a 25
inch width double drum sanding machine for no more woodworking than I do,
that for the most part doesn't generate much income at all.
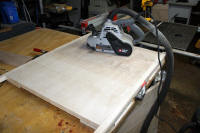
After finish sanding, I will cut the tops to their final 22" width and
27" length
after I get my circular rip saw blade re-sharpened which is about the 4th
sharpening if my memory is correct and ready for a replacement rip saw
circular saw blade. My crosscut circular saw blade is still sharp and
will be ready for some action. Hard curly maple takes a toll on
dulling sharp carbide blades quickly, depending on how much sawing you are
doing.
I will sand the edges with the aid of scrap material clamped in place to
prevent rounding over the edges as done with the coffee table top, of which
gives me a wider platform for the sander.
Click on thumbnail pixs for a larger screen view:


I screwed two corners of the work holder down to the outfeed aka work
station table.
It didn't take but a few minutes using the belt sander and the top was
pretty much level from board to board. I will then switch to the
orbital disc sanders and finish up the sanding
with the Porter-Cable palm sanders and go up to 320 grit.
I will then unscrew the cleats from the bottom of the end table top, flip it
over and rough belt sand the excess glue from the bottom being careful not
to round over the edges. I have a couple old bathtub mats that work
great protecting your sanding projects and keeps them in place while
sanding.
Web page updated by Bill aka Mickey Porter on 02-07-19.
SANDING CONTINUES
I finished sanding the first end table top and will do the back this
afternoon, the Lord willing of course.
The dust collection on the DeWalt orbital sander is much better than the
Bosch orbital sander and is much quieter in operation also.
I finished sanding both end table tops and backs in the afternoon after
having lunch in Rockingham, NC at the Pizza Inn, my bride's treat.
As stated earlier, one of the end table tops had an upward bow in the
center and after sanding, weighted it down on the flat table saw surface in
hopes to "de-memorize" it.
I am sure it can be leveled out with mounted screws from the end table upper
inner frame.
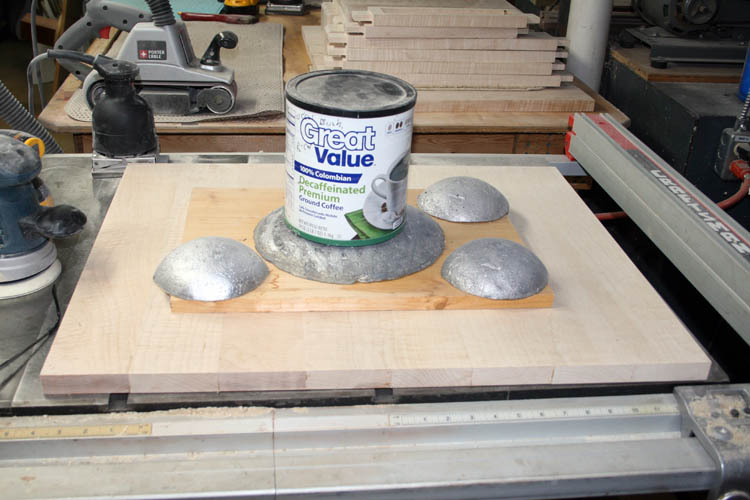
Placed some weights on one of the end table tops that had the worst
upward bow. The coffee can has firing range recovery lead wad cutter bullets in it and is
super heavy along with the other lead spheres. At the moment the top
is flat as a fritter.
Tomorrow, the Lord willing of course, I will sand the first end table
shelf and let the second shelf cure out a couple more days, since I glued
the last section to it this morning.
Web page updated by Bill aka Mickey Porter on 02-08-19.
FINISHED SANDING TOPS AND SHELVES
The end table tops and lower shelves were finished sanding today,
02-09-19. After breakfast, I went and purchased a couple Pillsbury
deep dish pie shells and baked a couple
pumpkin pies, one for my # 1 Brother-in-Law
Wink Myers on my bride's side of the family and the other pie for the Porter
family.
Next week, the Lord willing of course, I will start sanding the balance
of the components for the end tables and have my rip saw blade sharpened to
get a smooth cut on the end table tops and shelves.
I still have a route a mortise in each lower rail member to house the
sides of the shelf as per the
coffee table construction.
MORTISE JIG USAGE AGAIN
I thought of several options to route the mortise in the inside of the
lower side rail of each end table with four (4) identical mortises to route.
I was about to use the router table, but the length of the rail would be too
long to use my current stop blocks that will attach to the router table
fence which has a couple T slots which is use T bolts and Star knobs to
secure the stop blocks.
I could use my plunger router and re-set the side guides, but I wanted
something more fail safe since each of the side rails has five (5) 1/2 inch
square mortises in them for the upright square posts and I do not have a
piece of curly maple the proper size for another rail.
Using the mortise jig will be the safest option, however it will require
the repositioning of the rails at least 3 times since the cut out window in
the mortise jig is six (6) inches in length and the mortise needed in the
rails is 16 inches in length and at least one (1) inch in width x 3/8 inch
deep. The router bit used will be 3/4 inch in diameter and will plunge
cut, therefore will have to make another pass to get the required width of
one (1) inch plus. Since the mortise is centered into the lower inside
rail which is 3.5 inches wide, I will not have to move the lateral
adjustment of the plunge router on the 3/8 inch diameter guide rails, but
turn the board around and mortise the remaining 1/4 inch width needed.
Click on the below thumbnail pixs for a larger screen view:

The mortise was time consuming, but all the mortises in the rails came
out fine with no mishap. I will later square up the ends of each
mortise with a chisel, mallet and corner chisel.
Next week, the Lord willing of course, after the final sanding for the
legs, aprons, rails and upright members, it will then be time to glue up the side frames members with the upright
square posts.
I might have to improvise or make a longer crosscut sled since my current
one is about 24 inches wide and the tops are 27 inches long plus about an
inch extra before ripping to the finish width. My table saw fence is
only good for 25 inches maximum and a little short for this project.
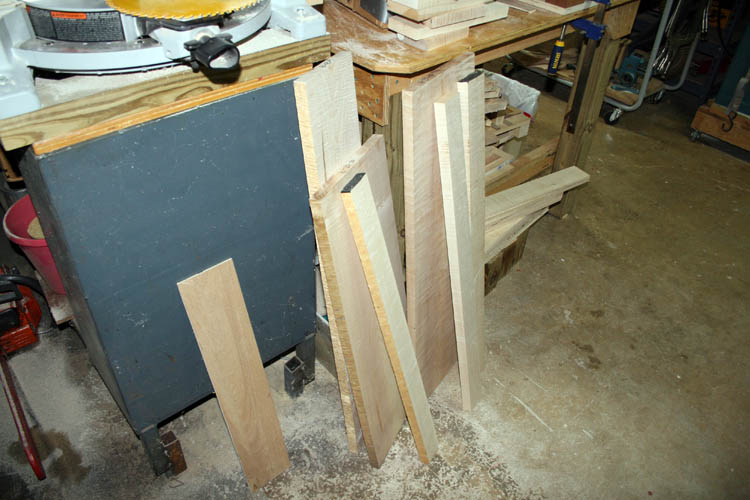
SCRAP AKA UNALLOCATED WOOD
Below pix of scrap aka unallocated curly maple from this
project:

I see the makings of a couple more curly maple
keep sake boxes.
Web page updated by Bill aka Mickey Porter on
02-09-19.
SANDING CONTINUES 02-11-19
I got a few hours of sanding in on the aprons,
lower rails and a couple of the legs. I did find one of the 1/2 inch
square mortises in one of the lower rails that was the width of a mortise
off center. I marked the correct location and drilled a 1/2 inch
diameter hole in the correct spot. I will fit a square plug of curly
maple into the mortise. With a good tight fit, it should not be
observable, unless one is doing some serious critiquing......grin if you
must!
That is about all I plan to do for today; get my
afternoon/evening Bible reading and study in and start a double batch of my
venison chili n
beans for supper.
Click on below thumbnail pixs for a larger screen
view:


After the legs are finished sanding, I will start sanding on
the square upright posts between the apron and the bottom rail.
Web page updated by Bill aka Mickey Porter on
02-11-19.
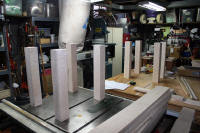
SANDING FIXTURE FOR UPRIGHT POSTS
I started sanding the square upright posts for the
end tables on 02-11-19 and I needed a easy way to hold about 10 of them in
place while stage sanding them from coarse to finish grit. I tried
clamping them in place and applying end to end pressure, but the orbital
disc sander would quickly move the pieces around creating a problem.
I remembered I had a DeStaCo 604 plunger toggle
clamp and decided to build a simple wood fixture out of scrap material that would
hold the upright square posts in position with at least ten (10) of them
which would give me a large flat surface for the sanders and to keep from
rounding over the edges.
A horizontal type sanding belt machine would work
great for this type of small part, but my 6 x 48 inch belt sanding machine
leaves too much room for error for this small part, therefore as above, had
to go to plan B and build a simple holding fixture.
I found a piece of 3/4 inch exterior plywood the
appropriate size and
mounted the DeStaCo 604 plunger toggle clamp to a hardwood board having to
bore a 3/4 inch hole and a 1 1/2 inch diameter hole for the treaded housing
to go through and secure it with a nut that was countersinked below the
surface of the board. I then glued the board to a substrate member and
glued and screwed the clamp holding device to the base of the plywood.
I wanted some clamping pressure adjustment and fabricated an end board with
an elongated slot to house a pair of 1/4 x 20 tpi hex head bolts that was
countersinked below the surface of the board. I wanted to use pronged
Tee nuts instead of a regular nut, but only had 10-24 and 5/16 x 18 tpi on
hand. I did have plenty of 1/4 x 20 threaded inserts, but decided not
to use them and take the easy route on this one.
I set the mortise jig up to cut the lateral slot in
the board and used a 5/8 inch diameter router bit, but it would not plunge
properly and switched to a good 1/2 inch diameter plunge router bit. I
cut the slot deep enough to allow the head of the bolt plus the flat washer
to remain below the surface of the board to not interfere with the sanding
operation. After the larger elongated slots were routed, I used a 1/4
inch diameter plunge spiral router bit and made several passes and cut
through the board for the 1/4 inch bolt access.
Click on the below thumbnail pixs for a larger
screen view.


As soon as the glue dries on the side pieces and the backer board for the
adjustable end piece, I will give it a test run.

Sanding the upright rail members will be time consuming since I am using
at least three sanding machines from coarse to fine grit and once the first
side is completed, will rotate the upright posts 90 degrees in the fixture
and continue until all four sides are sanded.
This fixture can be used for other small parts as well, even though
dedicated for this particular part. With the sanding machines that I
have, this is probably the best way to get those upright posts sanded
properly.
My Pat Warner
design
mortise jig is getting a workout on this end table project.
I definitely enjoyed making this simple sanding fixture that works great!
SN 70
Web page updated by Bill aka Mickey Porter on 02-12-19.
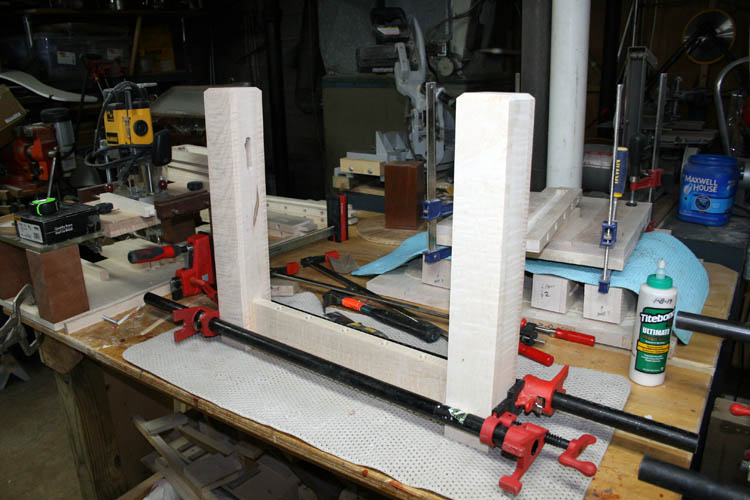
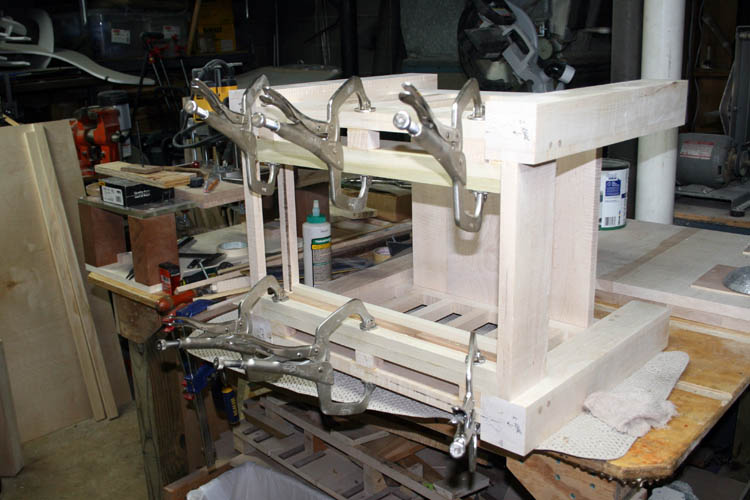
FIRST SIDE GLUE UP
I dry fitted one side of the end table and a couple of the tenons were
"tight as two coats of paint"
into the mortise and sanded the tenon thickness as needed.
I cut the ends of the upper side apron tenons at a forty-five (45) degree
angle because another tenon will be connecting and will do the same to the
other upper aprons which will be at a ninety (90) degree angle, otherwise
the tenon length will have to be shortened.
There were fourteen (14) mortise and tenons to glue up and had to work
fast. I had to use some serious persuasive force with a hammer and
block of wood to get the leg post mortises, apron and lower rail tenons into
position. I probably sounded like John Henry driving steel railroad
spikes into hardwood cross ties after a big breakfast of ham, grits, eggs
and a side order of flapjacks with maple syrup and fresh churned and printed butter. With the aid of the Bessey 3/4 inch diameter pipe clamps,
finally got everything pulled into position before the Titebond Ultimate III glue
locked the project. I believe a couple of the tenons were still a
little too tight.
Click on the below thumbnail pixs for a larger screen view:

The regular Bessey bar clamps would not pull the members together,
however the Bessey pipe clamps pulled the upper apron and lower rail into
position. You have more leverage with the pipe clamp handles than you
do with a round handle.
I will let the side frame rest overnight (glue cure) and will drill holes
into the legs and install a hardwood 3/8 inch diameter dowel with glue; two
(2) per tenon to seal the deal!
I glued one side of the apron
to one leg to make it easier for the glue up tomorrow on the second side
glue up.
Using the Bessey pipe clamps on thick stock such as the 3 +- inch square
leg, you need an opposing clamp on the opposite side to pull the mortise and
tenon joint together, otherwise the mortise and tenon will not pull together
equally on both sides, even though only a few visible thousands off. A
good parallel clamp would probably be better for this glue application,
however the Bessey K Body Revo parallel clamps on hand is not long enough
for this glue up.
Tomorrow, the Lord willing of course, I will release the clamps and
remove the right leg and commence the glue up of the other thirteen (13)
mortise and tenon joints after removing all the clamps from the first side
member glued.
After the second side is glued and clamped into position, I will then
drill 2 inch deep holes for 3/8 inch diameter wood hardwood dowels in the
mortise and tenon joints on the legs.
Web page updated by Bill aka Mickey Porter on 02-14-19.
SECOND SIDE GLUE UP FIRST END TABLE
Gluing one side of the apron in place to a leg worked out excellent and I
believe made it easier to fit the upright posts into the apron and lower
rail final glue up. I also made sure the mortise and tenon was not super tight and used
a wood rasp to take a few thousands off since the glue has a tendency to
swell the wood a little.
I still had to use the hammer and block of wood to persuade the apron and the
lower rail to pull into the leg mortises, but the Bessey pipe clamps pulled them
flush. I changed the way I used the pipe clamps and applied pressure
to the ends of the legs center top and bottom which worked much better and required
less clamps because the clamp pressure is evenly applied to the mortise and
tenon connection.
Click on the thumbnail pixs below for a larger screen view:

Web page updated by Bill aka Mickey Porter on 02-15-19.
SIDE GLUE UP AND DOWELS INSTALLED
I had a good productive day today being 02-16-19, whereas I got end table
side # 3 glued up. It was time to install some 3/8 inch diameter
hardwood dowels, of which I didn't have enough dowel material on hand and
had to make a trip to Lowe's in Rockingham, NC. I also purchased a
piece of birch 1/4 inch plywood 2 ' x 4 ' for the end table drawers, 3/4
inch x 6 inch poplar board 8' length for drawer support. I got a 3/4
inch x 3 inch x 8 ' length of white pine for top and bottom runners for the
drawers which will attach to the poplar side supports via glue and screws.
As with the curly maple coffee table construction, I am using old school
techniques for the drawer support instead of metal runners attached to the
side frame and the drawer itself.
The 3/8 inch hardwood red oak dowels were not perfectly round and most of
the maximum diameter was around .380 inches. I used a .375 diameter
brad point drill bit in some test material and a .377 and .386 letter drills
and decided to use the .386 letter drill. It is easy to burst wood
with a too tight a fit dowel.
After the layout of the dowels into the mortise and tenon joints, I used
my larger drill press with the quill stop set to drill 2.5 inches deep.
The foot operated safety floor switch leaves both hands free for positioning
the wood to drill and operate the down feed lever.
OUCH
I used my miter saw to cut the dowels to length and the miter saw blade
grabbed one of the 3' +- red oak dowels from my left hand leaving a good hammer to
nail type bruise to the nail and the left side of the index finger first
joint was red as a fire engine.....Ouch is the word for today!
I did a mock up of one end table without gluing in the front and rear
apron to check the measurement of the lower shelf and it needs to be 15 3/4
inch wide x 16 inches length to give me some clearance in the mortise in
each lower leg rail.
Click on the below thumbnail pixs for a larger screen view:


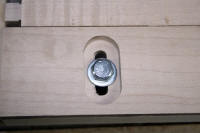
You can see a "boo boo" in one of the pix mortises, whereas the DeStaCo
225-U clamp did not apply enough pressure due to the square leg being
slightly undersized and I believe it was the first mortise I did.
Since the clamp rubber pressure pad spindle was maxed out, I used a tapered
shim between the pressure pad and the legs for the balance of the mortises.
I later, removed the jig from the stand supports and reduced the height of
the walnut support member for the clamps to one (1) inch which gave me
additional length on the spindle rubber pressure pad when using appropriate
spaces underneath the DeStaCo 224-U clamps. Luckily, the
cheek portion of the tenon covered up the "boo boo" and it is not seen.
Next week the Lord willing of course, I will finish gluing up the
remaining side and cut the end table shelves to the final length and width.
I will go over the end table members with at least 320 grit using one of the
Porter-Cable palm sanders. I can then glue one end table frame together with the lower shelf in place and drill
a countersink hole for a screw centered in each lower rail which will be
hidden by a dowel. The countersinked screw will keep the shelf from
moving since I have some clearance to allow for any expansion.
Before I cut any more dowels to length, I will make a simple trough for
the miter saw to
hold the dowel rod in place. This is not the first time that a piece
of material has gotten away from my left hand holding it and your left hand
is still too close to the saw blade when such a mishap takes place.
Safety has to always be
paramount when using machine tools or any piece of equipment that can do
bodily harm and/or death!
Web page updated by Bill aka Mickey Porter on 02-16-19.
DOWEL HOLDING FIXTURE
I got the final side of end table # 2 glued and drilled holes for the
dowels in side # 1 of end table # 2 that I glued up on 02-16-19.
As stated on 02-16-19, I planned to make a simple trough aka fixture to
hold the dowel rod while cutting it to length. I decided not to use
the miter saw and use the band saw since the miter saw does not have a
downward stop and did not want to jury rig something of the sort.
I located scrap wood aka unallocated wood and found a spare red oak runner
already sized that would fit the miter slot in the bandsaw table; a plus
starting out. I also found a piece of 1 1/2 inch square red oak material and cut
it to 7 5/8 + inch length and free hand drilled a 3/8 inch diameter hole using a spade
bit since all my other drill bits were too short. I had to free hand
drill from both ends and the holes met in the center. I didn't use my
larger drill press because I had it set up to drill the dowel holes in the 3
inch square legs and the small drill press doesn't have enough quill travel.
With the main part of the fixture drilled, I used a piece of scrap wood
3/4 x 3 1/2 x 12 1/4 inches from the old coffee table that we used for decades, whereby being replaced
by the custom curly maple coffee table finished last year. I glued the
red oak miter insert (runner) to the bottom of the base that will hold the red oak
square member that has the 3/8 + inch diameter hole drilled through it; end
to end. When the glue sets up enough, I will countersink a couple flat
head screws from the bottom of the red oak miter runner to the base of the
fixture.
In usage, I will place a stop that will limit the travel of the fixture
into the saw blade to prevent cutting the fixture in half. I will feed
the 3/8 inch diameter dowel rod from the right side of the fixture and use
the edge of the fixture where the rod will exit, of which will be set to cut
2.625 inch length dowels. If needed, I could later add a spring loaded
plunger that would go down into the 3/8 inch diameter hole in the fixture to
change the length of the dowels, if needed shorter than 2.625 inches, etc.
Click on the below thumbnail pixs for a larger screen view:


After finishing the dowel fixture, I glued the dowels into side # 1 of
end table # 2 and will let the glue dry and trim the dowels flush later.
I cut the end table shelves to their final width and length and glued the
back apron and front drawer surround along with the shelf in the mortise
slots of the lower rails, however I did not glue the shelves in place.
Tomorrow, the Lord willing of course, I will install dowels in side
member # 2 of end table # 2 and then glue in the back apron and the front
drawer surround and shelf. I will also drill holes for the dowels in
end table # 1 using the hand drill and install the dowels.
I will then cut the end table tops to their final width of 22 inches and
length of 27 inches. I glued temporary straight edge to one side of
each end table top because the ends of the boards were not flush enough to
ride against the table saw fence.
Web posted update by Bill aka Mickey Porter on 02-28-19.
HAPPY MACHINES CONTINUE TO SING
My bride aka Joyce of 51 years, calls my woodworking equipment
Happy Machines because she knows
I am definitely happy when using them and that is the truth for sure!
I had a Dermatologist appointment this morning at 0940 hours and my Dr.
got a little happy himself with the liquid spray Nitrogen or whatever the
chemical he uses to freeze areas needing such.
While still early this morning, I cut the ends of the tops and checked my
table saw miter sleds and located one that would crosscut a 24 inch wide
panel and cut both end table tops to their final size of 22 wide x 27 inches
length.
I drilled and installed dowels in end table # 1 front and rear apron
tenons to mortises and tomorrow will install dowels in end table # 2 side #
2.....I am about to confuse myself will all the end table sides, etc....grin
if you must!
I used a battery powered drill to drill a 3/8 inch diameter hole using a
a spiral brad point bit and a regular letter drill bit .386 inches in
diameter to ream the 3/8 inch hole larger since my dowel rods are over 3/8
inch in diameter.
Click on thumbnail pixs for a larger screen view.


Before a few of my cynical buddies make a comment about the Goliath
dimensions of these end tables, I will beat them to the punch.
"If I don't like them as end tables, I can use
them as baby Gorilla cages." Let them try and top that
one....another grin is in order.
Web posted update by Bill aka Mickey Porter on 02-19-19.
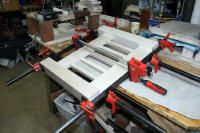
MORE DOWELS AND DRAWER RUNNERS
I got about four (4) hours in my shop today, cruising along and taking my
own good time. I definitely am not on a production schedule. I
finished the top apron glue up on end table number 2 and everything fit
together nicely.
Yesterday evening, I made a marking jig for the layout of the dowels that
go into the sides of the end tables using a scrap piece of wood and drilled
the layout position using a 3/16 inch diameter drill bit and for usage of a
3/16 inch diameter center transfer punch.
This morning, I used the dowel locator jig and in no time was through
center punching the location for the dowels. Sometimes, you have to
work smarter not harder, of which
I was doing the layout for the dowels the hard way for sure; measuring and
marking the location and then center punching.
I started on end table # 1 fabricating the drawer supports and guide
rails. It is easy to understand from a production standpoint and speed
of installation the current metal drawer supports. However, I enjoy
doing things the old way many times and forgo such technology!
Click on the below thumbnail pixs for a larger screen view:


I ripped a piece of 3/4" x 6" x 4" poplar wood and had enough material to
make the side support and the bottom and top rails for the drawer. I
used the DeWalt pneumatic finish nailer to attach the drawer runners to the side
support member with a layer of glue also. I will go back later when
the glue dries and countersink a flat head screw at each end of the support
into the leg which is an overkill for sure.
Tomorrow, the Lord willing of course, I will remove the clamps from end
table # 2, drill and install the side dowels. I will then fabricate
and glue in the blocks that will anchor the end table top to the main frame.
I will install three (3) blocks on each side between the upper side apron
and one at the center of the drawer apron and center at the rear apron.
Web page updated by Bill aka Mickey Porter on 02-20-19.
FRIED APPLE PIES
The Ladies Ministries of the Wadesboro Church of God had their
fried apple
pie sale on 02-21-19 and I volunteered to man one of the electric
skillets.
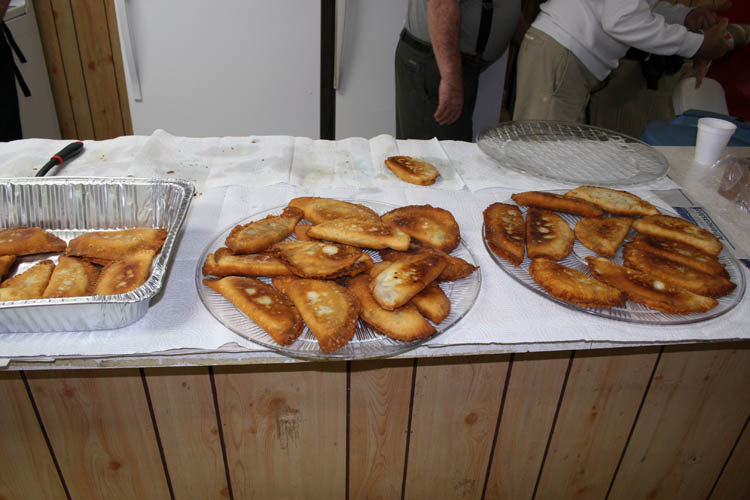
Above some of the fried pies cooling down ready to wrap in wax paper and
later deliver them.
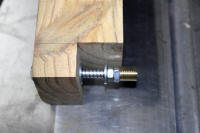
INSTALLED TABLE TOP MOUNTING BLOCKS
I didn't get back home until after 2:00 P.M. and did very little work in
my basement workshop, however I did glue mounting blocks in place to secure
the end table top to.
The above blocks are an overkill for sure, but that is my
modus operandi aka (MO). I
will later drill a 1/4 inch diameter hole through each mounting block,
transfer the hole location onto the end table top with a 1/4 inch diameter
transfer punch and
then elongate the holes for any top expansion.
Web page updated by Bill aka Mickey Porter on 02-22-19.
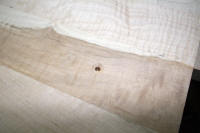
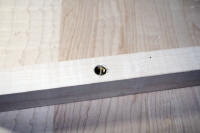
A FEW MORE DOWELS INSTALLED, ETC.
Today was more of a kick back day. My bride of 51 years had an
appointment for a hair cut and permanent around 11ish. I dropped her
off and came back home and finished adding a countersinked flat head brass
wood screw at each end of the drawer supports for end table # 1 and one in
each end of the drawer aka front apron.
I didn't like the single wood block at the rear apron to secure the top
to the base, therefore I sawed it off with a dowel saw and cut a piece that
would span the entire length of the back apron which should be more sturdy
in the long run, versus the 1.25 inch length block.
I finished with all the dowels on on end table # 1 except for the ones
that will cover the countersinked flat head brass wood screw that will go
into the shelf from both side rails.
Click on the below thumbnail pixs for a larger screen view:


Web page updated by Bill aka Mickey Porter on 02-22-19.
FINISHED DRAWER SUPPORT AND RUNNERS ET # 2
I did very little in my basement workshop today. I picked up our
youngest Grandson
Xander McKnight Gonzales around 7ish this morning and we had
breakfast at BoJangles here in Wadesboro, NC.
Our youngest Daughter Lisa
Dianne Gonzales and only Grand Daughter
Lily Danielle
Gonzales are coming this afternoon around 1 P.M. for a visit and
lunch.
I managed to finish the drawer supports and runners for end table # 2 and
installed wood blocks between the drawer support member and the side aprons
to anchor the end table top. I cut a support for the drawer and the
rear apron to secure the end table top as well.
My shop is cluttered to say the least and using the table saw table for a
work station too, when it is not in service, etc.
Below pix of what progress I made this morning.
Our youngest Grandson Xander McKnight grinned when I told him, it might
make a good baby Gorilla cage.
I will finish up the construction phase of end table # 2 carcass on
Monday, the Lord willing of course.
Web page updated by Bill aka Mickey Porter on 02-23-19.
SANDING END TABLE TOP SIDES/ENDS
I finished up the end tables carcass construction and waiting on a
Birdseye maple board from Canada via EBay to fabricate the drawer fronts.
The drawers will be identical to the drawers on the curly maple coffee
table except for the width, length and maybe height. I still have the Porter-Cable dovetail jig and routers set up and
will only need to surface plane the thickness of the Birdseye maple to .750
inches along with the sides and back for the drawers. I will use
walnut for the sides and back which is an overkill on the wood, but don't
have any poplar wood on hand. I plan to use 1/4 inch thick birch plywood for
drawer bottoms and the thickness is .200 inches, therefore a 7/32 inch
diameter router bit should work ok.
In order to sand the end table top sides and ends, I clamped both units
together with the finish sanded top surfaces together and clamped a straight
edge board parallel with the edge. This gives much more real estate
aka platform surface for the sanders and will prevent rounding over the
edges since I want a square edge keeping in the spirit of the Mission Style
of construction. I used end table # 2 as a saw horse to hold the tops
in position with the aid of some scrap wood and clamps.
Click on the thumbnail pixs below for a larger screen view:

My sanding belt for the Porter-Cable 4 x 24 inch belt sander was about worn out
and/or clogged up
and ordered a few replacement belts via EBay. There was some saw marks
visible on the sides of the end table tops and they were coming out way too
slow using the orbital sander even with 60 grit disc, therefore I will wait
until the 80 grit aluminum oxide sanding belts arrive before doing any serious sanding of the end table top
sides and ends.
NOTE: This afternoon, the Birdseye maple board arrived and
will start fabricating the two drawers after I do a review of the required
set-up for doing half blind dovetails for the entire drawers. Since
the Birdseye wood came at a premium cost plus shipping, I definitely don't
want to mess up!
Web published update by Bill aka Mickey Porter on 02-25-19.
SANDING, DRILLING AND DRAWER CONSTRUCTION
I received my sanding belts that was ordered on 02-25-19 which was a fast
delivery for sure. I raised my basement garage door to allow some of
the sanding dust to escape and got the ends of the tops sanded and will
finish the sides tomorrow, the Lord willing of course.
The drawer fronts were rough sized along with the sides and back, whereas
the drawers will be 19 1/2" in length, 11 1/32" wide and 2 5/32" tall.
When using 3/4 inch thick stock for the drawers, you have to subtract 3/4
inch from the length of the side members due to the half blind dovetail
construction which adds 3/8 inch to each end.
When the end table tops are finished sanding, I will set up the
Porter-Cable 4216 dovetail jig and run some scrap material to refresh my
memory on its usage. If my memory is correct, the dovetail jig and
router is still set up when I made the drawers for the
coffee table.
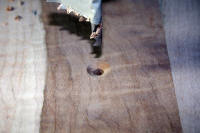
I drilled 1/4 inch diameter holes in end table # 1 for the bolts that
will anchor the top in place. When I finish sanding the end table
sides, I will position the end table top on my table saw surface and center
the lower carcass of the end table and use a 1/4 inch diameter transfer
punch to place a witness mark where the 1/4 x 20 tpi brass inserts will go
into the end table top. This is another overkill, since a regular
screw would work just as well. I will later elongate the bolt holes to
allow for any end table top expansion.
Click on the below thumbnail pixs for a larger screen view:


Web published update by Bill aka Mickey Porter on 02-26-19.
DRAWER DOVETAILS
Today 02-28-19 was one of those days that just didn't go smoothly as one
would like. Nevertheless, I continued to
"endeavor to persevere".....grin if you must!
It was yesterday morning I brought the Porter-Cable 4216 dovetail jig
from its dormant resting place and I have two 4" x 4" x 6" inch blocks that
has mounting holes drilled in them to align with the holes in the dovetail
jig base and also in my work/outfeed table. I located one of the
blocks and could not find the other one, therefore had to drill a couple
holes in another piece of the 4 inch square material which is actual 3 5/8"
inch square. I didn't have any spare 3/8" x 5.5" length hex head bolts
and made a trip to the local hardware store to purchase a couple bolts.
I told the clerk at the hardware store, I would probably locate the missing
block and bolts as soon as I got the replacement mounted. After
mounting the dovetail jig, it was probably five (5) +- minutes and I
happened to notice the missing block attached to a board that I used to
position the curly maple coffee table when applying lacquer to it. I
guess you could call that "The fulfillment of
prophesy of expectations."
I was hoping today would go along pretty smoothly, but it just wasn't to
be. I cut numerous test pieces of the half blind dovetails and I they
were too tight or too loose. Porter-Cable has an excellent set of
instructions on how to create various types of dovetails, but it was one of
those days when things didn't go as planned. Thanks to our Lord Jesus
Christ and Savior, no accident happened in the woodworking shop today!
Some times, it is best to just walk away from a project and come back at a
later time.
Anyway, I got the dovetail jig set fairly close, but not perfect and got
all the dovetails cut for both drawers and routed a 7/32" diameter x 5/32"
deep slot in the bottoms of all the drawer members for the bottom of the
drawer which is 1/4" birch plywood which is actually .200 inches in
thickness.
I test fitted both drawers and noticed that drawer # 2 was actually a
little wider than the opening in the drawer front on end table # 2 and the
light bulb then came on. I remember fine tuning the width of the
drawer front and back for end table # 1 and the front and back for end table
# 2 was about a 1/16" proud, but too late since the dovetails were already
cut. The solution will be to use the table saw and shave about a 1/32"
off each side of the drawer after the glue up.
The drawer dimensions +- as follows: 11 1/32" wide, 19 1/4" length
and 2 1/4 " height.
Prior to fitting the drawers together, I predrilled a couple holes in
each drawer front where the walnut pull handle will go and sanded the drawer
components.
Also, I used the DeWalt pneumatic brad nailer and it stopped working to
finish off a work day that did not go smoothly. I noticed the trigger
would not return and nothing would happen when the trigger was depressed.
I removed the trigger and the plunger that the trigger depresses worked ok,
however the safety mechanism wasn't working either; i.e., it would fire
without the safety tip being depressed which is not good either.
When I get around to it, I will disassemble the nailer and see what I can
ascertain.
Click on the thumbnail pixs below for a larger screen view:


Web published updates by Bill aka Mickey Porter on 02-28-19.
GLUED UP DRAWER # 2
I fitted the bottom to drawer # 2 and glued the frame up early in the
morning. This afternoon, I plan to position end table top onto the
base aka carcass and use a 1/4 inch diameter transfer punch to place a
witness mark where the brass inserts will go. I usually drill a 120
degree countersink hole followed by a couple different diameter drill bits
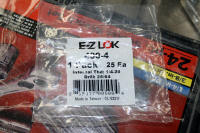
finishing off with the appropriate drill bit for the E-Z brass threaded
inserts for 1/4 x 20 tpi bolt.
Today was a good productive day, no mishaps to speak of and everything
went by without a glitch.
After the above glue up of the drawer for end table # 2, I laid the end
table top (face side down) onto my table saw table and centered the end
table carcass which is recessed about 1.5 inch all the way around. I
used a 1/4 inch diameter transfer punch and made a witness mark at eight (8)
locations on the underside of the end table top which matches the holes
drilled into the blocks for the attachment of the end table top. I
used a couple clamps to keep the top in place with the lower assembly aka
carcass.
After the witness marks were made in the underside of the end table top #
1, I had to think a little outside of the box to drill the holes for the EZ
Loc threaded inserts. I didn't have a piece of flat stock (birch
plywood) to increase the real estate of the drill press table and used end
table top # 2 to keep the end table top # 1 in position. I believe my
drill press metal table is 14 x 18 inches which is too small to support the
22 x 27 inch end table top. Rarely, I need more drill press table and
have managed so far without purchasing or building an auxiliary drill press
table which would be nice, but my workshop is crowded enough as it is.
DRILLING HOLES FOR THE THREADED INSERTS
Since, I have some leeway to enlarge and elongate the end table mounting
wood blocks holes, I didn't use machine shop techniques to drill super
accurate holes into the bottom side of the end table top. If precision
was needed, I would locate each hole position, clamp the top to the drill
press table and drill all three holes starting with the 120 degree
countersink then 1/4, 11/32 and finish hole diameter of 25/64 inches.
Instead, I drilled a 120 degree countersink hole at all eight (8) locations,
changed to 1/4 diameter drill and set the drill press down feed to give me
.540 inches depth and locked the travel adjustment. I placed a piece
of masking tape on the drill bit just for an extra visual of the drill bit
depth. After all the holes were drilled ending up with the 25/64 inch
diameter drill bit, it was time to install the threaded bushing.
On most of my smaller jigs and fixtures, I will use the smaller drill
press to chuck up a home made installation tool, however the end table top
is too large and went to plan B. There is a YouTube video showing how
to make the installation tool using a block of wood, washers, nuts and a
spring to install the threaded inserts accurate. I have trouble doing
a hyperlink to YouTube videos for whatever reason.
Click on the below thumbnail pixs for a larger screen view:


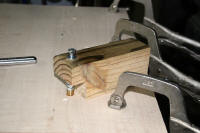

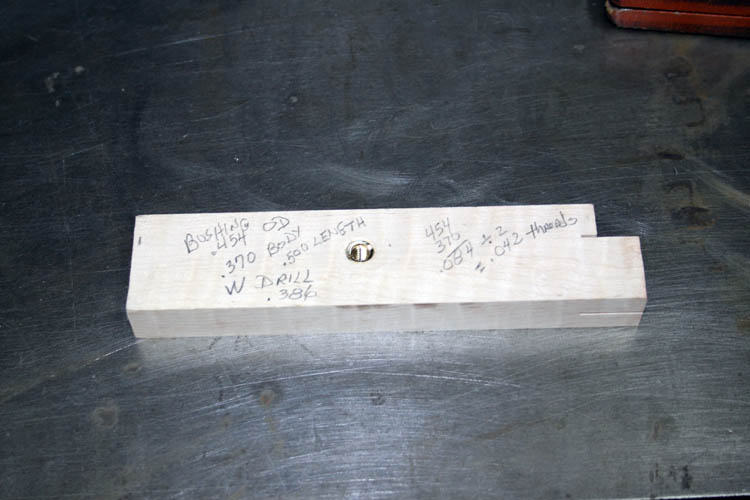
I did a test threaded bushing install using the home made wood
installation tool prior to installing the threaded inserts into the end
table.
If you are wondering why I used a 120 degree countersink as the first
drilling operation is because most standard drill bits are 118 degrees,
therefore the 118 degree drill bit will self align in the 120 degree
countersinked hole if your material is free to move and not clamped down.
Web published updates by Bill aka Mickey Porter on 03-01-19.
CARBON COPY OF YESTERDAY
I basically did the same thing today as per yesterday on end table # 2,
therefore will not post any more redundant pixs.
I tested out the threaded insert alignment with the end table # 2 base
aka carcass and everything lined up nicely with the top.
I have a length of walnut custom molding left over from the curly maple
coffee table project and will fabricate a couple drawer pulls. After
that, it will be finish sanding and get ready for Spring to arrive with the
humidity level conducive to spraying sanding sealer and nitrocellulose
lacquer. I need to upgrade to a less volatile
VOC type finish, but I have a
good amount of musical instrument grade lacquer and thinner on hand.
I think I will weight one of those end tables to ascertain the
weight.....I am guessing about 50 lbs. with the top installed!
US POSTAL SERVICE
I need to vent just a little on the Pony Express service aka
snail mail which are very
applicable names for our US Postal Service.
FOR EXAMPLE: I ordered some special stainless
steel bolts on February 25th and they where shipped from Hempstead, NY at 2:16
P.M. and arrived at the Mid Carolina-Charlotte, NC distribution center on
the 26th at 10:26 P.M. Whereas today being March 2, 2019, they show they
are in transit to the next facility. What a bunch of horse manure.
BTW, Charlotte, NC is about 60 miles from my location!
This is not the first time packages have been delayed from
that particular distribution center. This is fairly typical of the
quality of services rendered by our US Government run programs in my humble
opinion. No wonder the US Postal Service continues to lose money.
Web published updates by Bill aka Mickey Porter on 03-02-19.
NOTE: The package arrived at the Wadesboro, NC
US Post Office at 8:38 A.M. 03-04-19 and received in the afternoon.
Package was damaged and one (1) bolt was missing, no doubt the reason it
stayed at the Mid Carolina-Charlotte, NC distribution center. Will
absorb the loss; not worth the trouble for one bolt.
ANOTHER FOR EXAMPLE: I sent a large flat rate
Priority Mail 2nd Day package that was accepted by our local post office
here in Wadesboro, NC on 03-22-19 at 4:20 PM and departed at 4:33 PM.
The package arrived at the MID CAROLINA-CHARLOTTE NC DISTRIBUTION CENTER on
03-24-19 at 8:45 PM and as of 03-26-19 at 8:53 AM, tracking info as follows:
In Transit, Arriving l, your package will arrive later than expected, but is still on its way. It is
currently in transit to the next facility.
I sent another large flat rate box Priority Mail 2nd Day,
the next day 03-23-19 and it arrived at its destination on 03-25-19 at 3:49
PM which is normal.
Only in America! Our tax dollars at work.
Web page updated by Bill aka Mickey Porter on 03-26-19.
TOOK A "LAY DAY" FROM THE SHOP
I didn't do anything in the woodworking shop today except
check out my DeWalt brad nailer and it was working ok today.....grin if you
must.
I edited pictures I took yesterday at the Wadesboro Church
of God which celebrated my No 1 Brother-in-Law and Sister-in-Law on my
brides side of the family of their 60th wedding
anniversary
and faithfulness to our Church and community.
Web page updated by Bill aka Mickey Porter on 03-04-19.
DRAWER PULLS & CONSTRUCTION COMPLETED
I fitted the drawer pulls to the end table drawers which
didn't take too long at all. I had already predrilled the mounting
holes in the drawer fronts and had to enlarge the holes to fit the shank of
a 1.250 inch length coarse dry wall screw. A few other odds n ends was
done and that was about it for now on this project.
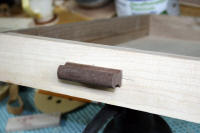
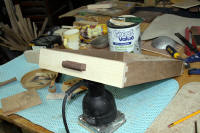
I have a good amount of finish sanding to do on the end
tables and will get the base sanded to 320 grit and take the end table tops
to a much finer grade.
Web published update by Bill aka Mickey Porter on 03-05-19.
WAITING FOR SPRING TO ARRIVE
At the moment, I have the final sanding on hold until it
gets warm enough to open the basement garage door and run a large fan to
help the fine sanding dust to escape.
Web page updated by Bill aka Mickey Porter on 03-14-19.
NOTE: It snowed and sleeted on 04-02-19 around
0930 hours!
PREP WORK PRIOR TO STAINING & FINISHING
I plan to finish the tops and bases of the end tables
separate due to their weight and having to spray them outside of my basement
workshop and getting them back into the workshop to dry before the next
coats of lacquer is applied.
I also needed some means to support and hold the end table
tops during this finishing process and had several 1 inch square aluminum
heavy wall tubing that I use to hang summer sausage in my smoker cabinet.
Holes were drilled into the aluminum square tubing to match
the hole layout pattern of the brass threaded inserts installed into the
underside of each table top and will work as a platform to add a wood handle
after the final finish sanding is completed.
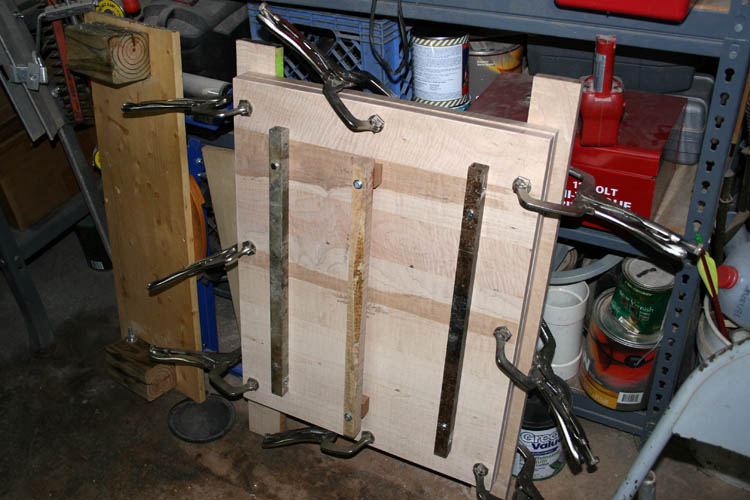
The top (finish side) of the end table tops are clamped
together to prevent any warping and to protect the surfaces.
End table serial numbers are SN 66 and SN 67.
FINAL SANDING COMPLETED
The weather has been excellent the past few days and got
some final sanding in using 3M 320 grit wetordry sandpaper. As soon as
the pollen subsides, I will start the finishing process.
Web page updated by Bill aka Mickey Porter on 04-12-19.
YELLOW MAPLE STAIN APPLIED
I applied an alcohol based yellow maple stain to the end
table bases and the tops and will let it cure out a few days before lightly
buffing them down and start with a sealer coat and then multiple coats of
musical grade nitrocellulose lacquer which will probably take about a month.
I usually wait about a week before wet sanding once I build up seven or
eight coats of lacquer and repeat the process several times.
I have several places on this
website describing how I finish my projects
and will not do a play by play pictorial essay of applying lacquer, wet
sanding and buffing out these end tables, etc.
Click on the below thumbnail pixs for a larger screen view:

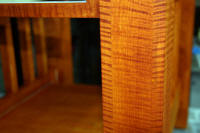

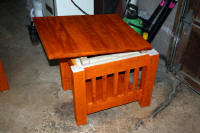

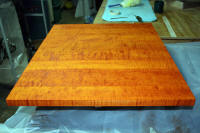
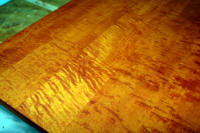
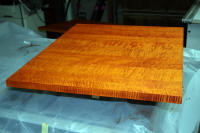
I added a small removable stand off on the base of each leg
to facilitate the finishing process and also added a couple handles to the
top of each end table base for the same purposes. I plan to weigh the
base and ascertain how much they weigh.
Web page updated by Bill aka Mickey Porter on 04-20-19.
SENIOR CITIZEN MOMENT
No disrespect to senior citizens of which I have been one
for several years, I noticed that the yellow maple stain seems much lighter
than normal once it dried on the end tables. I went to my website and
checked out my curly maple
coffee table construction pages and found that I
had used a medium brown walnut stain and it is no wonder the end tables were
lighter in color....grin if you must!
I checked my inventory of stains and I had a partial 16 oz.
bottle of the medium brown walnut stain that probably had a tablespoon of
stain in it and there was a full 16 oz. bottle of stain beside it and I
didn't look at the label, but assumed it was medium brown walnut.
To make a long story short, I stained the end table bases
and tops with the medium brown walnut stain and they are now the color they
should be....another grin is in order!
Click on the below thumbnail pixs for a larger screen view:
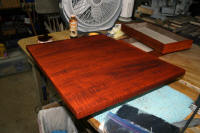
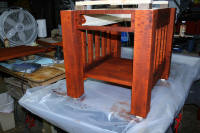
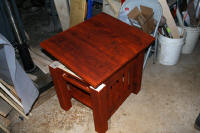
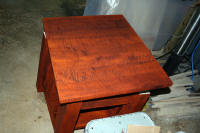
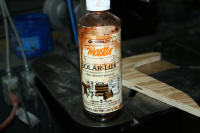
That definitely was my bad all the way, but it was easy to
salvage with an hour of extra staining time.
Web page updated by Bill aka Mickey Porter on 04-20-19.
SPRAYING SANDING SEALER
I sprayed a coat of sanding sealer to the end table bases
and tops on 04-22-19 and will lightly sand/buff the sealer before starting
to spray several thinned coats of nitrocellulose musical instrument grade
lacquer. I usually cut it 25 percent to start with and reduce the
thinner the farther I go along with building up the finish. I normally
apply four (4) coats waiting at least an hour or more between each coat, and spray
the other three (3) coats as before; let dry overnight. I will then lightly
dry sand with 320 grit sandpaper removing any high spots not trying to level the finish, but even the finish up some and
repeat the process; spray four (4) coats waiting at least an hour between
coats and let dry overnight. The next day I will lightly dry sand with
320 grit sandpaper and repeat the process; spray four (4) more coats as before.
I will then let it cure for at least one week to 10 days and hand wet sand
with 800 grit 3M wetordry sand paper and repeat using 1200 grit wetordry
sandpaper using soapy water as the wetting agent. If there is too much
"orange peel" in the finish, I
will go down to 400 or 600 grit wetordry sandpaper and increase to 800 and
then 1200 grit. I will then spray two more coats and let cure another week
to 10 days and wet sand using 1200 grit wetordry sanding paper. If the
finish looks good, I will then start the final
polishing. I want the
end table tops like the finish on my
banjo
resonator hyperlinked
here
that I did on 10-10-10; man time flies by in a hurry
and time waits for no one!
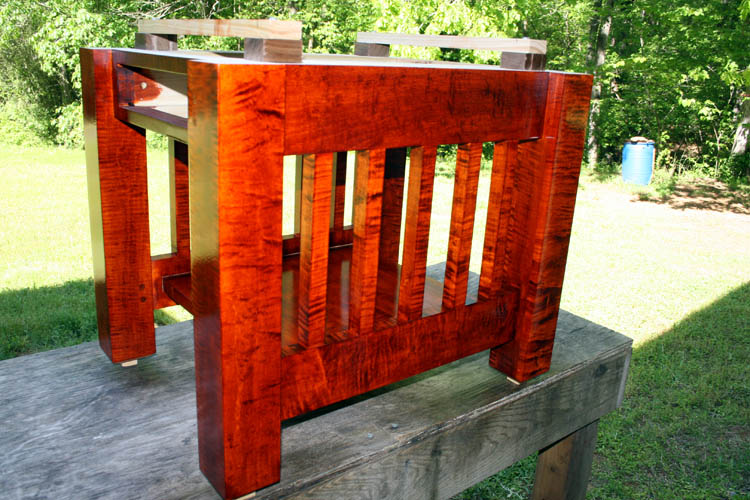
The curly maple grain is beginning to pop out real nice!
As stated many times on this website, curly maple is no doubt my favorite
wood and is tough to work with when running through a planer which curly
maple is prone
to produce chip out in the wood due to the tight grain structure. A
thickness sanding machine would eliminate much chip out, but the larger
units are high dollar for sure.
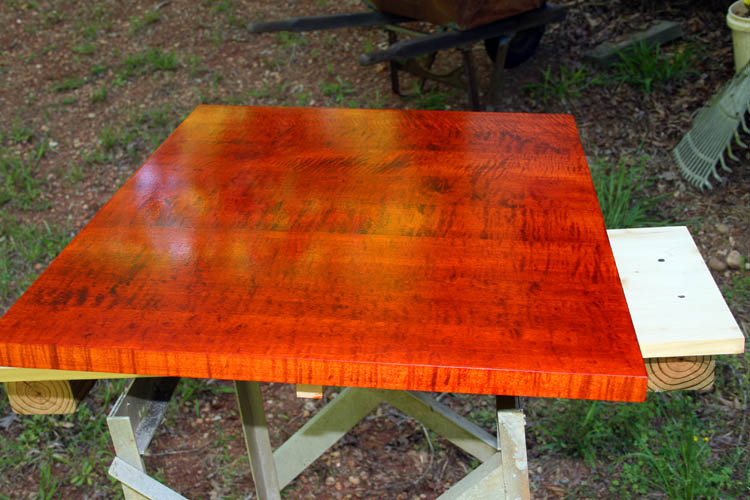
The bluish tint in the center left of the pix is reflection
from the flash and not the dreaded lacquer blush.
PERSONAL SAFETY PRECAUTIONS
It is imperative that you use a good face mask and
appropriate organic vapor filters due to the volatile nature of the nitrocellulose
lacquer and good ventilation. Using 3M 7500 series half mask and 3M
6001 filters at this time.

Web page updated by Bill aka Mickey Porter on 04-23-19 and
04-25-19.
SPRAYING NITROCELLULOSE LACQUER
I just finished spraying eleven (11) coats of
nitrocellulose lacquer over several days and will wait between seven to ten
days before I wet sand and level the finish. If all goes well, I will
proceed to the polishing stage and if not, will add additional coats of
lacquer as needed.
Web page updated by Bill aka Mickey Porter on 04-25-19.
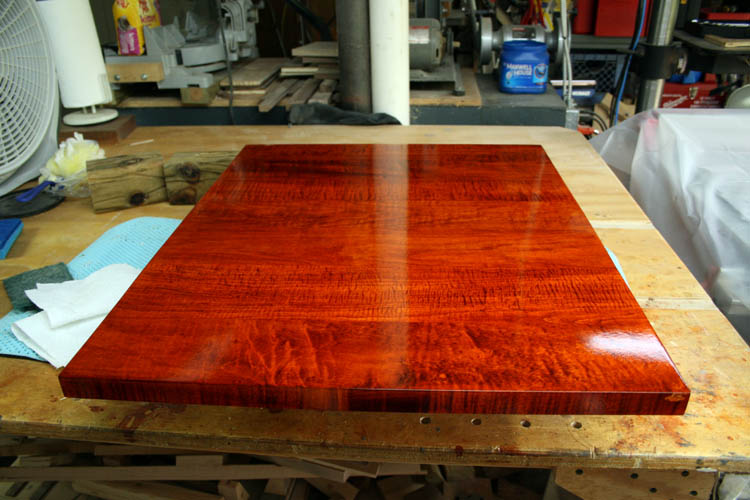
The curly maple grain pattern is really beginning to pop out
with the lacquer applied!
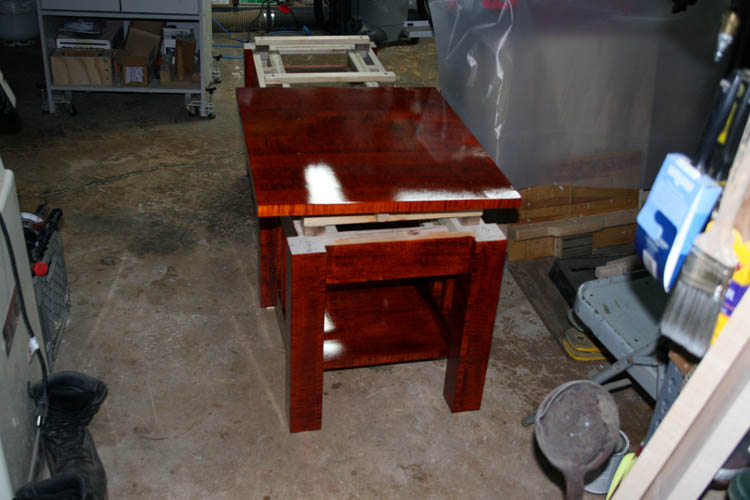
Web page updated by Bill aka Mickey Porter on 04-25-19.
WET SANDING
I let the above end table bases and tops cure out for fourteen
(14) days and wet sanded the tops with P800 and 1200 grit wetordry
sandpaper.
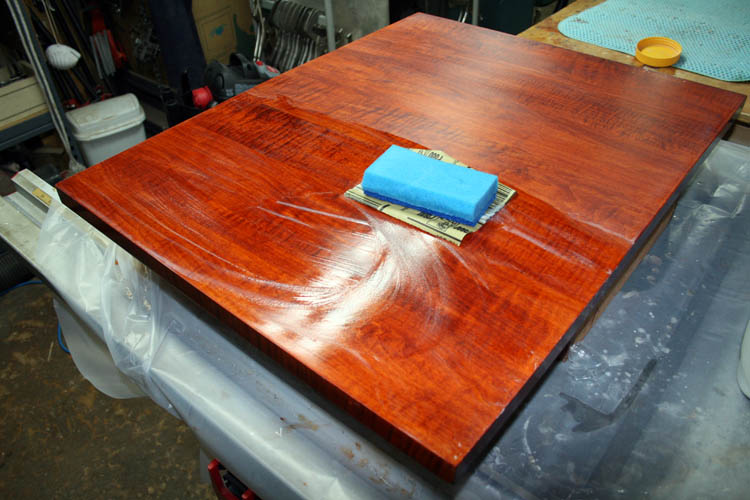
I let the sandpaper soak overnight in regular tap water with
a little bit of Ivory hand soap which acts as a lubricant. After wet
sanding with the 1200 grip wetordry sandpaper, the end table top was cleaned
with paper towels and a regular towel. I had a couple high tech
cloths, but can't remember what they are called....grin if you must.
Normal procedure is to wet sand a small area, remove the
sludge with a paper towel or cloth and observe your progress. You
definitely don't want to wet sand through the finish using caution when wet
sanding the edges. The wet sanding in the pix above, right hand
portion shows the dull finish after wet sanding.
The wet sanding leveled the finish real well removing most
of the orange peel, but there were a couple places where there were
imperfections in the wood caused by the planer chip aka tear out. I
could have gone to a higher grit wet sanding, but this is adequate for a
mirror finish.
BUFFING
For buffing out the wet sanding marks, I used a medium and fine liquid abrasive by
StewMac applied on a white and orange color foam buffing pad using a couple
orbital sanders.
POLISHING
For polishing out the finish, I used Meguiars Ultimate
Compound and a 7 inch wool buffing pad on a DeWalt DWP849X buffer running at
1000 rpm and then at 1400 rpm.
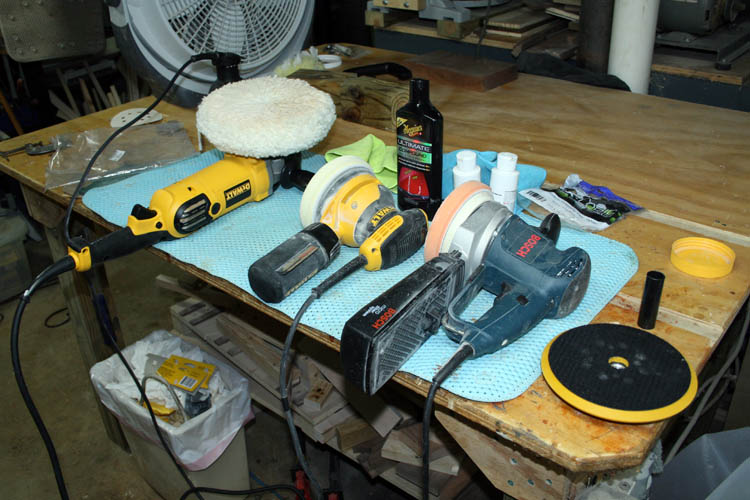
The DeWalt DWP849X is a fine polisher.
COMPLETED END TABLES
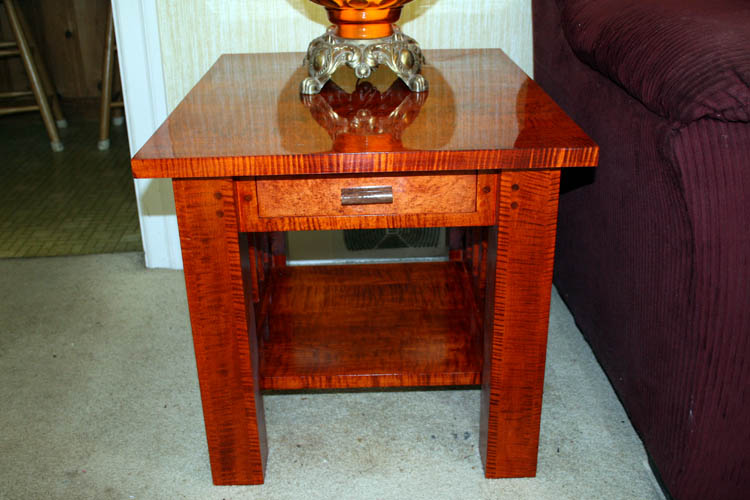
A good mirror finish manifesting itself!
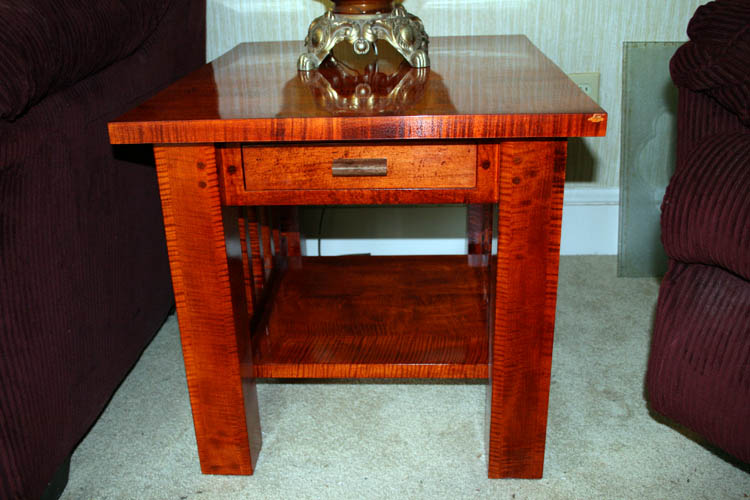
As I stated earlier, curly maple is probably my favorite
wood and the figure popped out pretty good in the above end tables, although
that was by far not the best curly maple wood I have used, but used what I
could find and afford.
If I can locate a small rectangular mission style drawer
pull, I will replace the walnut ones, whereby keeping the spirit of the
mission style design furniture.
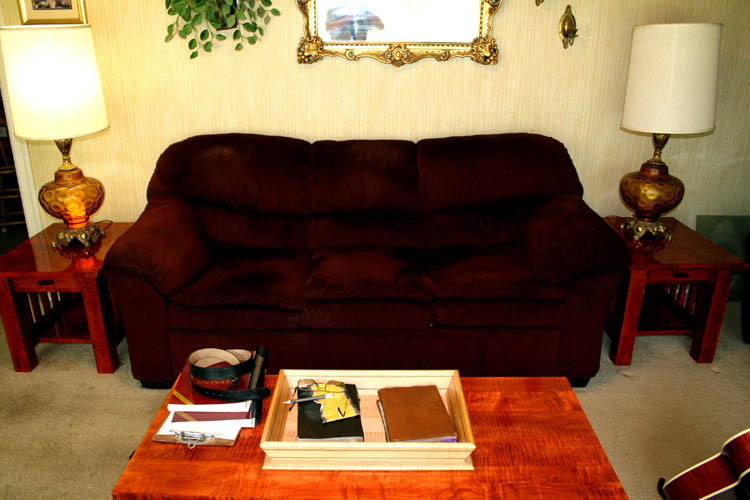
This has been a fun project and I am now surrounded by curly
maple wood including my Porter Custom Made
Resophonic Guitar and have God's Holy Word
aka Bibles in a curly maple serving tray within arms reach, but most importantly,
God's Holy Word dwells within my
soul, spirit and body!
Web page updated by Bill aka Mickey Porter on 05-09-19.
SPRAY GUN CLEANING
At the end of my projects that requires spraying multiple
coats of lacquer over a period of time, the spray gun needs a thorough
cleaning, etc. I will normally run lacquer reducer through the spry
gun at the end of spraying a coat of lacquer and wait until after the final
coats of lacquer is applied before dismantling the spray gun for a complete
cleaning.
Nothing high tech about cleaning a spray gun, just takes
some time and a few tools to take a few parts loose from the main body of
the spray gun.
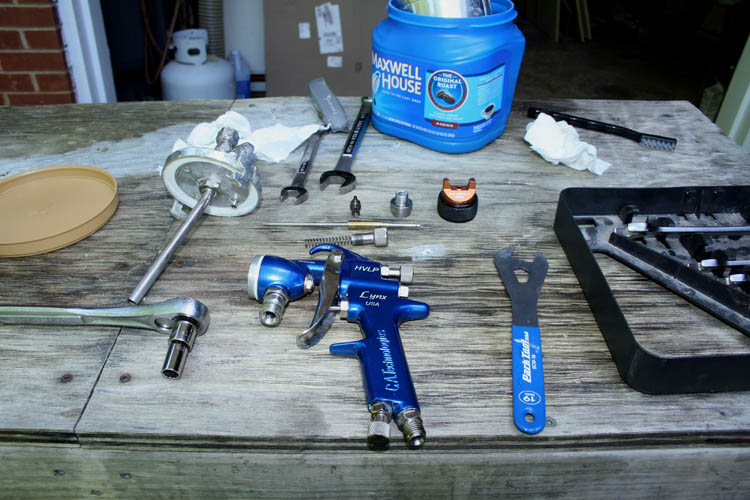

Gun looks as good as new, however the pressurized quart
container has taken a slight whipping over the years.
WORKSHOP READY FOR ANOTHER PROJECT

I need to start rounding up some 4/4 black walnut and start
on a few secretary/letter boxes.
Web page updated by Bill aka Mickey Porter on 05-13-19.
INSTALLED CORRECT DRAWER PULLS
I finally found the correct size and mission style drawer
pulls for the end tables and coffee table from a dealer in Florida via the
internet.
I received the drawer pulls on 05-20-19 and after marking
and locating two holes for the hardware, I realized it would be easier to
make a simple wood drill template to clamp onto the face of the drawer for
the 9/64 inch diameter holes.
THUMBNAIL PIXS
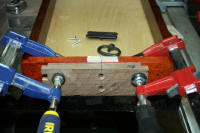
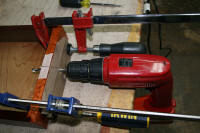

The mission style drawer pulls really adds to the overall
look and spirit of the mission style end tables and coffee table.
To reiterate, This has been a fun project and I am now surrounded by curly
maple wood including my Porter Custom Made
Resophonic Guitar and have God's Holy Word
aka Bibles in a curly maple serving tray within arms reach, but most importantly,
God's Holy Word dwells within my
soul, spirit and body!
Web published update by Bill aka Mickey Porter on 05-20-19.
LEAVING ON A
SPIRITUAL NOTE
If you do not know Jesus Christ as your Lord and Savior, please take
this moment to accept him by Faith into your Life, whereby Salvation
will be attained.
Ephesians 2:8 - 2:9 8 For by grace are ye saved through
faith; and that not of yourselves: [it is] the gift of God: 9 Not of
works, lest any man should boast.
Hebrews 11:1 “Now faith is the substance of things hoped for,
the evidence of things not seen.”
Romans 10:17 “So then faith cometh by hearing, and hearing by
the word of God.”
Open this
link about faith in the King James
Bible.
Romans 10:9 “That if thou shalt confess with thy mouth the
Lord Jesus, and shalt believe in thine heart that God hath raised him
from the dead, thou shalt be saved.”
Open this
link of Bible Verses About Salvation,
King James Version Bible (KJV).
Hebrews 4:12 “For the word of God is quick, and powerful, and
sharper than any two edged sword, piercing even to the dividing asunder
of soul and spirit, and of the joints and marrow, and is a discerner of
the thoughts and intents of the heart.”
Romans 6:23 “For the wages of sin is death; but the gift of
God is eternal life through Jesus Christ our Lord.”
Romans 3:23 “For all have sinned, and come short of the glory
of God;”
Micah 6:8 “He hath shewed thee, O man, what is good; and what
doth the LORD require of thee, but to do justly, and to love mercy, and
to walk humbly with thy God?”
Philippians 4:13 "I can do all things through Christ which
strengtheneth me."


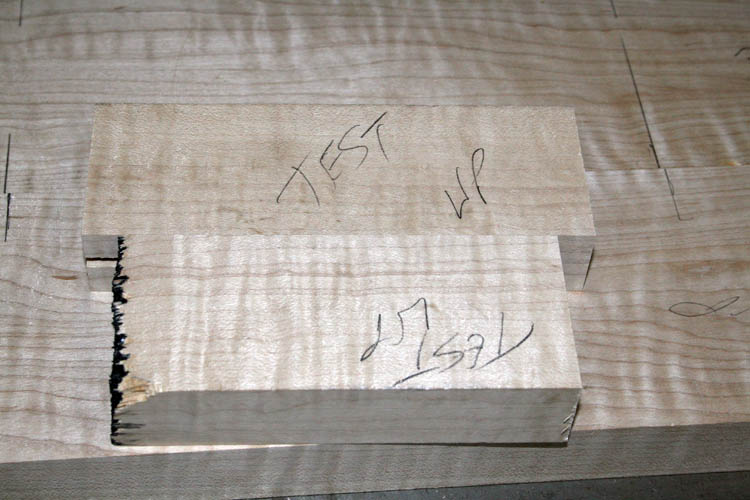
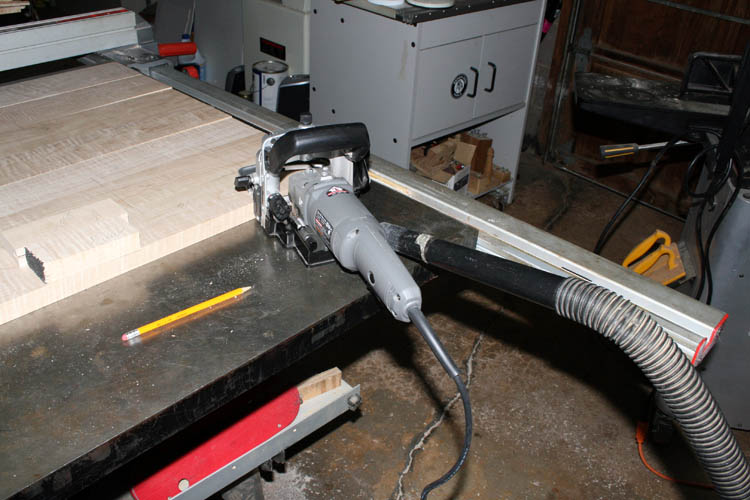

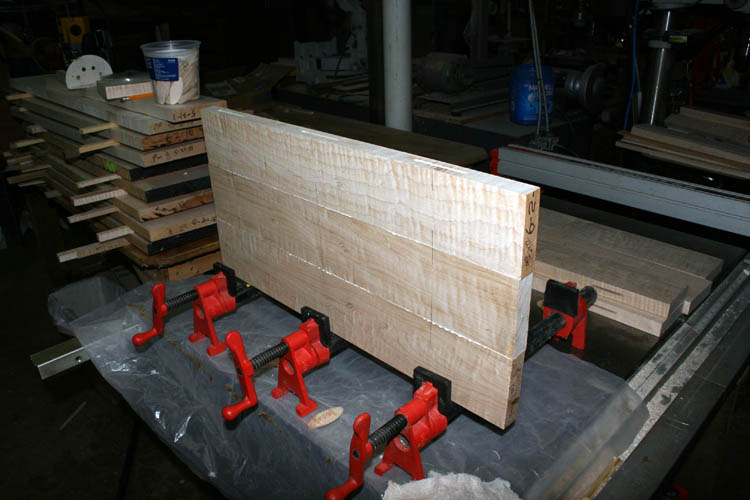

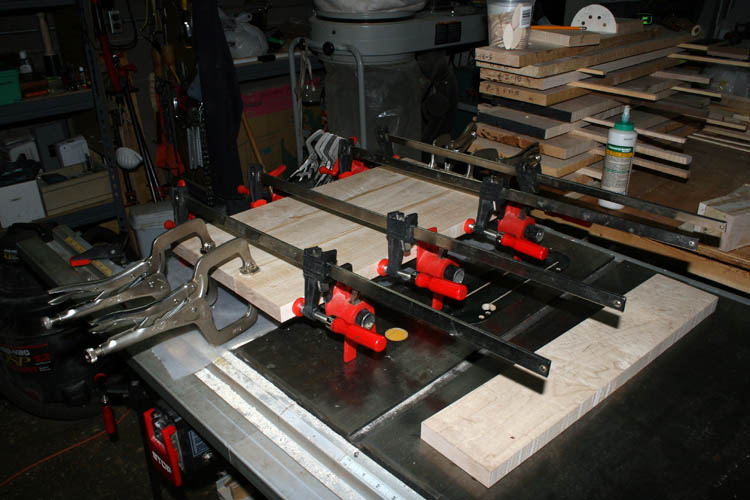
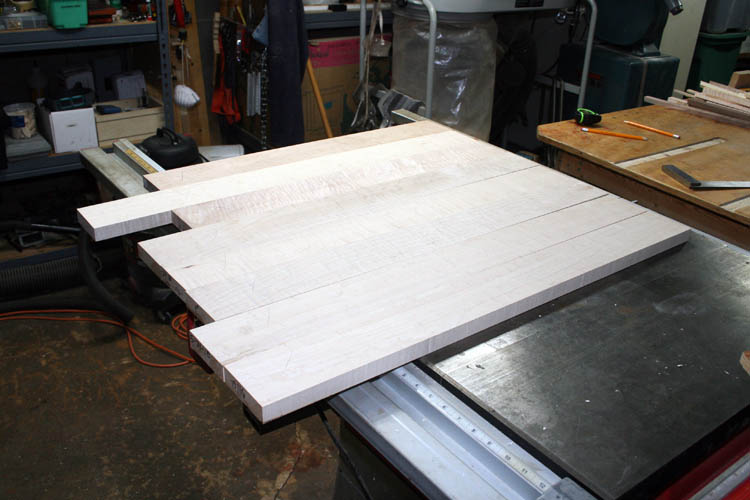


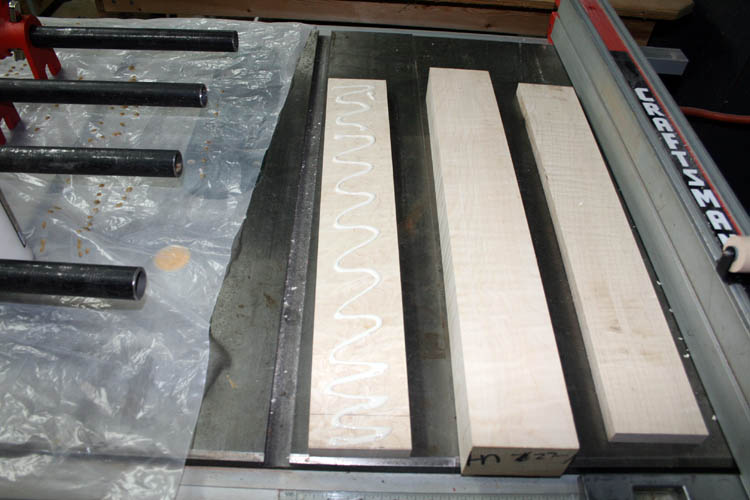

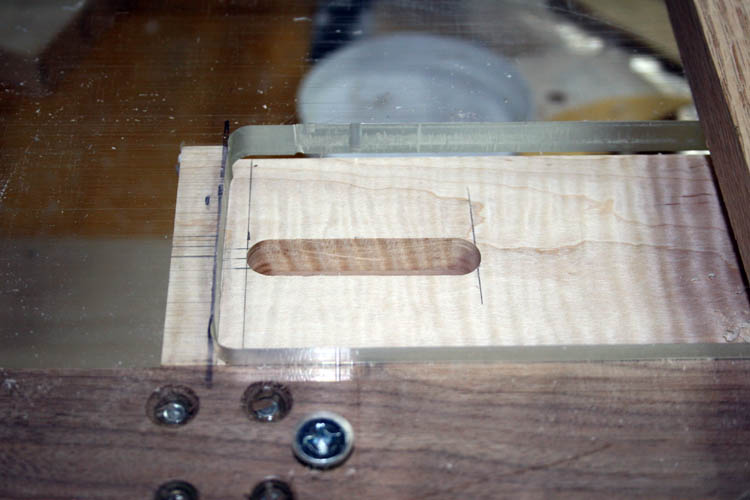
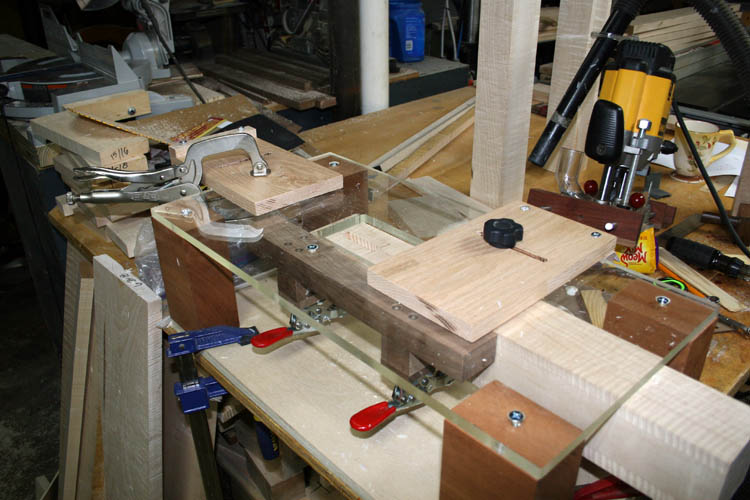
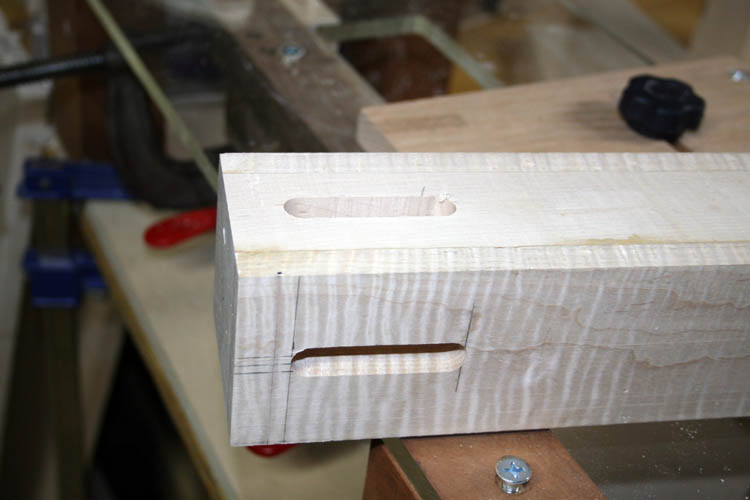
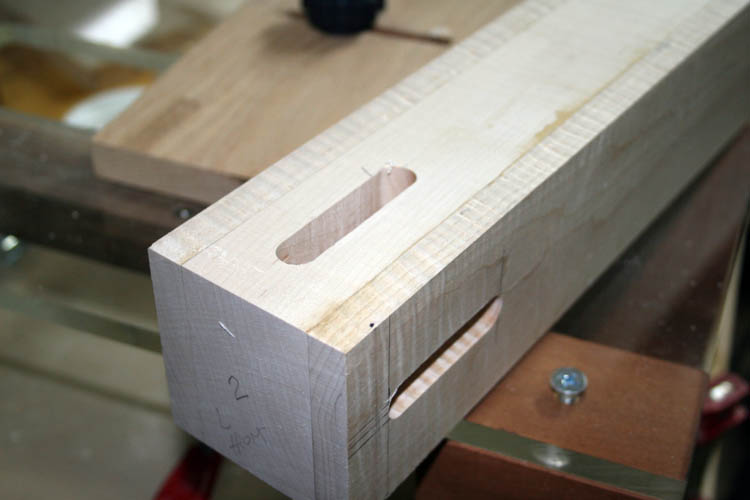
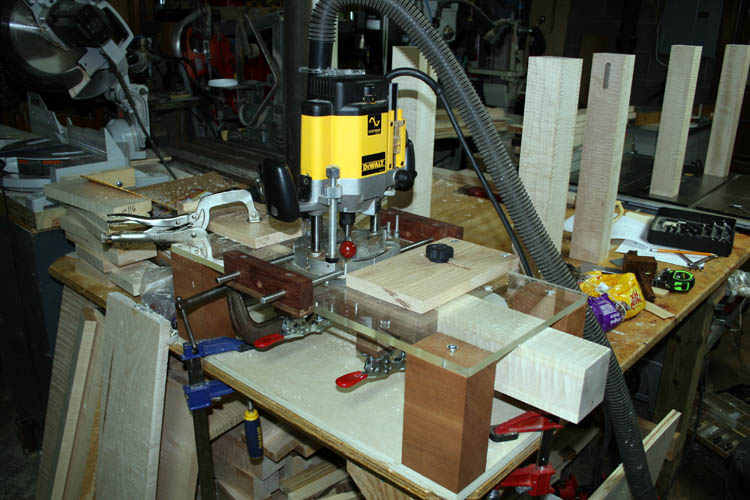

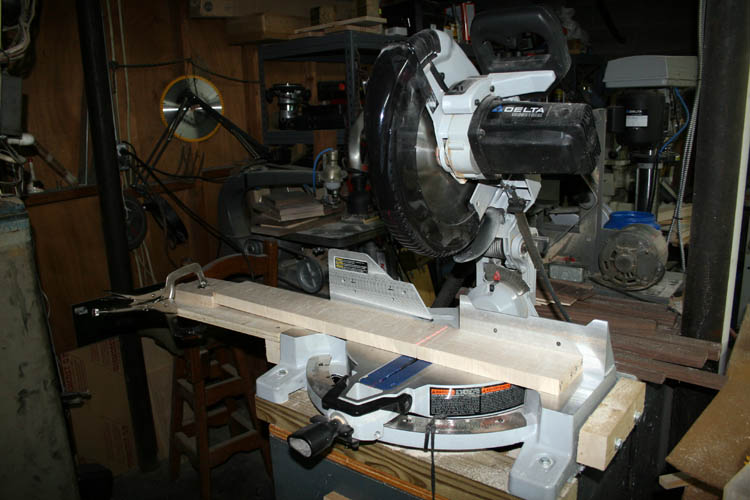
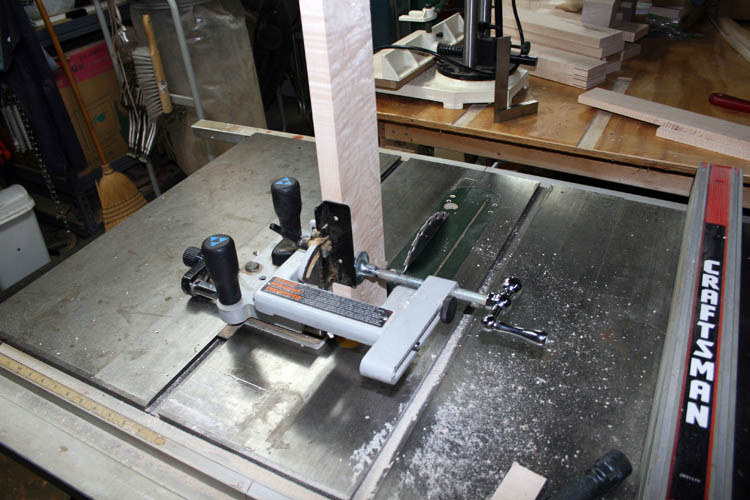
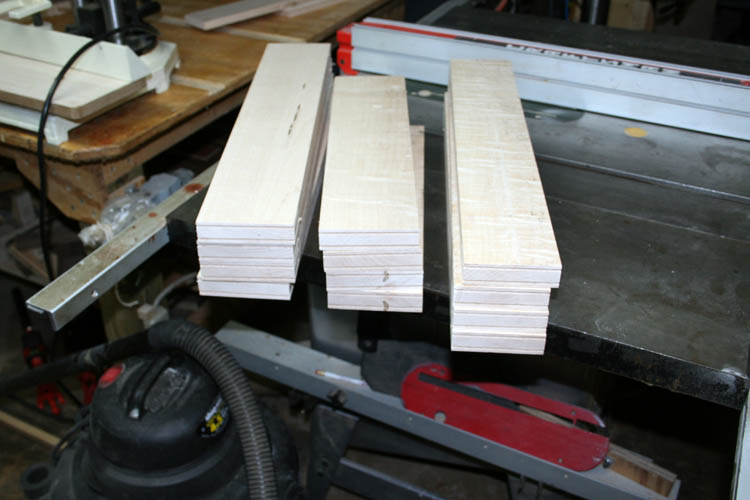


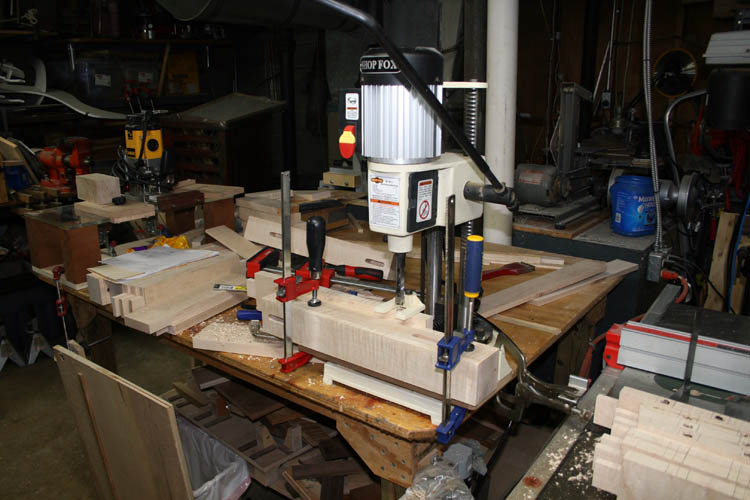
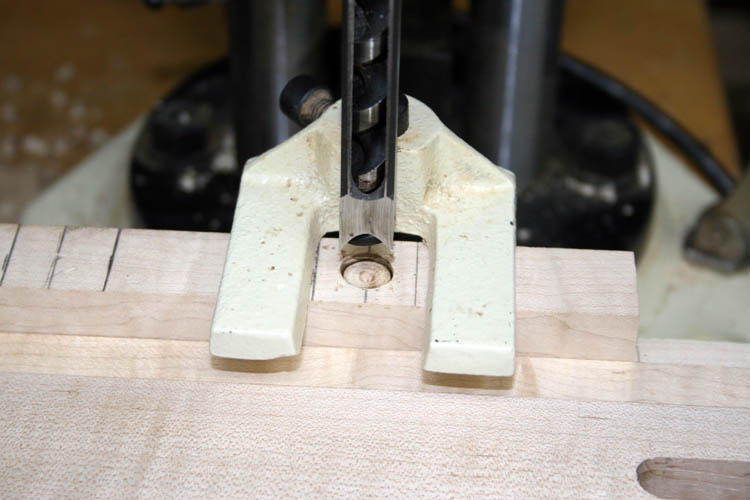
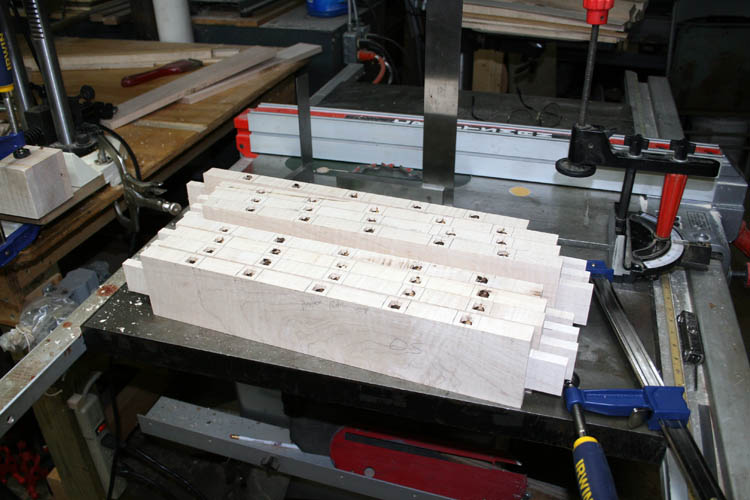
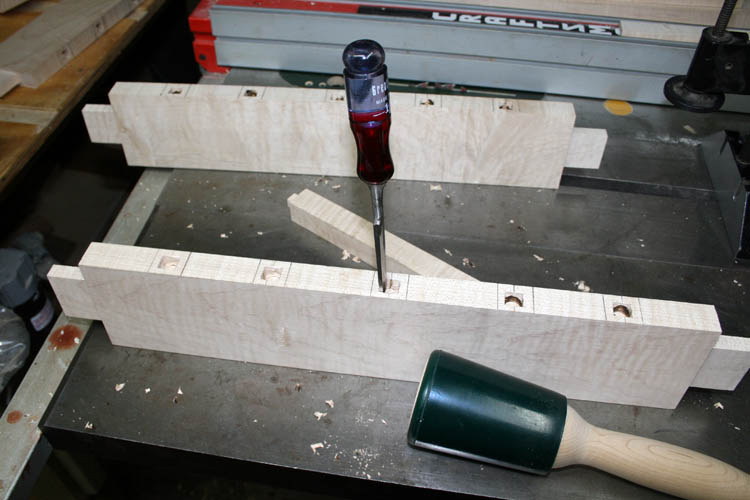

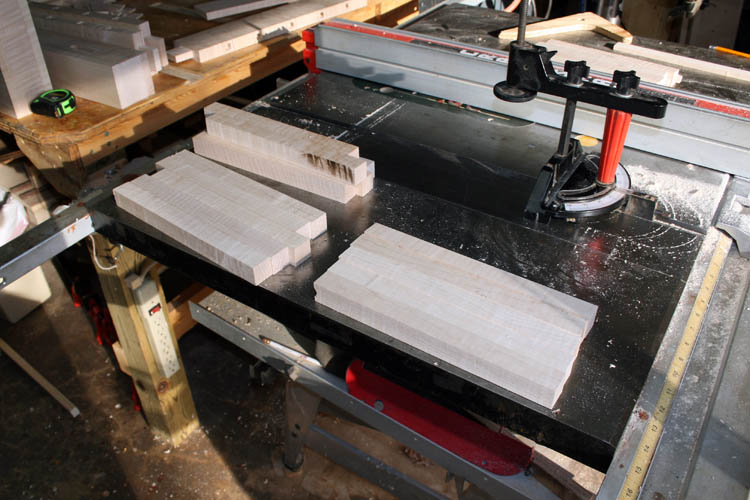
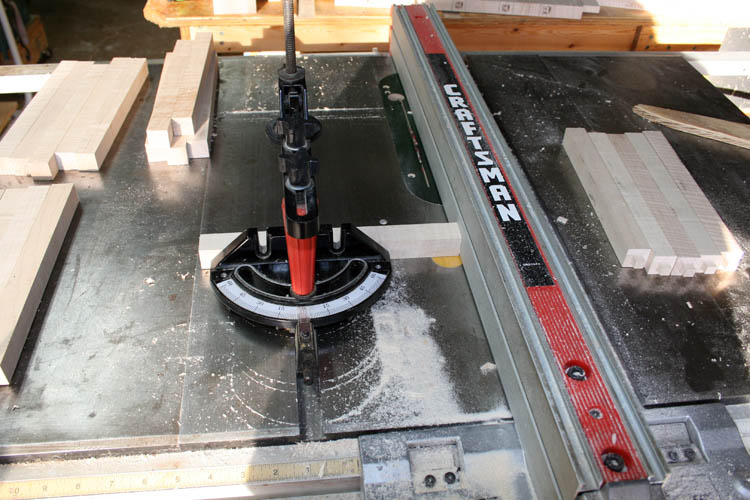
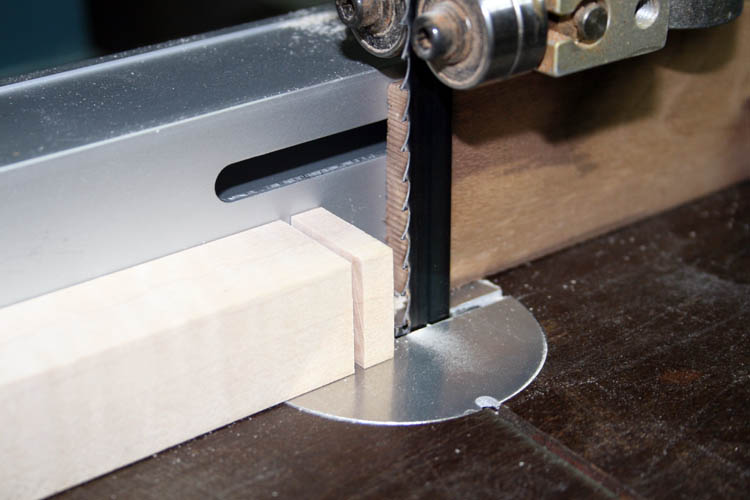
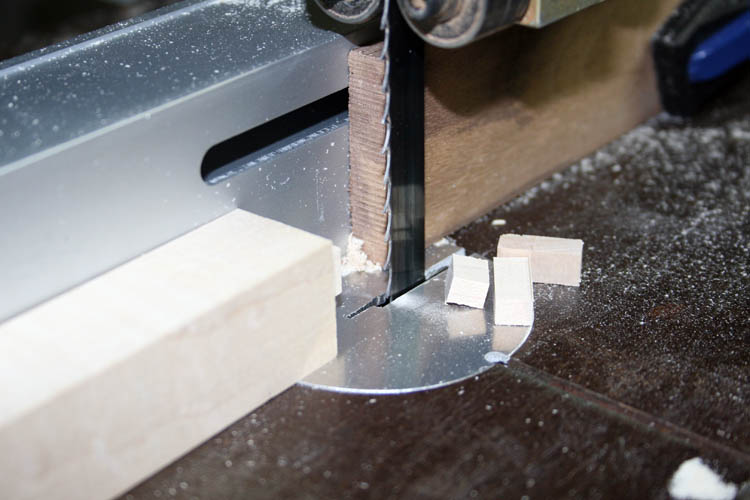
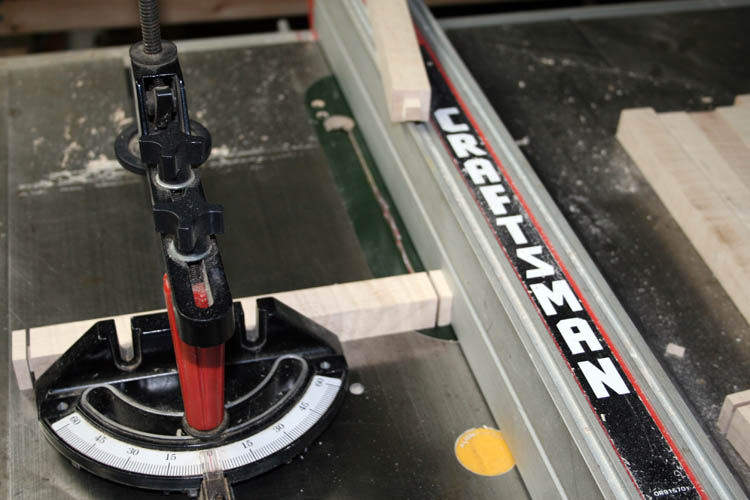

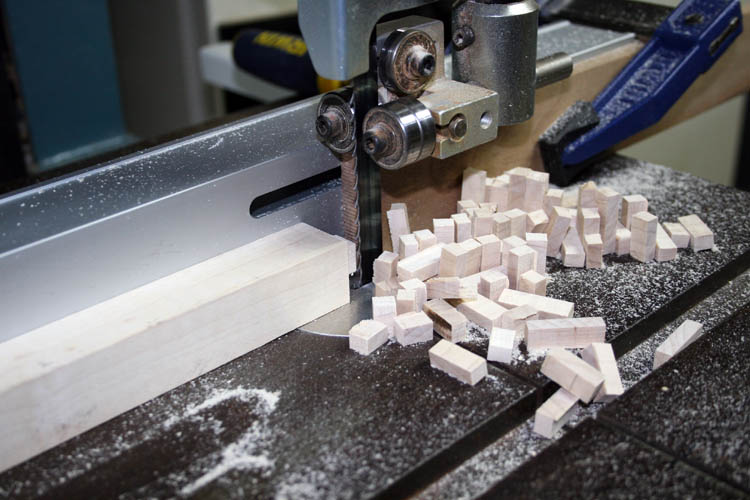

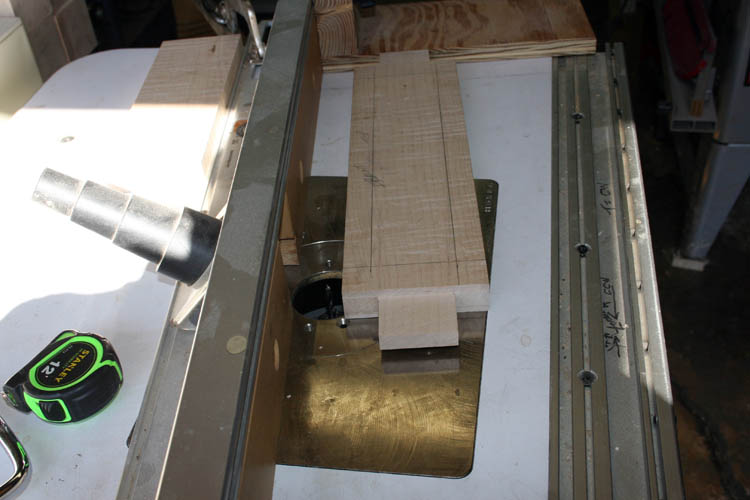

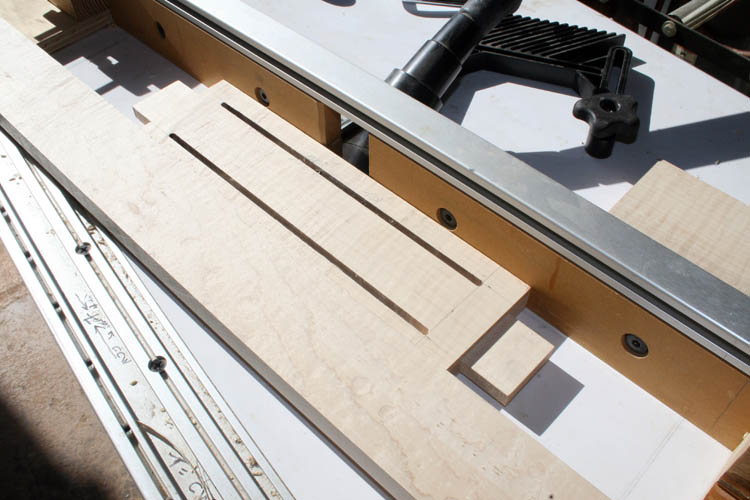

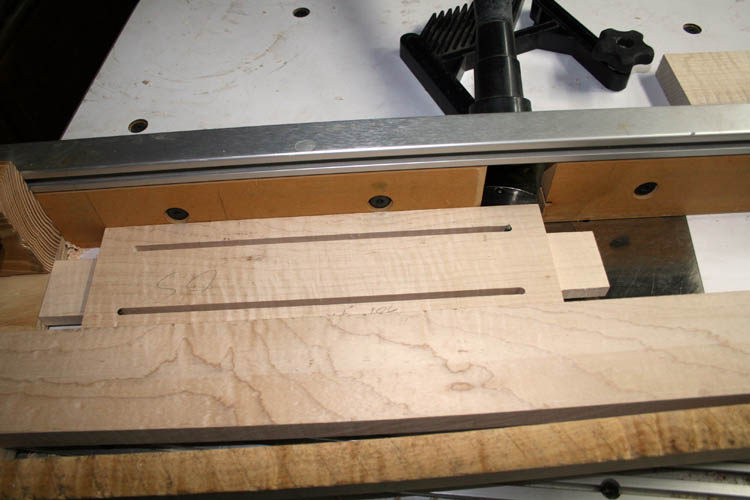
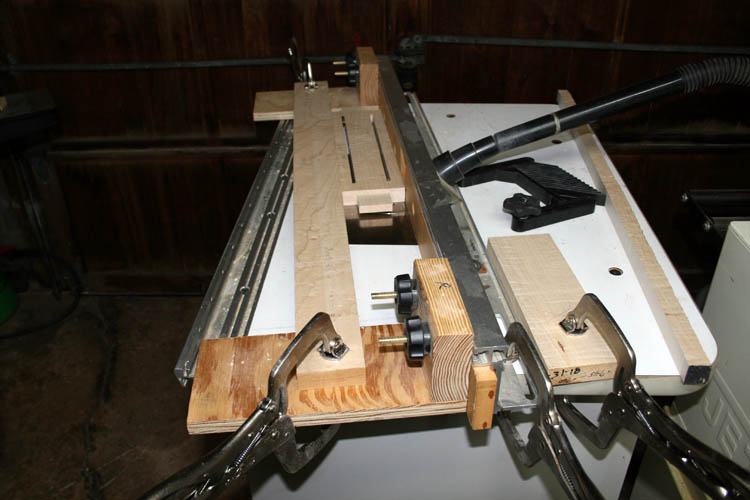
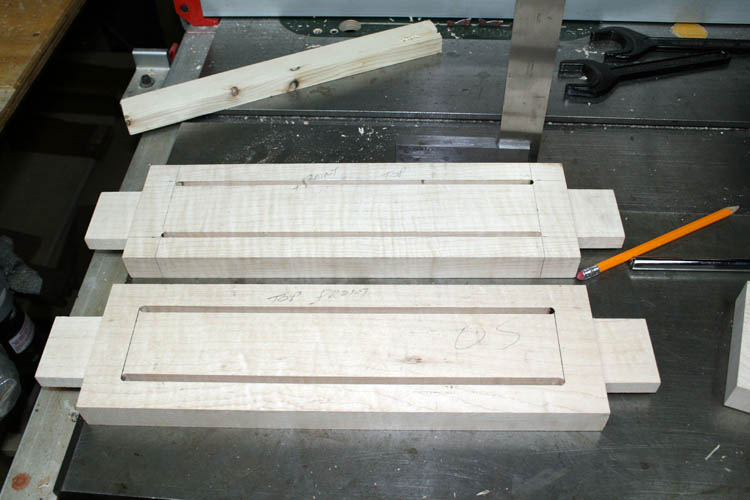


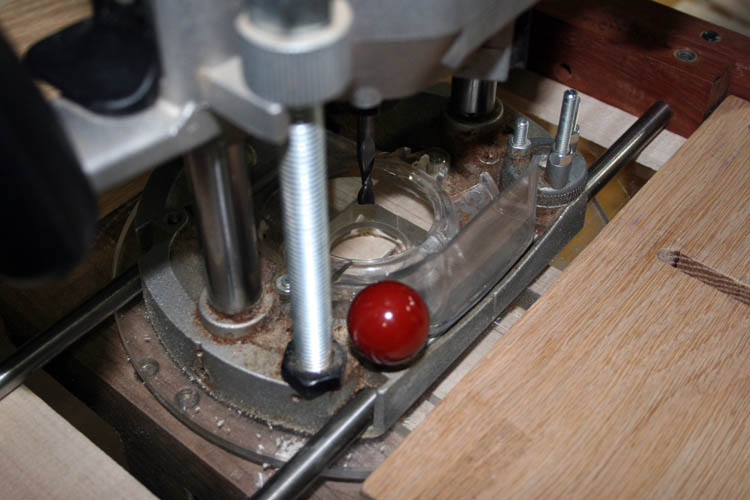
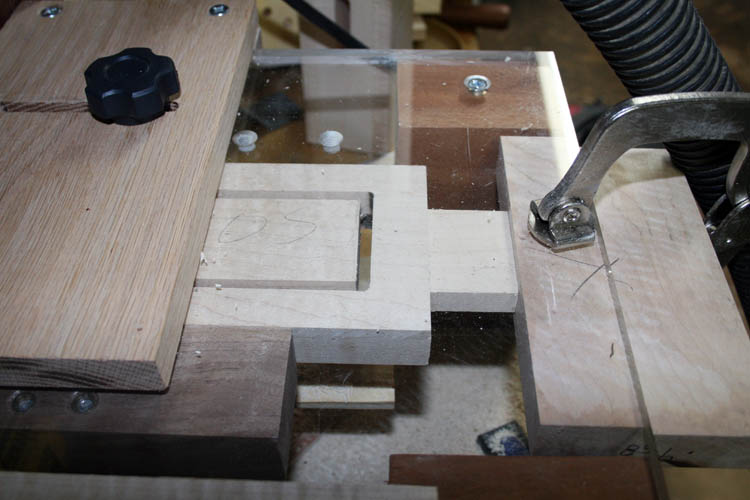
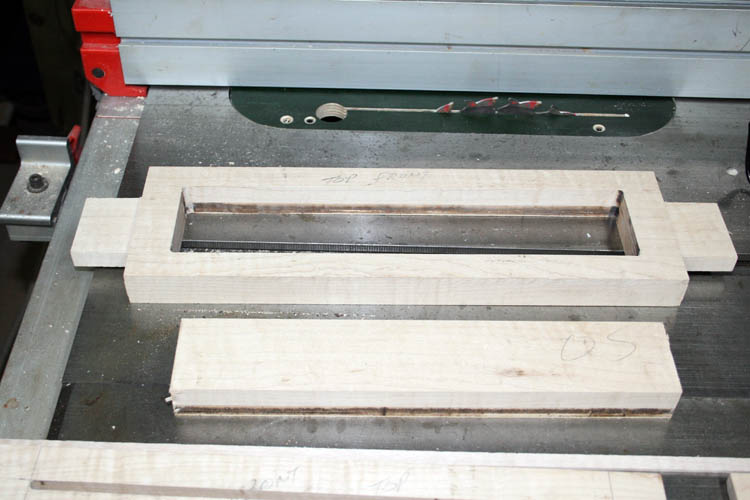
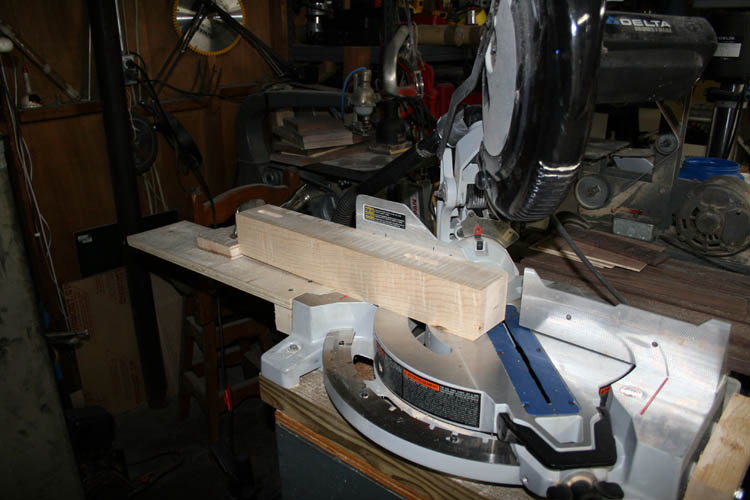

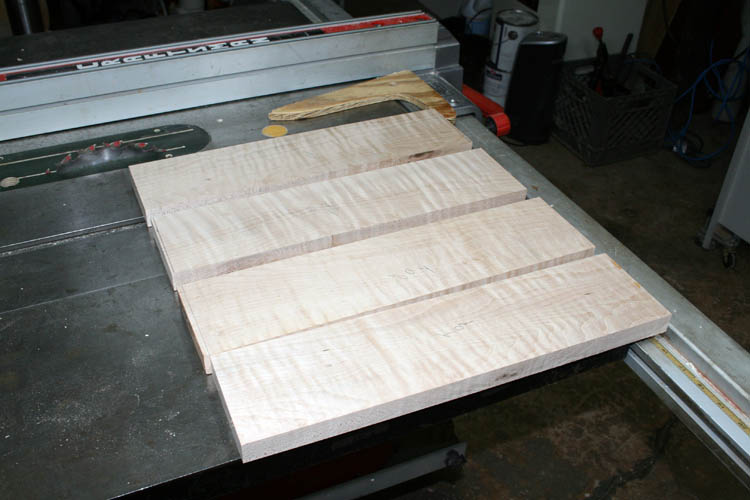
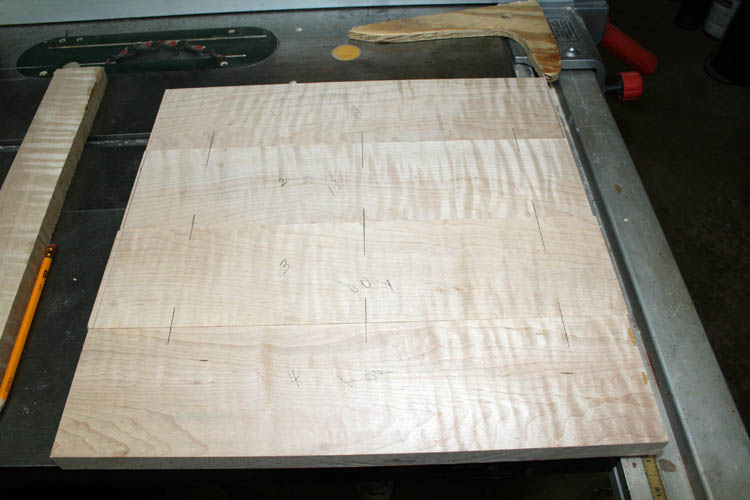

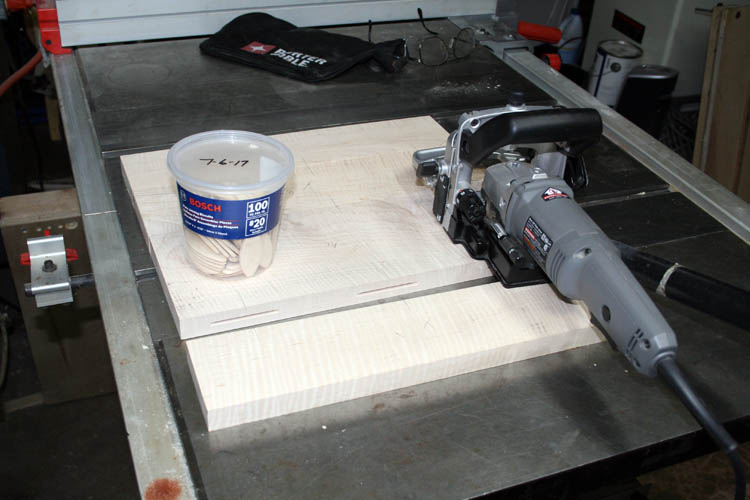
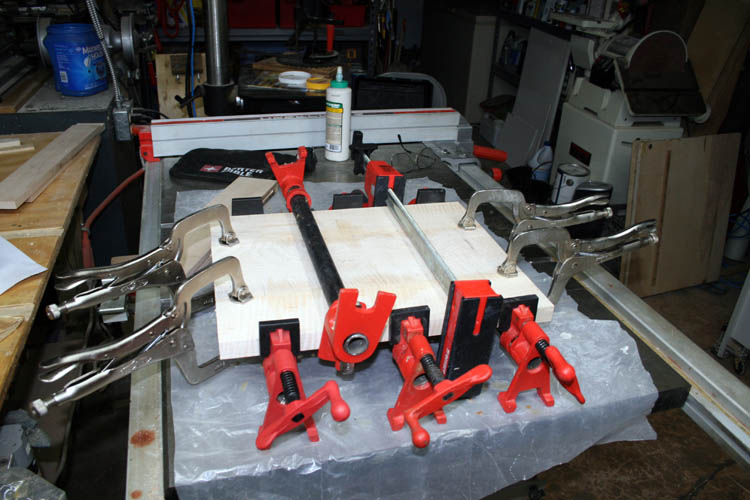

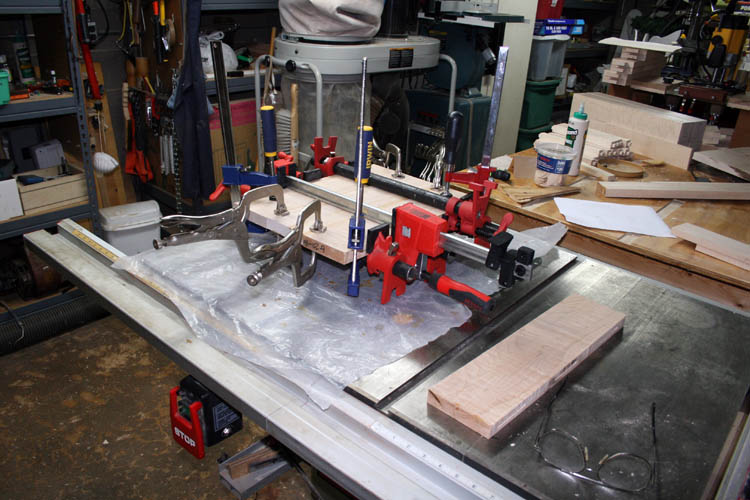
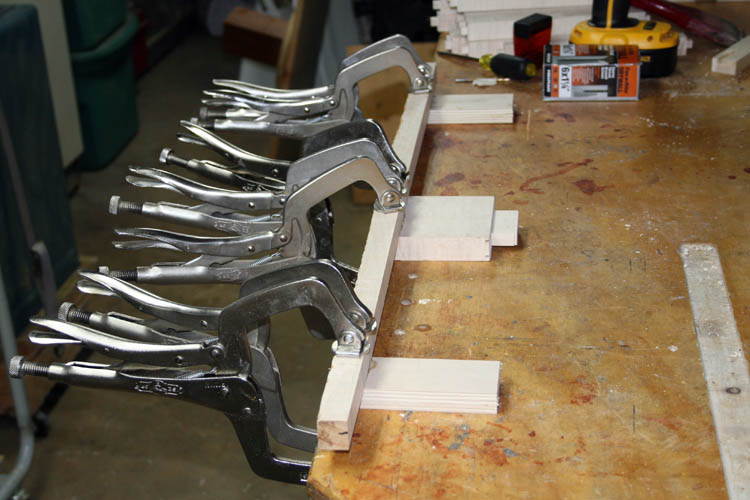


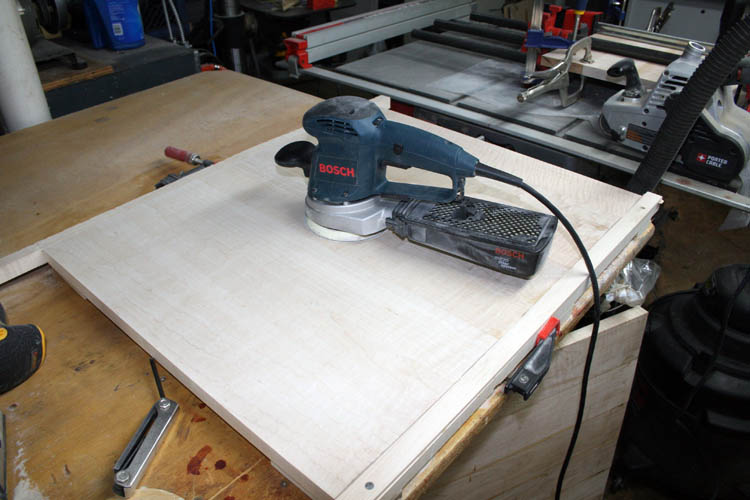

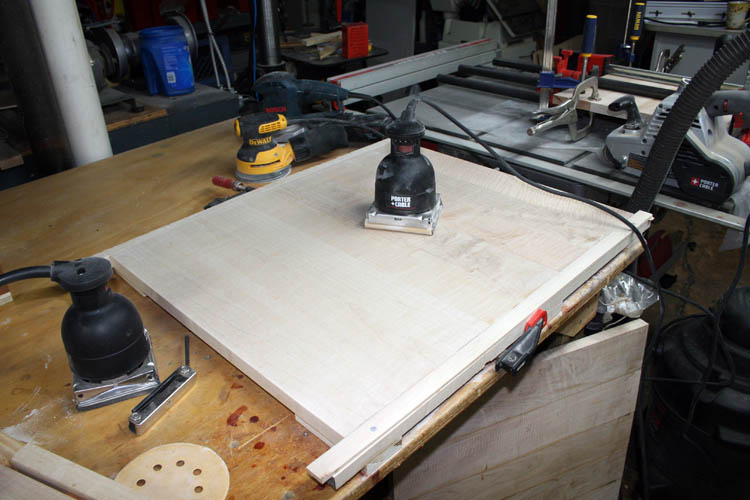


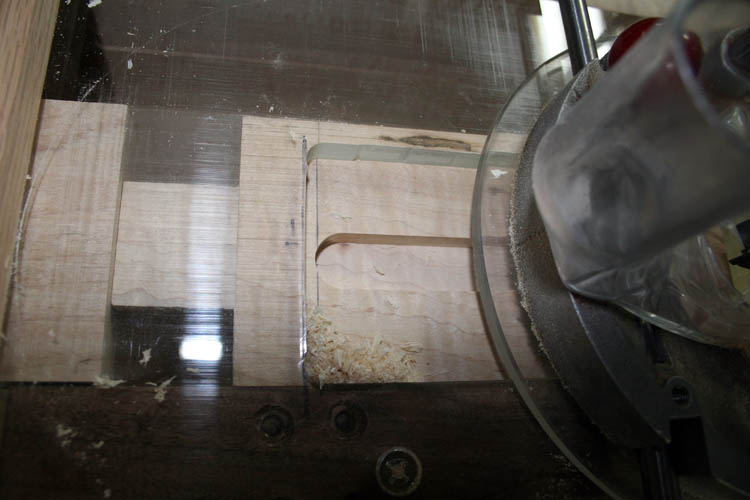

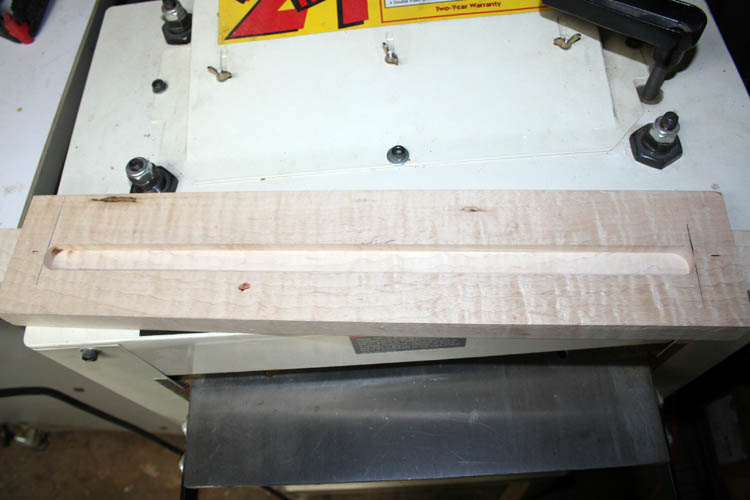
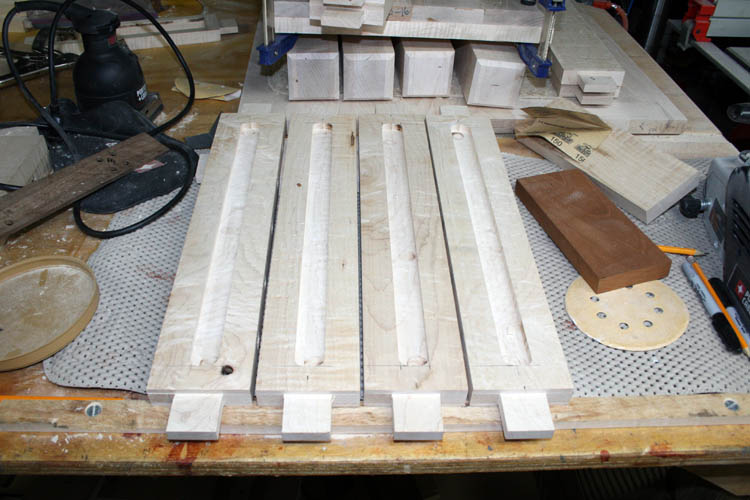
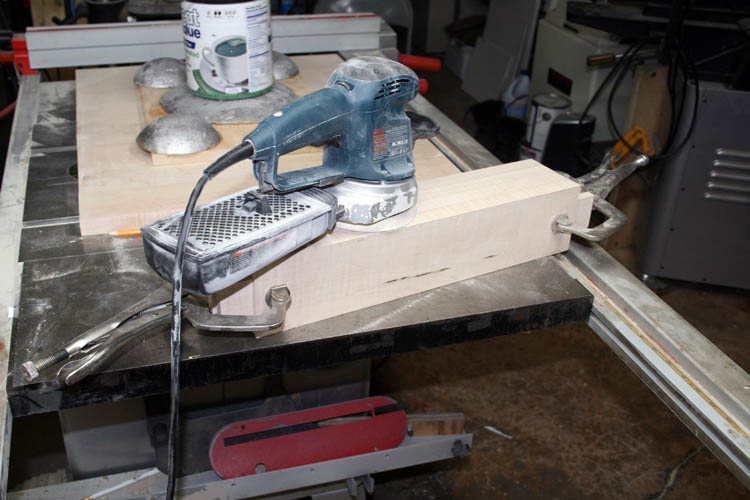
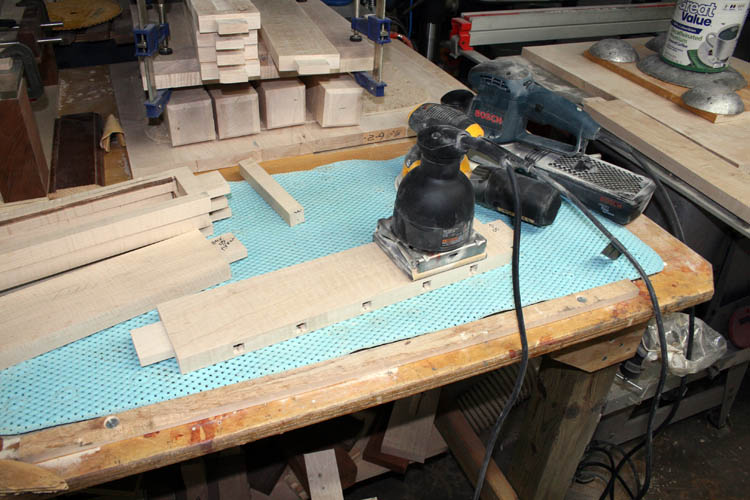


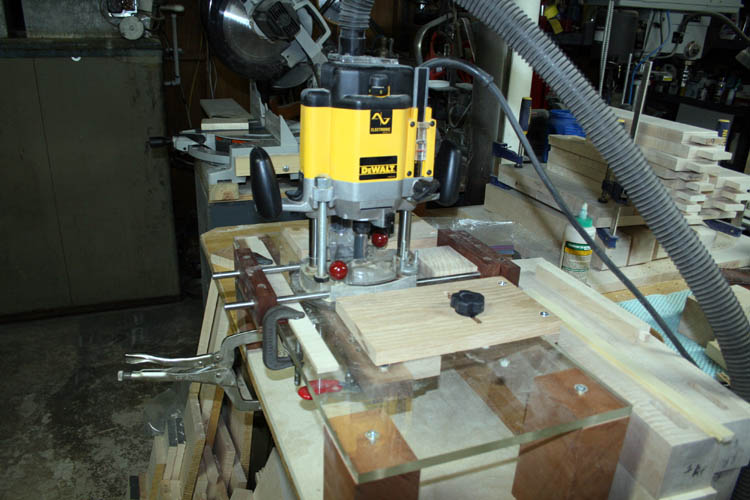
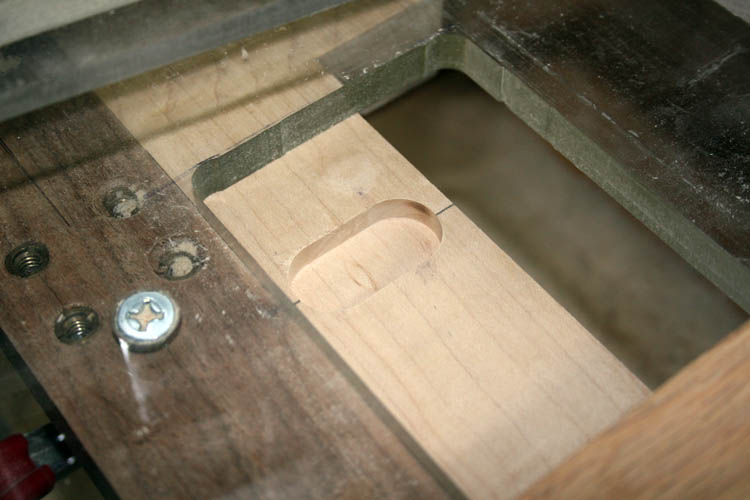
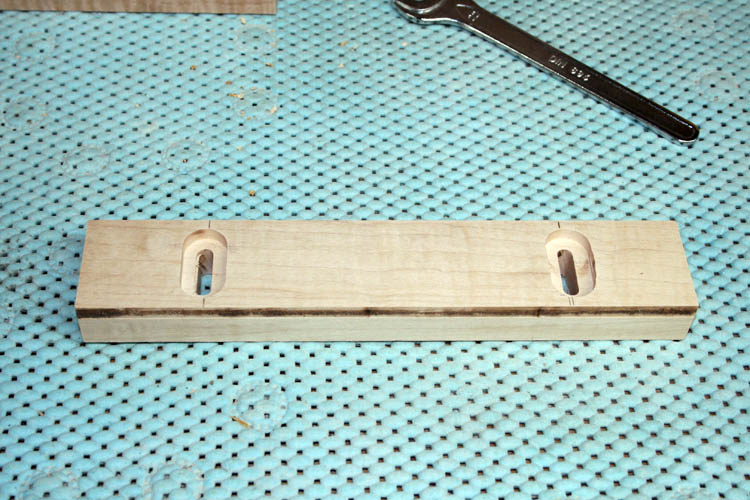
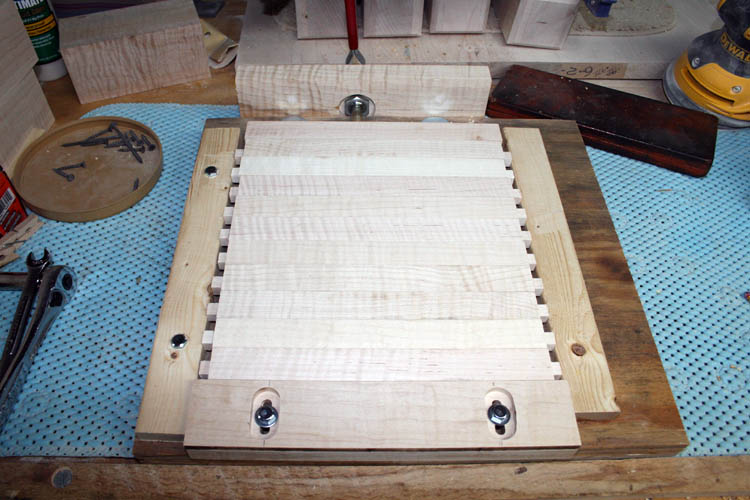
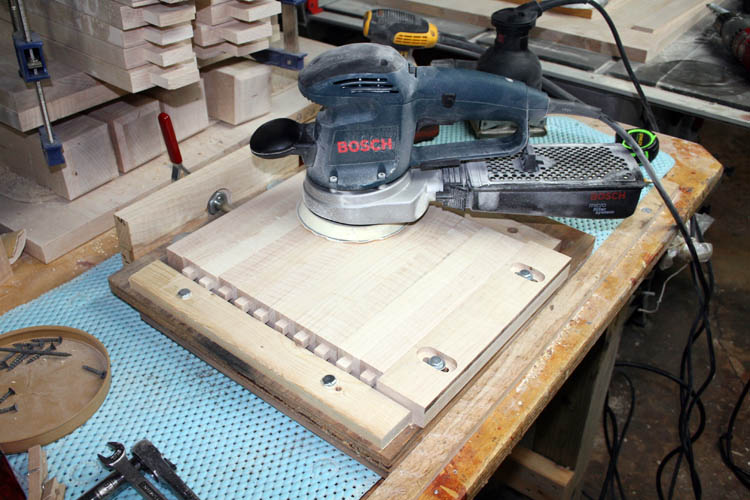
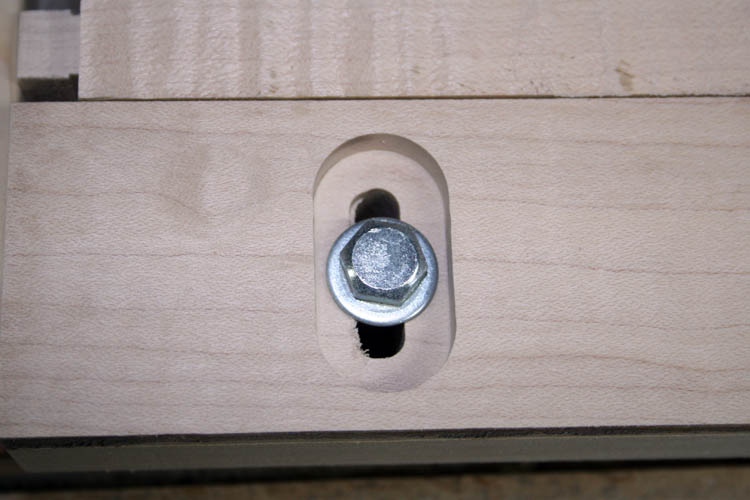
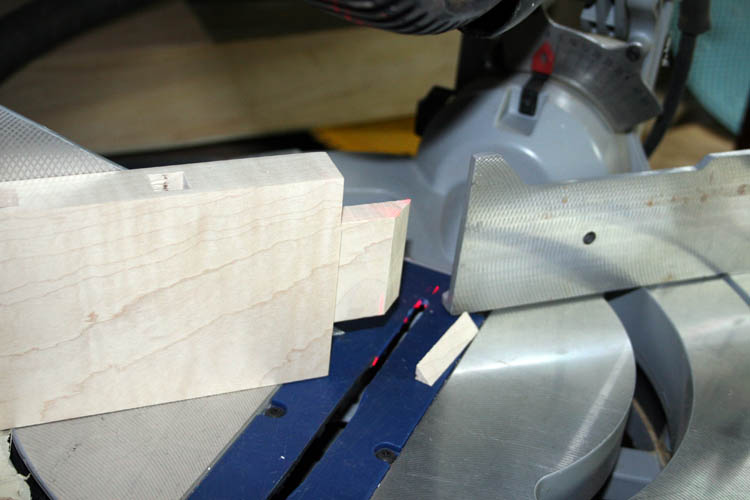

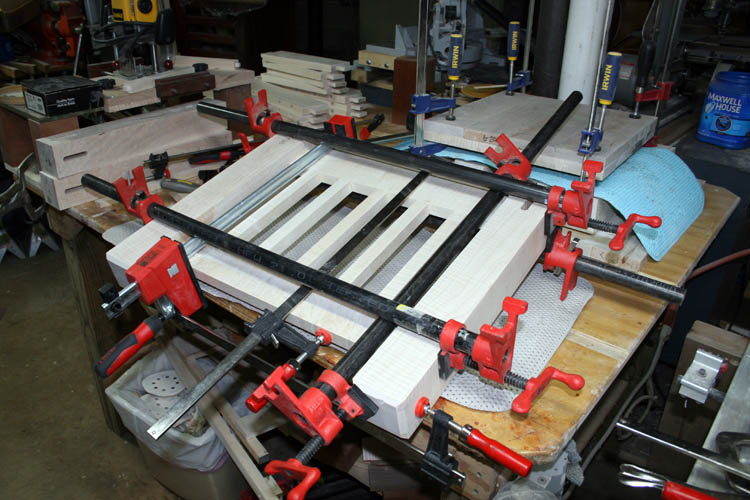
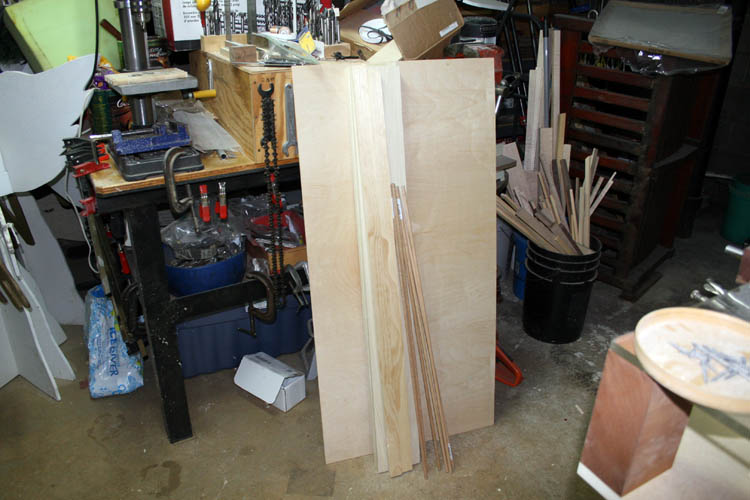
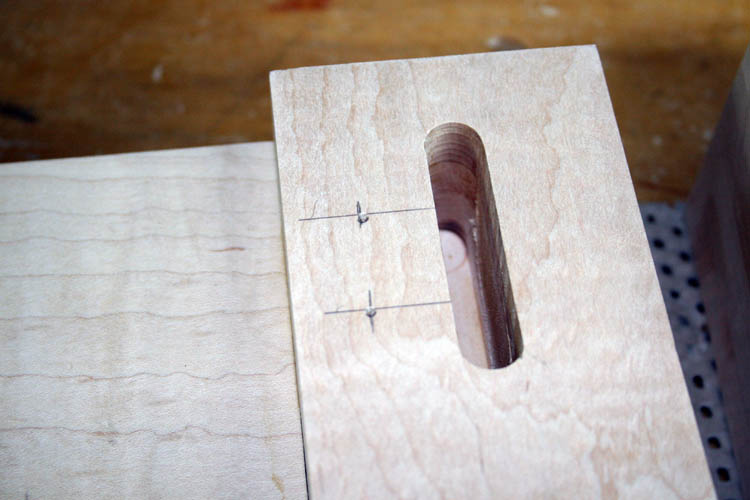
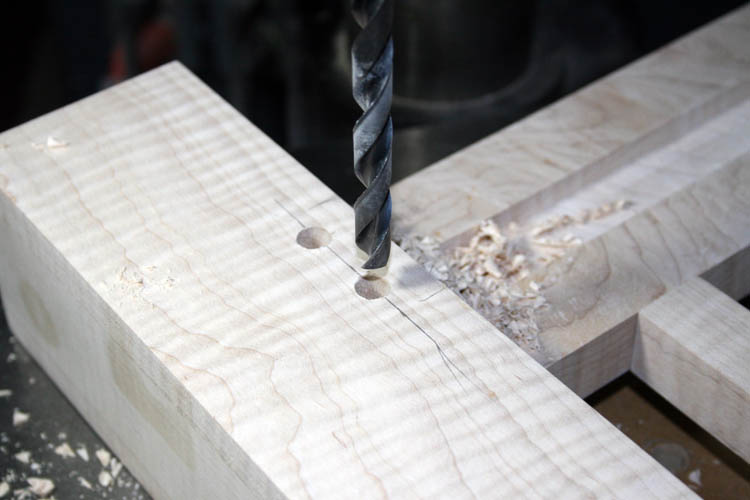


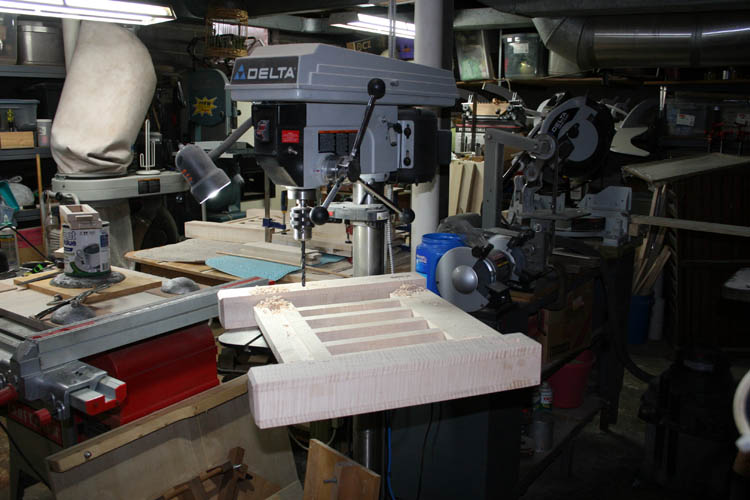
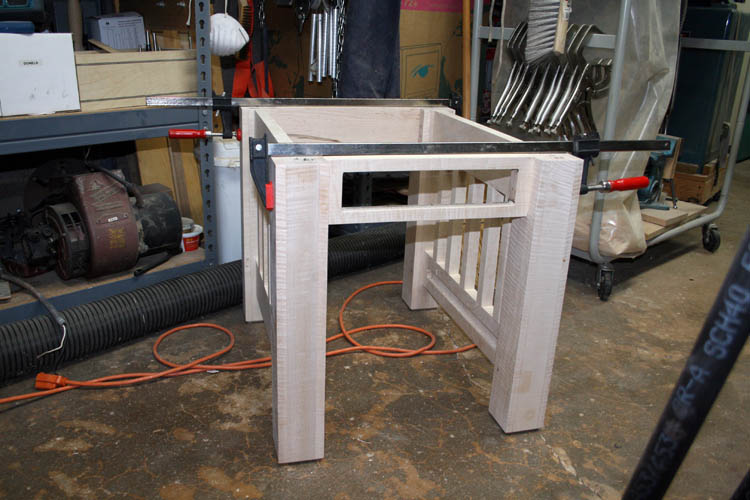


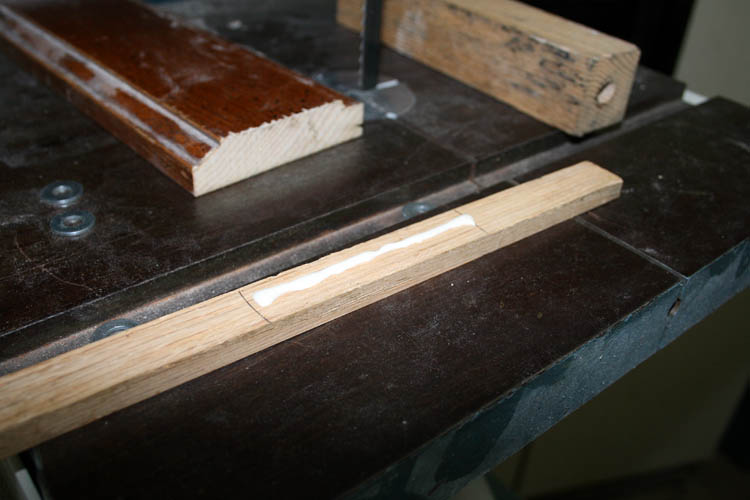


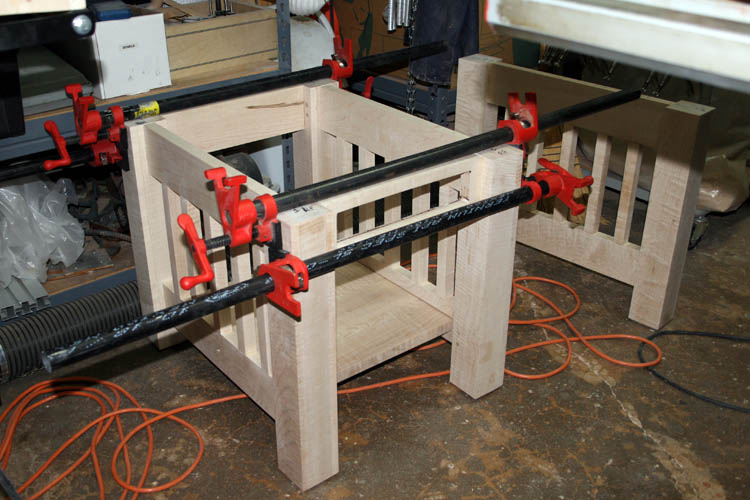

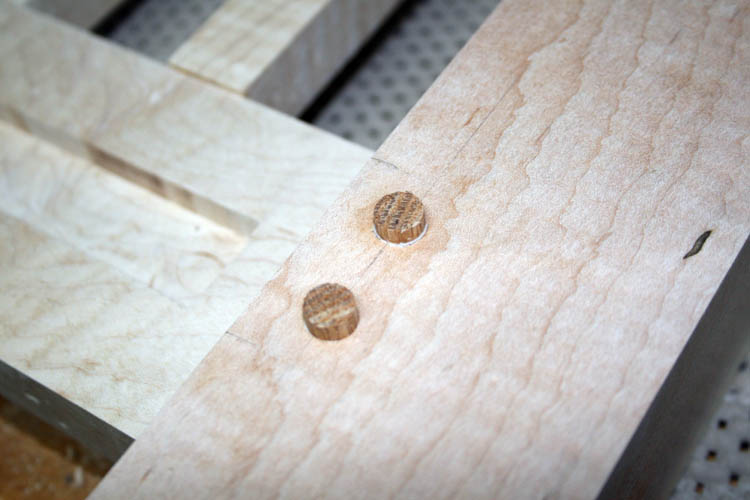


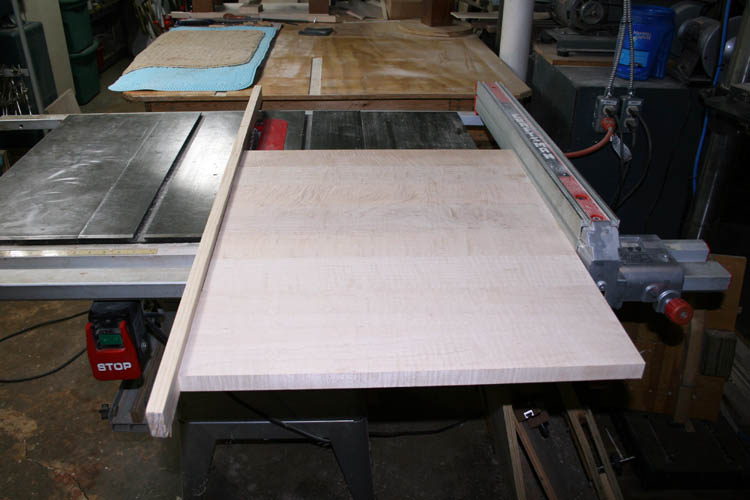
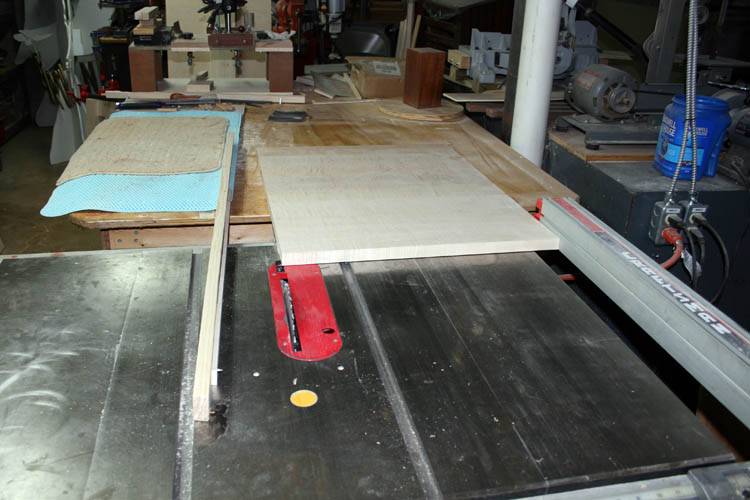
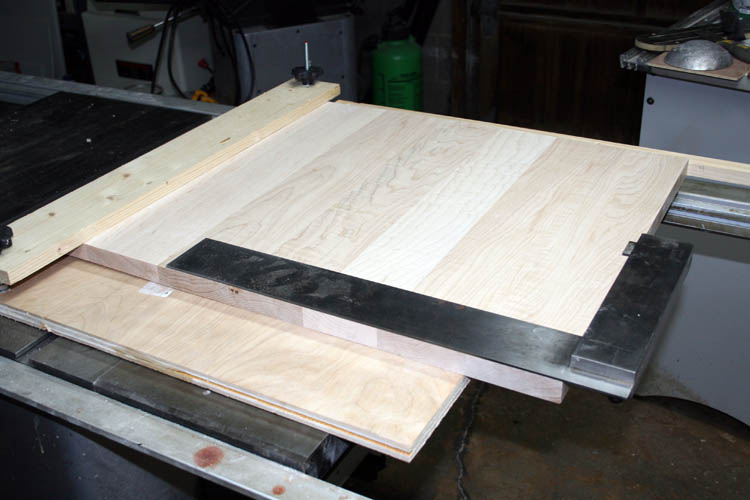

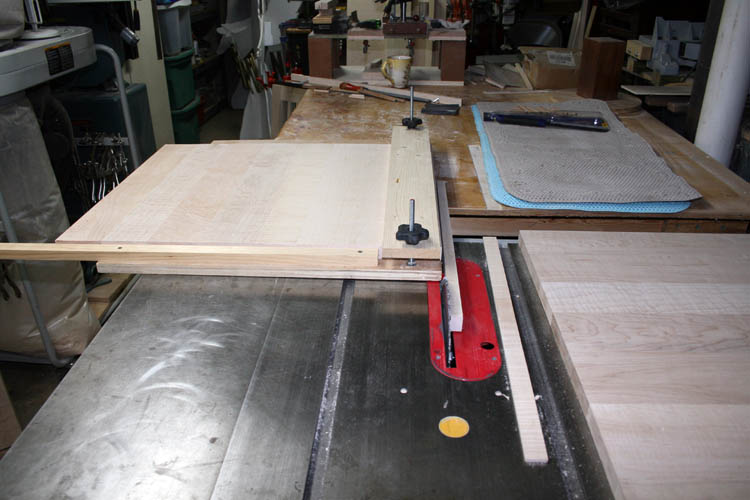
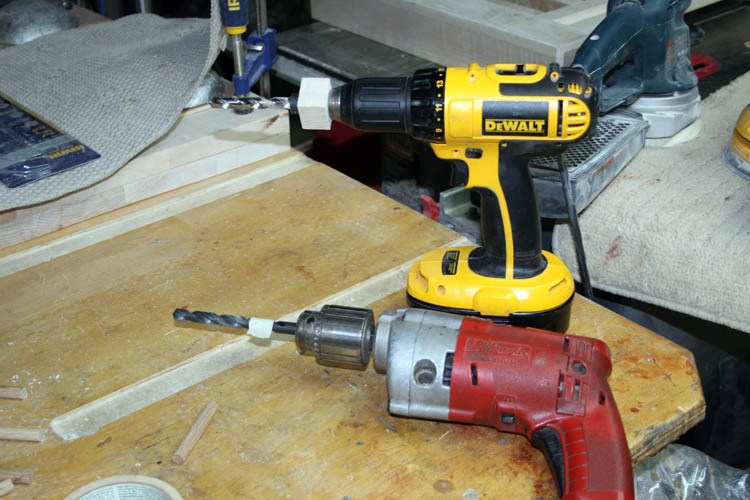
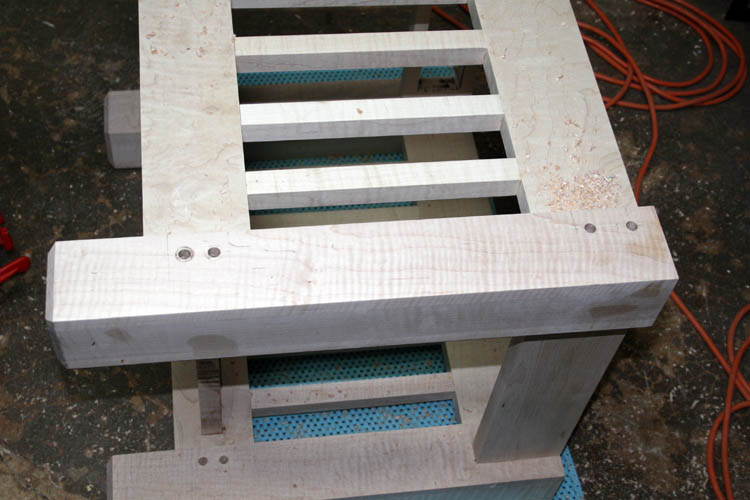
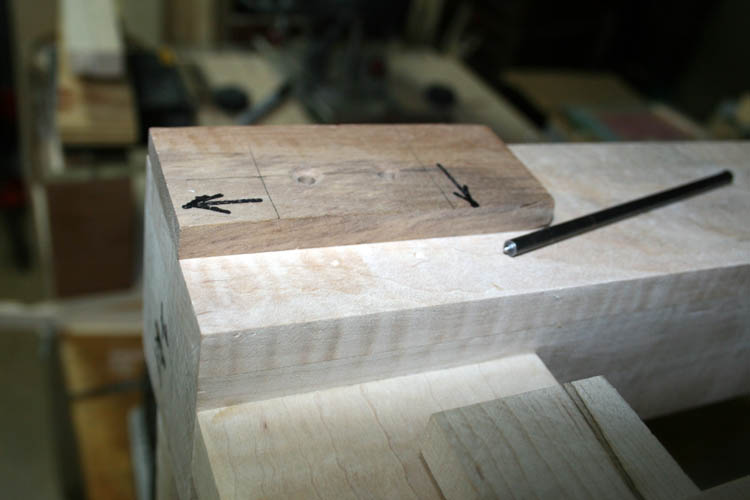
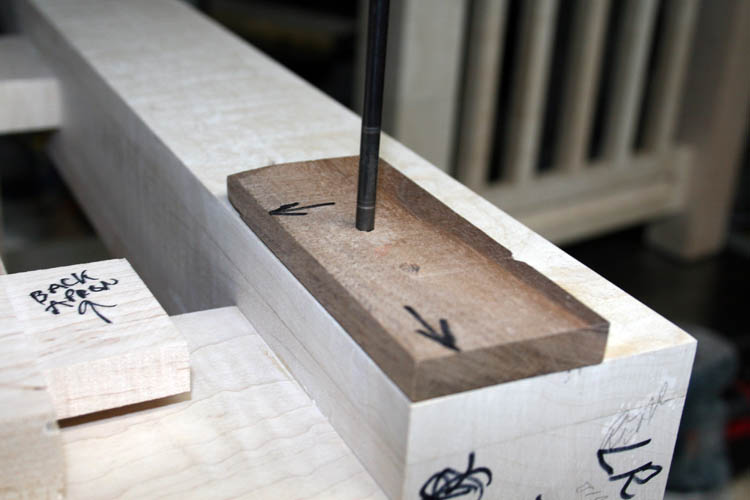

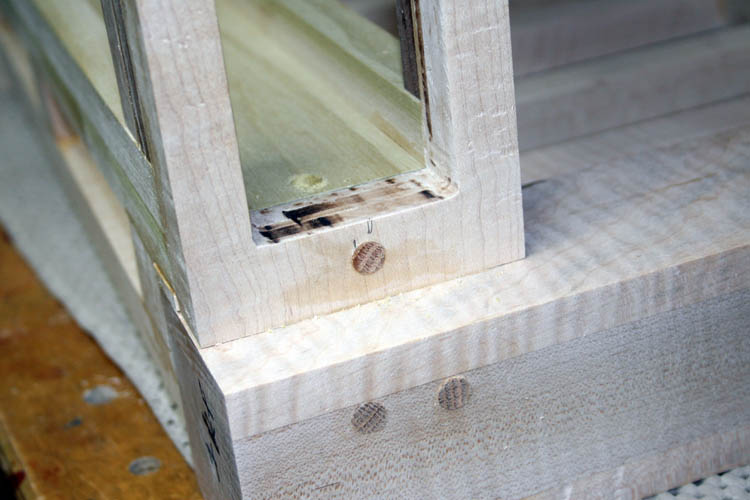
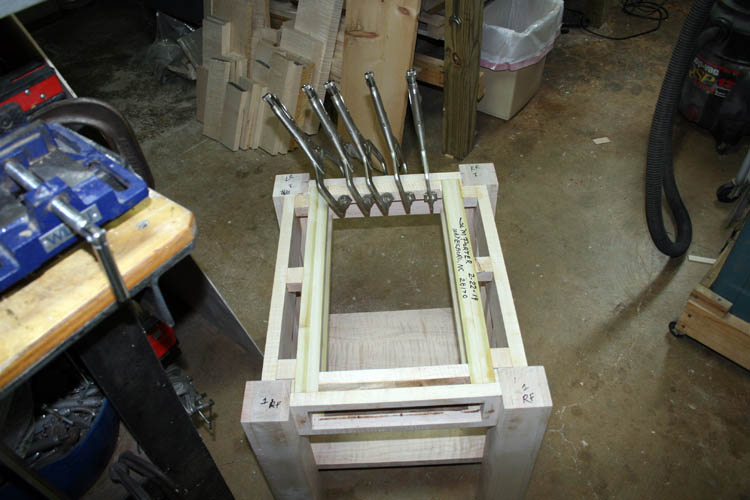
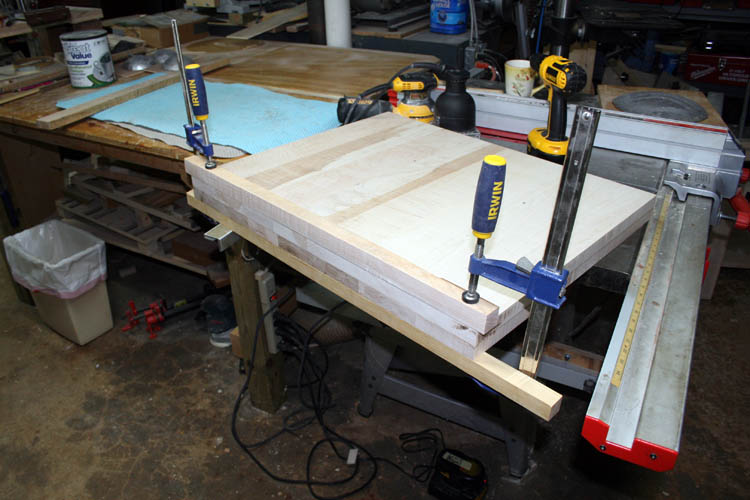
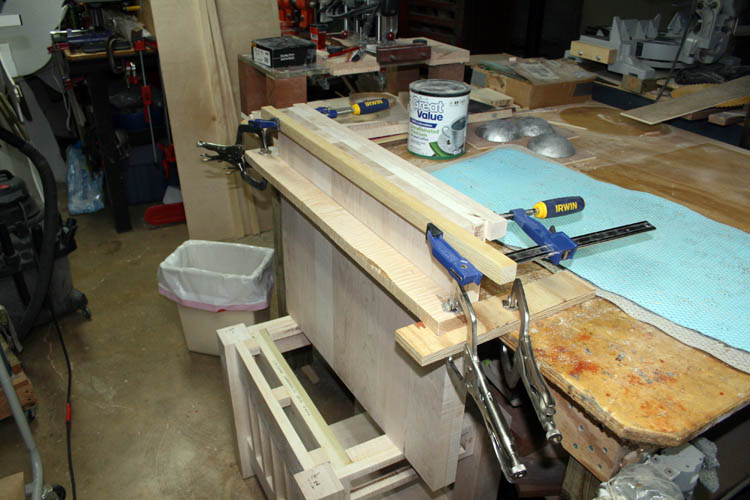


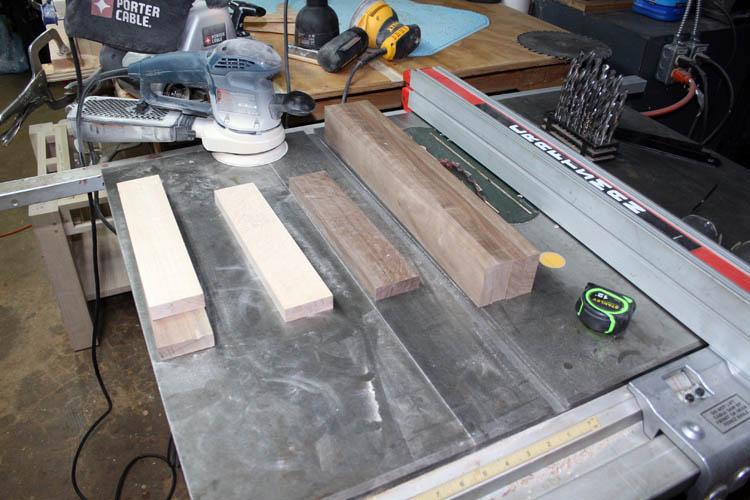
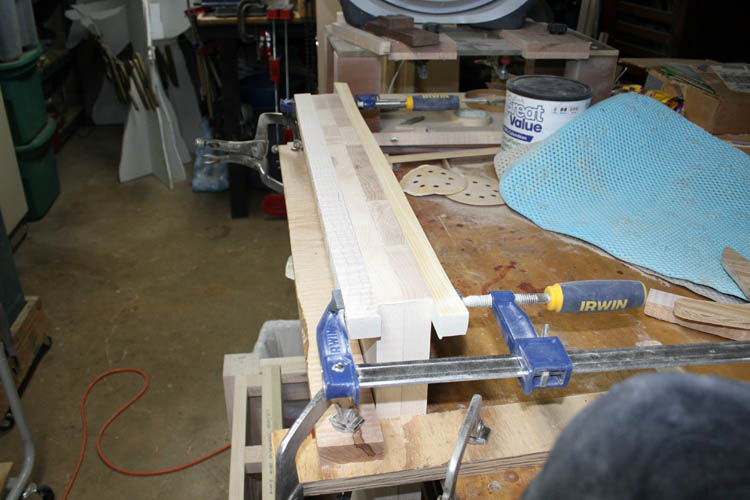
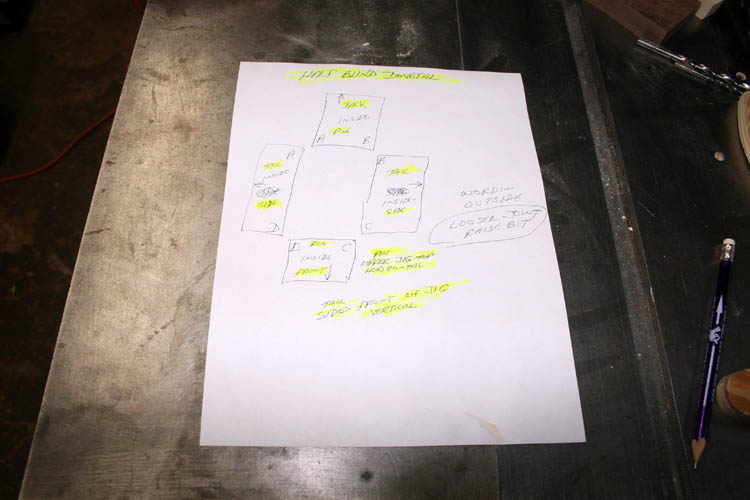
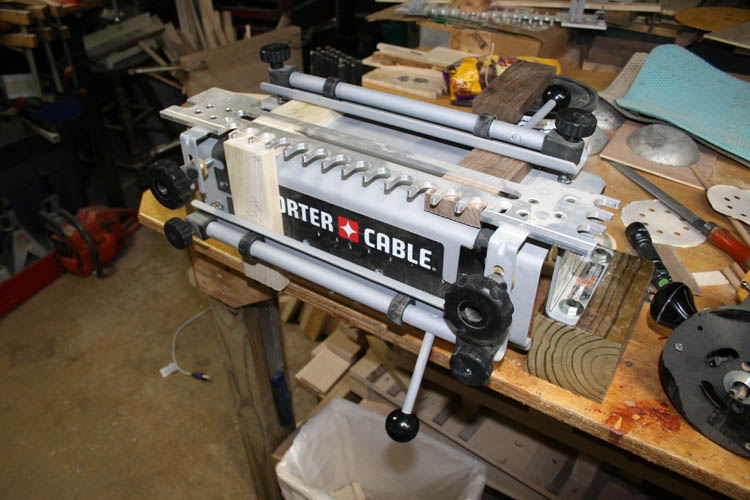


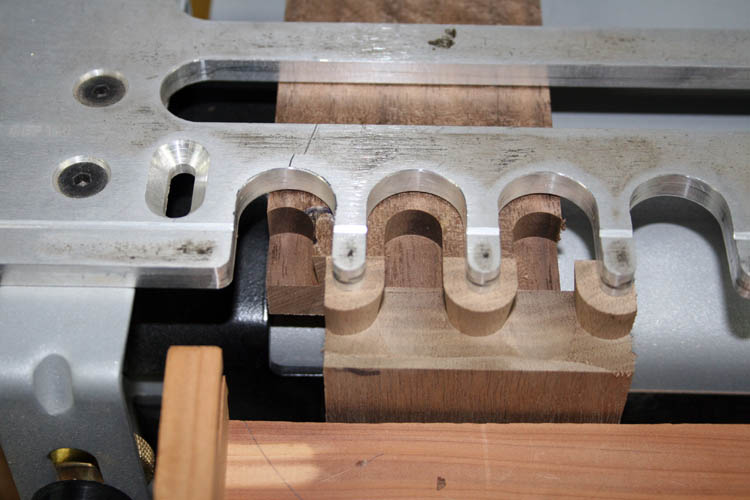
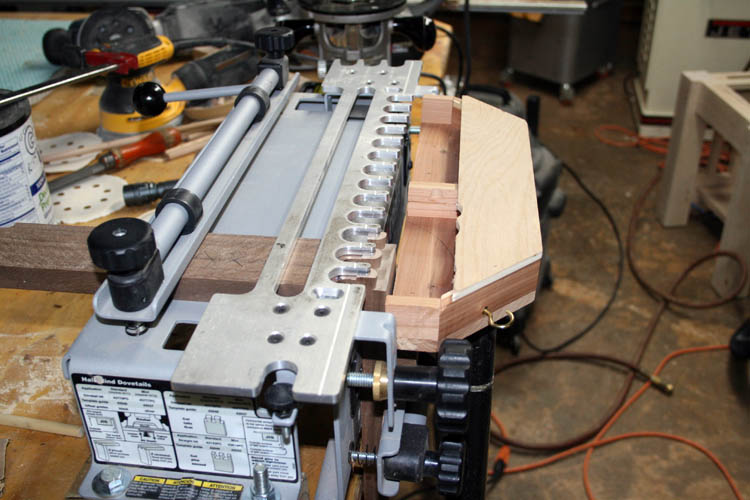
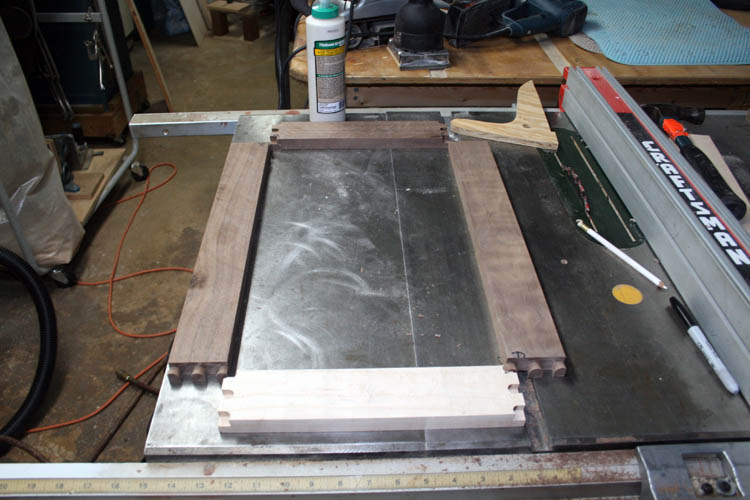


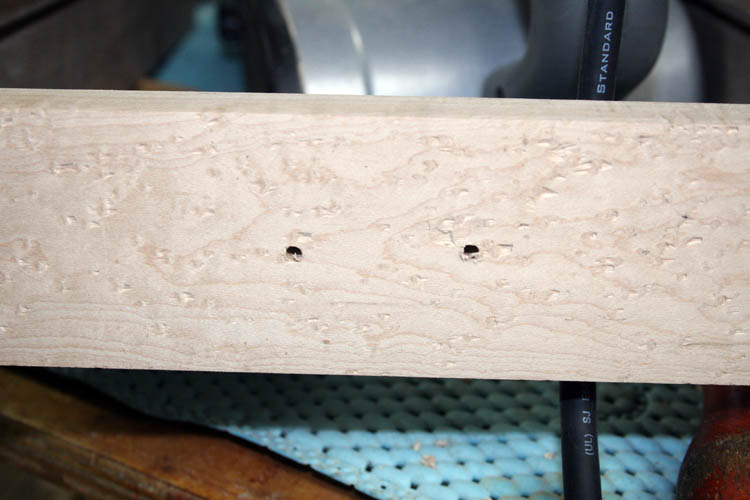

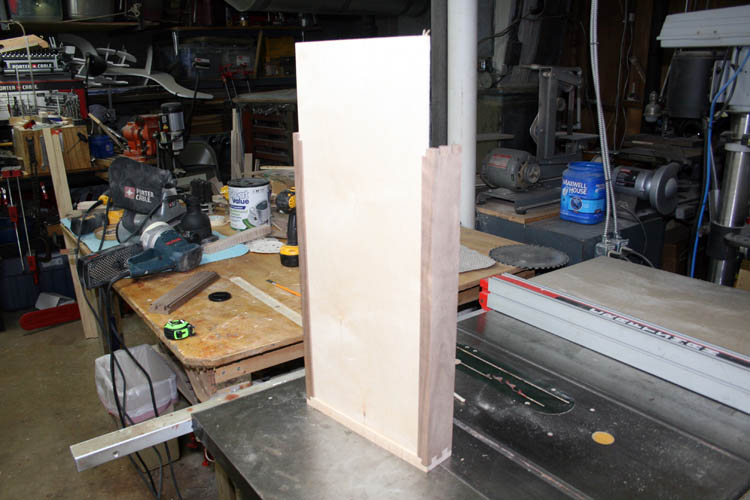

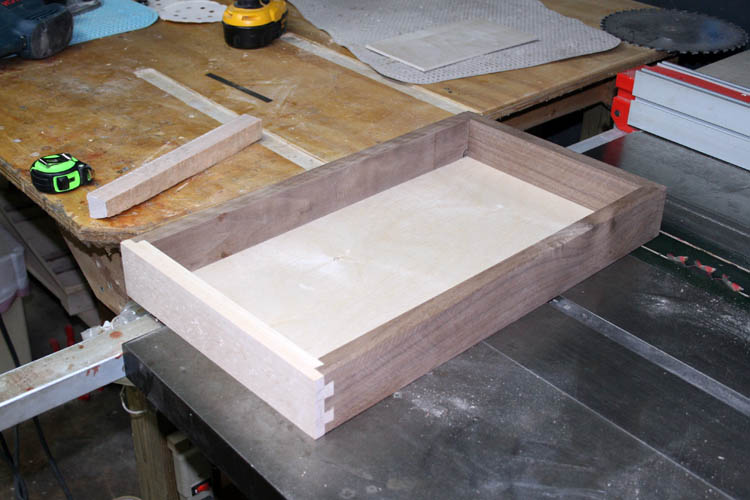

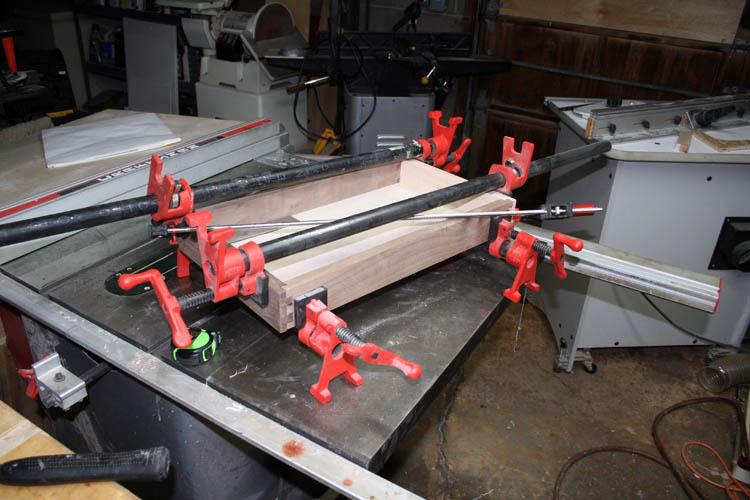
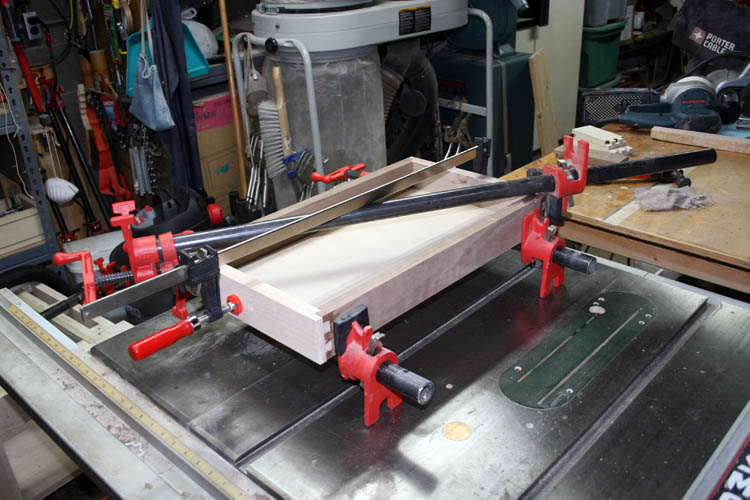

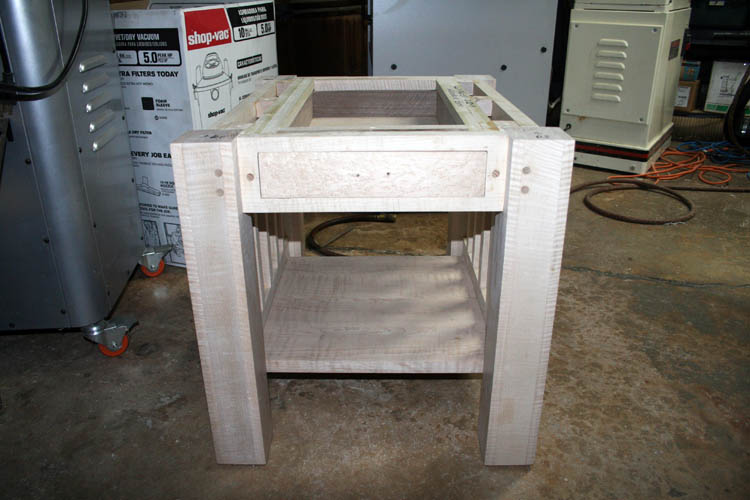
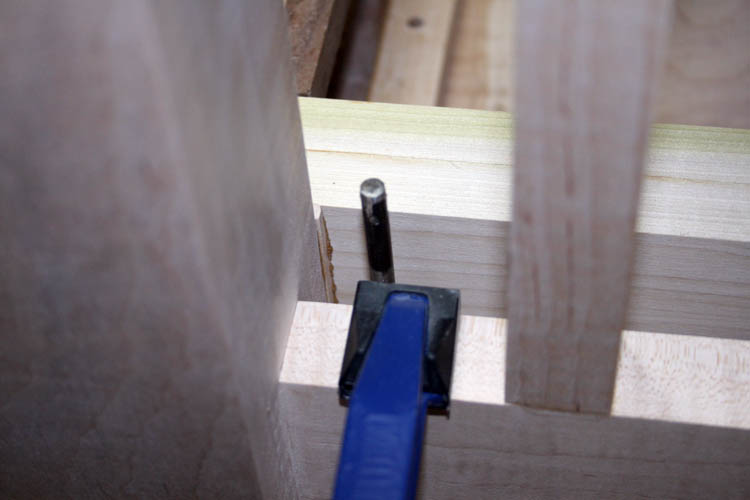
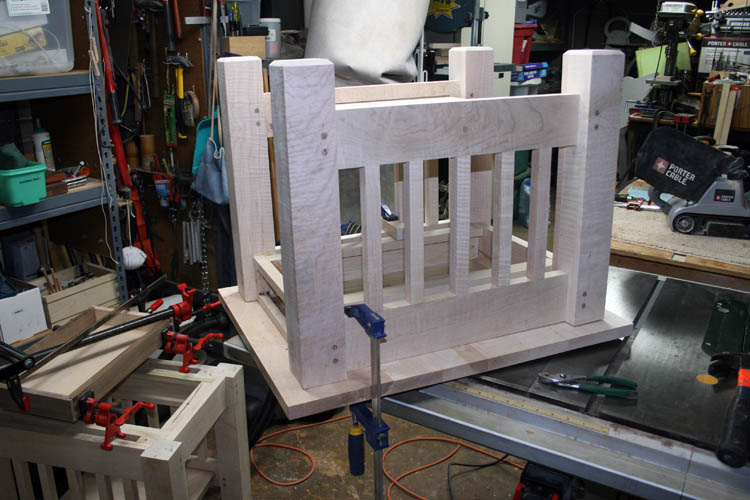
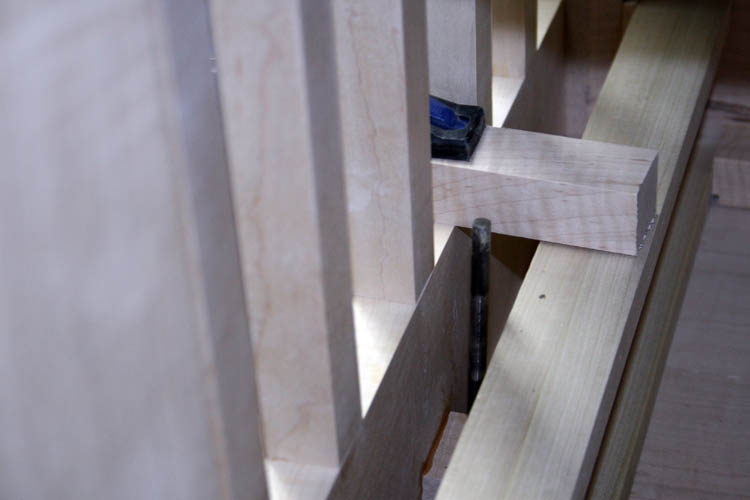
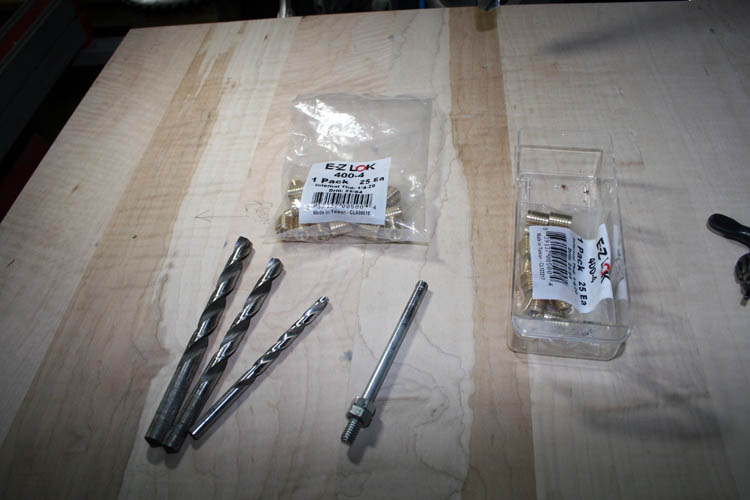
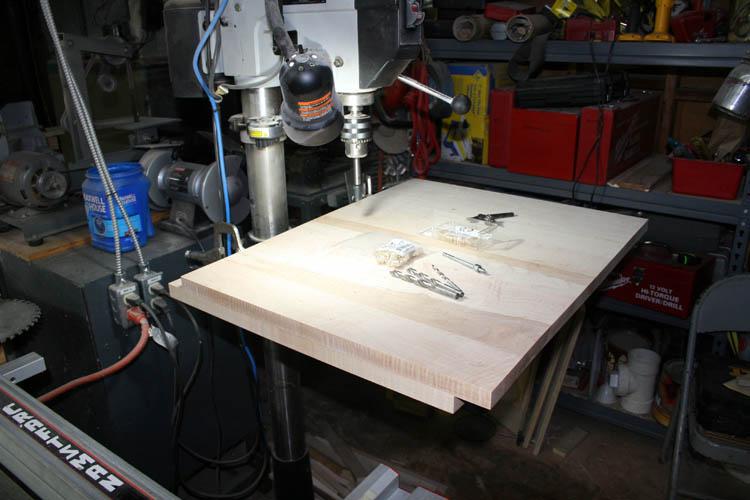
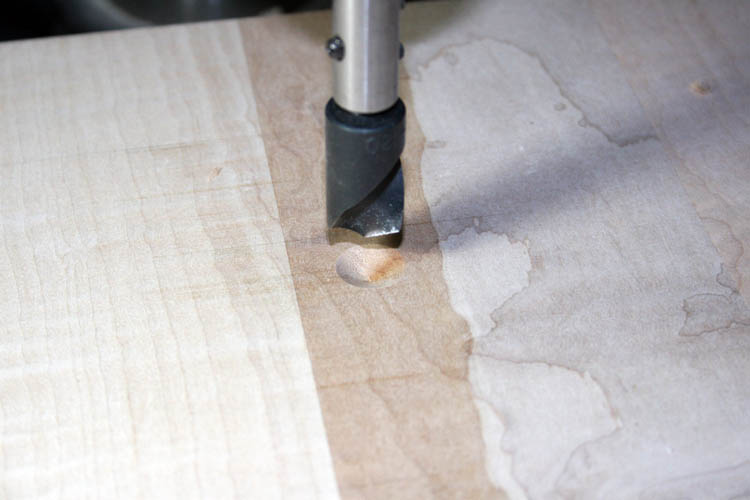
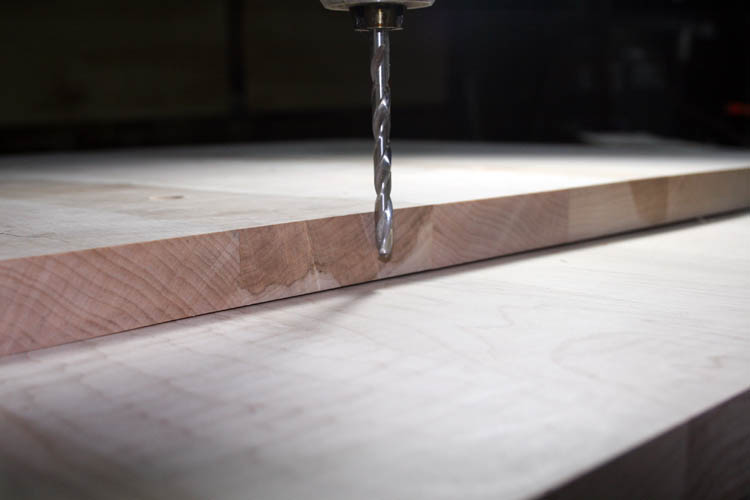


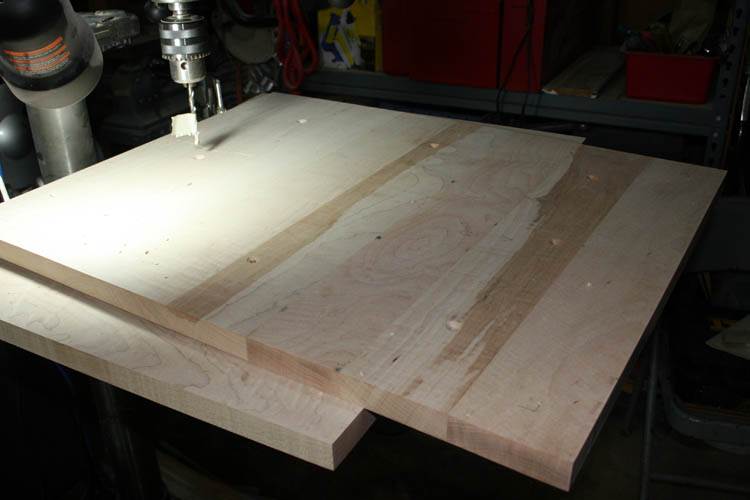

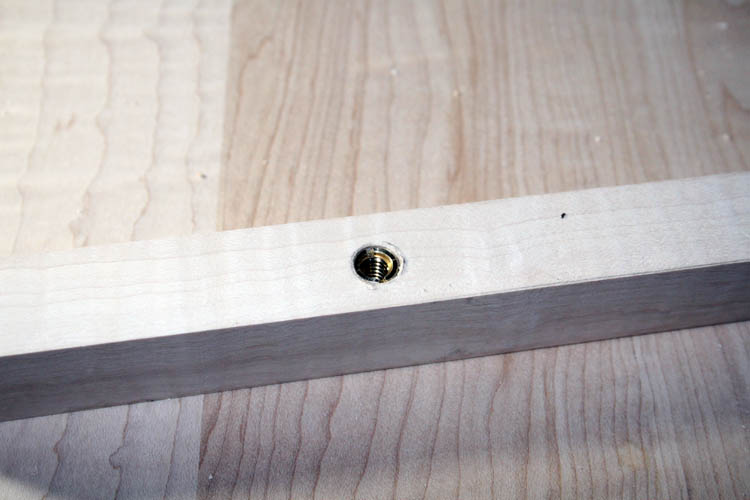
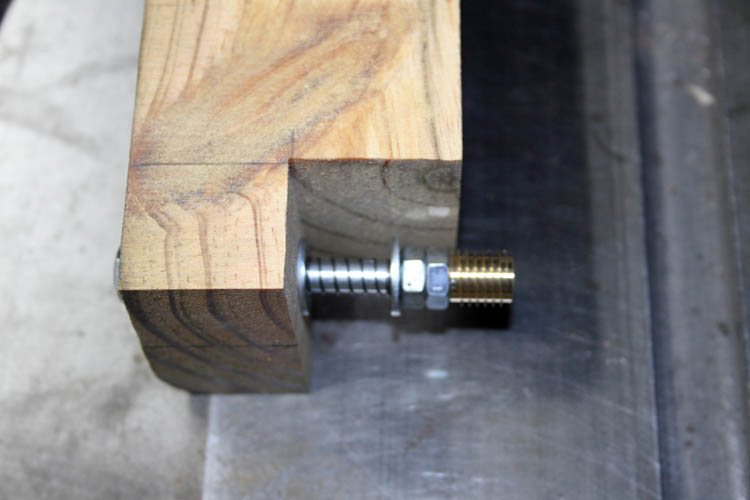
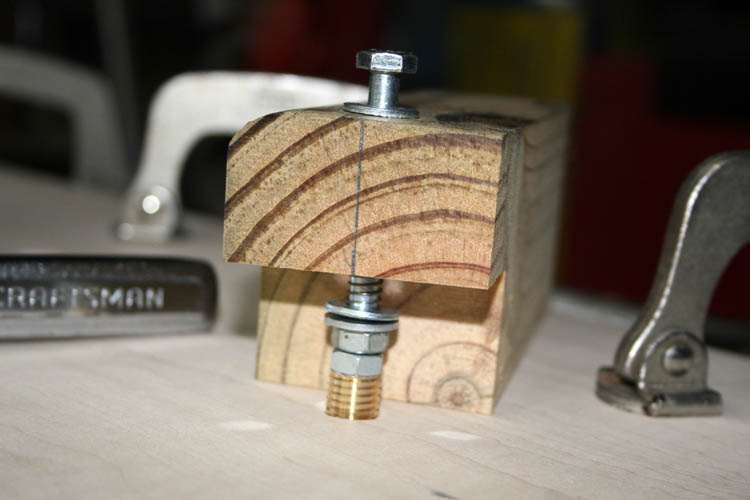


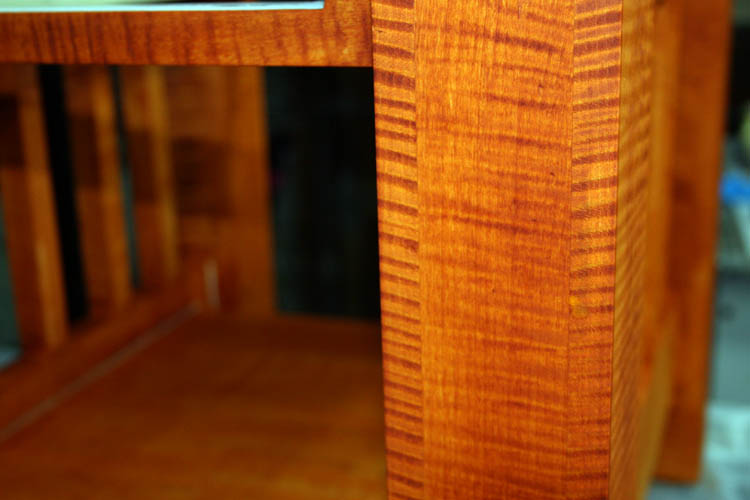
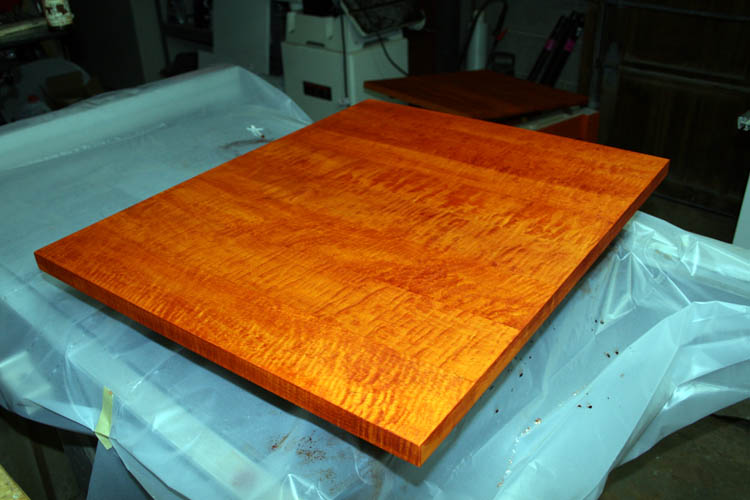

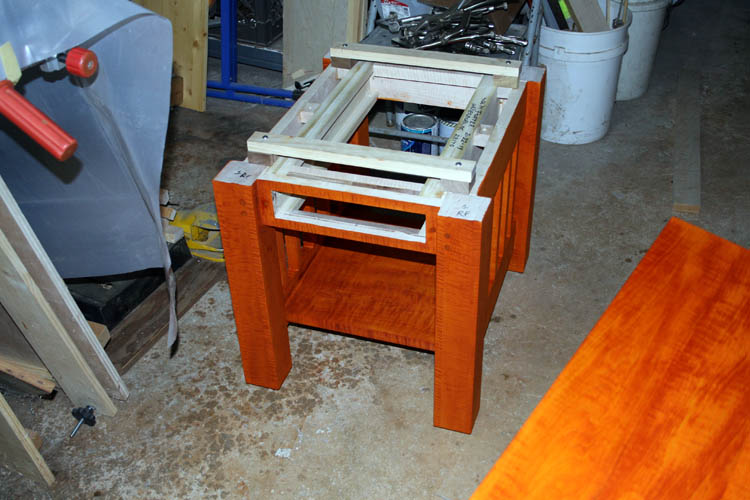

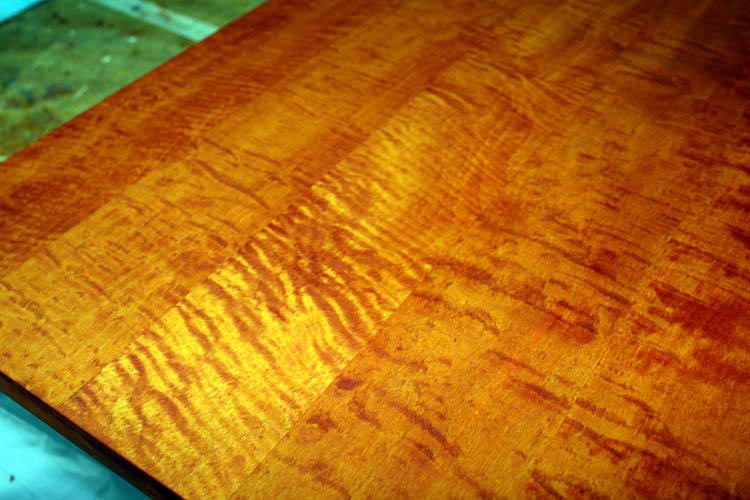


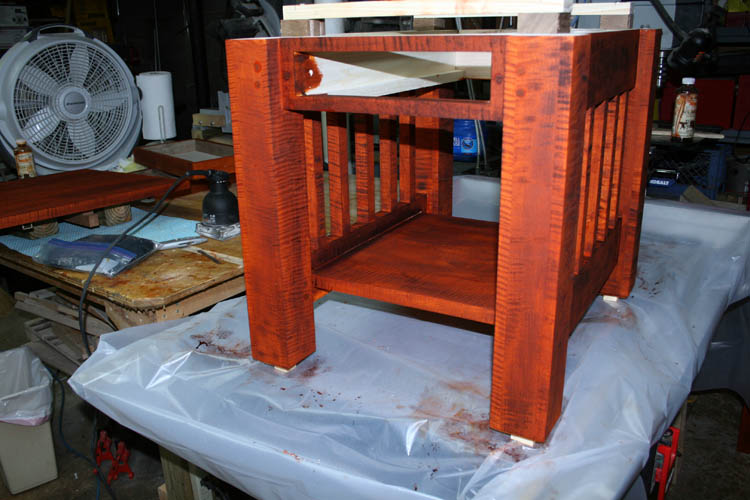
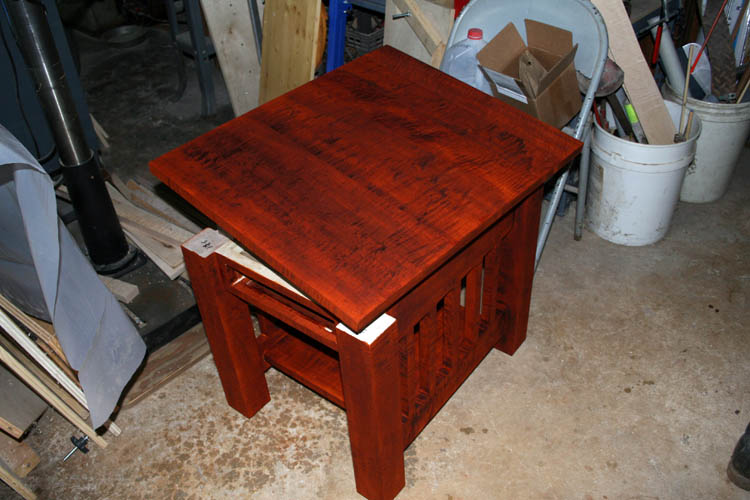
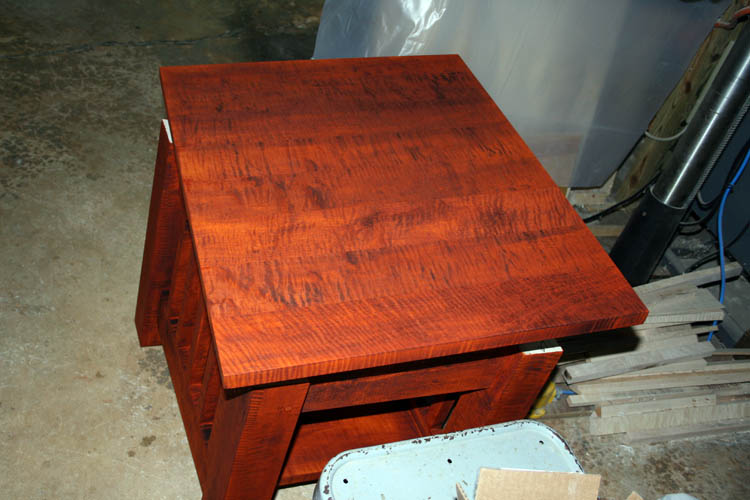


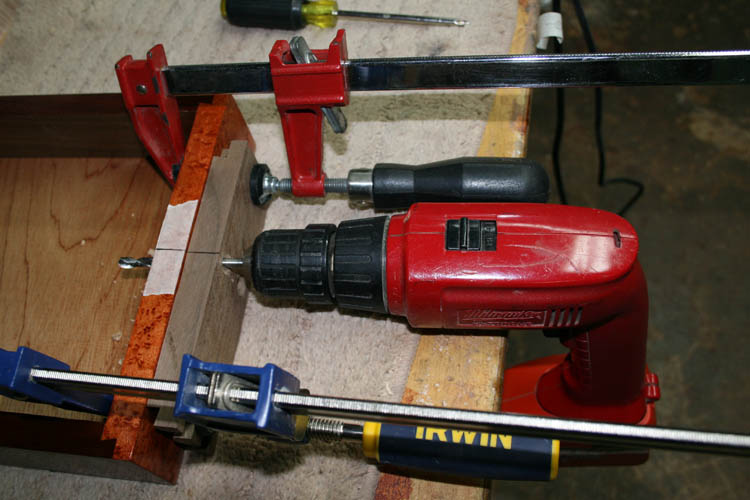

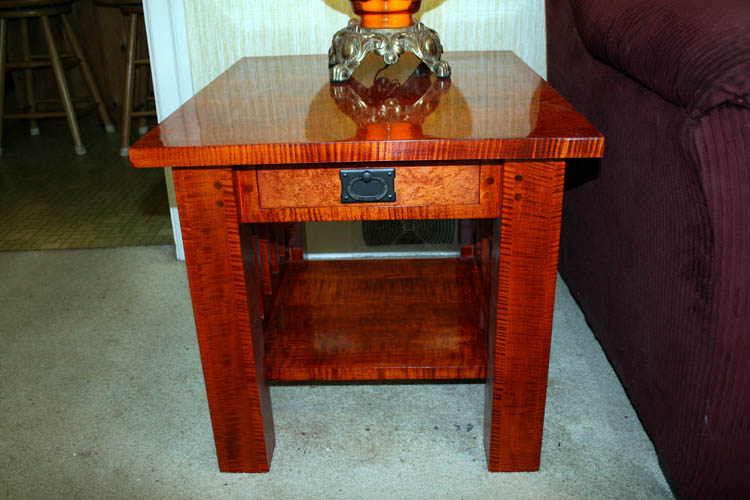
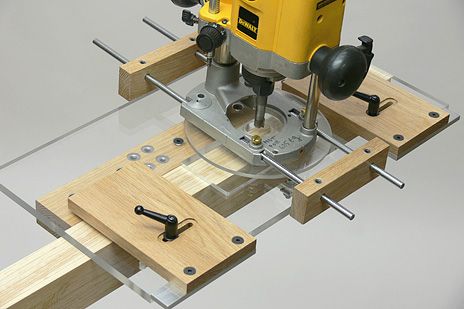
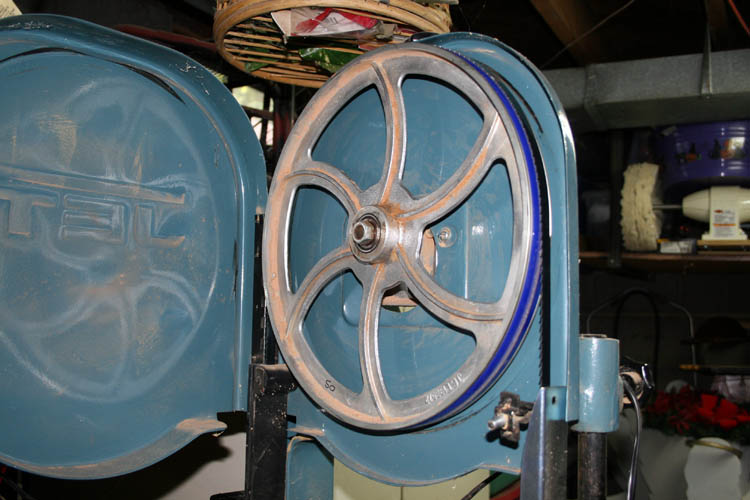
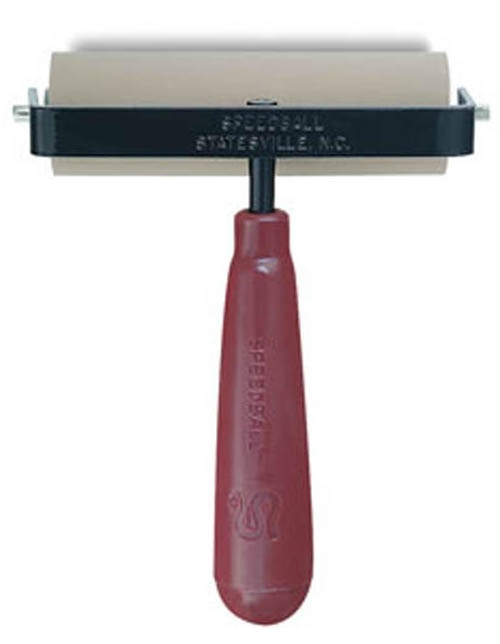