RESOPHONIC GUITAR AKA DOBRO CIRCA. 2000I fell in
love with the sound of the
Dobro slide guitar back in the early 1960s and
tried to mimic the sound using a Sears and Roebuck Silvertone flat top
guitar. I didn't have a clue that the strings were raised high from
the fingerboard. For whatever reason, I remember cutting the dyed
black maple fingerboard area between the frets trying to level them up.
It was later that a local musician Joe Huneycutt (now deceased) explained to me that the strings didn't
contact any of the frets at all. I purchased a metal extension nut
from Crider's Jewelry here in Wadesboro, NC and attempted to get a Dobro
type sound using a slide bar made by Stevens. I watched the Lester
Flatt and Earl Scruggs Show back in the black and white TV days and figured
out that Josh Graves was playing in an open G chord but wasn't aware that
the first string was tuned to a D pitch, therefore I broke
several 1st strings trying to get it up to a high G.
It was not until I was married and working for the North Carolina
Telephone Company when I located a musician named Doc Moss in Waxhaw, NC who
had an ole Mossrite Dobro and he showed me the correct open G tuning
GBDGBD and I learned to play some stuff with his amateur band. I
traded him one of the Dopyera Brothers (OMI) Dobros for the Mossrite Dobro
(with some boot) which was a 14 fret model and it didn't have a conventional sound well in
it but a type of baffle construction....had good tone, but not much volume.
Later, I realized that Doc Moss ( A Jack of all Trades and Master of None)
had distorted and crinkled the resonator cone by applying too much tension
from the adjustment screw from the spider bridge.
Without reinventing the wheel, check out my
Biography page concerning my Musical
Instrument Repair and mail order business from 1969 through 1978.
Below is a copy and paste of a resophonic guitar aka Dobro that I made
for myself back in April 2000 before I owned a digital camera and scanned the
prints that I located and eventually posted them in my biography page.
PERSONAL SAFETY AND LIABILITY ISSUES
My goal will be to keep Safety
paramount because hand and power tools can do serious bodily harm and death
if not used properly, therefore these pages are solely for
entertainment purposes only from
a personal liability standpoint. Please read the
Legal Stuff
page for additional information concerning liability issues
before going any further. Safety glasses and hearing protection is a must,
although I do forgo the hearing protection many times; my bad!
With some free time on my hands again, I
decided to make another musical instrument and called my good friend Jim
Yarboro in Gun Barrel City, Texas that still had the molds for building a
resophonic aka Dobro guitar that he got from me in 1979 and he shipped them
to me UPS and the fun started. I had sold most of my wood working equipment and had
only a few power hand tools left and this guitar was made by good friends
letting me use critical pieces of equipment such as the band saw, table saw
and jointer, etc. all of which I do have today…another grin is in order.
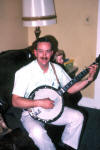
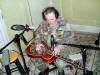
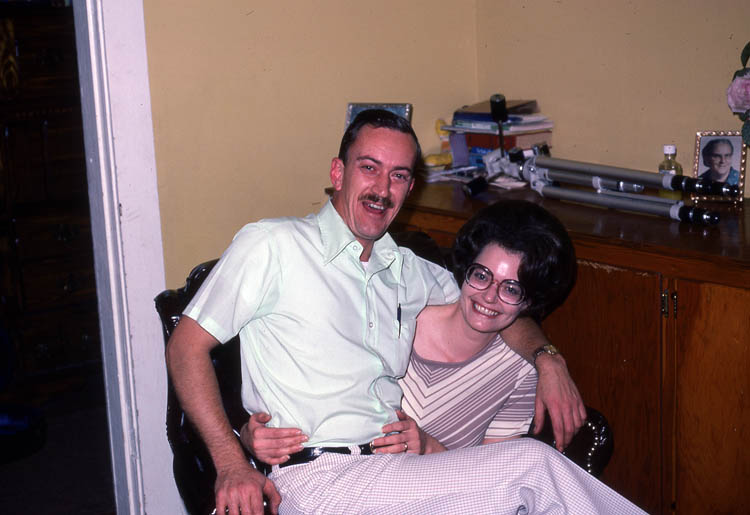
A few pix of that guitar under construction and Jim Yarboro and his banjo
picking "bride" Carol in December 1976.

The poster board pattern tracings that I used to make
the bending and working molds were received from Tut Taylor when he was with
George Gruhn and Randy Wood of GTR there in Nashville. Tut made a
tracing from an original 4-way match walnut Dobro (if my memory is correct
on the model) sometime in the early
1970s when I was working with the North Carolina Telephone Company in
Marshville, NC and had my instrument repair and mail order business going at
the same time. Many nights, my bride and myself stayed up until after
midnight filling orders, etc.
NOTE: I sold Paul Tester (deceased) of
Landover, MD., a walnut four-way match unfinished Dobro body that was
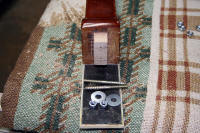
created using the molds in the early to mid 1970s! I still have the
rosewood head overlay with an original inlaid mother of pearl
logo that was supplied by the Dopyera Brothers that was going on the above
Dobro. The logo inlay doesn't have the engraving on it. I located the head stock overlay in the Dopyera Brothers file.
I guess I am a pack-rat for sure, since that has been over forty (40) years
ago.
NOTE: I replaced a neck in
Ray Atkins ole
"White Faced" Dobro sometime before 1972 and the Dopyera Brothers sent me an
original Dobro decal to place on the headstock.
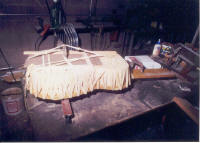
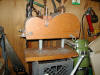
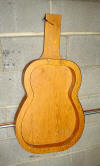
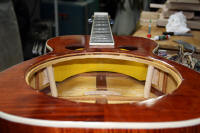
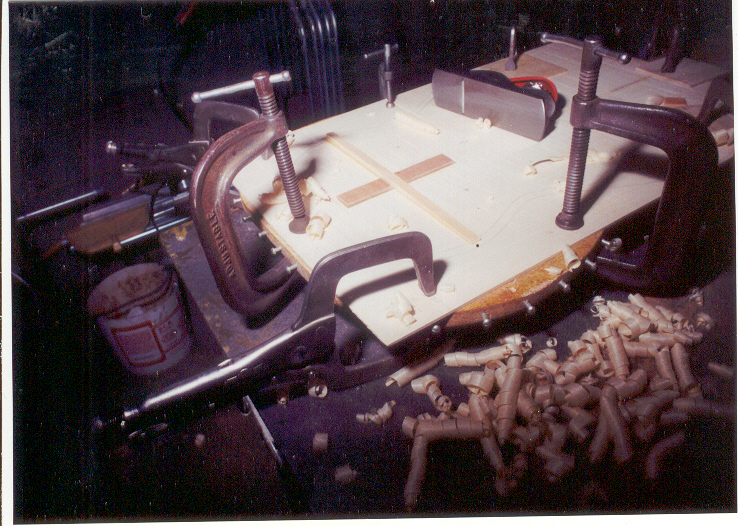
Pix
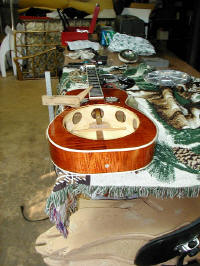
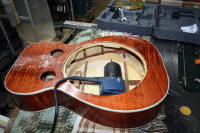
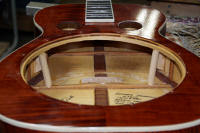
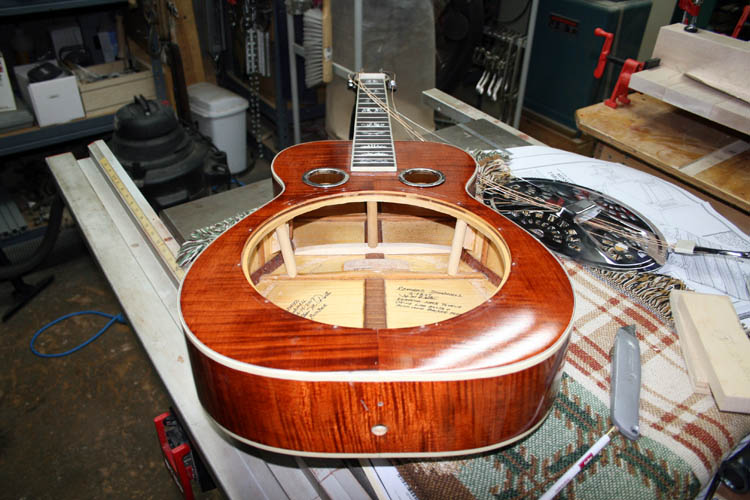
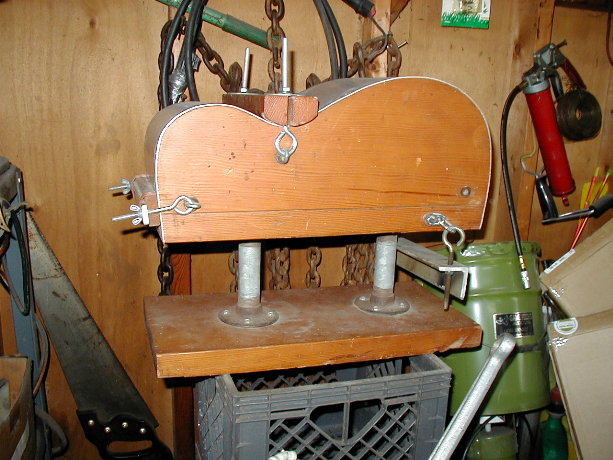
of the guitar back with the bracing just hand planed to shape. Most
resophonic guitars (square neck) do not have any bracing, but I added it
since this was going to be my personal guitar and might have been just a
little overkill, but that is ok too.

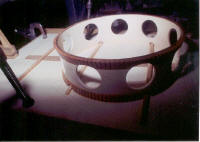
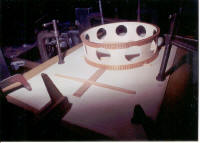
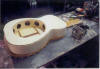
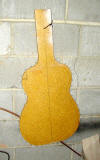
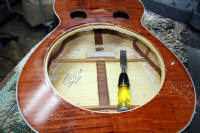
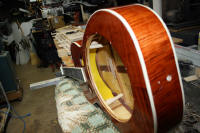
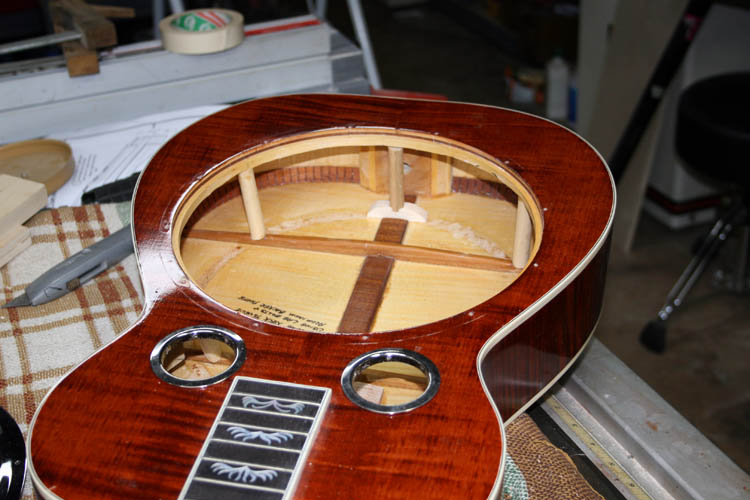
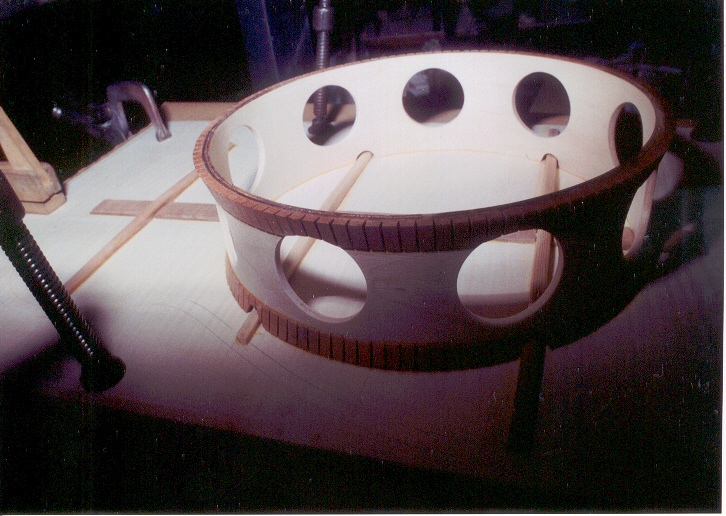
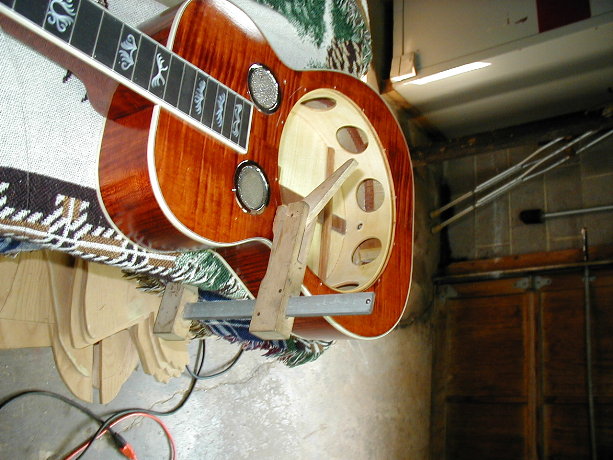
Pix
of semi-finished body of guitar with the holes for the sound screens not cut
yet or any bindings added and bending mold and working jigs used to build
the guitar.
 Note:
Ervin Sloane's mold design.
Note:
Ervin Sloane's mold design.
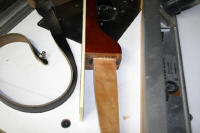
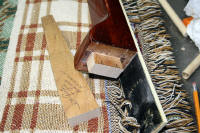
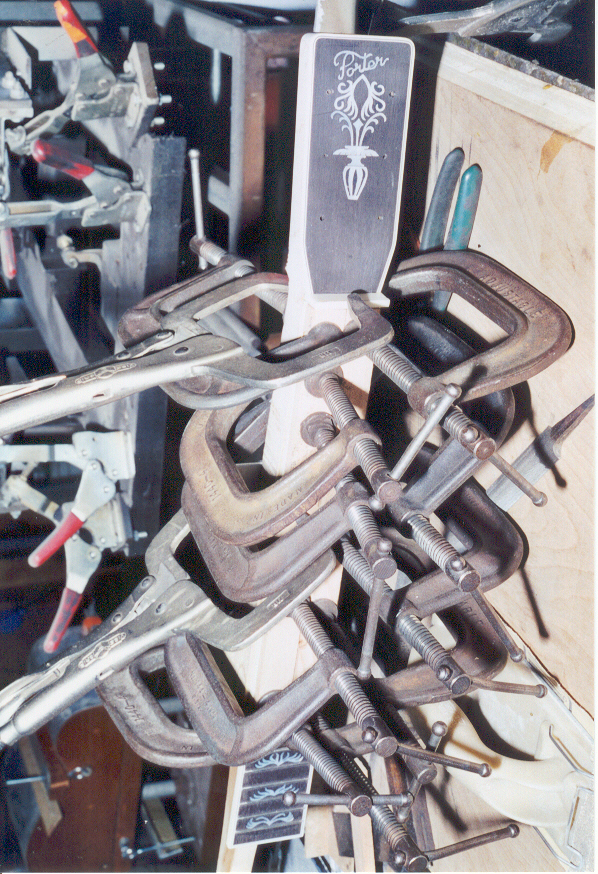
Inlaid ebony fingerboard with the Flaming Claw mother
of pearl inlays being glued to the curly maple neck blank with a pile of C
clamps. Might be another overkill on the clamps too!


 Old style "neck tongue" construction.
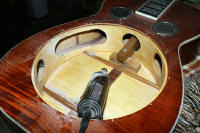
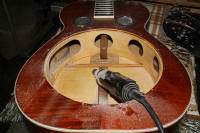
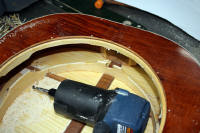
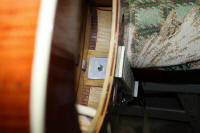
The two upper right hand pixs above is when I removed a
Fishman Classic Passive pickup from the resonator cone a number of years later.
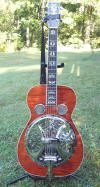
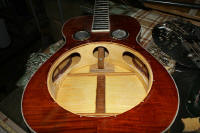
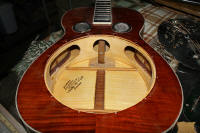
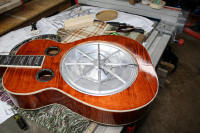
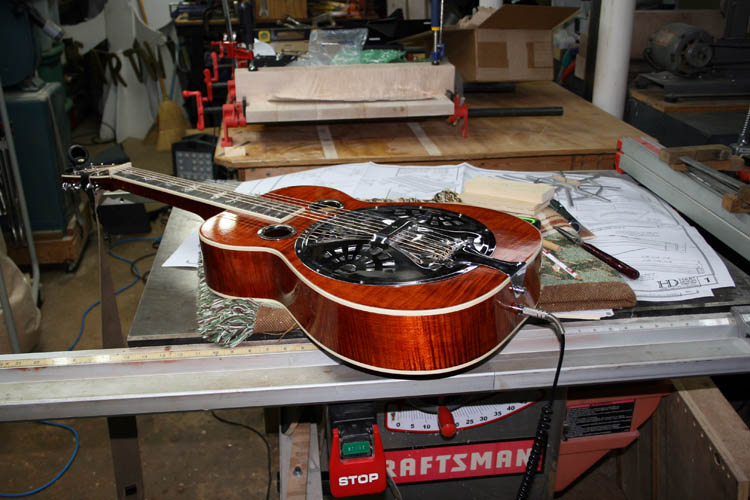
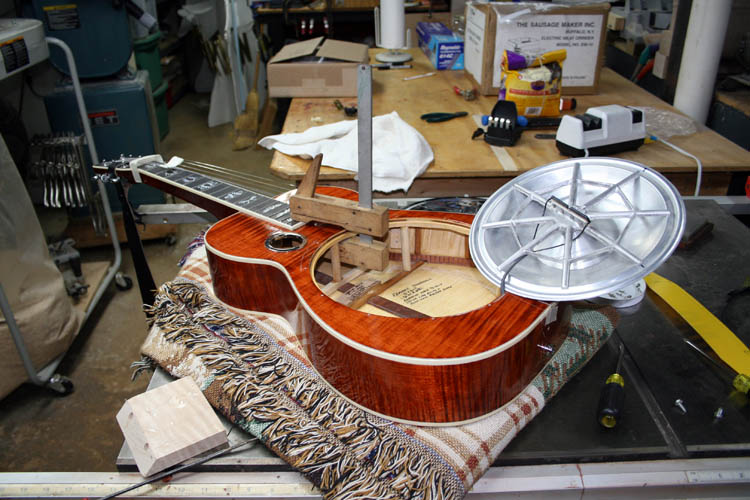
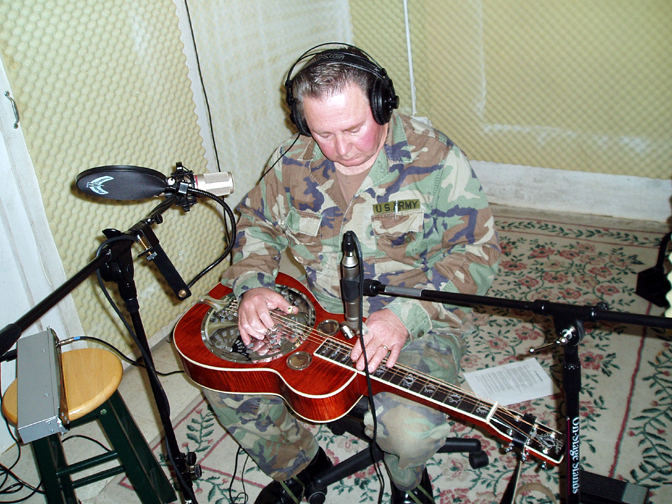
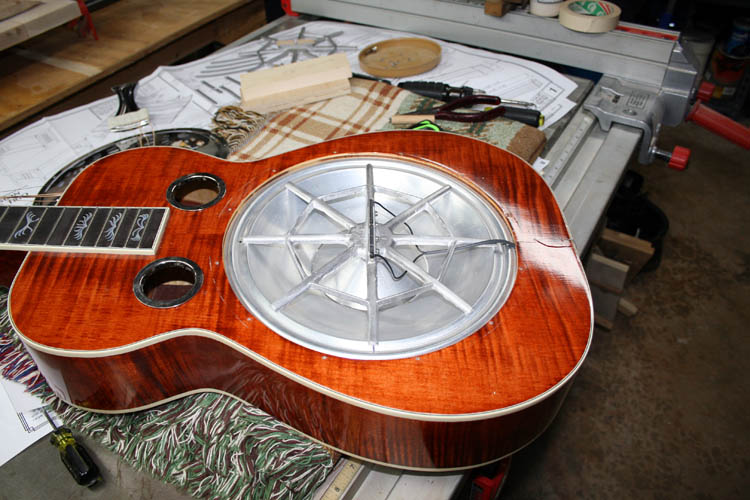
Pix
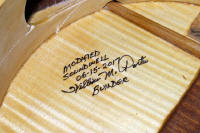
of finished resophonic Dobro guitar with all curly maple neck, back, sides
and top with inlaid ebony fingerboard and peghead. It was finished on Father’s Day in 2000 and has aged
now and sounds great! The little pc microphone doesn't accurately
replicate the bass range of the guitar and the guitar sounds much mellower
"in person".

 Softly and Tenderly .mp3 file
Pee Dee River Slide .mp3 file
Softly and Tenderly .mp3 file
Pee Dee River Slide .mp3 file
Never Grow Old .wav file
I'll Be All Smiles Tonight with
Porter & Curtis. Click on links to hear mp3 sound file.
Fireball
Don't grin too big; I hadn't picked on the Reso
in about twenty-five (25) years and started messing with it a little after I made the
above guitar and as with other things, it went back into the guitar case!
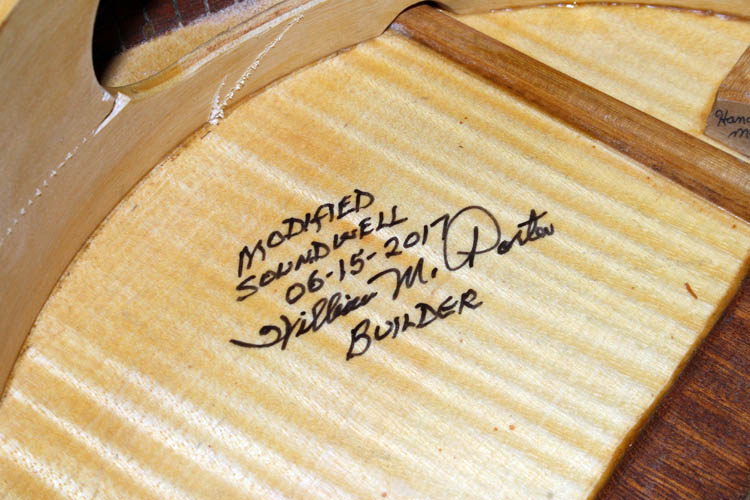
MODIFIED SOUND WELL HOLES 06-15-17
The old saying, "If it
ain't broke, don't fix it", which is very sound advice, but
sometimes, I do violate my own logic and thinking. Another ole cliché,
"It is better to leave well enough alone"....grin
if you must!
I started back trying to play my resophonic guitar this
year (2017) and the above resophonic guitar is made from curly maple except for the
sound well which is poplar and has a little higher resonant pitch due to the
solid wood construction versus the plywood construction of the Nationals,
Regals, and Dobros from the 1930s, whereas walnut, mahogany, cherry, etc.,
will give a somewhat lower tone. The curly maple bodied resophonic
guitars do seem to project a much brighter sound and volume with all things
being equal, but can have some annoying overtones.
I viewed a number of different sound well construction
resophonic guitars as well as the ones with nothing but baffles and "sound
posts", whereas I decided to modify the standard round sound holes in the sound
well on this guitar. Many of the die hard traditionalists like the
parallelogram shaped holes versus the round holes, but as to which one is
better is still open for debate; the parallelogram shaped holes would have
more area open.
I could remove the sound well all together, but that
would require extensive modification for the existing body of the guitar and
present additional construction problems which I did not want to entertain.
I know, I will be taking a gamble on
the modification,
but don't think it would change the sound for the worse and would open up
the sound well air/sound movement and maybe lower the resonant frequency which might even pump up
the volume some, but this guitar has very good volume and sustain. I
know, it seems crazy to mess with it
and later,
"The Fulfillment
of Prophecy of Expectations" would manifest itself to maturity
and fruition for sure!
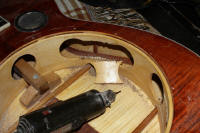
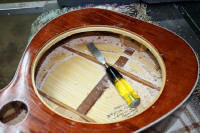
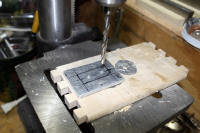
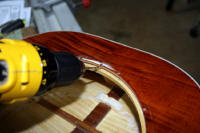
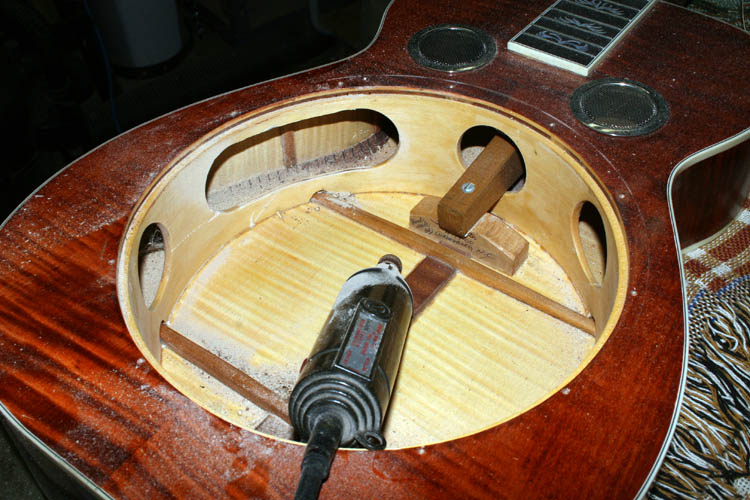
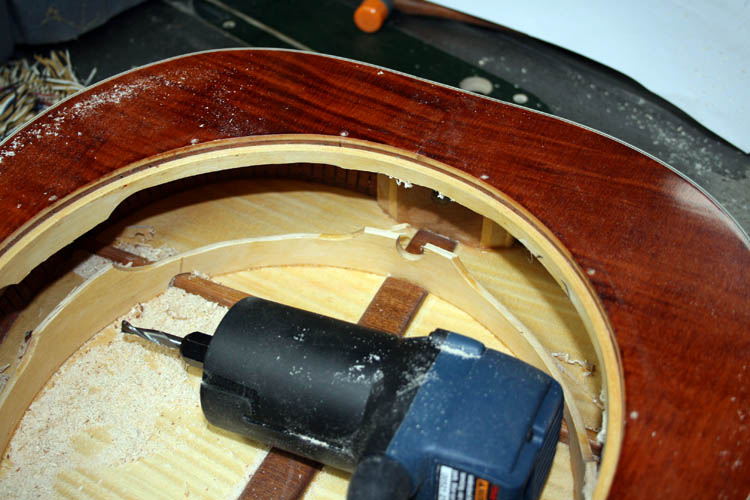
I didn't have any good RotoZip router bits on hand and
had to wing it. I tried to use a slotting cutter in my portable drill,
but I couldn't control it freehand due to the number of teeth on the 3 inch
diameter slotting cutter/saw and that was out. I put some good
gashes in the sound well which is cosmetic only. I found a 3/32
inch diameter router bit x 1/8 inch diameter shank and used the Dremel tool and drilled close connecting holes
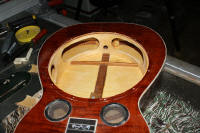
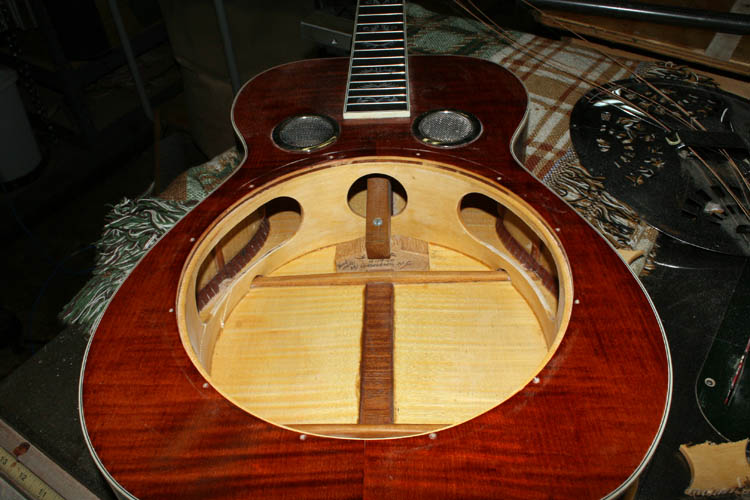
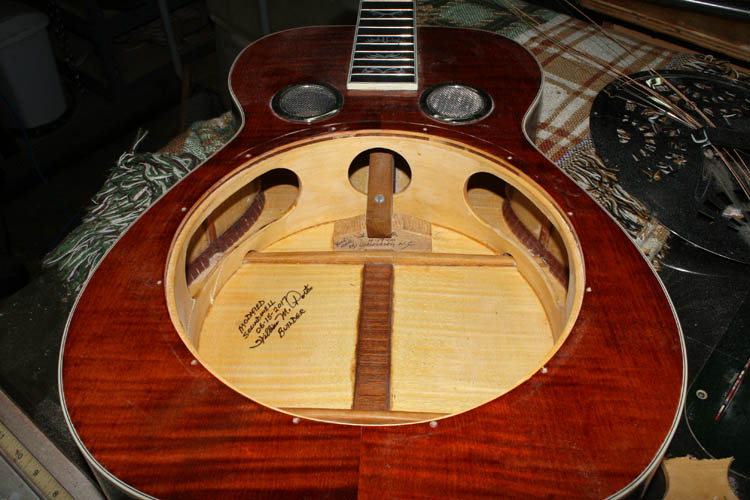
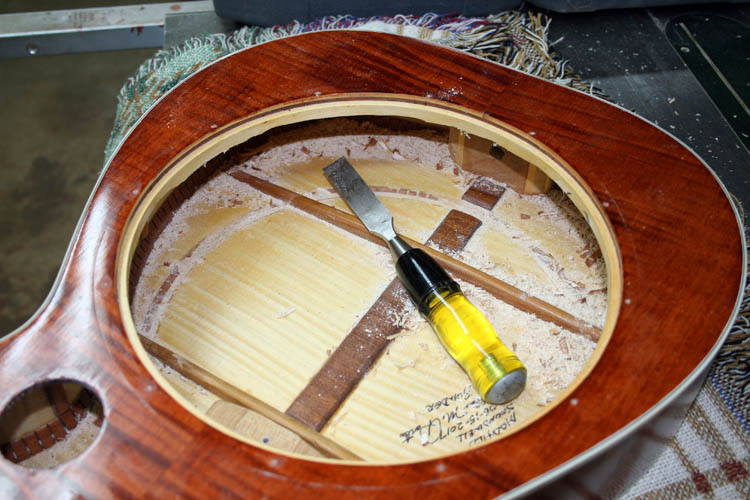
between four (4) of the existing sound holes that I wanted to remove and ended up with four (4)
very long elongated sound holes, with a regular round sound hole for
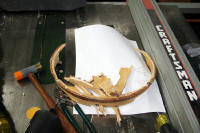
the neck area and a solid section at tailpiece area. After cutting the pieces out, I
used a small 3/4 inch diameter sanding drum on the Dremel tool and 100 grit
sandpaper to finish the work. I applied some lacquer to the raw wood
with a Q-Tip to seal the deal.
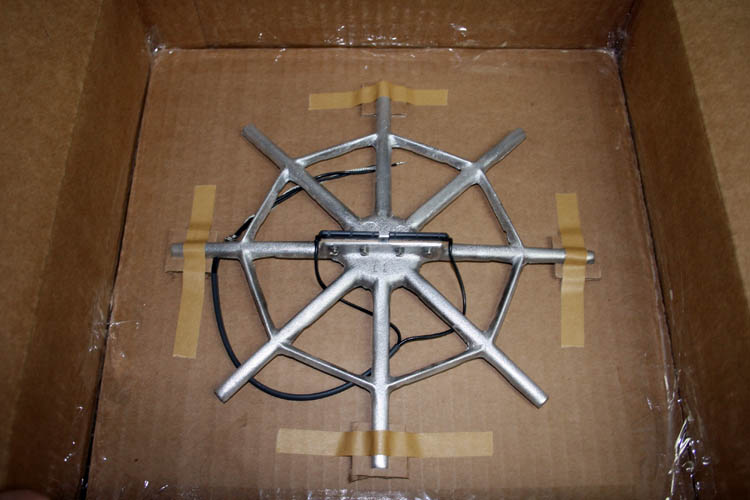
I put the resonator cone and spider bride assembly back onto
the ledge of the sound well, attached the cover plate and tailpiece and tuned her back
up. I believe it has more volume, sustain and the tone is still sweet!.
I will let it settle down a few days and see if I can get an old Windows XP
Pro system running and record some sounds and see if I can hear a difference
between something that I already have on file, of which I do believe there
is a difference, but there is no sure for psychological bias; e.g., we hear
what we want to hear......grin if you must! This PC here is Windows
8.1 and I don't have an audio imaging program that works on the 64 bit
system. If you cover the sound hole screens, the volume
definitely goes down, therefore sound is projected from those holes for sure
and they are not there just for looks in my humble opinion. They work on the
same principle as the vent hole on a drum shell as to the release of sound waves/air
pressure, sound holes for
the mandolin, violin and guitar, of which size does matter. An
acoustical engineer would have the data to validate the size sound holes
needed for a particular sized sound chamber, but most of what was done before the invention of the PC, was
trial and error until it sounded right.
The traditional Dobro sound well definitely help to
keep the top from imploding and offers a secure platform to mount the lip of
the resonator
cone, functioning as a type of speaker cabinet. Later designed baffle systems accomplished the same thing as does
the sound post system to keep the top from imploding and the more open body
cavity does change the tone, volume, overtones, etc. and seems to depart
from the 1950s traditional Dobro sound in my humble opinion. Most
using this type of design, add a curved flexible polycarbonate baffle to redirect the sound. Now, it
seems like everyone wants to copy Jerry Douglas....grin if you must, but I
am still an ole
Uncle Josh Graves style of picking fan.
I plucked the bass string and counted one thousand one
and could still hear an audible sound at one thousand twenty one count, but
it was very weak at the last count. I don't have a clue as to what the sustain on other
resophonic guitars would be and what the gauge mark would be as to the
number of seconds of useable sustain is, but I think the modified sound well
improved the sound of this guitar. Strumming the strings open, there
is a good 8 to 10 seconds of usable sustain.
I did hear a sound improvement when the screen covers
were removed. The bass response seemed lower in tone and the volume
and sustain did pick up too. Again, it might be my own
psychological
bias, of which there definitely is no known cure.
Simply stated, "If one believes something sounds
better, it will sound better",
to that individual anyway!
I ordered a set of standard 1 7/8 inch diameter metal
chrome screen covers, of which I
will remove the screen wire from them, but leave the set of screens I have
intact. The guitar doesn't look right without the screen covers, but I
think the sound is much improved with them removed on this guitar. The covers with
the screens removed should still add some eye appeal versus just the plain
sound hole openings in the top in my humble opinion.
NOTE: I went ahead and removed the screen
grill from the sound hole covers I have on the ole reso guitar and it
doesn't look "too off the grid", but departs away from the traditional look
which doesn't seem to bother myself any.......grin if you must!
06-22-17. Also, the imported screen covers were a little too small in
diameter to snugly fit.
Web published by Bill aka Mickey Porter on 06-16-17.
REMOVED SOUND WELL 06-23-17
The tone aka timbre of the bass strings still sounded high to me
and decided to completely remove the original sound well and install some
support posts for the overhang aka lip of the top of the sound well. I
thought about making a wood ring support for the resonator cone, but that
would take some serious routing and might damage the top.
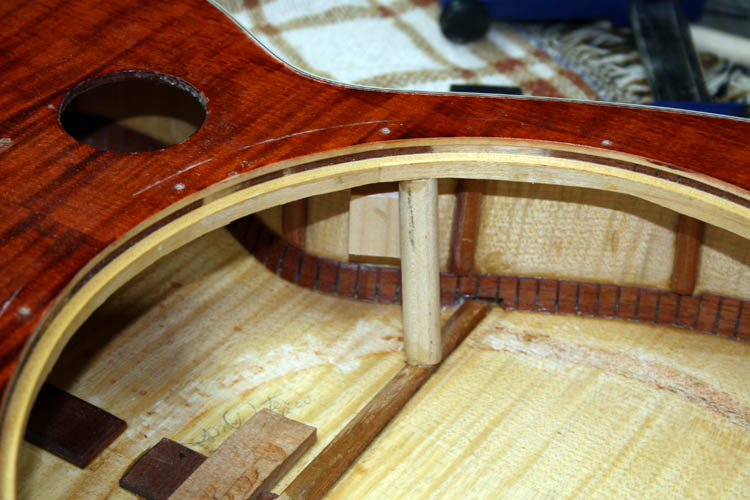
I used a small hand held router and roughed out most of
the sound well and cleaned the lower portion that was glued to the back with
a sharp chisel. I used 1/2 inch diameter poplar hardwood dowels for
the support posts and ground a radius on the end that contacted the back
braces. End grain doesn't glue very well but had some tension on them
when I glued them in place and hopeful they will stay in place.
Click on thumbnail pixs below for a larger screen view:

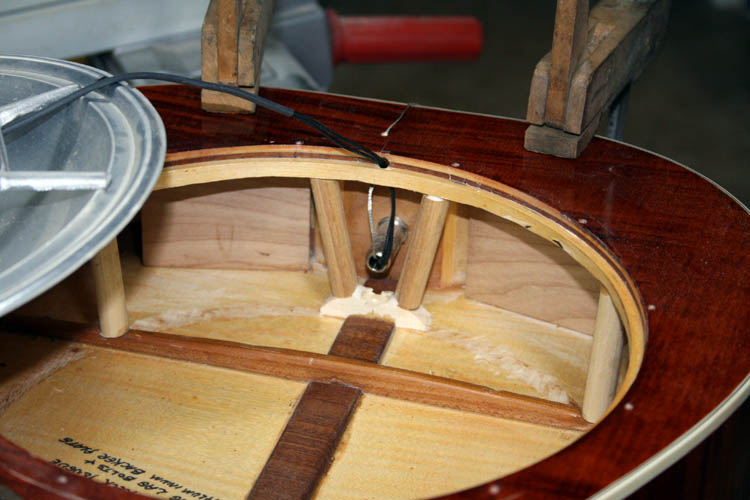
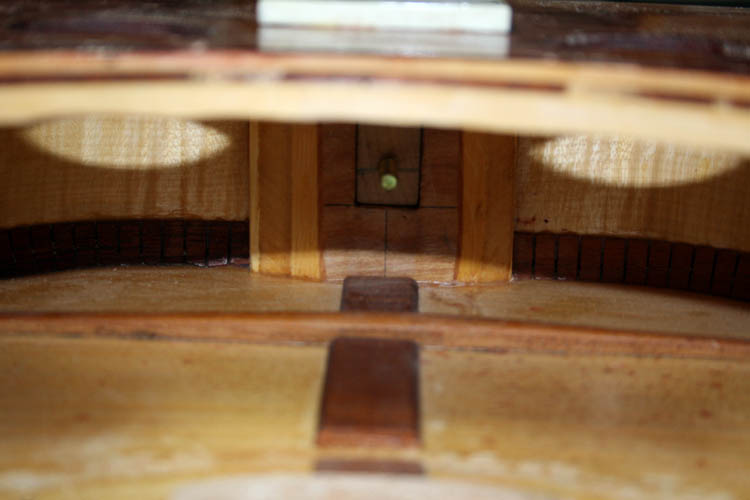
After the sound well was removed, the support block for
the neck was trimmed down and the support posts for the resonator ledge was
installed.
BLOCKS INSTALLED FOR BAFFLE
ATTACHMENT
I glued a couple pieces of soft Pine wood to the guitar
sides in front of the upper support posts to connect the ends of the plastic
flexible baffle. I didn't permanently attach the baffle since this is
my first attempt at a flexible baffle and will see what happens, sound wise.
I used a No Trespassing plastic sign that was 11 x 14 inches and about 1/8
inch plus in thickness. I believe the baffle was 2.5 inches in height
and the inside height of this guitar is 3.250 inches. The baffle was
long enough to where it curved on the other side of the sound hole openings
in an arch.

NECK TONGUE REMOVED
Most of the 1930s Dobros had a neck tongue that was
glued into the end of the neck block via a modified mortise and tenon type connection
which worked pretty good. The tenon or tongue portion actually was
resting against the guitar top instead of a true mortise fitting. This was a carry over from the open back
banjo days as a means to connect the neck to the instrument body and have
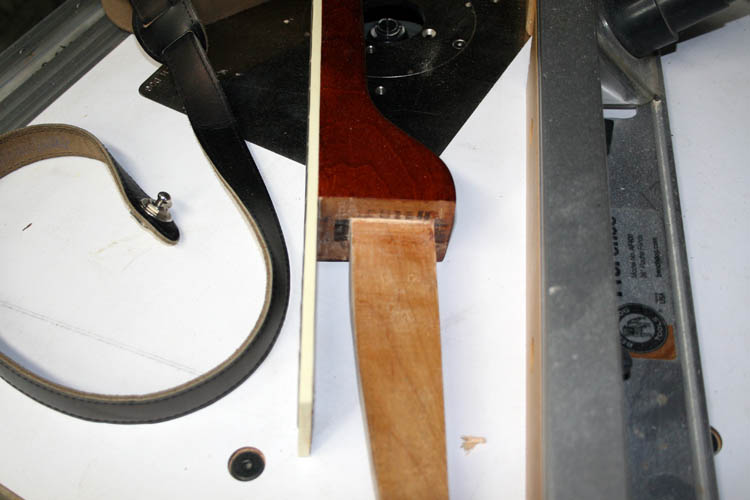
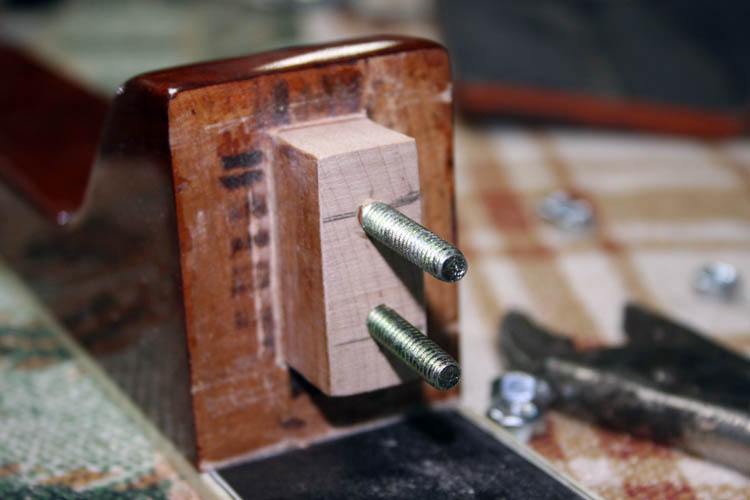
the ability to adjust the neck action. On this instrument, I shaped the tongue
portion as part of the neck; e.g., it was one piece instead of glued into
the neck heel. The neck block and tail blocks were 3/4 inch thick
Birch plywood and I had an extremely tight mortise and tenon fit for the
neck tongue. The length of the tenon needed was a little less than an
inch since the sides were a little less than .125 inches in thickness and
the Birch plywood neck block was slightly under 3/4 inch in thickness.
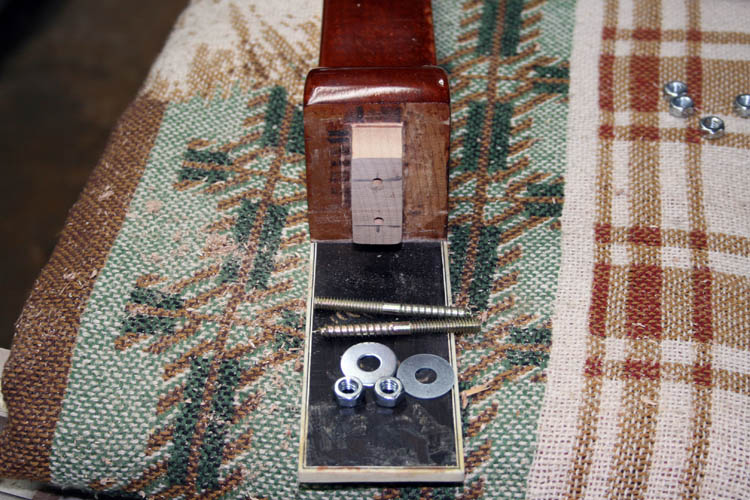
I band sawed the "tongue" to length and installed a couple lag screws,
1/4 inch x 20 tpi, pre-drilling the holes to around .190 inches in diameter and tested
the fit out on the scrap piece of tongue wood from the neck and it was a
good tight fit without the danger of bursting it out. The length of
the lag screws was 2.5 inches in length and went deep enough into the neck
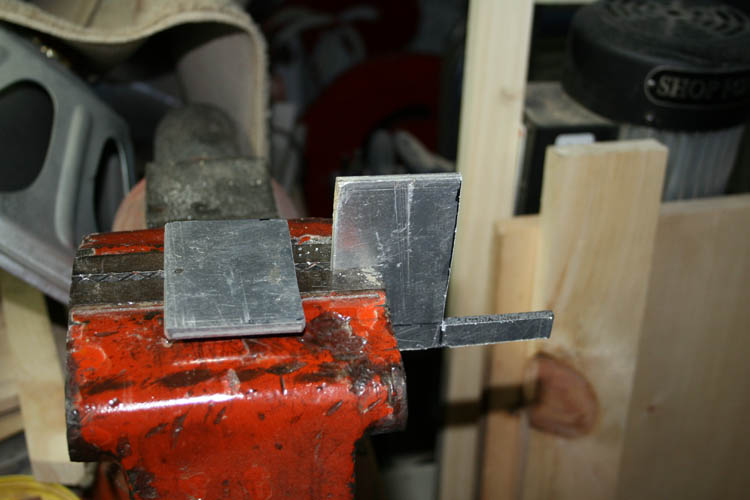
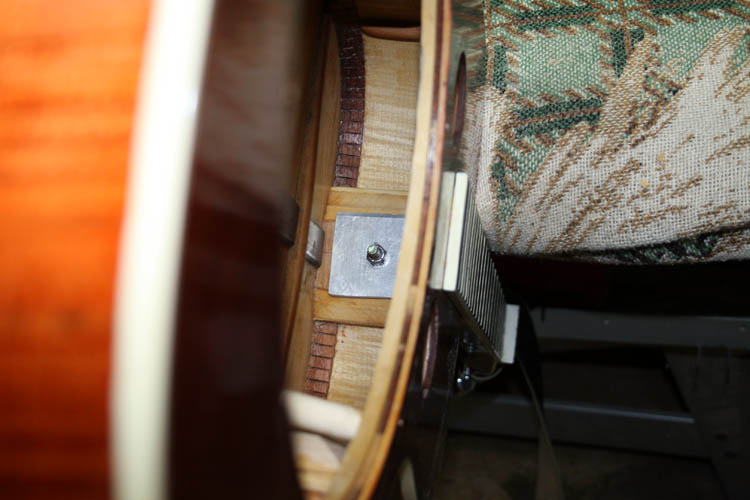
heel, not just relying on the short tendon portion for strength. The aluminum backer plate was 3/16 inch
thick and drilled the holes a little oversize, however the neck did not move
right or left or up and down due to the fit of the mortise and the short
tenon......the lag bolts just held the neck tight against the body of the
guitar. I used an extension on a 1/2 inch drive ratchet to access the lag
screws and bolts; tightened them down very snug.


STRUNG THE GUITAR UP FOR A TEST RUN
I installed a set of D'Addario EJ18 heavy gauge
phosphor bronze strings and used a .018 string for the first string instead of the
.014 string that is supplied with the set. This reso sounds good with
the medium gauge D'Addario EJ42 strings as well, but I have a quantity of
the EJ18 strings on hand. I got the guitar up to
pitch and after the strings settled in stretch wise, I wasn't that pleased
with the sound. It definitely had more bass response, but everything
seemed to be somewhat muted or muffled. Since the baffle was flexible
and I didn't anchor each end, I removed
it by twisting it out through one of the sound holes, without having to take
the cover plate off, tailpiece and resonator cone out. In all probably, the
baffle was far too large in height and as I said before, this is an
experiment since I have not had access to a baffle guitar such one that
Tim
Scheerhorn makes, whereas he is the top resophonic guitar maker in the USA
and has more instruments in the hands of the professionals than probably any
other individual maker and/or company in my humble opinion.
Paul Beard resophonic guitars are also at
the top as well and has many of his guitars in the professional arena too.
After the plastic baffle was removed, I immediately
noticed the guitar was not muted and the bass response was great along with
the high end response.
In summation, I am well pleased with this last
modification and will see what it sounds like, once everything settles in.
The only problem, without a nearby microphone and/or
pickup, the resonator guitar is easily overpowered by other instruments,
therefore plan B is about to manifest itself!
Updated webpage by Bill aka Mickey Porter on 06-24-17.
FISHMAN UNDER THE SADDLE PICKUP
INSTALLATION
Years ago, I installed a
Fishman Classic Passive Resophonic pickup to the cone
of the resonator, but it was horrible sounding and took the device back to
Holloway's Music in Monroe, NC for a full refund, of which they agreed to
beforehand, if I wasn't pleased with the sound. To me, the reso
sounded like an amplified Ovation guitar.
Playing the resophonic guitar in our Church, the only
complaint was, I couldn't be heard loud enough and did some research on the
latest
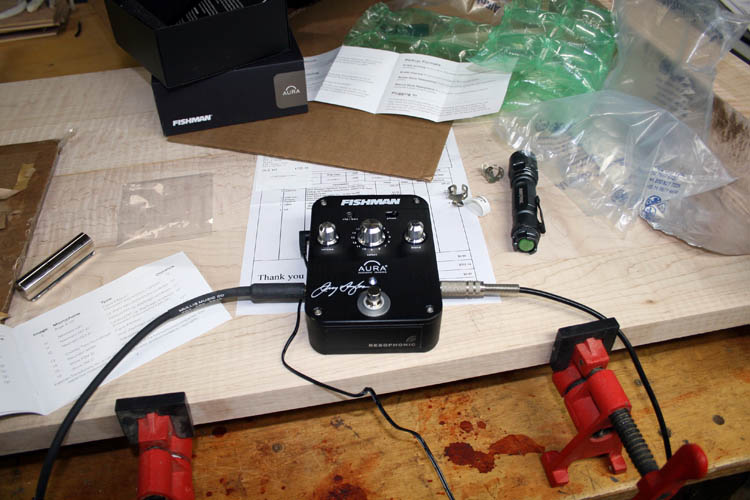
Fishman under the saddle piezo ceramic pickup. The new Jerry Douglas
Nashville series pickup sounded good with the Fishman Jerry Douglas series
Aura
imaging pedal for a somewhat realistic resophonic guitar sound. We have
input jacks in the choir area to our sound board system which should work
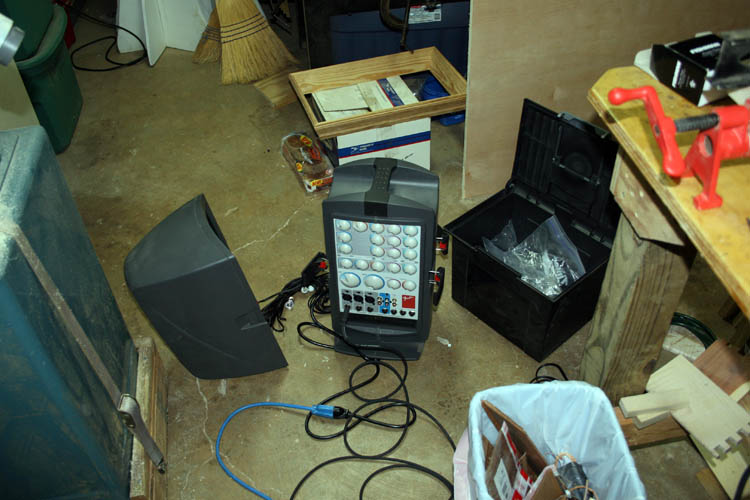
fine. If necessary, I can break out a 150 Watt Fender PA system which
has a pretty decent sound too, which will be needed at our local nursing
home monthly singing.
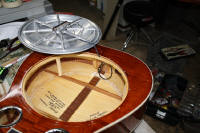
I decided to install a couple more "support posts" for
the resonator cone ledge and a lateral brace toward the upper bout of the
guitar body and another post near the tailpiece which should have the
pressure pretty much spread out from the downward force of the string
tension. All this is necessary, since I removed the sound well that
was part of the original construction.
I probably would have been better off just purchasing
another resophonic guitar, but I don't mind doing things the hard way, which
is part of my DNA......grin if you must!
ADDITIONAL SUPPORT POST INSTALLATION
I doubt I will ever install a clear polycarbonate baffle
system, since I wasn't impressed with the one I installed earlier, which
muted the volume and tone in my humble opinion. I did add a cross brace
glued in place for the center support post and countersunk a 1/2 inch
diameter hole for the support post. I could have easily gotten by with
a 3/8 inch diameter post or smaller, but I like to go into the overkill mode most of
the time.
I glued a short block in place to support the rear
post, of which I didn't glue the support post in place, since I will need
access to the jack hole already drilled into the tailpiece block. If
the 1/4 inch jack is short enough, it would not be a problem, whereas the
pickup should arrive tomorrow via Priority mail from Beard Guitars, LLC. I went ahead and
ordered a Beard # 14 spider bride which has four set screws to keep the
Fishman bridge pickup inserts in place.
PICKUP INSTALLATION
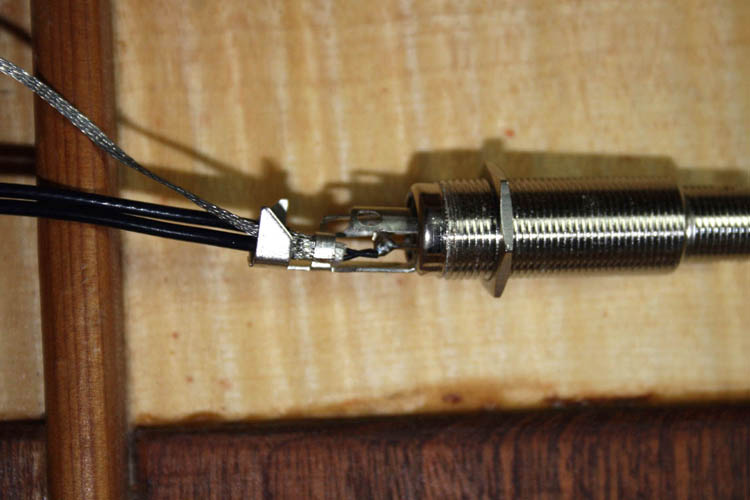
According to Beard and Fishman, a 3/16 inch diameter
hole is drilled at an angle in the rear of the ledge adjacent the resonator cone to allow the two
pick up wires into the body of the guitar to solder to the 1/4 inch jack
which will accommodate a balanced configuration, however only the tip and
sleeve are used.
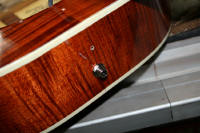
A small hole is drilled underneath the footprint of the tailpiece to allow
the braided cable ground wire to contact the tailpiece, of which the braided
ground wire is mounted underneath the tailpiece near the end pin screw which
keeps it tight in place against the conductive metal tailpiece.
I had Nate Martin of Beard Guitars, LLC to fit the
pickup inserts to the spider bridge and slot the inserts for D'Addario J42
medium gauge strings using 2.250 string spacing with the first string being
.018 inches in diameter which is the same diameter as the 2nd string.
With the depth of the ledge of my guitar, the bridge insert height was specified as .582
inches which has the strings about as high as you can go without touching
the resonator cover plate hand support, which puts adequate downward
pressure onto the resonator cone.
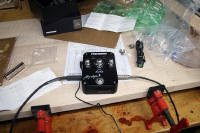
I received the Fishman pickup, spider bride and the
Fishman Jerry Douglas Nashville Series Aura Imaging Pedal and it didn't take too
long to install the pickup. I planned to install a rear vertical support post
in front of the tailpiece block, but the 1/4 inch jack was too long for
that. That post probably would have been my normal overkill, therefore
everything worked out OK nevertheless.
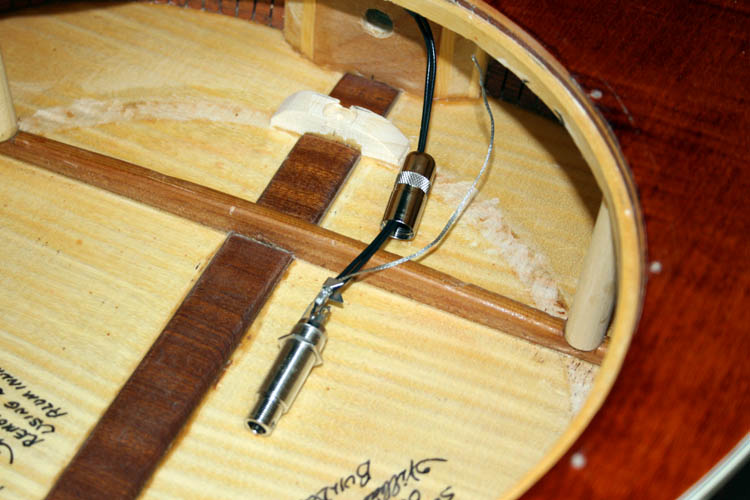
A couple holes were drilled into the body of the guitar; one for the pickup leads
from the bridge inserts and one under the tailpiece footprint for the
braided ground
wire to attach beneath the tailpiece.
Beard Guitars, LLC definitely knows more than a thing or two about
shipping parts, etc. The # 14 spider bridge and pickup inserts were totally isolated with packing
materials, of which you definitely need it like that when dealing with any of our
US Shipping carriers.........grin if you must!
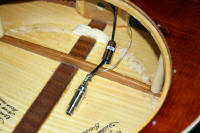
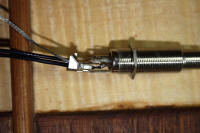

The 1/4 inch jack has a detachable sleeve that goes over the
exposed threads in case you want to install a sling. I already have a
sling base for a detachable sling attached to the tailpiece screw, but installed
the sleeve anyway since it looks better and offers additional protection to
the jack.
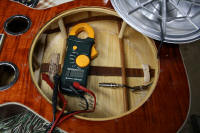
I double checked with the multi-meter to be certain I
had continuity between tip portion, aka signal lead and had a good solid
ground between the sleeve portion of the jack to the tailpiece before
reassembly.
According to Frank Padellara of Fishman, there is no normal
resistance on a capacitive device. It will test as an open circuit, but I
wanted to make certain there was no short between the hot lead from the
passive pickup to the shielded ground wire.
READY FOR THE ACID TEST
In summation, I was initially stoked with the way the
Fishman Jerry Douglas Series, Under Saddle pickup performs, but the
more I listened to it, it just didn't have the true traditional resophonic
sound that I was hoping for. The reso sounds pretty good
without plugged into an amplifier/PA system and is light years ahead of
Fishman's older model piezo pickup disk that attached to the resonator cone
via a pressure sensitive adhesive strip.
I am having a problem with the high G string, which
seems to be producing overtones or harmonics and sounding wiry when played open, but not as
noticeable when played away from the nut. I checked the nut slot and
everything looked ok.
I talked with a resophonic guitar legend
Bobby Wolfe at Davidson, NC on
07-19-17 who has been making resophonic guitars for many decades and
one of the first inventors of the baffle type design. I discussed what I had done removing the sound well and he said I needed to
beef up the area around the tailpiece since there is at least 200 psi
pressure there due to the string tension. Bobby also gave some
recommendations as to the set-up. He said he had never run into a
problem with the high G string producing those wiry overtones or harmonics played
open and will have to keep checking until I can find a cure for it.
Whatever it is, it definitely isn't obvious.
When running the guitar straight into the PA system, it
wasn't too bad, however the Jerry Douglas Signature Series Aura Imaging
Pedal gives more of the resophonic guitar sound when imaging at 100
percent and tried different combinations.
Now, to get some serious practice aka
"Practising" in as Gary Cooper
stated in the movie, Sgt. York.
BEEFED UP THE TAILPIECE BLOCK SECTION
I removed the tailpiece, cover plate, bride and
resonator cone after releasing tension from the strings. I placed
masking tape around the tailpiece to keep the strings in place at the
tailpiece when planning to use the same strings when setting everything back
up.
In my spare resophonic parts box from the year 2000,
which consisted of an extra steel fan pattern cover plate chrome plated,
an OMI brass chrome plated tailpiece, 1930s # 14 spider bride with the
narrow slot which came out of
Ray Atkins "white face" Dobro and several tailpiece blocks that were
3 1/4 inches square x 3/4 inch birch plywood which would be ideal to glue in
alongside the existing tailpiece block which will strengthen the top at the
tailpiece and help prevent the top from caving in due to the 200 lbs. plus
pressure there. I had to grind a small radius on one edge of the lower
block where it could be angled into place and then pushed into a vertical
orientation as the original tailpiece block. I used Titebond Ultimate
III glue. The block on the left was very tight and the block on the
right wasn't as tight but tight enough for the glue to do its job. I
put a couple guitar makers clamp in place for some extra force, of which I
don't think it moved the top/bottom to the blocks if any, because of the two
angular upright posts installed.
I also added a couple angular supports after the
additional tailpiece blocks between the top
resonator cone ledge to the small block I glued in place before installing
the Fishman under the bridge pickup. Their placement, will allow
access to the pickup jack in case I decide to remove the pickup at some
point in time. This was a premonition
for sure, since I had to remove the pickup later.
I put everything back in place and brought the strings
up to pitch, which should exert some downward pressure on the two additional
tailpiece blocks and upright support posts.
The open G string overtones will no doubt be a
"dawg" to find and hopefully will
find and fix the problem. It could be some weird resonant frequency of the
entire guitar or might even be the resonator cone, but doubt it is the
resonator cone.
FISHMAN PICKUP FAILURE - 07-21-17
I tried everything I could to locate the source of the
G string overtones without success. A few days ago, I noticed that the
low B (5th) string sounded muted and was hoping that it wasn't the guitar body
remodeling causing the issues. I decided to take the Fishman pickup
out along with the Beard # 14 spider and put my original spider bridge which
had the ebony/maple inserts back in the reso and go from there. I
originally had the ebony portion under the strings, but the tone was too
bright and slotted the maple portion of the bridge inserts and had the ebony
portion in the bridge slots and the tone was much better; not as bright.
Upon removing the cover plate, I noticed that the top
black portion of the insert for strings 6,5,4, the top portion of the insert had
just about come totally unglued from the maple bottom section with the piezo
ceramic sandwiched in the bottom half. It appeared
to be a glue failure!
I called Beard Guitars, LLC and talked to Nate Martin
and we decided to send the entire spider bridge and pickup back to them, of
which they would send the pickup back to Fishman for analysis and Beard
would replace the pickup and fit it to my specifications to the Beard # 14
special spider bridge as originally ordered.
FISHMAN REP PASSES THE BUCK
In the mean time, I emailed Fishman about the problem
and their representative stated that they had never had one to come apart as
I described it, unless it was plied during the installation process, etc.
I advised the rep that Beard Guitars, LLC installed and slotted the bridge
inserts to my specifications securing the pickup inserts into the Beard # 14
spider bridge which should have eliminated any mishandling of the product
issue as detailed.
Therefore, I must be the
culprit in the pickup product failure as eluded to by the
Fishman rep!
He stated that the downward pressure of the strings
kept the top to bottom of the pickup inserts in place, however in my humble
opinion there is also lateral tension applied to the insert, especially when
the strings are brought up to pitch which has a somewhat shearing effect on
the vertical placed inserts, since a portion of the bridge insert is above
the slot in the spider bridge that supports and secures said inserts, of
which is normally no problem with a regular bridge insert.
It is OK to defend ones product, but to
pass the buck either directly or
by inference without a thorough
evaluation of the root cause of the product failure is very unprofessional
in my humble opinion and what I call, jumping
the gun to
conclusions without the facts. This reminds me of CNN
and other Liberal news agencies.
For the record, I am on my second year of not watching any of the news
broadcasts which tend to create news and drama instead of reporting the
facts. Also, my personal TV has been unplugged a few months and plan
to keep it that way. Without revealing a
source, this appears to be a not to uncommon problem with this type of
pickup. There are forces at play, other than downward string tension
as annotated above and I definitely do not possess enough testing equipment
to ascertain the mechanical stress factors, therefore I offer no conclusive scientific
data to manifest and support my own opinions, other than
a part failure
which is evident and factual. Fishman is emphatically
stating, it was faulty installation that caused the part to fail. My
role, was simply placing the spider bridge and inserts onto the resonator
cone and completing a normal set-up for the resophonic guitar.
Nate emailed me a Priority 1-Day shipping prepaid label
and I got the package in our Post Office in short order this afternoon.
I plan to install my original spider bridge back into
the guitar to ascertain that the above issues have disappeared.
I didn't take the time to get a pix of the broken
Fishman pickup.....my bad!
Beard, LLC received the mailed packed on 07-24-17.
INSTALLED ORIGINAL SPIDER BRIDGE AND
INSERTS
I installed the original spider with the ebony/maple
bridge, of which I had the ebony portion on the bottom of the spider bridge
slot, since with the ebony under the strings, the reso sounded a little too
bright for my ears. The maple under the strings sounded better to me.
I still had the wiry overtones on the 3rd aka high G
string, but not as bad as with the Fishman under the saddle pickup
installed.
My very good friend Jim Yarboro of Gun Barrel City,
Texas calls that wiry sound a rattle. To quote him,
"I called it a Rattle, it makes you Rattled when
you can't get it to stop." And that
is a fact for sure!
I plan to make a set of solid maple inserts and make a temporary
nut for the 3rd string to try and isolate the problem. There are several
variables that have to be eliminated; one at a time to get to the bottom of
what is causing the wiry overtones and/or harmonics for that string only.
Hopefully, it will not be the modification that I did to the sound well.
CURE FOR THE RATTLE
NOTE: I made another flexible plastic
baffle, but much smaller in height and also didn't extend past the sound
holes, just inside the screen sound holes. The
baffle did reduce the 3rd high G out of phase string oscillations to a
near nil level and I do believe the sound well modification was the problem.
Sometimes, we have to learn the hard way. Updated on 08-17-17 by
Bill aka Mickey Porter.
I found a piece of 40 year old plus hard tight grained maple in my
Kennedy machinists tool box big enough for the spider bridge inserts and
will install them at a later date: the Lord willing of course.
I have learned a valuable lesson from all this,
"If it ain't broke, don't fix it."
Web page updated by Bill aka Mickey Porter on 07-19-17, 07-21-17
and 07-22-17.
SHELVING THE FISHMAN PICKUP AT THIS TIME
I received a replacement Fishman under the saddle pickup back from Beard
Guitars, LLC on 07-27-17 and decided not to install the pickup at this time.
I doubt I ever will install it again in the ole reso, whereas I am going to
leave well enough alone. I
will drag out a few different microphones and do some audio testing which
probably should have been my first option. Seems like I have to learn
the hard way sometimes!
I definitely would not
recommend this Fishman Under the Saddle Pickup, because it simply does not
accurately and faithfully reproduce the true acoustic sounds of the resophonic guitar in my humble opinion.
I know, Jerry Douglas uses this pickup and aura pedal along with a pile of
other accessory equipment to get the sound that is his signature style,
whereas he could probably take a two by four, car hub cap, tuners, nut and
bride,
set of strings and tailpiece and he would still sound like Jerry Douglas.
Grin if you
must!
Not to leave on a negative note, instrument tone and
timbre is
very subjective and what sounds
great to one person might sound not so good to the next person. To
reiterate, instrument tone and timbre is very subjective and most of us harbor
some type of
psychological bias
toward such. Simply stated, "If one believes something sounds
better, it will sound better",
to that individual anyway!
My recommendation,
for resophonic amplification, stick with a high quality condenser
microphone terminating into a good sound system!
Web published updated by Bill aka Mickey Porter on
07-29-17.
INSTALLED THE REPLACEMENT FISHMAN
PICKUP
With our NC Big Game annual hunting season closed and
with some free time on my hand, I decided to install the replacement Fishman
Pickup I received from Beard Guitars. I originally did not plan to
install the replacement for reasons already mentioned, however I decided to
give it another try.
On 01-02-18, I installed the replacement Fishman Pickup
and everything went smoothly. Since the guitar jack has the tip, ring, sleeve
and extra ground configuration, I cut the ring, sleeve
and extra ground portions off the jack leaving more room for the soldering of the tip
portion of the jack needed.
I also glued down the end of the fingerboard to the
top, whereas I did not glue it down when I removed the neck and installed
two lag bolts to replace the neck tongue.
I field tested it on 01-03-18 and still
not stoked
with just the pickup by itself going to my PA system, but with the JD Aura
imaging pedal, it sounded
good. Switching between the different settings, 1 - 16 on the Aura
pedal, I could hear the
difference in the tonal qualities. I tested it with a 50/50 mix, etc.,
but prefer the 100 percent Aura
imaging pedal.
I am still convinced a high quality condenser
microphone and PA system is the way to go, but this Fishman Pickup in
combination with the JD Series Aura imaging pedal does have it application and purpose,
especially when moving around on stage, etc. If you are a resophonic
guitar purists, this certainly is taboo for sure.......grin if you must!
There is no known cure for
PSYCHOLOGICAL BIAS,
of which we all no doubt harbor such bias, whether we believe it
or not! That is what fuels the demand for prewar musical instruments.
Without the original sound well type construction and
more modern spun resonator cones, you loose that old traditional Dobro
sound, however the sound post system does produce more volume with all
things being considered. It all boils down to what the individual
player desires as far as volume, tone and sustain. With a good
microphone and sound system, you are not handicapped using the ole 1930s
Regal Dobro such as the model 37 with plywood top and back. Solid wood
tops and backs do make a difference in the tone of the resophonic guitar
with the more denser woods such as figured maple giving a higher pitch tone
and volume with all things being equal; body size and depth, etc.
Solid tops and backs of walnut is a good compromise between mahogany and
maple as far as tone, volume and sustain is concerned.
Beard Guitars LLC was First Class All-American in getting
me the replacement Fishman Pickup and cannot fault them one bit in their
excellent customer service and a special Thank
You to Nate Martin.
I highly recommend Beard Guitars LLC and their
services!
Web page updated by Bill aka Mickey Porter on 01-03-18.
LEAVING ON A
SPIRITUAL NOTE
If you do not know Jesus Christ as your Lord and Savior, please take
this moment to accept him by Faith into your Life, whereby Salvation
will be attained.
Ephesians 2:8 - 2:9 8 For by grace are ye saved through
faith; and that not of yourselves: [it is] the gift of God: 9 Not of
works, lest any man should boast.
Hebrews 11:1 “Now faith is the substance of things hoped for,
the evidence of things not seen.”
Romans 10:17 “So then faith cometh by hearing, and hearing by
the word of God.”
Open this
link about faith in the King James
Bible.
Romans 10:9 “That if thou shalt confess with thy mouth the
Lord Jesus, and shalt believe in thine heart that God hath raised him
from the dead, thou shalt be saved.”
Open this
link of Bible Verses About Salvation,
King James Version Bible (KJV).
Hebrews 4:12 “For the word of God is quick, and powerful, and
sharper than any two edged sword, piercing even to the dividing asunder
of soul and spirit, and of the joints and marrow, and is a discerner of
the thoughts and intents of the heart.”
Romans 6:23 “For the wages of sin is death; but the gift of
God is eternal life through Jesus Christ our Lord.”
Romans 3:23 “For all have sinned, and come short of the glory
of God;”
Micah 6:8 “He hath shewed thee, O man, what is good; and what
doth the LORD require of thee, but to do justly, and to love mercy, and
to walk humbly with thy God?”
Philippians 4:13 "I can do all things through Christ which
strengtheneth me."


