Applying finish to a musical instrument has very few set rules chiseled
in stone and the options might be as great as the stars in the sky.
Each Craftsperson has his or her own ways and methods of applying finish and
have their own merits and detractors as well. A large manufacturing
facility geared toward production will no doubt have the latest in
technology available with some robotics driven by CNC programs and the
results usually justify such a huge investment.There are plenty of
reference books and materials available with in-depth study to address
musical instrument finishes. One of my earliest acquired books is
VIOLIN-MAKING by Ed. Heron-Allen published by Ward Lock and
Stewart MacDonald has a good reference book
Finishing Step-By-Step for duplicating old and current finishes
as well.
However, this banjo will
certainly not have such benefits, not even a spray booth or any high
technology spray equipment but about as meager as you can get; well the Lynx
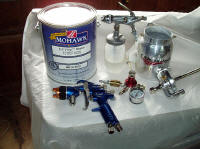
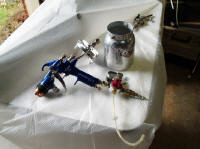
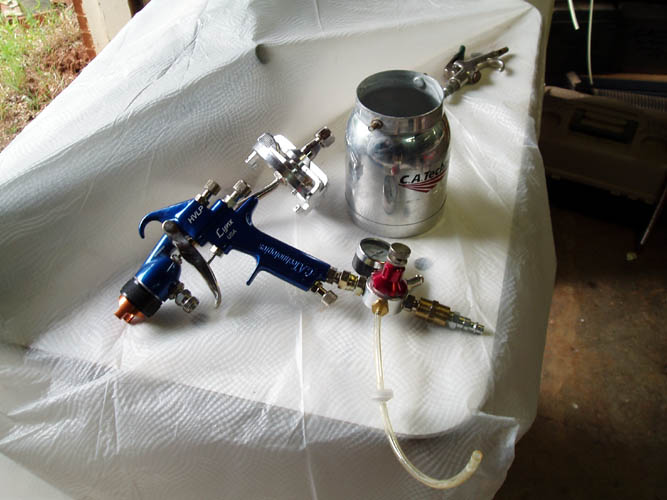
spray gun might be above the meager level...grin if you must! I
have a small spray touch up gun left over from my music days; a DeVILBISS
EGA-502 of which they still manufacture this little spray gun
today but the new model is EGA-503 and basically it is identical. I also have a Lynx L-300H 1 quart pressure feed
HVLP spray gun manufactured by CATechnologies that I used on outside yard decor and obtained a smaller
tip/nozzle 1.3mm, etc. for it and will probably use it for the lacquer top coats and
the EGA-502 for the application of the sanding sealer before and after the
usage of the mahogany wood filler.
SAFETY
The majority of the finishing products I have used over the years are
certainly hazardous to your health if not used properly and in a well
ventilated area. Most small shops and individuals making an occasional
instrument do so without the benefit of a dedicated or portable spray booth
set-up and are at the mercy of the elements since spraying has to be done
outdoors or in an open doorway or window area to allow the toxic fumes to
escape. A good dual canister respirator with appropriate charcoal
filters is a must for the higher VOC (volatile organic compounds)
products; e.g. nitrocellulose lacquers and thinners, and rubber gloves
either the heavy duty kitchen type or the inexpensive disposable medical
type should be worn. There are plenty of free information on the web
for the construction of a permanent or portable spray booth and will not
venture into that area.
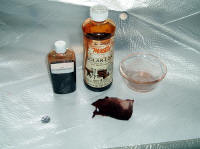
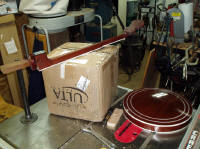
STAINING
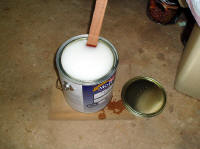
For the staining of the wood rim, resonator and neck, I will be using
alcohol based, non-grain raising dye stains made by Behlen Master Solar-Lux
and one of unknown origin; only has the stock # and color ID on the bottle.
I believe I purchased it when I made my Reso guitar back in 2000. In
the past, I used acrylic automotive lacquer made by DuPont which that
particular product is no longer made and planned to use Lawrence McFadden
products and unable to get them at this time, so settled on Mohawk Finish Products which
is a division of RPM Wood Finishes Group, Inc. located in Hickory, North
Carolina. They are readily available here in NC and can obtain them at
a discounted price of which several of the top custom instrument makers using
their products and it is to my understanding they produce the
Behlen line of products as well.
 .
. .
. .
.
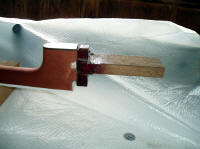


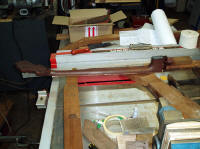
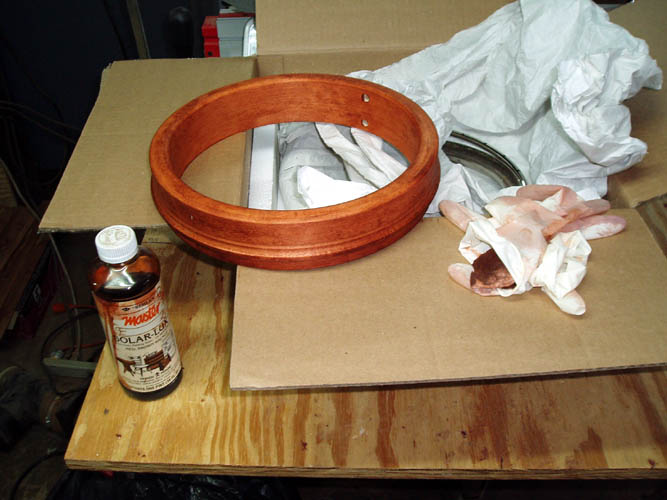
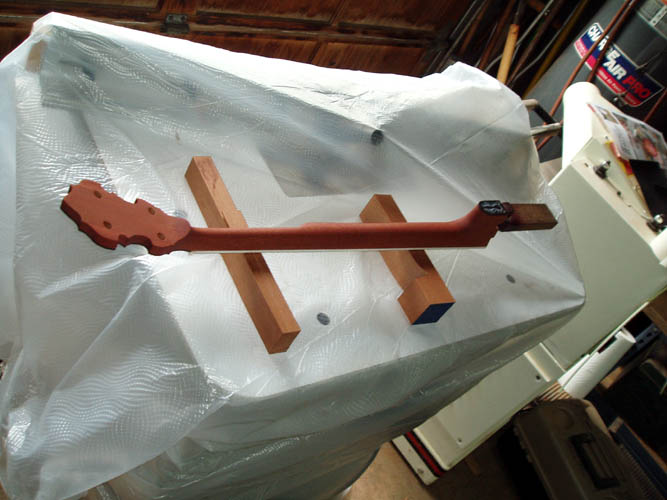
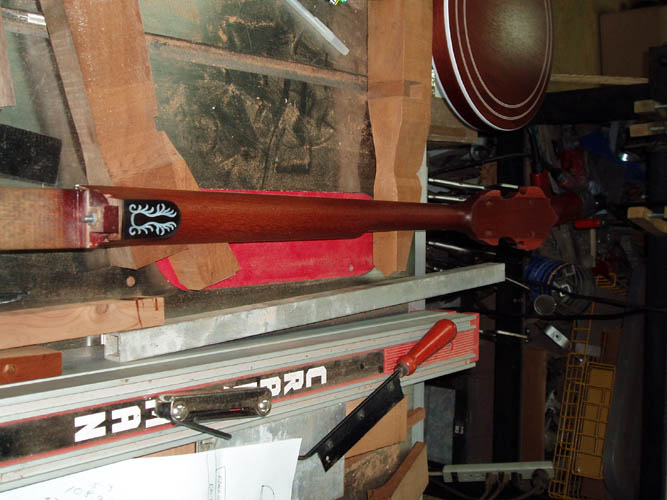
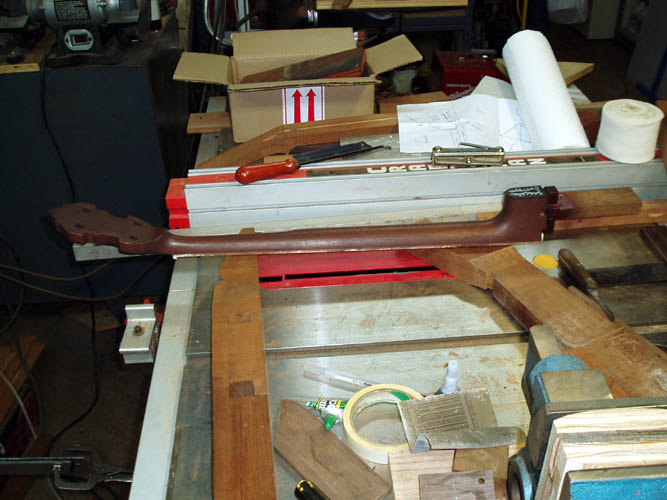
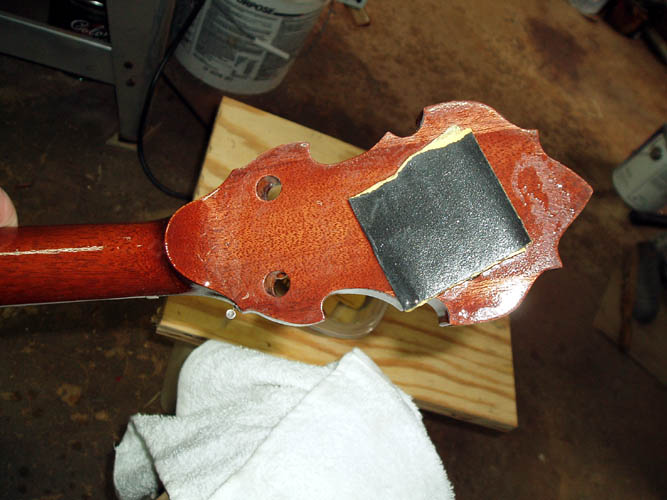
I masked the fingerboard area off and left a little gap between the
binding and the fingerboard which reduces the chance the finish will be
chipped when removing the masking tape for final scraping/cleaning of the
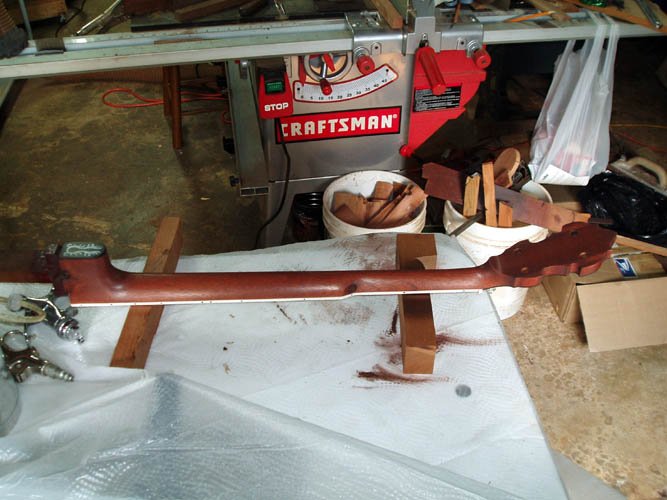
fingerboard, etc. I found one of my neck holding handles from the
1970s that still has some of the RB800 red lacquer still showing and bolted
it to the neck hanger bolts using a couple 10-32 tpi nuts. A plastic
"tarp" was placed over my router table which will be the staging area for
spraying and will raise the basement garage overhead door when I start
spraying the sanding sealer and top coats of lacquer. The sanding
sealer and lacquer are dangerous to your health and you need to be in a very
well ventilated place while spraying those materials. Many states are
banning the use of similar products but there are no suitable water based
replacement products that will give the same results as the nitrocellulose
lacquers for musical instruments; at least that is my opinion and I am not
alone either!
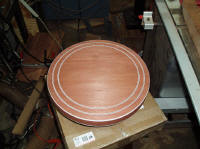
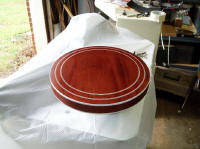
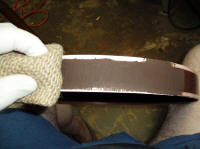
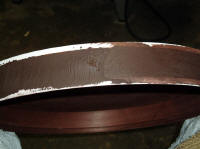
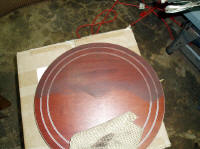
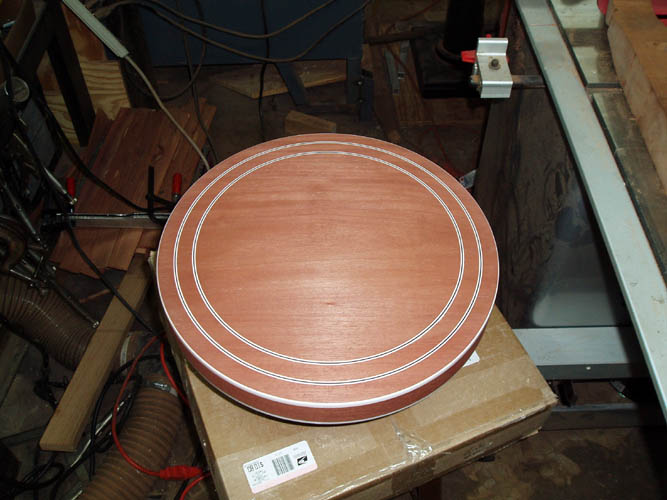
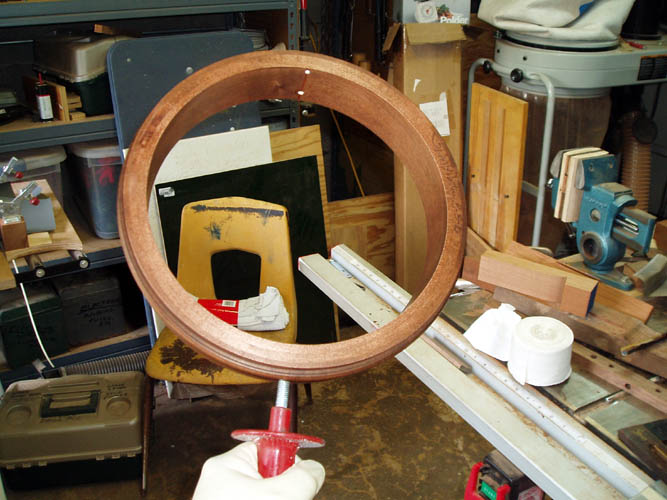
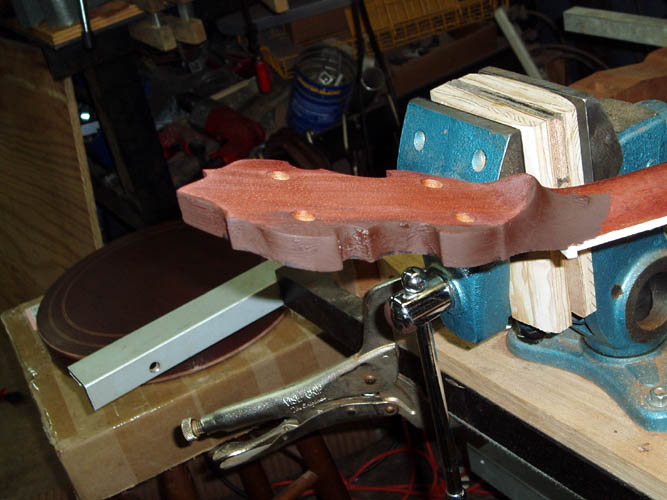
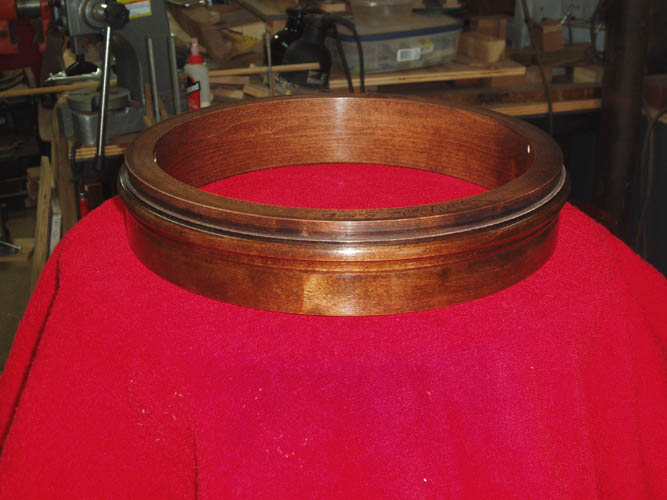
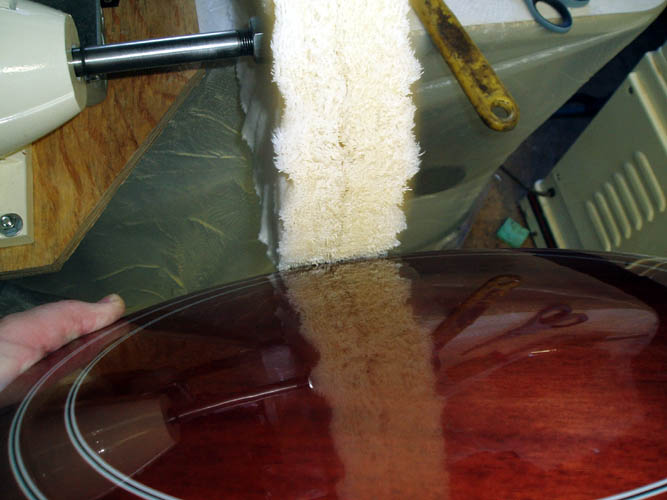
I stained the wood rim earlier with a maple stain but thought it was too
light even with several coats applied and went with a darker walnut color
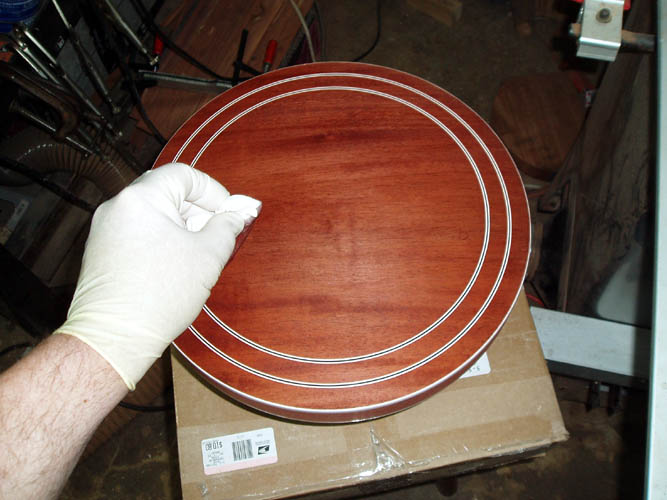
which did darken it up. I used a piece of cotton tee shirt material to
rub the stain with the grain of the wood rim and the resonator and those aniline dye stains are
permanent so put on a pair of disposable medical gloves to prevent dyed
hands...grin if you must! It might take several applications to get
the desired color and keep the wood rim wet with stain and overlap and
evenly spread the stain to prevent streaks. After you have the entire
part stained, lightly go over it to fully blend all areas before it has a
chance to dry. Before the spraying takes place, I will insert an
auxiliary handle from a Milwaukee 1/2 inch electric drill of which the bolt
threads are perfect for the 5/16 inch diameter lower coordinator rod hole in
the wood rim and the handle will allow me to control the wood rim while
spraying sealer and the finish top coats.
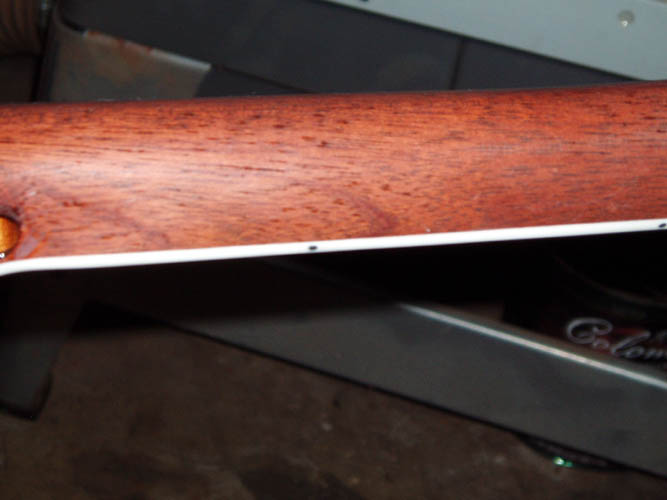
It is not necessary to tape over the neck and resonator binding since the
stain will leak under the tape most of the time anyway. Use caution
around the peghead area since you don't need any stain on the peghead
overlay or outside of the nut. If you do get a little stain on those
areas, they can be scraped/sanded clean before the top coating of sealer and
lacquer takes
place.
The longer the stain dries, the less chance there will be bleed through
when applying the sanding sealer and/or wood grain filler which ever one you
elect to do first, however mismatched incompatible components are the main culprit. I plan to apply a thin wash coat of sanding sealer
before the application of the mahogany wood grain filler since mahogany has
been know to bleed through a few weeks and months after application of the top coat.
It is imperative that the dye, wood filler, sanding sealer and top coat
products are all compatible with each other and you need to follow the
manufacturers protocol for the application of their products. It is
also very wise to do a test run on scrap similar material to verify your end
results
SANDING SEALER
Notice my last sentence above...do a test run. The stain aka
aniline dye had plenty of time to dry and started getting my materials and
equipment ready for the application of the sanding sealer over the stain
before the paste wood filler and planned on using the little DeVILBISS EGA
502 touch up gun, however after loading the spray gun to do a test pattern
on scrap material, it would not pull the sealer from the glass cup. I
quickly ran some solvent through the gun and nil, nothing but air and had to
put that spray gun aside for a later complete take down. Luckily the
CATechnologies Lynx L-300H HVLP gun was operational and a few adjustments to
the air and material flow screws had a decent spray pattern going on scrap
material. I was unable to take pixs while actually spraying the parts
but you should get the picture without them.....no pun intended.......grin
if you must!


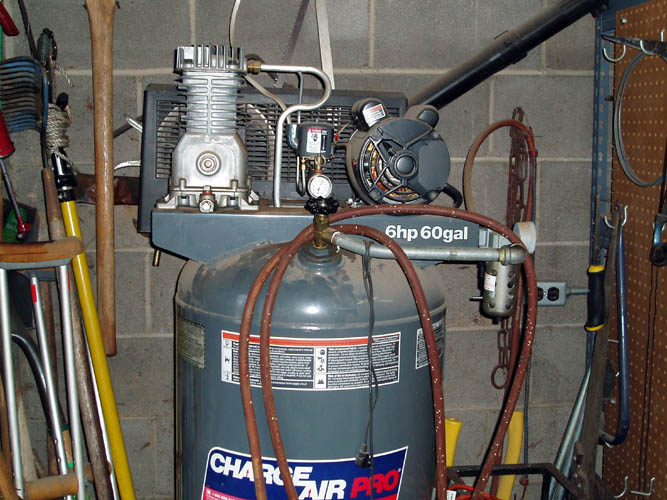
A two stage air compressor with a tank large enough to keep from quick
recycling is an advantage to prevent rapid starts which can show up on large
spray patterns areas such as cars, etc. but would probably not be noticeable
on musical instruments. My single stage 6HP air compressor is ok for
my home projects but if I were doing musical instruments for a living, I
would get a better outfit and a spray booth set-up for sure; either home grown or
store bought. On the flip side of the coin, some like the smaller
units that recycle more often keeping the air supply hot instead of cold
reducing the moisture condensation in the air supply line.
Mohawk does not recommend thinning their sealer and it sprayed and
atomized very well with the 1.3MM tip/needle combination in the Lynx L300H
spray gun with the pressurized cup. I also have a cheap gravity flow gun
with a large 2.2MM tip/needle for spraying heavier materials for yard decor
projects, etc. and definitely not suitable for the sealer and lacquer
applications.
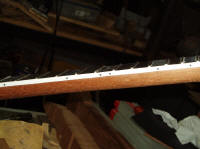
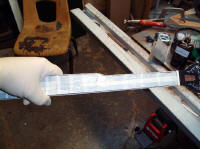
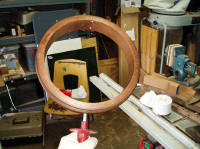
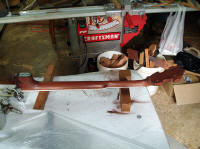
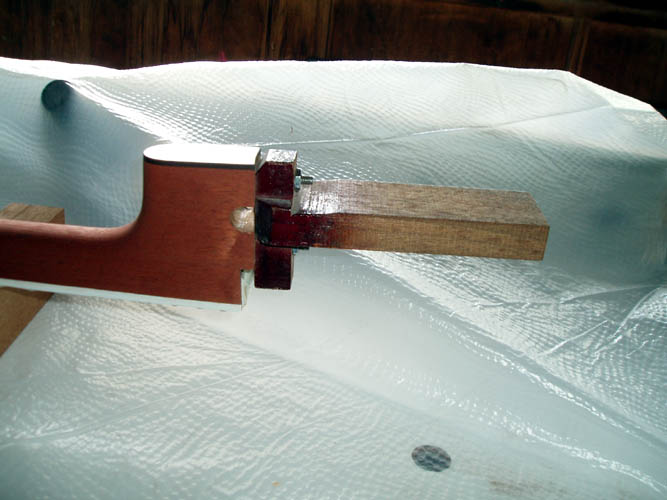
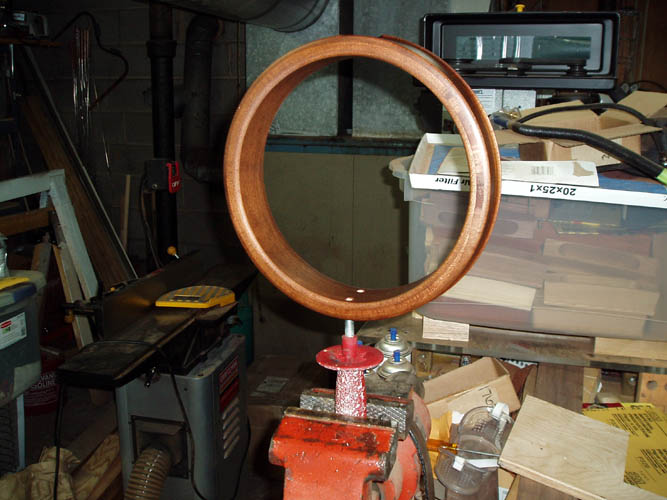
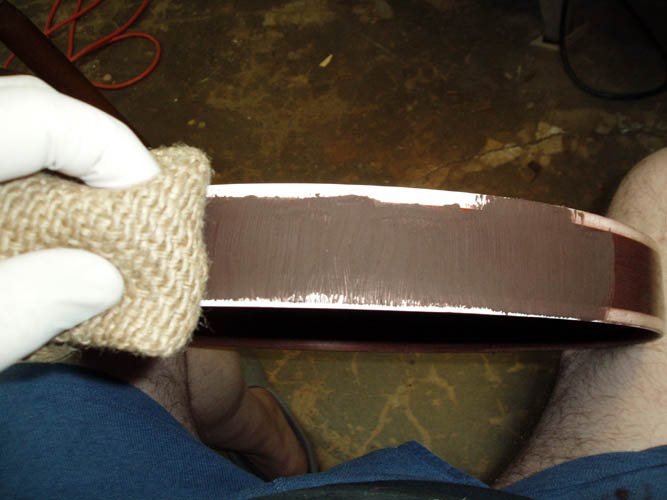
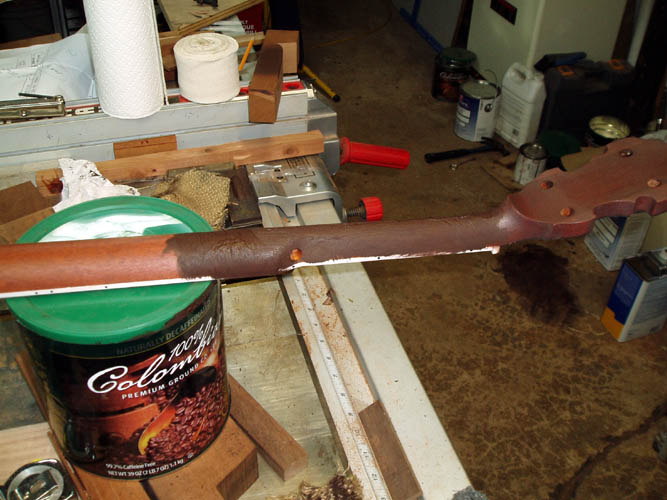
You will notice the holder I am using for the wood rim is an auxiliary
side handle off a
Milwaukee 1/2 inch heavy duty electric drill and the attachment bolt threads
worked perfect in the 5/16 inch coordinator rod hole for the tailpiece and gives you
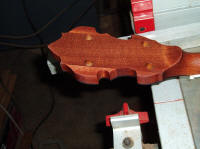
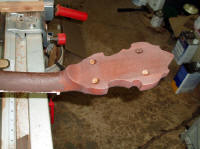
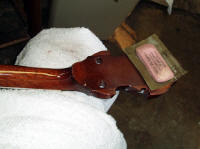
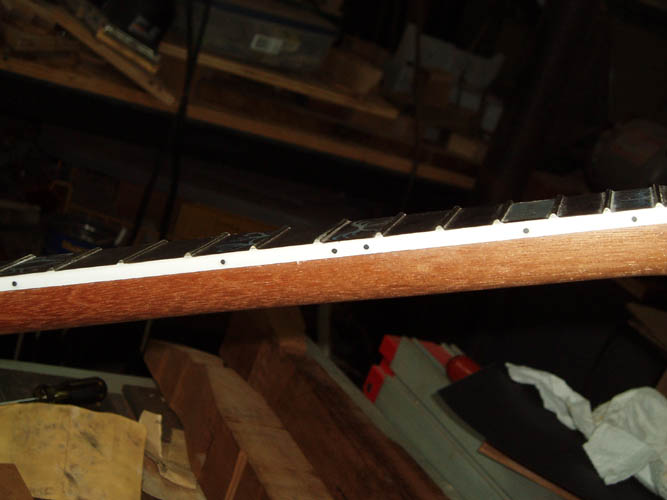
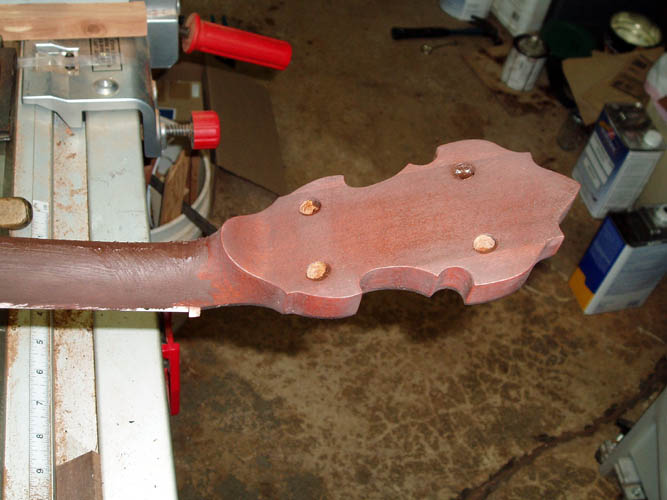
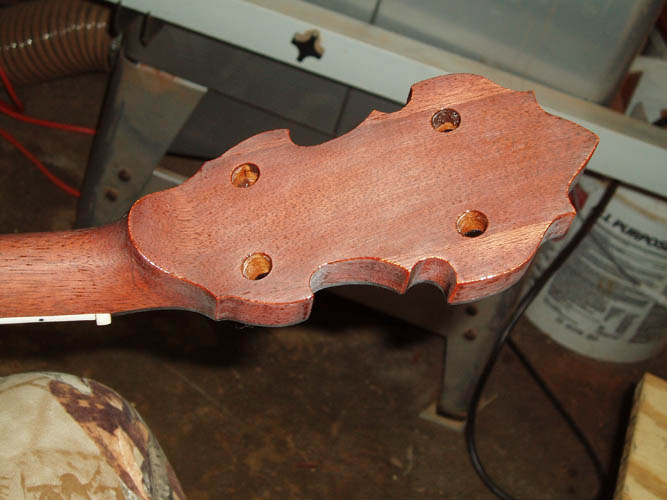
plenty of room to spray the wood rim around that area. I have a
close up pix of the headstock which shows the porous nature of this piece of
Honduras Mahogany and it would take a lot of top coats to fill the grain
without a paste wood filler application to seal and level the wood pores.
I will probably wait at least several days to a week before lightly sanding the neck and
resonator down since there is rain in the forecast for the next several
days and humidity is definitely an enemy to finishing.
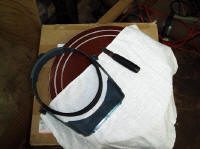
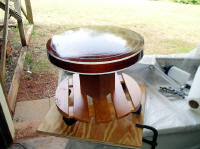
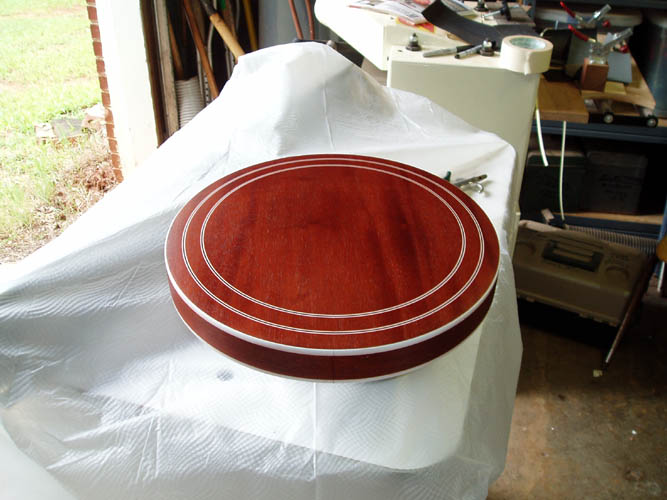
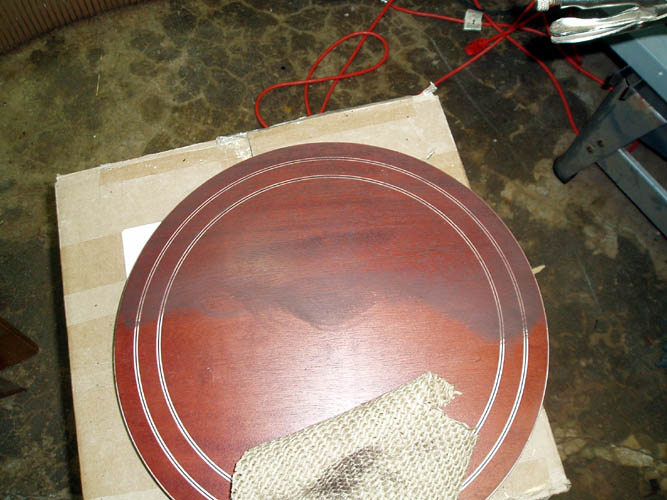
Before I do anymore spraying to the resonator, I need to find a lazy
Susan type fixture or turntable since the coffee can is about as rube
snorkel as you can get, unless you can walk around the entire
resonator while spraying which is about what I had to do on this one.
It was very difficult to try and rotate the part and/or coffee can without
some type of rotating base plate. I certainly did not do my homework
on spraying the resonator. Since I plan to do the neck notch cut out
in the resonator after finishing, I could just as well drilled a hole in the
waste material and used another drill auxiliary handle but will find a
simple rotating base instead.
The small DeVILBISS EGA 502 touch up gun was taken apart and re-cleaned,
however I did notice build up in the glass materials cup and the feed tube
had remnants of the white primer paint from my last yard decor project and
poor cleaning was the culprit. I ordered a parts kit for the gun; the
gun is replaced by the EGA 503 which looks identical and the
EGA 503 parts also fit the EGA 502 which is a good thing. According to
the price of the repair kit, there had to be some platinum used in their
manufacture! I ordered a spray gun cleaning kit and with the repair
parts kit and will refurbish the gun before I spray
another coat of sealer after applying the mahogany paste wood grain filler
and the top coats. The ole sayings, "An ounce of prevention is
worth a pound of cure" and "a stitch in time saves nine"
rings very true on this one.
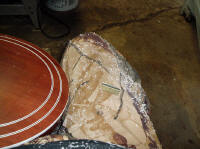
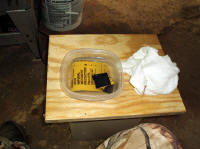
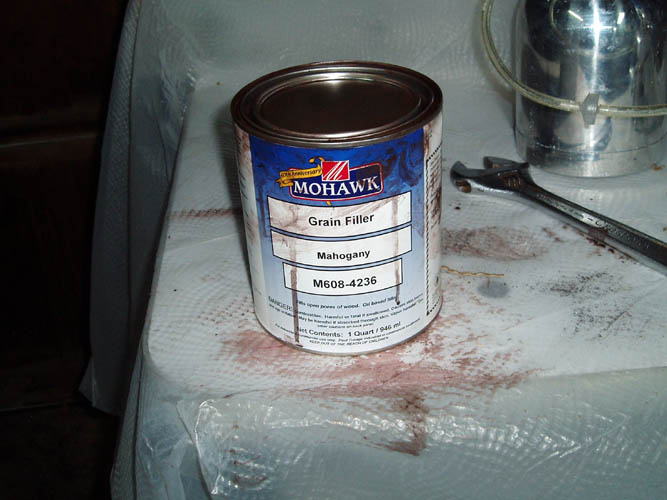
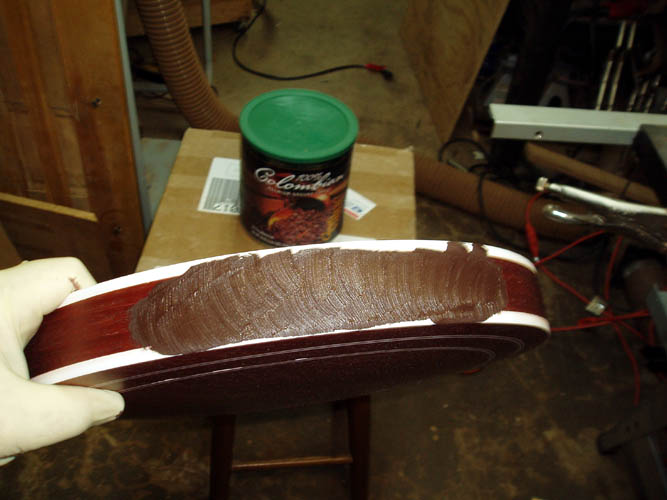
PASTE WOOD FILLER APPLICATION
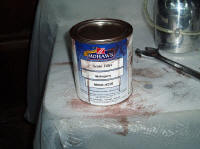
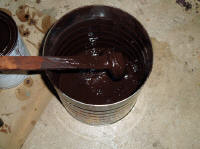
I will be using a mahogany paste wood filler # M608-4238 filler
manufactured by Mohawk and they recommend thinning it down 3 parts filler to
1 part thinner. Since I did not order any paste filler reducer from
them, an oversight on my part, I called their customer service and they said
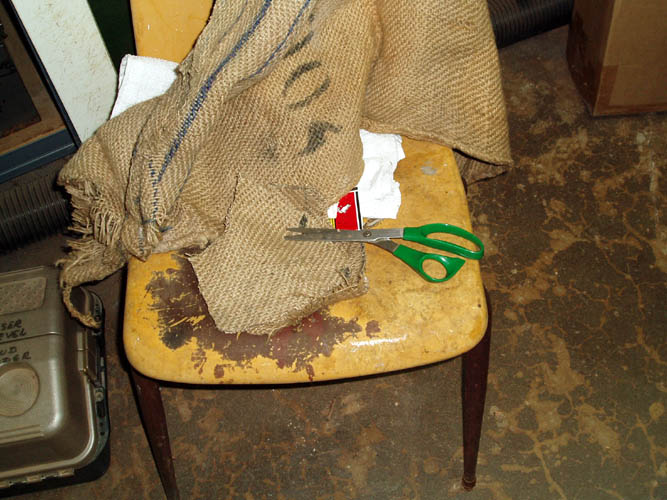
I could use Naphtha or mineral spirits to cut it with. I thinned the
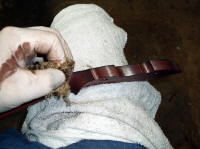
paste filler until it was the thickness of a thin custard filling and a
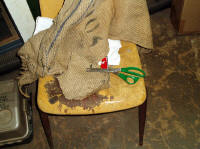
little thinner than sour cream and cut plenty pieces from a burlap sack to
rub the filler into and off the parts. As everything else about this
project, it has been decades since applying a paste wood filler and I
probably could have gotten by just as well without using the paste wood
filler and elected to spray a few more top coats and sand them down.
However, a filler in the open pores of woods like mahogany, walnut,
rosewood, oak, etc. can add extra eye appeal to the project, especially if
the filler is a little darker than the stain which gives a good contrast.
Gibson during The Great Depression Era filled the open grained
woods they used such as Brazilian rosewood, mahogany and walnut for their
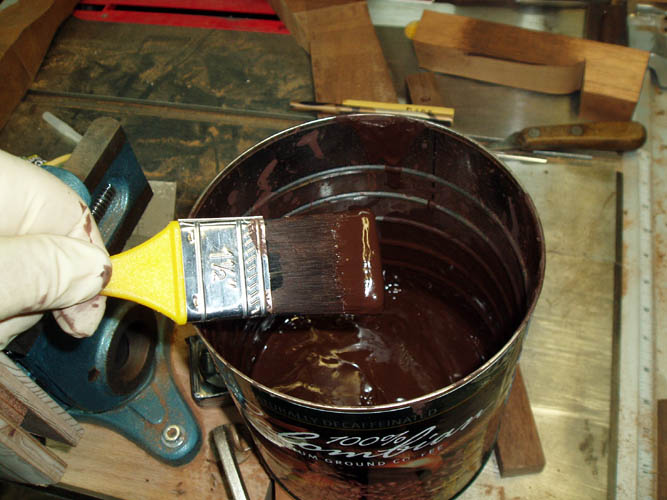
guitars and banjos. I did a little testing of the wood filler on scrap
mahogany before applying it to the resonator and neck and threw all caution
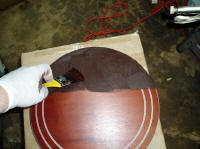
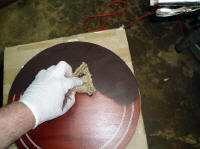
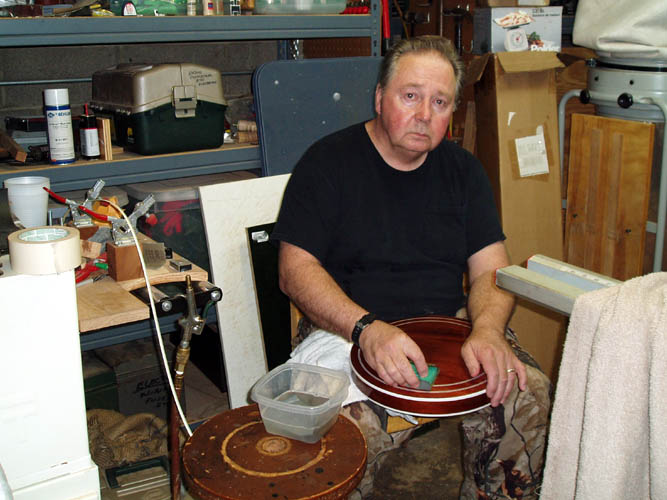
into the wind and went for it. I applied the paste wood filler using a
cheap stiff plastic bristled brush and packed it into the pores and went
then brushed across the grain to aid in getting the wood filler into the
pores. It only took a couple minutes before the paste wood filler
glazed over and it was then time to rub the filler into the wood using a
figure eight pattern and then across the grain. I finished up lightly
rubbing with the grain. I did only small areas at a time since the
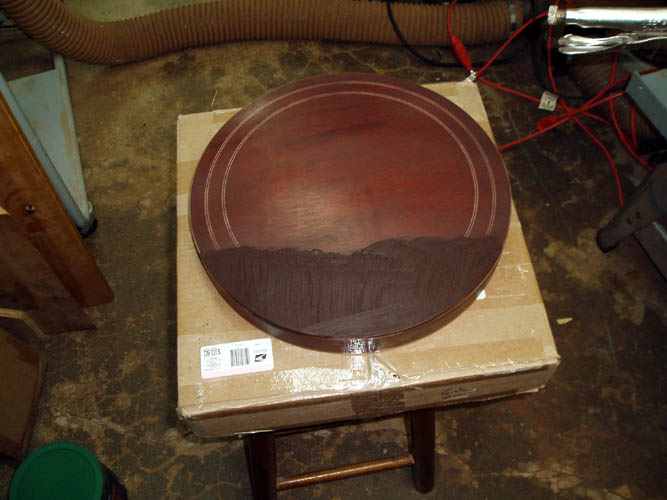
thinning agent dried out very quickly. I will let the resonator and
neck set a few days and go over them with 0000 steel wood rubbing with the
grain and try and polish down to the filled pores since there is a wash coat
of sanding sealer under the wood grain filler and should get the parts back
to the red mahogany aniline stain color. This product tinted the parts
more brown than red but it should be ok either way it turns out. It is
imperative that you rub the excess wood grain filler from the parts,
otherwise it will take some serious sanding to remove it when it dries.
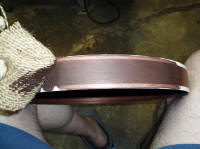
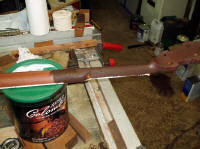
Last three (3) pixs with the neck and Reso polished with steel wool.
The resonator could use another application of filler but don't plan to do
it. Sequence pixs below:

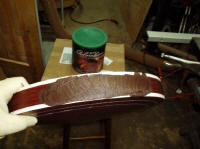


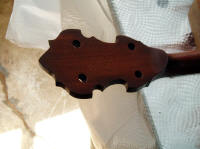
 Note: The above peghead is much lighter than depicted in the
pix
Note: The above peghead is much lighter than depicted in the
pix
I wasn't impressed with my application of the paste wood grain filler
especially on the resonator. I attribute that to myself not having
used any paste wood filler for decades and my learning curve was not up to
speed either. The 0000 steel wool might have been a very bad idea
since it could easily have pulled the wood grain filler from the pores. The wash coat of sealer that I used over the stain was still
"slick as glass" after I sanded it down and that could have had
some bearing on the filler not staying in the wood pores. I also did
another error by thinning the product with Acetone instead of
Naphtha or
Mineral Spirits per the manufacturer's recommendations. The Acetone
is the fastest drying of the three products mentioned above with the mineral
sprits being slowest drying of the three. The acetone did dry the
paste wood filler out far too fast and I didn't realize the
mistake until after the fact. I simply didn't look at the label on the
container as
"brain dead" as that sounds; both the Naphtha and Acetone container had nearly the
same color scheme; still no excuse......ok go ahead and grin because I am for sure! The Acetone
should have cut into the sanding sealer some by being in the wood grain
filler but it did not have any effect on it. Very little of the
paste wood filler stayed into the pores of the resonator back and will have
to make up for it with additional top coats to get a smooth level finish.
I simply had enough of the paste wood grain filler and back in the early
1970s did a custom one piece Brazilian rosewood hearts and flowers neck for
a tube and plate pot assembly and did not use any wood filler and it came
out fantastic. I still have the letter of appreciation on file from a
very satisfied customer or it could have been his Dad.
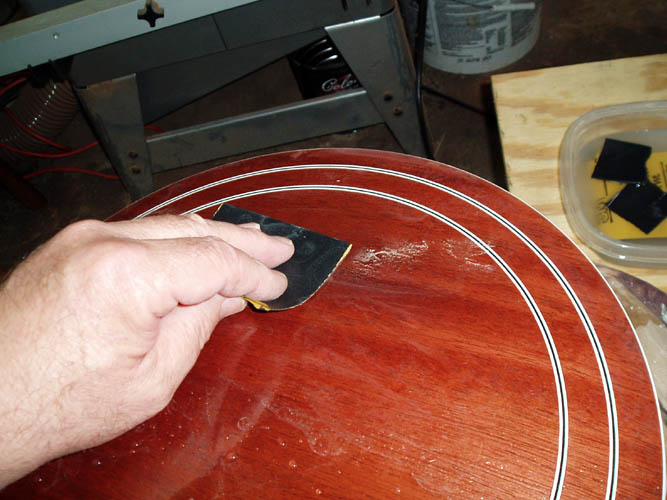
The resonator and neck were lightly sanded and buffed with 0000 steel wool
and allowed to cure a couple days to make sure it was totally dry and no
bleed through into the stain was noticed or white discoloring as has been
attributed to some mahogany wood.
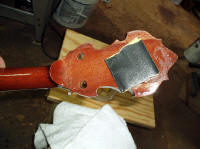
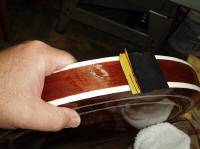
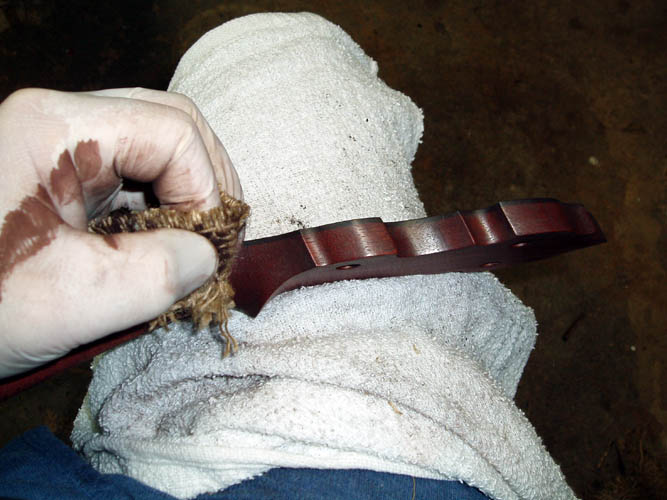
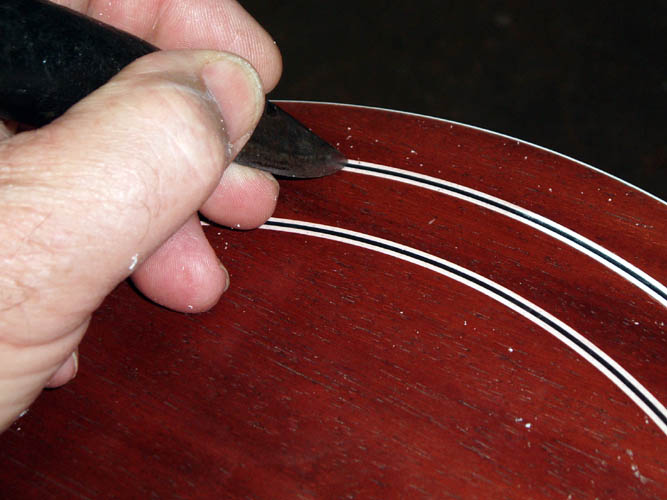
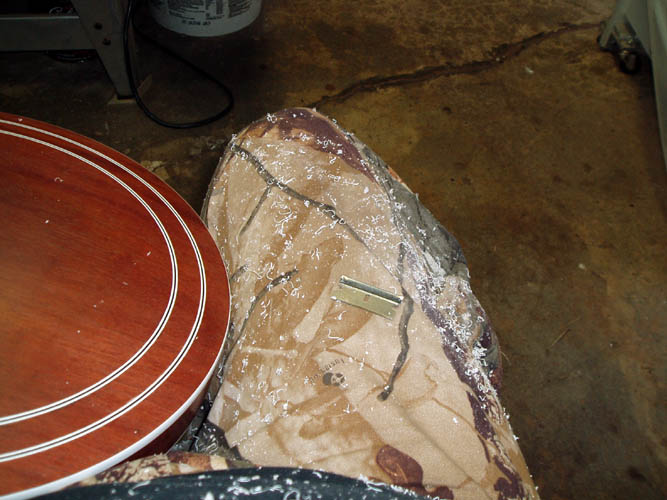
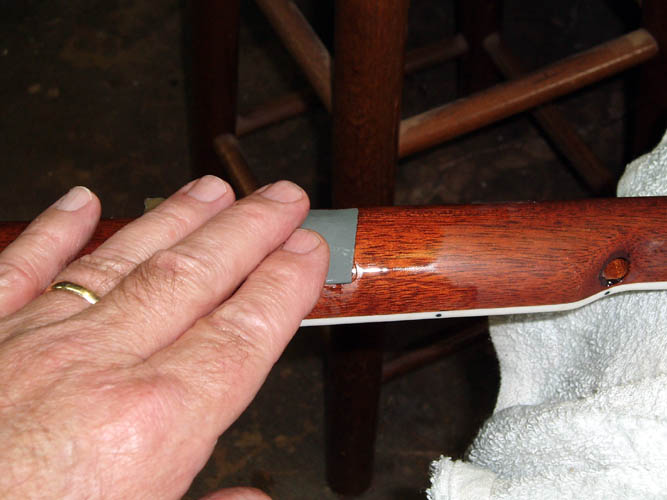
SCRAPING THE RESONATOR AND NECK BINDING
Prior to spraying a coat of sanding sealer on the neck and resonator, I
decided to scrape the binding to remove the color from the aniline dye stain
and the wood filler staining. It would be scary to know how many miles
of binding THE GREAT DEPRESSION ERA Gibson craftsmen scraped over the
years. I tried to find my favorite tool that I used to scrap the
binding from the neck and resonator side walls which was an ole Case
XXX multiple blade pocket knife and used the "Sheep Shank"
shaped blade which worked very well for me. I could not
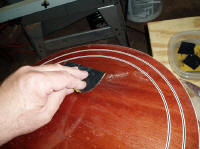
locate said knife so used a single edge razor blade and a small round
pointed utility knife for the rings in the back of the resonator. One
needs to get comfortable and take your time because scraping the binding is
quite boring and it is easy to make a slip so attention to detail is
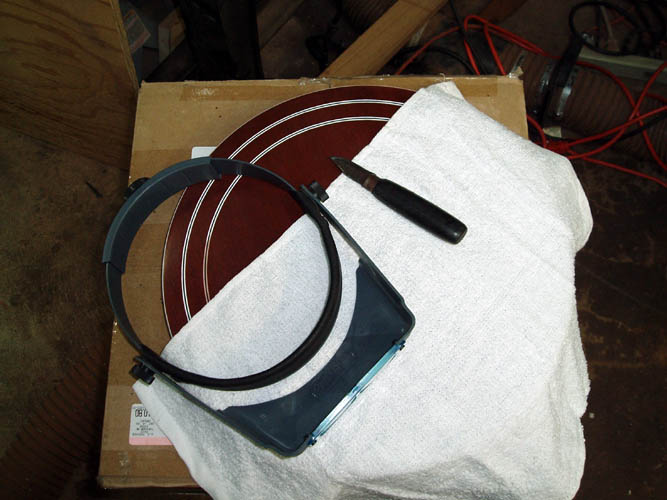
required. I got out the Opti-Visor for this job which really helped
see the edge of the binding against the wood. I could not get a good
pix of the actual process because I need to access the camera shutter button
on the right side of the camera, therefore I had to hold the razor blade and
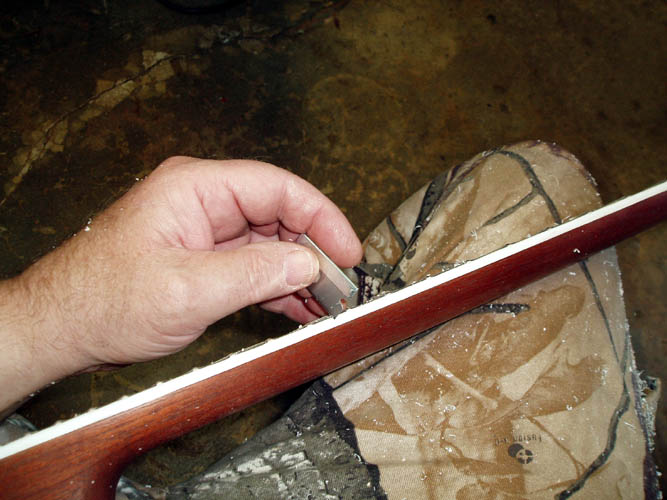
utility knife in my left hand of which I use my right hand for this task.
The forefinger is used as a guide and limits the length of the razor blade
contacting the binding and I normally scrape the binding from my right to
the left and the razor blade or knife is positioned about 10 degrees toward
myself and not held vertical at a 90 degree angle, otherwise it will skip
and make a sound like chalk scraping on a slate chalk board. Also, a
small rag or towel was used under my right hand to protect the resonator
from my fingernails since while scraping the resonator rings, the small
utility knife is held more or less like you would hold a pencil or pen and
the left hand aids in controlling the movement on the resonator rings.
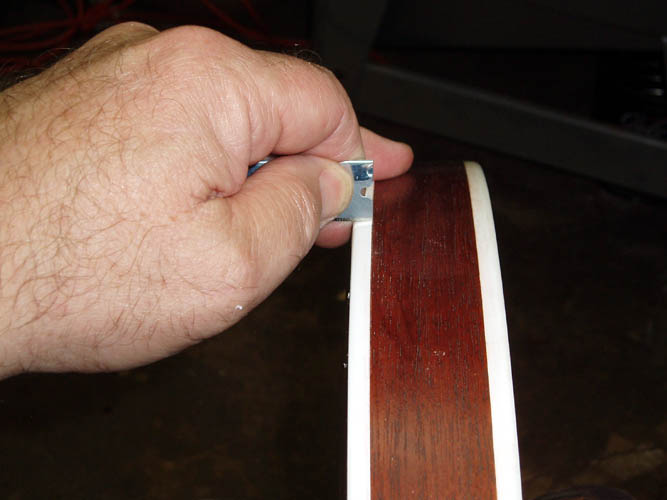
While scraping the binding from the resonator sidewalls, I held the
resonator about vertical controlling it with my left hand and did the
scraping with my right hand. You can take an inch or more in length
scrapes and once you get the technique down, you become much faster with
more confidence that you will not scrape into the wood removing any stain.
After a few inches of binding being scraped, the technique started coming
back and I got a little more aggressive scraping the binding. If you
have any doubts about bleed through from the stain or paste wood filler, I
would recommend spraying the sanding sealer over the paste wood filler and
then scrape the binding since some finishes tend to bleed through with the
first coat of sealer or top coat of finish. Scraping the neck
binding is pretty much "freehand style" since the frets create
a bump in your gauging, however you could place a thin piece of sheet metal
on top of the fingerboard but didn't see a need for that. A few pixs
below:
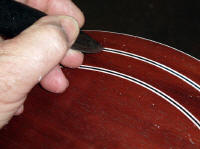


 This pix shows how much the stain and filler colored the binding!
I sprayed another coat of the sanding sealer on the neck and the
resonator after scraping the binding per the manufacturer's recommendation using the little DeVILBISS
EGA 502 spray gun, however the 1.0MM tip was a little small for the sealer
without thinning it. The sealer sprayed much better with the Lynx
L-300H spray gun with the 1.3MM tip plus being pressure feed and might have to go with it for the top
coats. The sealer will be allowed to dry a few days to a week
depending on the weather and will go over
the resonator and neck lightly with 320 grit or higher dry sandpaper and then start the
application of the top coats. I believe I finally have all the white primer
gunk removed from my spray guns from usage a few years ago. Many
Craftsmen today apply many thinned coats of sanding sealer for a build up
and sand down with 320 grit paper before starting the application of the top
coats, however old habits are hard to break!
Seems like the finishing part of this project is beginning to be a
nightmare with the weather not cooperating with intermittent high
humidity. After spraying the neck with the sanding sealer, a quick
shower blew in and it didn't take too long before the dreaded blush appeared
underneath the sealer and halted the rest of the spraying for the day.
I didn't have any lacquer retarder on hand and hopefully the blush will dry
out some of which it didn't and had to do a good sanding back through the
layer of sealer which took the edge off the fun element of this project.
To add insult to injury, I knocked over the glass 8 ounce feed cup for the
Devilbiss EGA 502 touch up spray gun shattering it into many pieces on the
concrete floor and will have to round up a replacement
of which the glass one has been replaced with a plastic one from the
manufacturer now. I
have owned two of the EGA 502 spray guns and that is the first glass feed
cup that I have broken...Murphy's Law Never Sleeps!
I contacted a few instrument builders that have sprayed this product and
they recommended cutting it about 25 percent or more and doing the same thing for
the nitrocellulose instrument lacquer. In the mean time, I ordered
some blush remover which is basically lacquer retarder and a mixture of
thinner which cuts into the top coat melting it and slows down the evaporation process
allowing the trapped moisture to escape; at least that is the intended plan
anyway. I might be a "blue fin sucker" on this one!
I think I am ok with the fine sanding and steel wool getting rid of the
blush from the neck. I will definitely order lacquer retarder and keep
some on hand for my other lacquer spraying projects. The best
prevention for blush is not to spray when the dew point is less than 20
degrees from the temperature or the relative humidity is above 65 percent
and keep your compressor tank and lines as free of moisture as possible.
I received a 13 oz. spray can of Jet Spray Blush Eraser
product code B101-0871 manufactured by Behlen available from StewMac and applied
a thin coat to the neck and it did the trick although I removed most of the
blush with fine sandpaper and delicately and lightly sanded the curved parts
of the peghead not wanting to cut into the wood removing any filler and/or
stain. A thousand dollars or more is not a bad price to pay for a
5-string neck after all....grin if you must!
LACQUER TOP COAT APPLICATIONS
My friend
Harold Chriscoe of Seagrove, NC (deceased
July, 2018) was
very correct in saying that some
of the new finishing products; filler, sealer and lacquer are different from
the stuff that we used back in the early to late 1970s and the finishing
techniques have changed to shading and coloring components mixed in the lacquer instead of the
older aniline dyes and stains that I grew up on and my learning curve is
much slower now than it was back in 1970s when I was around 24 years in age.
Duplicating the post war Gibson finishes such as the RB800 with the red
sunburst was all done with mixed colored lacquer but I guess I am still
old school at heart.......no disrespect intended
to us Senior Citizens....grin again if you have to! It didn't take but
a few applications of the sealer/lacquer sprayed onto the resonator to realize
that sitting the resonator on top of an empty coffee can without a way to rotate the resonator
easily is a bummer for sure.
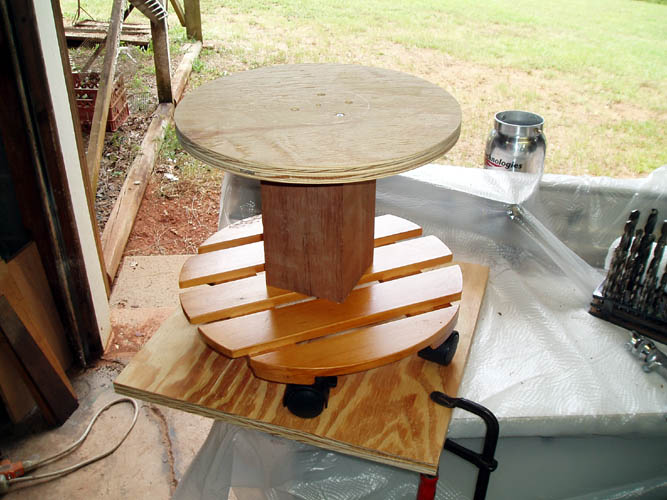
To hopefully make it easier to spray the resonator, I picked up a cheap 6
dollar carrousel from Wal-Mart in their home and garden center that has a
simple base with four pivoting wheels used for moving
around heavy potted plants and figured it would surely work for this project. I had
some scrap mahogany 4 x 4, 3/4 inch plywood and a length of 1/2 inch
diameter maple wooden dowel and that should be all the
materials needed with the addition of a few wood screws and glue.
Pixs below:
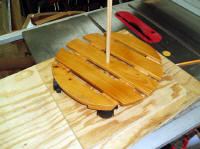
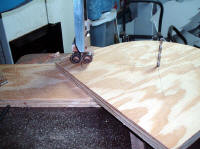


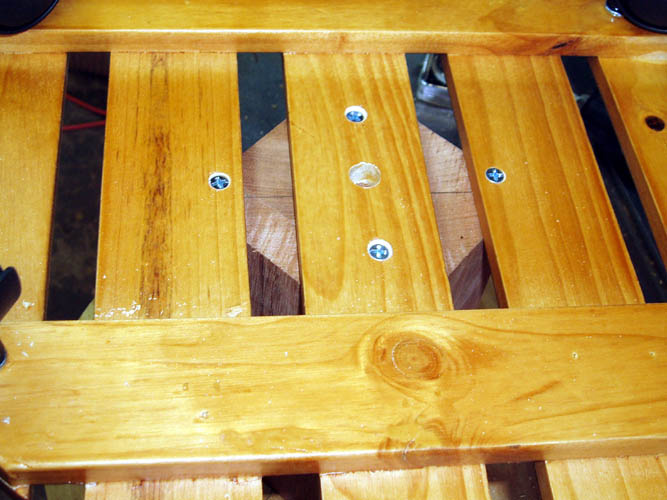
To rig this rotating fixture, I cut two (2) pieces of 3/4 inch thick plywood to
12 1/2 inches square for use as the base plate and upper platen support for
the resonator since I want the fixture
portable. I then drilled a 1/2 inch diameter hole in the center of the
one of the the plywood squares all
the way through and glued a tight fitting 1/2 inch diameter maple dowel in place
leaving enough exposed to engage the four wheel carrousel base of which I drilled
a matching centered hole in the carrousel slightly oversize to allow it to
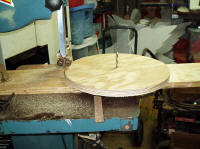
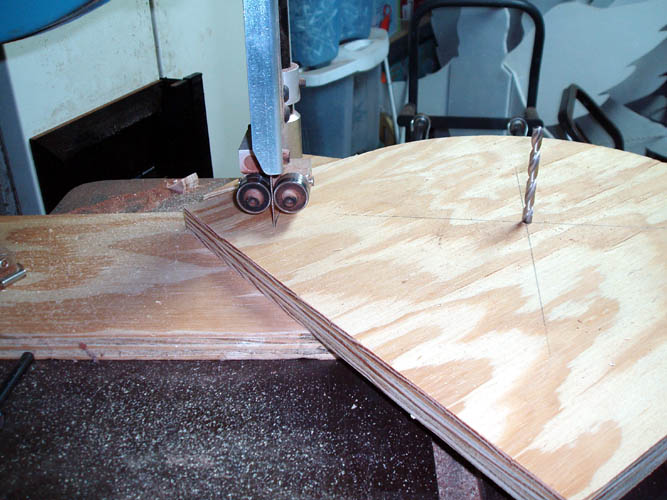
rotate freely around the maple dowel. I then cut a piece of scrap 4x4
square mahogany stock to 8 inches in length for the pedestal for the upper platen
to retain the resonator. I used the band saw with a piece of wood that
had a 1/4 inch diameter hole drilled about 6 1/4 inches from the band saw
blade to pivot the 12 1/2 inch square upper wooden platen for the resonator
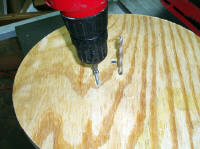
rendering an accurate circle. The parts are held in place with flat
head Phillips wood screws about 1.5 inches in length with the heads
countersunk.
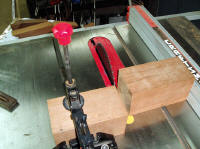
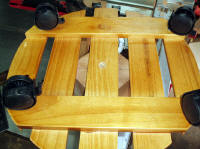
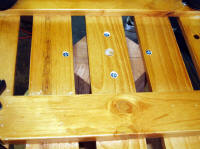
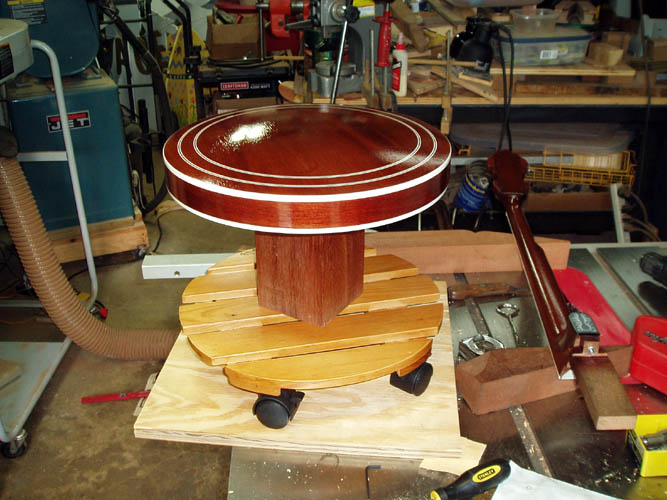
The length of the pedestal can be shortened or lengthened depending on
the height of the table or equipment you plan to place it on top of for
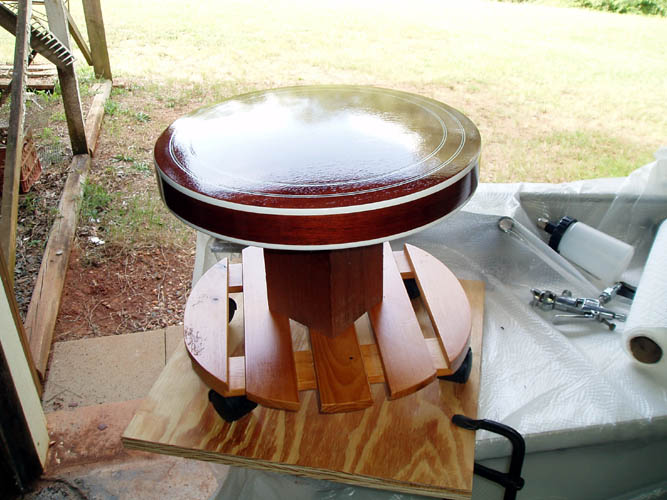
usage. This spraying fixture worked great clamped to the top of my router table and didn't have but 6 bucks cash outlay since I
already had the other materials laying around needing usage anyway. I
held the spray gun the correct distance from the resonator side wall and
rotated the fixture and kept the spray gun in the same parallel orientation
to the resonator outside side wall and rotated the base of the carrousel the
proper speed to get an event coat of lacquer. I then quickly sprayed the back
of the resonator and lay on a good wet coat of the lacquer that was thinned about
50/50 to help fill in the open pores of the mahogany
that wasn't properly filled to begin with.
I plan to spray at least six coats, about 3 coats a day about 2 to 3
hours apart and let dry a week or more and wet sand to level the finish
and go from there. It will probably take another 5 or 6 sets of 3
coats a day to get a good build up of lacquer ready for final wet sanding,
polishing and/or buffing out the finish.
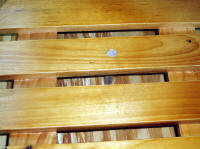
After a few days of curing, I "drop filled"
several places on the peghead, resonator and wood rim that had very low
places that had absorbed the lacquer and well below the coats of lacquer.
I used a small brush and also toothpicks to apply a small drop or two of
lacquer to those areas and will sand them flush with the regular finish with
a small strip of 320 grit free-cut sandpaper prior to water sanding.
I do not plan to add a tremendous amount of lacquer to the wood rim of
which I feel too much finish actually inhibits the wood rim to promulgate
vibrations transferred from the neck, head and tone ring just like too much finish on a guitar top is a bad thing as well even
though the wood rim doesn't vibrate or move air in the same method and
fashion as a guitar top does but it does transfer energy from
the vibrating strings back to
the banjo head helping augment the amplification, timbre and sustain process.
I formulate a PC analogy as: "The wood rim being the "motherboard" which controls all the
pherpherphical components such as the tone ring, neck, strings, head, tension hoop,
bridge, tailpiece, hook & nuts, resonator, etc. to produce the
volume, sustain and timbre one desires!"
The Great Depression Era banjos didn't have the
heavy build up of lacquer on the wood rim as post war banjos do especially
the resonator models since very little of the wood rim is seen anyway and
is really counter productive once the wood rim is sealed. Whether or not
the wood rim is allowed to "breathe" naturally with
the changing levels of humidity in the air or a means of controlling said wood
rim expansion and contraction by synthetic means, I have never ventured
heavily into that area of experimentation and do not have any conclusive
evidence to support or deny such claims. Gibson has changed their
finishing techniques over the decades and I still favor the ole hand stained
finishes such as the sunburst and other finishes mimicking the 17th century
violin finishes.
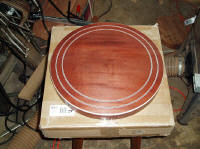
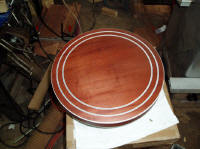
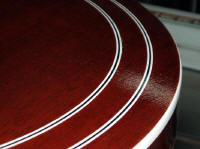
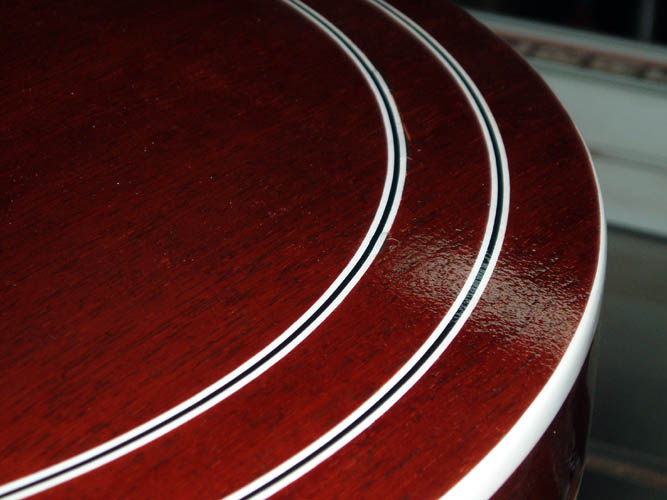
Pix below of drop filled areas on the resonator back adjacent the inner
most white/black/white ring along with dust that has settled on the back as
well of which can be vacuumed or air blow away. Note: No
wet level sanding has been done yet on the resonator and will be the next
step in a few days and will commence with the build up of top coats of
lacquer about three or four coats spaced about three hours apart and will
wet sand at the duration of each three to four sets of top coats applied.
You can see the darker paste wood filler that adhered to open
pores in the mahogany back veneer panel which adds contrast.
WET SANDING
With a good build up of lacquer top coats around nine (9) coats of which
the first six (6) were sprayed on very thin about a 50/50 mix or one to one
of lacquer to thinner ratio even though the manufacturer stated it could be
sprayed on without reducing, however without ideal conditions, the thinned
lacquer was the way to go in my case although
retarder added is more fail safe to reduce the evaporation
rate of the solvents in the lacquer but will increase the drying time. Since I failed to properly fill
the pores of the resonator and neck, the thinned lacquer was necessary
although you don't build up finish as quickly.
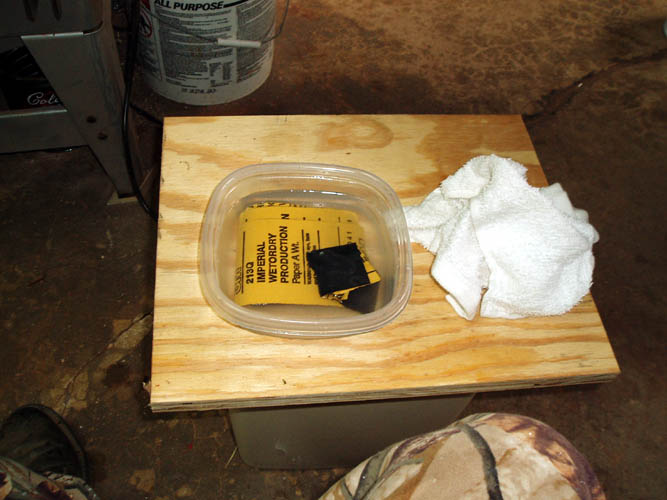
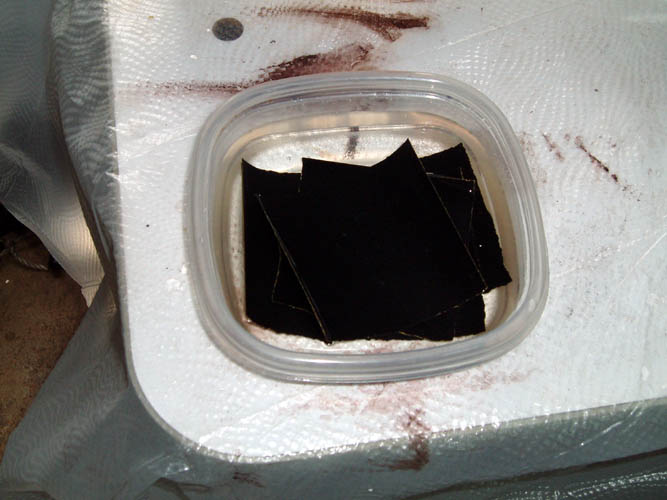
I am using 3M 213Q Imperial wet or dry Production Paper P320 grit available
at Wal-Mart locations, most hardware stores and Automotive centers and allowed the
paper to sit in plain tap water, preferably overnight and a clean cotton
towel to dry the areas wet sanded to check on the progress of the wet
sanding and keep the thin white slurry produced wiped off the parts.
The P320 grit is the European grade designated with the letter P in front of
the grit size. The P320 paper is about the same grit as a 280 USA
grade paper which is more or less for dry sanding only. I had a
good build up of lacquer due to the need since the wood grain pores were not
properly filled, I wanted to cut the top coats down pretty fast and used the
P320 size paper, however under normal circumstances I would have used a 400
grit in the USA or CAMI grading system or started with the P600 or P800
European P-grade wet/dry paper. I believe the European graded paper
has a more uniform grain size and does cut more aggressively.


This first wet sanding is to try and level the build up of top coats of
lacquer to a smooth even finish to remove the bumps, dust fuzz, nubs and orange
peel type finish. It is imperative that you keep the
part being wet sanded coated with plenty of water since this keeps the pores
of the sand paper open and allows the sand paper to cut evenly into the
finish without dragging any of the finish. You can add dish a drop or
two of dish washing
liquid to the water to increase the lubrication factor of the water, but I
never have used an additive although many do and there are products
commercially available for this specific purpose. Dip the paper into
the water often and remove the slurry generated by cutting the lacquer top
coats.
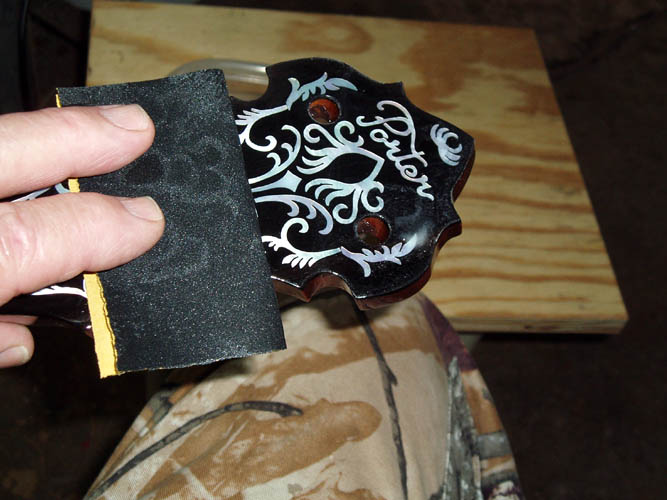
While wet sanding the edges and curves of the peghead and neck, great
caution must be exercised not to sand through the finish into the stain
and/or filled areas which will require touch up which you definitely want to
avoid. It is best not to try and sand the finish down completely level
the first wet sanding time around since it will require four or five more
three or four top coat applications and wet sanding to get a thick enough
finish of top coats of lacquer build up prior to the final polishing and buffing the
parts for a piano type mirror finish.
After wet sanding a small area, immediately dry the area off with the
towel and inspect the finish tilting the part toward a light source to allow
you to properly see the areas that are still below the level of the finish
which will appear as bright shiny spots. To
reiterate, "wet sand with caution"
since you don't want to cut through the finish into the filled and stained
wood. The pix above on the lower left of the back of the peghead shows
the shiny areas that are below the level of the finish and also on the neck
portion next to the hand volute or hand stop you can see the bright shiny
spots that are the pores of the wood that are below the level of the finish
that has been water sanded down. You can also see the edges of the
peghead which I left alone since that is the main area that is the easiest
to sand through into the finish because the lacquer build up is thinner on
the edges and more prone to cutting through into the stained/filled wood.
On the flat portions to be wet sanded, you can use a small block of
wood with radius edges, large flat rubber eraser, piece of cork,
sponge backing or hard rubber pad but I prefer
to use the flat portion of my first three fingers to gently guide the paper
over the areas in a circular motion. I did not cut the finish down to completely level but
after each build up coats of three or more, the finish will be leveled up
more each time and will increase the wet/dry paper size at the end of each
three to six coats of top coat with 400, 600 and 800 USA CAMI grade wet/dry
paper and hopefully will not cut through the finish into the filler
and stain. After the parts were wet sanded, a clean wet cotton towel
was used to remove any remaining slurry and prepare the parts for another
series of top coat applications, however the weather at the moment has too
high humidity and with archery deer hunting season coming in yesterday, I
will apply coats of top lacquer when I can "squeeze" it into my busy work
and hunting schedule.
A good comfortable chair is also required since this is
time consuming and those experienced will wet sand more aggressively than I
am doing on this project due to the fact it has been ten (10) years since
building any kind of instrument and more than 32 years for a banjo.
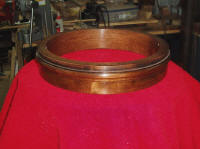
WOOD RIM
While waiting for the neck and resonator finish to cure a while before
wet sanding and laying down several more top coats of lacquer, I decided to
finish up the wood rim finish. As I stated earlier, I do not want a
heavy build up of lacquer on the wood rim and dry sanded the wood rim using
3M 216U Production RN Paper A wt. Open Coat Fre-Cut in grit size P320
available from StewMac and leveled the finish which didn't take very long. I did not wet sand
since I want a satin finish and polished the wood rim with nothing but 0000
steel wool and buffing by hand using a cotton towel without any rubbing
compound or polish. I cut what little finish there was on the top edge
of the wood rim that supports the tone ring "lip" and the side portion that
makes contact with the "skirt" of the tone ring. My nomenclature is
probably not standard describing the tone ring but it should be in the "ball
park". Before going too much further with the wood rim, I will fit the
tone ring and if there is too much build up of finish on the side, I will
sand it down for a proper fit which can vary from loose to tight depending
on what school of thought and your own personal preference biased by what
timbre you desire or "hope" to achieve. Pix below:
NECK AND RESONATOR
After spraying six (6) or more top coats of a 50/50 ratio of lacquer to
thinner over the course of a few days and letting dry about a week, I wet
sanded the neck and resonator with 3M 413Q 600 WetorDry Tri-M-ite Paper A
wt and both parts leveled out very well. A few pixs below:


On the flat portion of the peghead, I used a rectangular shaped eraser as
a backing for the wet sanding and it was the perfect size. I wet
sanded the sides of the peghead with the paper carefully with only the tip
of my forefinger as the backing means. I used a small piece of sponge
as the backing for the paper for the resonator side wall and the back.
I will spray another six (6) coats of 50/50 lacquer to thinner over a two
or three day period and should have enough finish built up for the final wet
sanding with 800 grit Tri-M-ite sanding paper. I will let the finish
cure for a week or two before doing the final wet sanding and polishing,
etc. Since I do not have a time line for this project, time is
not of the essence.
Ole Murphy's Law came out of retirement again and my Lynx spray gun
started throwing "globs" of lacquer out while I was right in
the middle of the first coat or two of the final top coats for the resonator
and had to stop in the middle of spraying the back of the resonator and try
and salvage the mess. The next morning, I scuff sanded the resonator
back with 3M 320 grit free-cut paper and leveled the "globs" of lacquer to
the surface and continued the build up of top coats of lacquer for the
resonator and neck.
The neck looked so good with the final three thinned top coats of the
lacquer it will be hard to make myself wet sand it down with 800 or 1000
grit wetordry paper but I will do it; well maybe not!
BUFFING AND POLISHING
I have reached a cross roads as to which direction to take since
basically I no longer have any serious buffing equipment such as a pedestal
buffer, buffing wheels and the appropriate buffing compounds or adequate
buffing pads for my random orbital variable speed sander/polisher. To
get a factory mirror/glass finish, it is imperative that you buff the finish
after the final wet sanding operation to obtain that "piano" type
mirror finish . I have hand buffed and polished banjo components in
the late 1960s but that requires a tremendous amount of elbow grease and
time and it still takes a back seat to a properly machine buffed and
polished instrument. Since a buffing arbor is a fairly expensive
piece of equipment, especially one large enough to do a guitar or banjo
resonator and the price varies as to the quality, I decided to go on the low
to medium side cost wise and opted for a 3/4 inch diameter shaft buffing
arbor and will use my own motor and home made portable platform to mount it
on. If I were in the Musical Instrument business I would not
hesitate to purchase the
complete buffing arbor offered by StewMac.
By the time the lacquer has dried a few weeks on the neck and resonator,
I should have the buffing arbor, buffing wheels and compound in and test
driven before attempting the buffing and polishing the neck and resonator.
I will take a few pixs along when the buffing arbor arrives and start
putting it together.
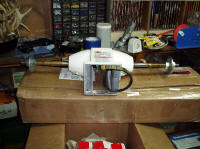
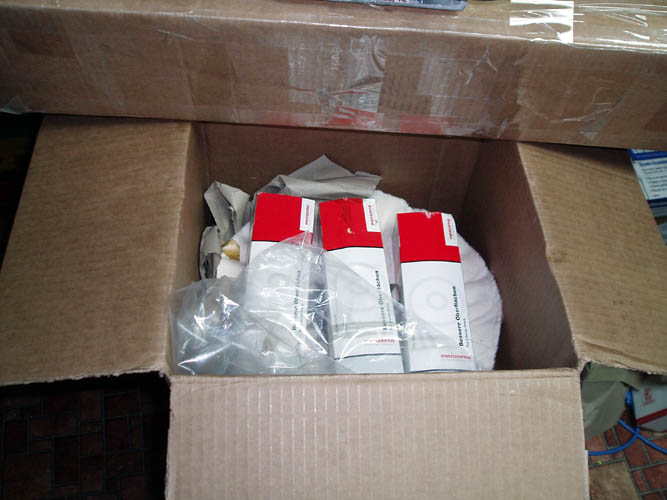
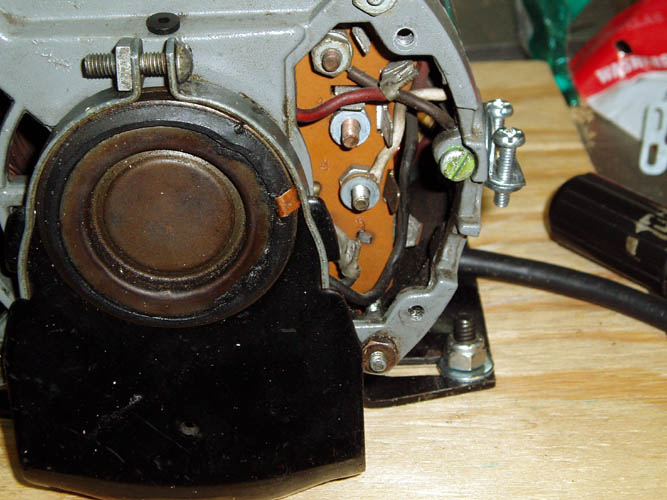
I received a Shop Fox Model W1681 Buffing Assembly (arbor) from an
internet company and I have used the ole saying
"Normally you get what you pay for" and this is a very good
example of it being true for sure! With shipping it was a little over $126 bucks and figured it should do well enough for no more than I plan to
use it; certainly not for any type of continued usage. The shipping
weight was advertised at 30 lbs. and thought it would be adequate, but in
reality the shipping weight was only 14 lbs., therefore the housing for the
shaft had to be light weight and that it is....made out of 3/16 cast
aluminum and the bearings don't look that large either. I also
received some buffing wheels from Stewart MacDonald along with buffing
compounds and they are first class as is most of Stew Mac's products.
Pix below;

The buffing assembly comes with a stepped 3, 2 and 1 inch diameter V
groove pulley and the recommend rpm for the shaft with a 10 or 12 inch
buffing wheel is somewhere between 800 to 1000 rpm. I checked the only
spare motor suitable and it was 3HP but running at 3450 rpm and 115/230
volts single phase and will have to round up something in 1725 rpm since I
can't get a small enough pulley on the motor shaft due to it's size...the
motor is a Baldor on a metal chop saw which has never seen any usage as it
was a spare or back-up when I manufactured metal climbing hunter's tree
stands. The Baldor motor is certainly old school and weights a "ton"
as compared to the new lighter motors. I could use a couple step
pulleys to get the rpm correct but I don't want to have a Rube Goldberg
looking portable rig that I plan to store in a corner or on the basement
shop wall, etc.
Hopefully, I have misjudged the buffing assembly even though it did not
meet my initial expectations; guess I like the more heavier industrial stuff
better. If the shaft runs true without a lot of vibration, then it
will serve the purpose.
I will put a few feelers out and try and find a used 1/2 hp 1725 rpm
motor for 115VAC.
I have the banjo project on hold since the weather has gotten cooler and
smitten by the archery hunting bug and with a couple deer already tagged,
plan to fill the freezer between now and the first of the year using archery
equipment, .50 cal. muzzle loader, .44 cal. Mag. pistol and 270 cal.
rifle.
Bill aka Mickey Porter 10-10-10.
With a full moon last night 10-22-10, I decided to forgo deer hunting
today since deer normally feed all night and then come out again in the
middle of the day and will be a good time to get the buffing assembly (arbor) mounted onto a
base board
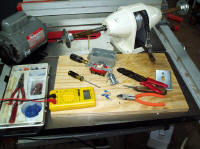
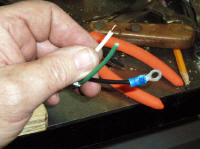
and get it operational. I purchased a used 1/2 hp 1725 rpm motor off
EBay and my friend Joe Estridge at Estridge Lock and Key, now deceased gave
me some electrical parts, power cord, switch, switch housing, etc. and only
had to purchase a small pulley for the motor and a metal cover to match the
switch box housing. Pixs below:
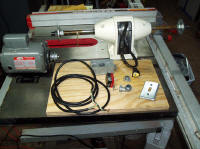
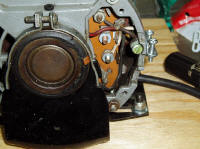

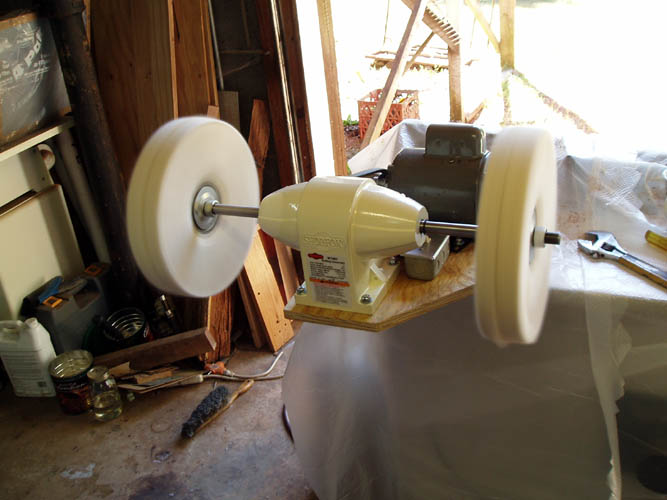
After getting the parts mounted onto a 3/4 inch thick piece of plywood as
a base plate, I was
surprised at how smooth it ran. The 1/2 hp motor had a little
vibration to it but the buffing arbor ran very true. I positioned the
motor bracket base holes in the plywood to allow some adjustment for the
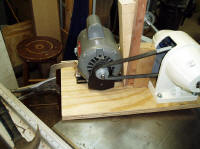
belt. It was difficult to position the motor with the correct
belt tension due to the 1/2 inch width V belt being very stiff and was
coiled up around the buffing arbor pulley and did not want to relinquish the
memory that had taken place since manufacture, package, storage and shipping. I used some
"horse engineering" by
clamping the motor down with a couple C clamps and used a couple blocks of
wood and a tapered wedge and drove the wedge into position to get tension onto the belt and marked
and base plate and drilled the bolt
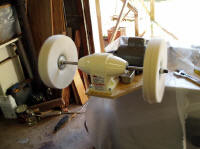
holes. After breaking in the 12 inch diameter StewMac
buffing
wheels, I looked as if I worked in a cotton mill with all the lent, etc. from
the new buffing wheels all over my person and the floor. I used a 1.5
inch diameter motor pulley and might have to go to a 2 inch diameter pulley
to increase the speed a little. I loaded the left buffing wheels with
Extra Fine and the right with Fine
Menzerna compound since I plan to wet sand the neck and resonator with
1000 grit wetordry paper. It has been one month since I applied the
final top coats of lacquer and I believe the lacquer shrinkage has maxed out
and will final wet sand, buff and polish the neck and resonator very soon.
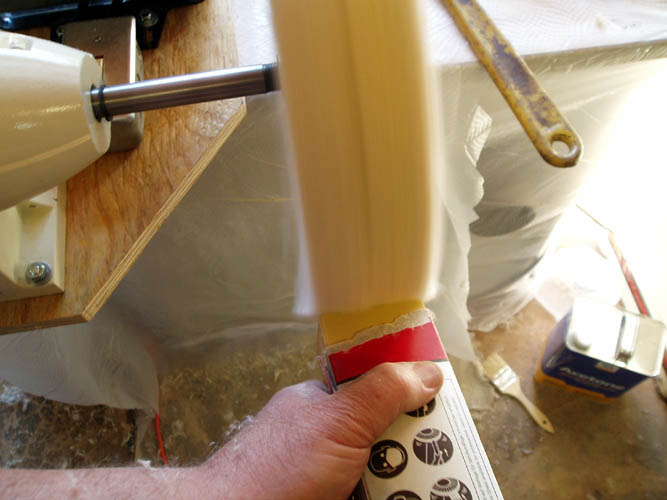
On 10-24-10, I completed the final wet sanding for the neck and resonator
using 1000 grit wetordry 3M paper. My favorite auto parts store did
not have any 800 grit in stock so it took a little longer with the 1000 grit
due to the shrinkage on the resonator since I applied a few final top coats
heavier than normal. Below a few pixs with the buffing arbor in usage:


A few observations on the "jerry rigged" buffing arbor; I
believe the arbor shaft speed is too slow and also the 1/2 hp motor is under
powered using the 12 inch diameter two inch width cotton buffing wheels;
using two (2) that are 1 inch in width. It was difficult to get the
Menzerna compound to properly melt onto the buffing wheel as it should
because of the lower surface feet per minute (SFPM) of the buffing wheel and
the 1/2 hp motor would slow down very quickly if much pressure was applied
to the wheel from the part being buffed and/or buffing compound. I
will change the 1.5 inch diameter motor pulley to 2 inches and see if that
helps any and be on the lookout for at least a 1HP 1725 rpm 115VAC motor.
It could very well be the used motor I am using is also on its last leg
too....grin on that one!
The pix to the right is a comparison of the neck that was wet sanded and
no buffing has taken place yet. I believe the finish is going to come
out fine even with all the set-backs and mishaps that has occurred during
the finishing stage of this banjo and no ones fault but my own due to my
prior experience remaining dormant for decades.
After buffing the neck, I will start getting the neck ready for
attachment to the pot assembly which will
include cleaning up the fingerboard, installing the tuners, 5th string peg
and re-checking the fret work, etc. and cutting/filing the nut string slots
and getting the proper action. This banjo
project will probably be on the "back
burner" since it is getting close to our Central North
Carolina section annual deer rut and plan to be out and about a couple weeks
next month filling my freezers.
NOTE: On 10-25-10 I replaced the 1.5 inch diameter motor
pulley to 2 inches diameter and the increased SFPM worked like
a champ. It was much easier to apply the buffing compounds to the
wheels and the motor did not bog down when applying pressure from the
buffing compound applications and the actual buffing of the parts. It
didn't take but a minute or two to complete the buffing out of the neck and
resonator and very pleased with the results. I did change to the
medium and fine Menzerna compounds instead of the Extra fine and Fine and
both parts buffed out to a mirror finish! Surface feet per minute is
figured by dividing the wheel diameter by a factor of 4 and then multiplying
that by the shaft revolutions per minute (rpm). Many commercial
finishing outfits recommend a surface feet per minute (SFPM) between 3500
and 7500 depending on the material you are polishing and buffing. This
motor to arbor ratio of 2/3 gave me 1150 arbor rpm which equated to 3450
SFPM for the 12 inch diameter buffing wheels.
Web page updated by Bill aka Mickey Porter on 08-15-19.
LEAVING ON A
SPIRITUAL NOTE
If you do not know Jesus Christ as your Lord and Savior, please take this
moment to accept him by Faith into your Life, whereby Salvation will be
attained.
Ephesians 2:8 - 2:9 8 For by grace are ye saved through faith;
and that not of yourselves: [it is] the gift of God: 9 Not of works, lest
any man should boast.
Hebrews 11:1 “Now faith is the substance of things hoped for, the
evidence of things not seen.”
Romans 10:17 “So then faith cometh by hearing, and hearing by the
word of God.”
Open this
link about faith in the King James Bible.
Romans 10:9 “That if thou shalt confess with thy mouth the Lord
Jesus, and shalt believe in thine heart that God hath raised him from the
dead, thou shalt be saved.”
Open this
link of Bible Verses About Salvation, King
James Version Bible (KJV).
Hebrews 4:12 “For the word of God is quick, and powerful, and
sharper than any two edged sword, piercing even to the dividing asunder of
soul and spirit, and of the joints and marrow, and is a discerner of the
thoughts and intents of the heart.”
Romans 6:23 “For the wages of sin is death; but the gift of God is
eternal life through Jesus Christ our Lord.”
Romans 3:23 “For all have sinned, and come short of the glory of
God;”
Micah 6:8 “He hath shewed thee, O man, what is good; and what doth
the LORD require of thee, but to do justly, and to love mercy, and to walk
humbly with thy God?”
Philippians 4:13 "I can do all things through Christ which
strengtheneth me."
PREVIOUS PAGE
NEXT PAGE
BANJO CONSTRUCTION HOME PAGE


