YARD/HOME PROJECTS AND REPAIRS 2020This is
a catch all page for yard projects and the maintenance of yard equipment
such as the lawn tractor, Troy-bilt tiller, home generator, weed trimmer, leaf blower
and furnace and all home maintenance whether corrective or preventative!
TOMATO PATCH
A couple weeks ago around March 5th; guessing at the date, I fired up the
antiquated Troy-Bilt tiller and tilled the soil for the tomato patch adding
some 10-10-10 fertilizer to help jump start the tomatoes. I do no plan
to place any tomato plants in the soil until around the second week in April.


The weather prognosticators are forecasting rain for the next five (5) days or
more and will probably "churn" the ground up after the rain.
The same day I tilled the tomato patch, I aerated the front and back yard
and spread fertilizer in the front yard and was on time since we got
several decent rains since then.
YARD SWING MAINTENANCE
The yard swing maintenance could go under my
woodworking page,
but decided to add it here.
Each year when cold weather hits, I place the
yard swing
in the basement shop and let it fully dry out and come Spring will add stain
and/or marine varnish to it.
A month or more ago, I was looking the swing over pretty good and noticed
that two or three of the vertical back members were a little spongy feeling
at the base where the tenon terminate into the lower cross member mortise.
The marine varnish was still in tack and water apparently had gotten into the
mortise and wicked its way into the vertical member's lower tenon.
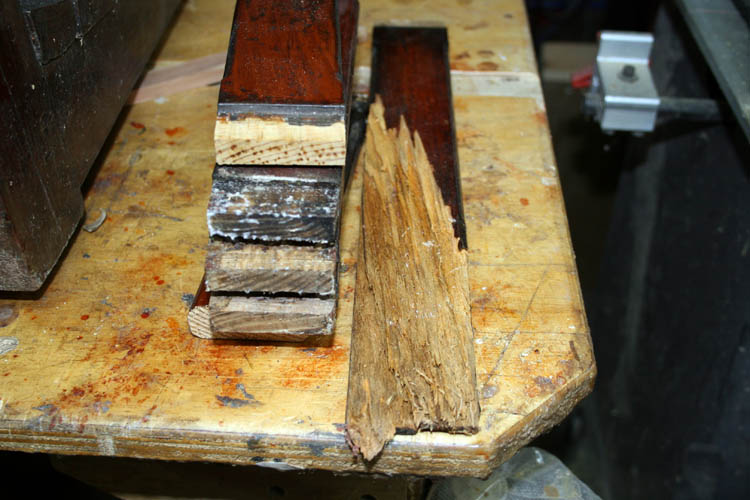
The pine wood was treated and ripped from bull nose
decking boards. One thing is for certain, the current wood treatment
process definitely does not last like the treated wood of thirty (30) or more years
ago and I am sure due to all the current regulations for the usage of
volatile products.
I decided to replace all the vertical back support members and add 1/4
inch overhang on each side of the vertical member, whereas the original
plans had no overhang and this allowed moisture to accumulate in the mortise
slot since wood expands and contracts.
The vertical back members has a tenon at both ends and they were
installed in the upper and lower horizontal support member and once in
place, the assembly was glued into the side
frame members and dowels installed. The only way to get the vertical back
support members out was to saw
them in two and then remove the tenons from the mortise slots. To get the new back support members into the mortise
slots, I had to open up the outside of the lower mortises and/or could have
done the upper mortise slots.
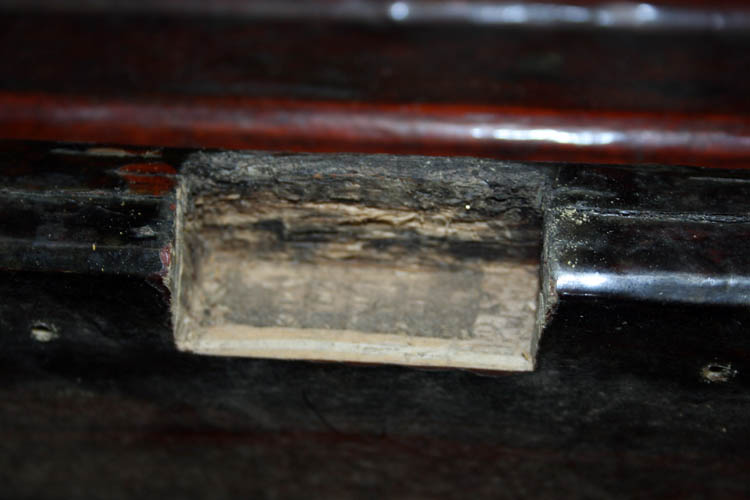
I used a dowel saw, chisel and mallet to remove the outer portion of the
mortise.
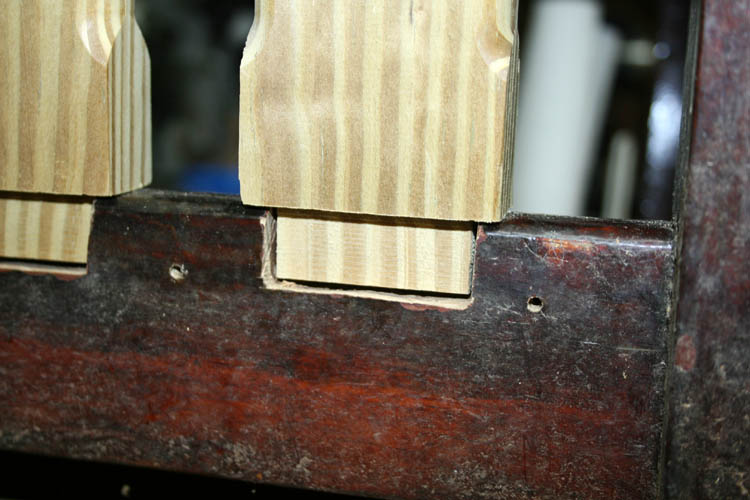
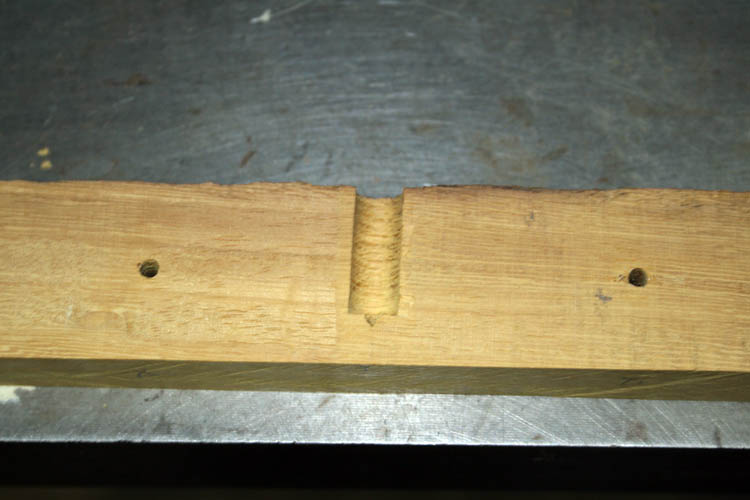
As depicted above, the vertical back support members now have the 1/4 inch
overhang. I also provided a means to allow any accumulated water in
the mortise slot to escape by drilling a hole into the horizontal member
added to keep the tenons in place. I had a piece of unallocated teak
wood strip which I only had to cut to the proper length and sand a slight
taper on the ends since it was a little thicker than needed and didn't want
to run it through the planer.
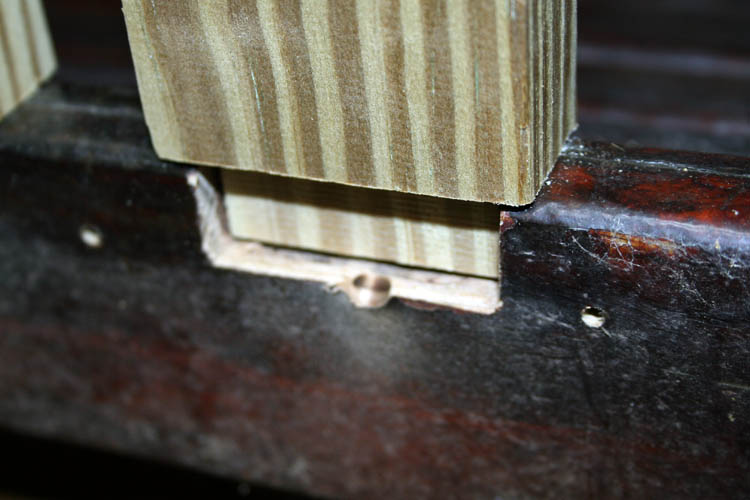
The vertical back slats were sealed/stained and then placed into the
upper and lower mortise slots.
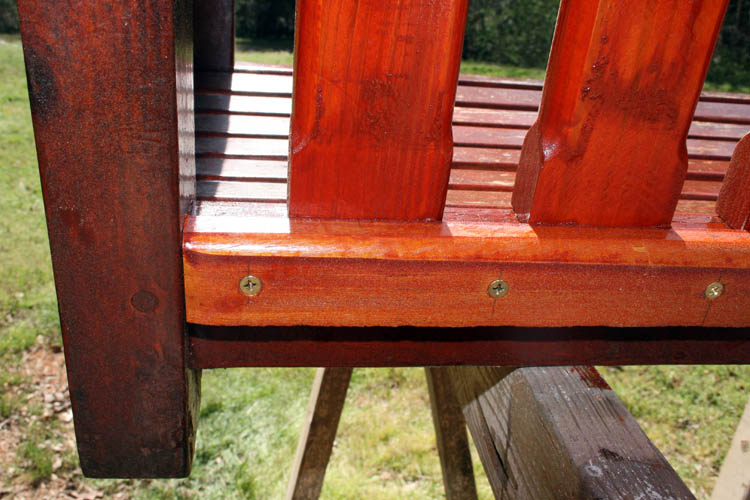
The stained teak wood covered the exposed mortise slots and offers some
protection from rain.

I will spray another coat of stain onto the vertical back rest members
and clean the entire swing with some mineral spirits and touch up areas as
needed.
Tomorrow, the Lord willing of course, I plan to change the oil, filter
and spark plugs in the John Deer Lawn Tractor and sharpen the blades since
grass cutting season is here.
Web page created by Bill aka Mickey Porter on 03-20-2020.
UPDATE 03-24-2020
It has drizzled rain since the 20th and haven't had a chance to finish
refurbishing the yard swing.
UPDATE 03-27-2020
Yesterday was a dry day and turned off beautiful in the mid to late
afternoon and got a chance to spray a good coat of redwood stain on the
swing.

I used a cedar oil type based
stain TWP 100 from
SealandProtect.com and used my
spray gun to apply
the sealant. The finish is curing out as I type and will probably take
several days to properly cure before I hang it back up in the front yard.
REPAIRS AND MAINTENANCE NEEDED
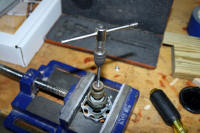
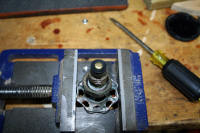
While waiting for the rain to stop, I checked our small home emergency generator
and it would fire with one pull of the starter cord, however it would run
only a second or two. Normally, this would indicate a gummed up
carburetor since it apparently wasn't getting enough fuel and/or a clogged
up spark arrestor in the muffler system. I removed the carburetor and
sprayed cleaner it in and put some fresh gas in the tank, but it still would
not run, yet would crank on the first pull or two. I cleaned the spark
arrestor with the same results.
I didn't want to be without an emergency generator, therefore decided to
take it to the pros and left it with Pinkston's Inc. here in Wadesboro and
the technician who helped me unload the generator, stated it was probably the carburetor. When I pick up
the repaired generator, I will find out exactly what the problem was.
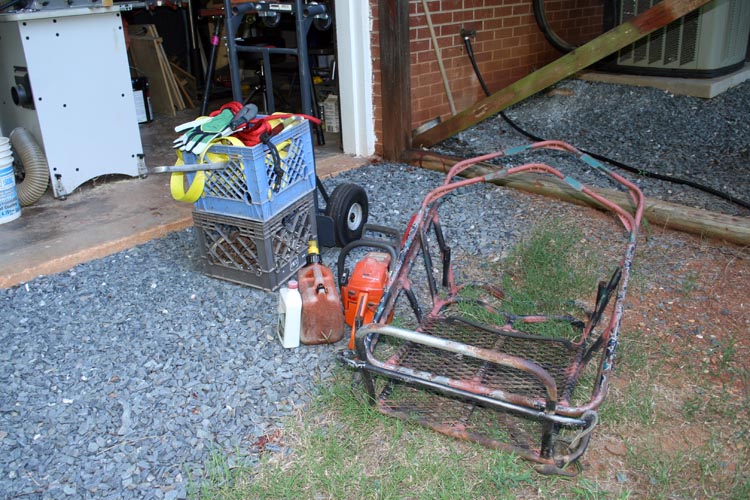
I used my deer hanging tree nick named
Tom Dooley aka Tom Dula to winch the
generator into the air and drove the truck bed underneath it to load it
because I don't have any ramps and no one close by to assist. I probably could have used the slopping
area in the side/back yard, but due to the wet grass/ground, the ole Ford
Ranger probably would not back up the incline, whereas there is no weight in
the rear of the truck for adequate traction and it will spin on wet
grass........grin if you must!
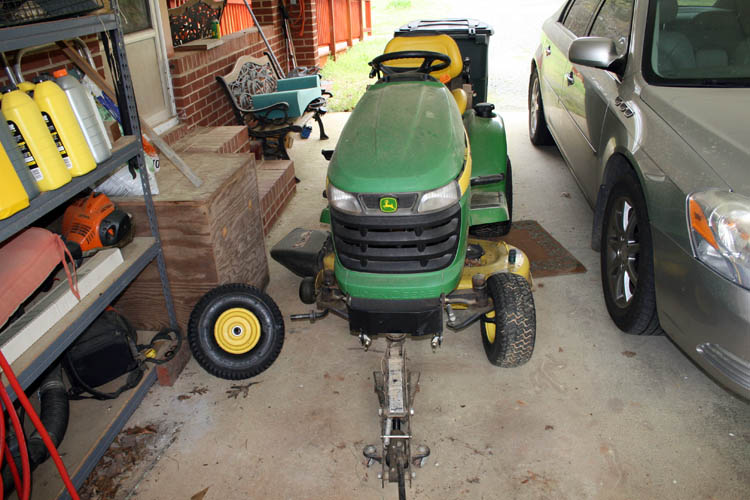
LAWN TRACTOR MAINTENANCE
The John Deer lawn tractor is due for yearly routine maintenance, however
it has a slow air leak in the right front tire. I inspected the tire
and could not detect any foreign object in the tire and took the tire
to Danny Bowers, aka Moore's Garage, whereas Danny stated we had two options
since the tire was dry rotted: 1) Install a tube which he didn't
recommend and 2) Replace the tire. I had him to order a replacement
tire.
Web page updated by Bill aka Mickey Porter on 03-24-2020.
SERVICED LAWN TRACTOR - 03-26-2020

My deer hanging tree nick named
Tom Dooley aka Tom Dula gets a workout even though our big game
hunting season ended around the 1st of this year (2020).
I removed and sharpened the two blades, changed the engine oil and
filter, greased the fittings and changed out the two spark plugs.
Air was added to three of the tires and reduced the air pressure on the
new tire that Danny Bowers installed on the tire hub. I forgot the air
filter and will check/clean or replace tomorrow.
The lawn tractor is now ready for another grass cutting season, the Lord
willing of course!
SERVICED STIHL FS 70RC WEED TRIMMER
I changed the spark plug in the Stihl FS 70RC weed trimmer and the air
filter. I used air pressure to blow out any debris from the weed
trimmer motor housing, etc. and was having trouble removing and installing the gas
cap. That type of gas cap has always been a
"dawg" to install and remove and went on line to see if there
was an alternate type of gas lever type lock cap to use.
I found on the Stihl website there was a recall issued for the gas cap
for the FS 70RC weed trimmer and my serial number was within the recall.
I contacted Stihl via their website contact form advising them that my weed
trimmer was in the recall. I also called our local dealer Pinkston's
Inc. who wasn't aware of a recall and he called the factory and ascertained
there was a recall. He said to bring the trimmer and they would
replace the gas cap at no charge and file a warranty claim.

NOTE: I took the above weed trimmer to our Stihl dealer
Pinkston's Inc., here in Wadesboro and they replaced the gas cap free of
charge!
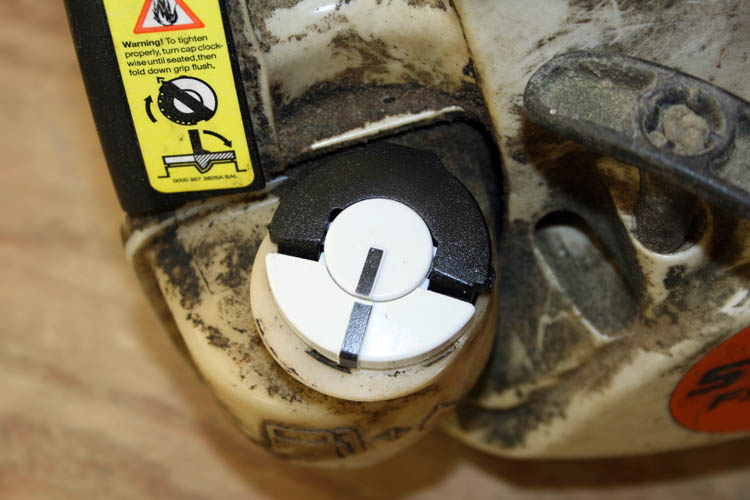
Before next usage, I plan to use Mineral Spirits and clean the entire
housing, gas tank etc. of the gunk buildup.

Looks much better now.
MORE MAINTENANCE AHEAD
I have to change the oil, filter, spark plug and air filter in the
portable
generator when I get it back from Pinkston's Inc. and also
change the spark plug and air filter for
the Husqvarna back pack leaf blower.
Then it will be the same for the Husqvarna
chain saw........grin if you must!
I also have a couple wood working
projects to do!
MURPHY'S LAW NEVER SLEEPS
As of 04-13-2020, I am still waiting to hear from Pinkston's Inc. to pick
up the portable generator needing repairs.
I do not want to be the prophet of doom, but I had a feeling I would need
the generator before it got repaired and this morning around 6:13 A.M. while
reading God's Holy Word, the power went off and as of 4:13 P.M. it is still
off. I guess you could say, This was
"The Fulfillment
of Prophecy of Expectations" aka
self-fulfilling prophecy!
However, I went to Lowe's in Rockingham, NC this morning in hopes they
would have generators in stock and glad they did. I purchased one
similar to the current one I have (in the shop for repairs) made by
Craftsman and has a 306CC Briggs and Stratton OHV engine.
I looked on the box and the 240VAC 30A receptacle looked like the 4 prong
twist lock plug
that I have on the power cord to the 200 amp main power panel for the older
model Craftsman portable generator which I believe is 7.8 HP.
After getting the unit home, the 4 prong twist lock plug on my generator power cord was 20A and all
the supply houses are closed for Easter Monday. I surveyed the scene
and figured I could modify the upper ground prong by grinding down the
right angle twist locking tab which was orientated different from the 30A receptacle. To
make a long story short, with the aid of my Dremel tool, small grinding
rock and using the generator for 120VAC power, the ground prong was modified
enough to fit the 30 amp generator receptacle.
Hopefully, the 4 prong 20 amp plug will still work with the other generator
when
I get it back.
The projected power outage is to last sometime around 6:30 P.M., and I didn't
want to take a chance on loosing anything in two refrigerators, whereas the
chest freezer will remain frozen for a good while without power if you don't
open the lid.
The little 5000 watt portable generator is running everything in our home
except the 5K watt hot water heater and I don't plan to turn the stove oven on
either which is wired for 50 amps. Also, I don't plan on using the
clothes dryer which has a 30 amp breaker for it as well.

I just checked the incoming power at around 5:00 P.M. and it was on and will wait a
little while before I go back on the main power line.
This generator has a fuel tank of 8.5 gallons.
The 200 amp service panel feeds one 100 amp sub-panel located inside the home,
one sub-panel for my basement woodworking shop, outside cooling unit and a
couple GFCI receptacles which are not currently being used and the
generator receptacle. All have breakers in the 200 amp service panel
and main breakers in the two sub-panels and the ac unit also has a
disconnect box at the unit.
I have to manually disconnect power to the main incoming line by flipping
the 200 amp main breaker to the off position.
NOTE: Later, I installed a generator interlock to prevent
the danger of back feeding the main line.
UPDATES: I am glad I didn't get any tomato plants into the
ground yet, since it was very cold this morning being 37 degrees per the
weather prognosticators.
Also, yesterday I stopped by City Electrical Supply here in Wadesboro and
purchased another 20 amp 4 prong twist lock plug, 30 amp 4 prong twist lock
plug, 30 amp 4 prong twist lock female connector and 4 feet of 10
gauge 4 wire heavy insulated generator cord. I replaced the modified 20 amp
plug with the 30 amp 4 prong twist lock plug and made an adapter cable for
the older model Craftsman generator where I can use my current generator
cord for both generators. I don't think I will need two generators
running at the same time. Hopefully, I will get the repaired generator
back from Pinkston's Inc. here in Wadesboro, NC, but with all the Hustler
zero turn machines needing service in their back storage lot, it will be a
very long time.

CHANGED OIL IN THE 5K WATT GENERATOR
I changed oil in the Briggs and Stratton 306CC engine per manufacturers
recommendation after initial usage. I also pulled the spark plug since
the manual had a Sears reference number, of which I could ascertain the
actual spark plug. The spark plug is a Torch
F6TC and ordered a couple on EBay.
I will find out what brand oil filter to use and I expect it will be the
same for the Craftsman 7.8HP generator that is currently in the repair shop.
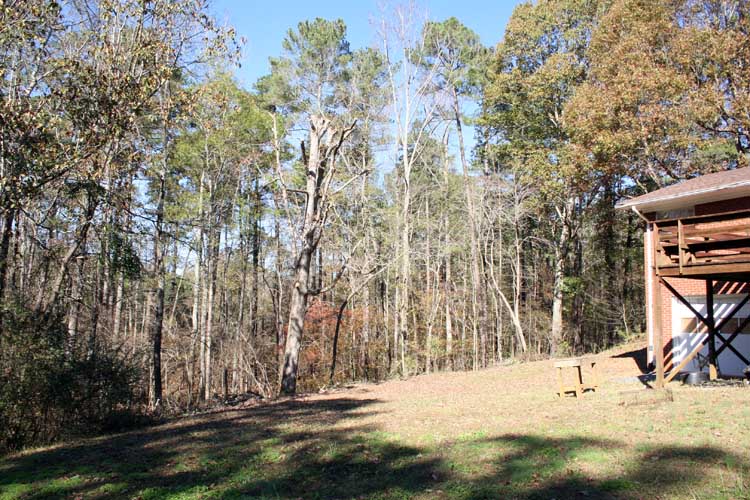
WHITE OAK TREE NEEDS CUTTING BACK
The white oak tree I am referencing, I nicknamed Tom Dooley aka Dula.
I have used the tree to hang my deer for skinning and quartering up and to
lift the lawn tractor for routine service.
When we purchased our home over thirty (30) years ago, the tree was
leaning some then if I am not mistaken.
I recently noticed the leaning of the tree which seems to have increased
over the decades and decided it was time to have it cut back in the event it
did fall, of which it is tall enough to land onto our home.
I called a couple professional tree arborists, but with the recent storm
damage here in southern NC and South Carolina, they are booked way in
advance. One of them hasn't called back that I talked to and earlier
send pixs of the tree in question.
In the past, I would attempt to do the tree trimming and/or
removal
myself using tree
climbing hooks, safety belt and harness, but the date on my birth
certificate and common sense alerts me to put Safety first.
I will do a short story on the tree trimming when it happens and below
are pixs of the tree:


NOTE: I contacted three (3) tree service companies and
Eddie's Tree
Removal and Lawn Service here in Wadesboro, NC agreed to cut the tree
back with a schedule date of November 9, 2020. I will probably do a
separate short story on the tree trimming.
NOTE: Eddie came by our home on November 8, 2020 and advised
he had some pressing issues that came up and we rescheduled the tree service
for November 17, 2020.
Web page updated by Bill aka Mickey Porter on 10-26-2020 and 11-21-2020
WHITE OAK TREE TRIMMED WAY BACK

Eddie Maye and his crew showed up Tuesday, November 17, 2020 at
approximately 12:58 PM and cut the tree back to my satisfaction.
Open this hyperlink for the short story:
Eddie's Tree
Removal
Web page updated by Bill aka Mickey Porter on 11-19-2020,
DANDELIONS
After taking the above pixs, I dug about four (4) gallons of dandelions
from the yard too!
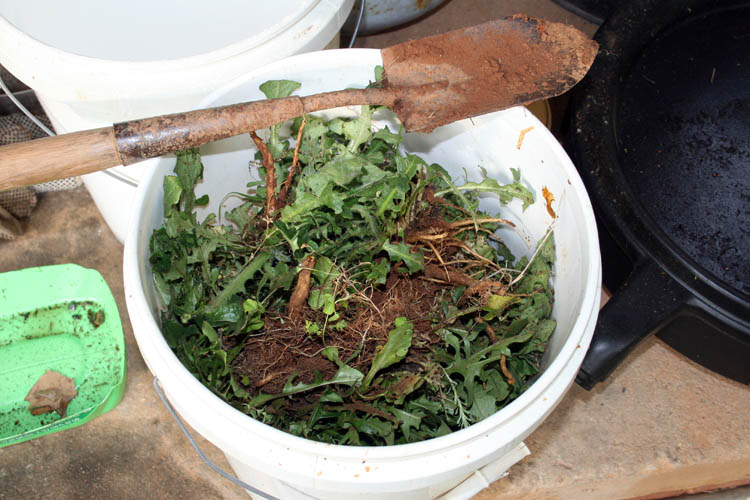
The ole trappers shovel comes in handy for getting to the
"root of the problem", no pun
intended!
TOMATO PLANTS IN THE GROUND
I made a trip to the Hamlet Hardware Store in Hamlet, NC on 04-29-20 and
purchases some tomato plants and got them in the ground the next day, but
not sure of the exact date.
I made another trip to purchase some of their larger tomato plants on
05-02-20 and got them planted on 05-04-20 and we had a gulley wash aka frog
strangler rain on the early morning of 05-05-20 and the plants got a good
jump start for sure.
The weather prophets are forecasting a low of around 37 degrees here on
Saturday morning and the plants should survive that low temp. The past
few days have been gorgeous for sure!

There is probably too much shade for this tomato patch, but hopefully
will produce some good tomatoes. Most of the larger tomato plants have
blooms on them and two or three plants have small tomatoes on them already.
Only a couple of the larger plants are slicing tomatoes with the balance
snacking and/or salad tomatoes.

TOMATO PLANTS UPDATE
Seems like forever it has rained since the tomato plants were placed in
the ground and yesterday and today so far, has been rain free.

All eight (8) of the larger tomato plants have tomatoes on them.
Six of the eight are small aka salad tomatoes and two plants are larger
slicing tomatoes. The smaller tomato plants are coming along, but a
few I believe has had too much water, especially on the lower end of the
tomato patch, but hopefully they will make it.
Web page updated by Bill aka Mickey Porter on 06-01-2020.
PORTABLE GENERATOR UPDATE
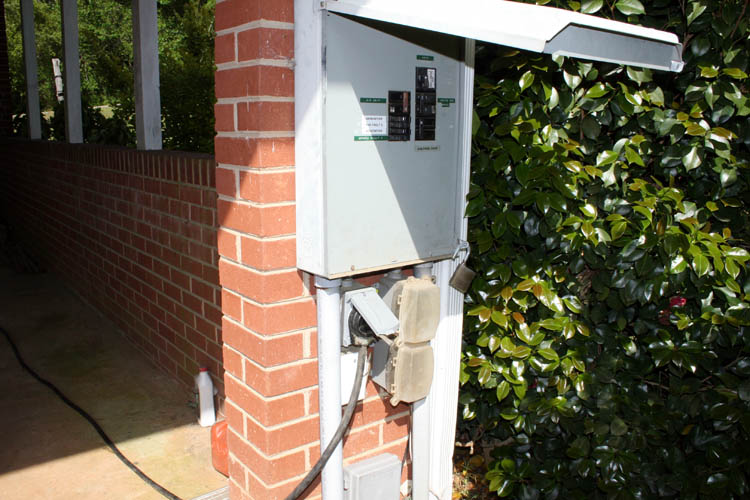
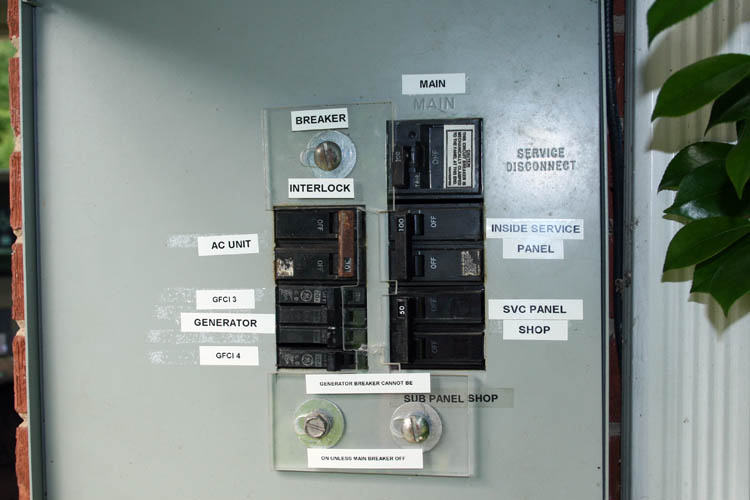
I finished up today labeling the Midwest 200 amp service panel, of which
I earlier changed out the generator receptacle to a Reliance PB30 which is
per code for the 5K watt generator and made a generator lockout plate to
prevent back feeding into the main incoming line.
I had my Sister SusieQ of Reidsville, NC send me a pix of the receptacle
their electrician installed and also the breaker interlock used for their
panel. A commercial breaker interlock will only work on our service
panel when the
generator is connected to the top left breaker position below the main
service disconnect switch and had to build one to fit my box since I didn't
want to change the breaker positions.
You cannot move the generator breaker to the on position until you move
the main 200 amp breaker to the off position, whereby you can slide the
breaker interlock to the right allowing the generator breaker to be moved
to the on position. I made the breaker interlock from 1/4 inch thick
Plexiglas. I can also use GFCI # 4 anytime as needed which feeds power
to the weatherproof 20 amp receptacles mounted to the right and above the
PB30 generator receptacle which I normally used for my smoker, etc.
I believe my internal gyroscope aka plumb level is off a tad since I had
difficulty getting the labels orientated in a good horizontal
position.......grin if you must! Of course the power panel outside
cover was low and you had to lower your head....another grin is in order.

Above is an Alliance PB30 receptacle that meets code....Two (2) GFCI
weather proof receptacle boxes were in the way, but had enough room to
squeeze the PB30 in, however the down feed tubing wasn't parallel with
another feeder pipe; eye appeal only.
I removed the other generator receptacle that didn't meet code because
the mating plug from the generator had exposed prongs and also the GFCI
receptacle box that wasn't being used.
Today, I got our 4200 watt portable generator back from the repair
shop, Pinkston's Inc. and the trouble was a bad oil switch and the total bill was $ 72.56 and
very pleased with their service. The generator fired and ran on the
first pull of the starter cord!
NOTE: I changed the oil, oil filter and spark plug on
05-12-2020.
I am thinking about using the 4200 watt generator to power my external
cooling unit only when there is a power failure in hot weather.
The 5K watt generator will be used to power necessary house appliances with
exceptions noted earlier. I will
need to check the code requirements and see if this is feasible or not and
check the start up amperage of the cooling unit compressor versus the
amperage when it is running.
Web page updated by Bill aka Mickey Porter on 03-26-2020, 03-27-2020,
04-13-2020, 04-16-2020, 04-18-2020, 04-21-2020, 04-29-2020,
05-05-20 and 05-12-2020 and annotated at other place through out this page.
STRAWED THE TOMATO PLANTS
A couple days ago, I placed some newspapers around the larger tomato
plants and put a good layer of rye straw around them to help retain moisture
and the newspaper will help keep the weeds down; at least that is goal.
I stepped on a couple of the smaller tomato plants and was as graceful as
"a bull in a china shop"....................grin
if you must!

The past week has been cold in the mornings, but we didn't have any frost
due to the high wind and the temperature didn't dip below 37 degrees F.

The salad aka cherry tomatoes are growing on several of the larger plants
with the larger plants blooming real well.
Web page updated by Bill aka Mickey Porter on 05-12-2020.
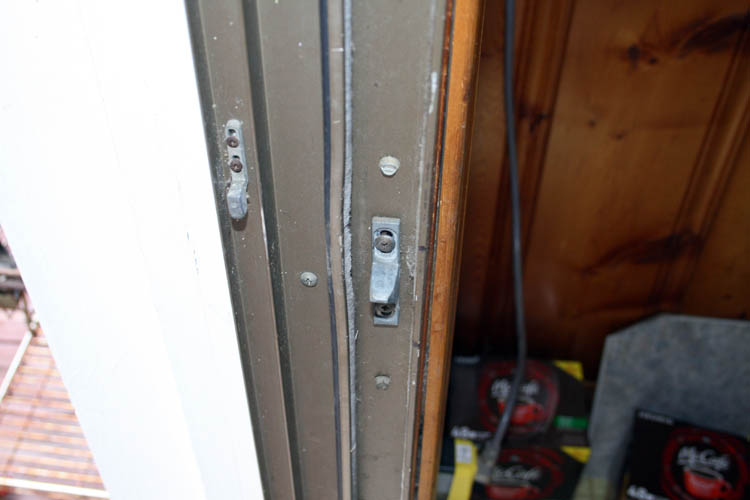
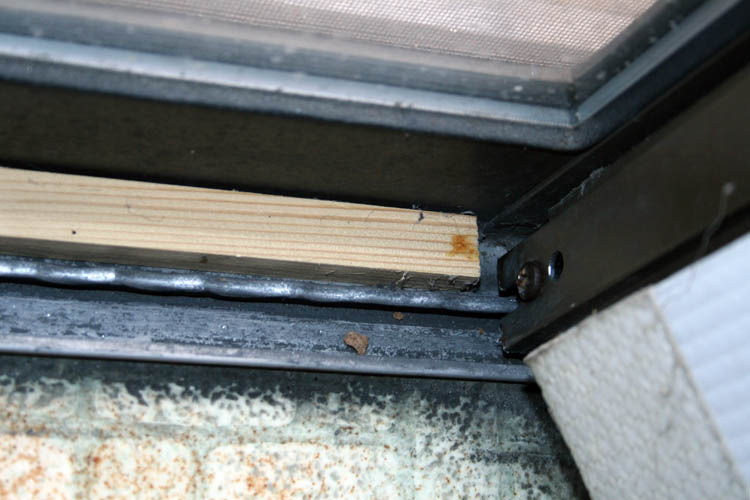
SLIDING GLASS DOOR REPAIRS
The sliding glass door to the deck has been very hard to open and close
for a long time and noticed the aluminum track the door slides on was badly worn with
several divots aka dents in them apparently from the door steel track wheels.
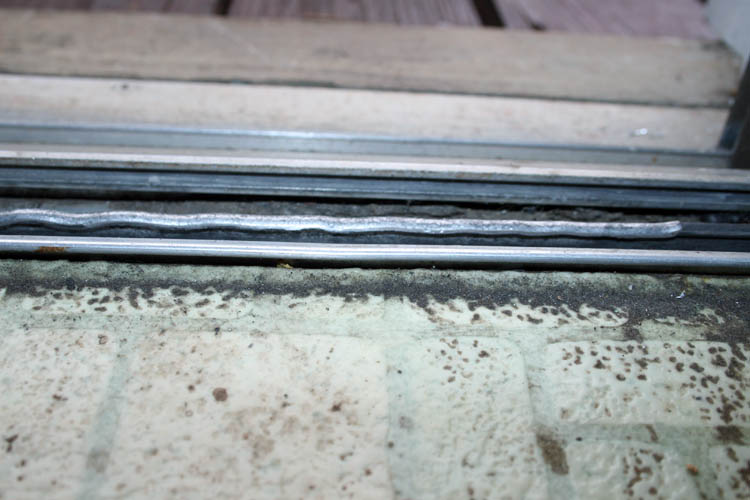
You can see how much the aluminum track rail is worn down by comparing the rail at
the extreme right in the pix where the door roller wheel does not make
contact.
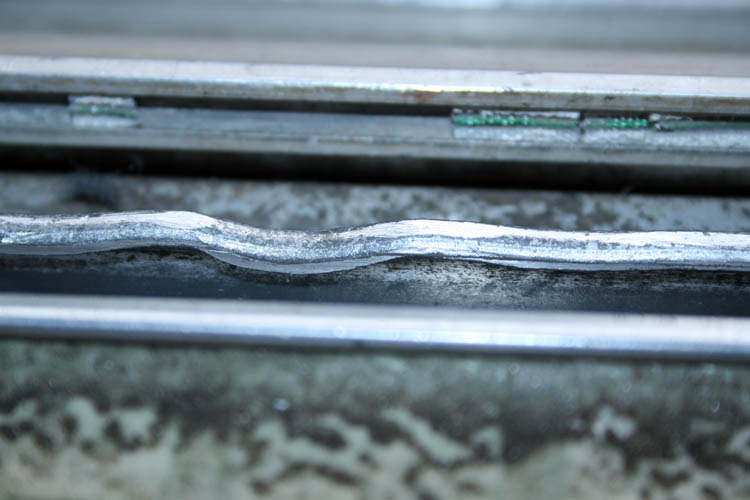
Above is a close up pix of the door rail which shows the serious divots
worn into the rail reminiscent of a miniature roller coaster.
I went on line and watched half a dozen YouTube videos on replacing the
rollers on the bottom of the door and also the repair of the bottom
aluminum track the door rollers rides on.
The part I needed was hyperlinked in one of the videos I watched and went
on line and ordered the part at this link:
https://www.dkhardware.com/8-stainless-steel-small-patio-door-sill-cover-6701a8-product-13764.html
In case the door roller assembly was worn out and needed to be replaced,
I took the door out of the track and got it onto the deck picnic table.
There are hundreds of different roller assemblies and you have to
carefully measure the one that is in your door and do a visual comparison
also. Removing the door from the track is a two man job, because the door is very, very heavy and
must weight 50 pounds or more, plus is awkward to handle.
I checked the rollers and it was found they were out of adjustment and
the rollers were lowered out of the roller housing assembly by turning a
Phillips head screw clockwise. I lubed the roller wheel axles with some
Remington oil which has Teflon in it and the roller wheels would turn
easily.
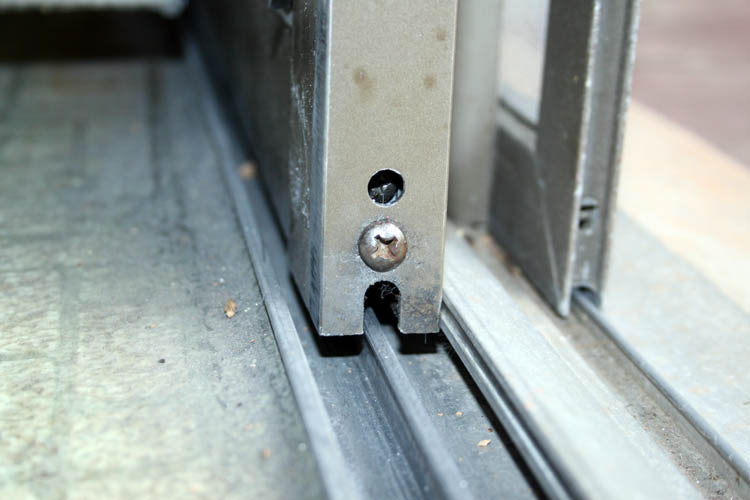
Here is a pix of where the adjustment is located for each roller wheel
assembly. The top opening gives access to the Phillips head adjustment
screw, whereas the bottom screw retains the wheel assembly inside the door
frame and to the lower frame member. All doors are not the same!
If you need to remove the roller wheel assembly from the door channel
frame, the door has to be supported on a table or saw horses. You have
to remove the large Phillips head screw from the roller assembly at the
bottom that secures the roller assembly to the U shaped channel frame member
and secures the member to the bottom frame member also. There is a
Phillips screw that secures the top of the door U shaped channel member to
the upper frame. It is necessary to loosen the bolts/screws that
secure the handle/locking device to the door frame to relieve tension so the
door frame can move. Using a rubber mallet and a piece of wood, you tap the U shaped frame
member a couple inches away from the bottom door channel member exposing the
roller wheel assembly. You replace the wheel assembly and adjust the
wheel out from the wheel housing assembly. Using a rubber mallet and
piece of wood, you
tap the channel member back into place where the large Phillips head screw
will align with the bottom channel member. Repeat the sequence for the
other roller wheel assembly.
I have the roller wheels adjusted out and when the stainless steel sill
cover is installed, I will probably have to let the wheels go back into the
door frame by turning the adjusting screw counter clockwise. The
roller wheels did not have any tension on them by the adjusting screw
when originally installed and probably didn't need to be adjusted out.
I got lucky on this repair, since the roller wheel assemblies were in
good shape and did not need replacing.
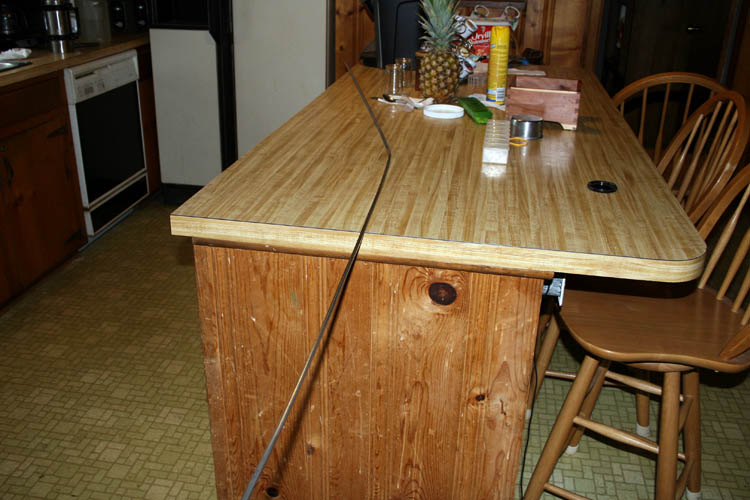
I don't plan to carry the heavy sliding door onto the deck picnic table
again unless absolutely necessary,
but will adjust the roller wheels while the door is in the track and will
relieve some tension with a wedge since I will be working alone, otherwise
your helper could lift up on the end of the door while adjusting the screw.
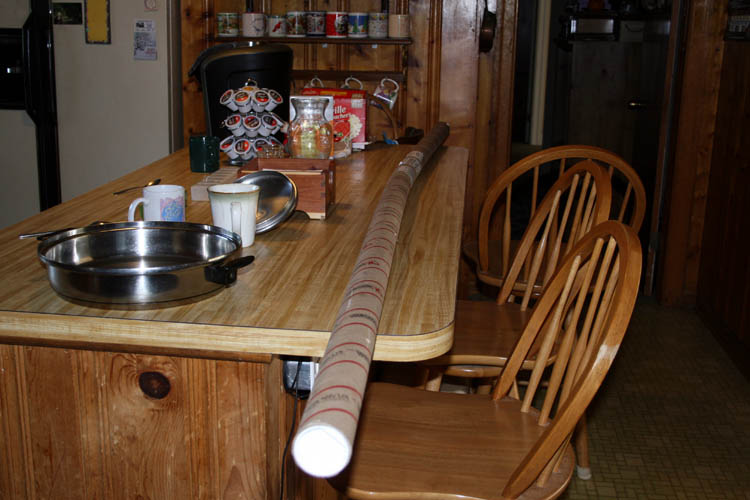
When I remove the sliding door from the track, I will position the door upright resting against a wall in the dining
room/kitchen and elevate the door on a couple pieces of wood to keep the
rollers off the floor and adjust the
rollers after installing the stainless steel sill cover over the
existing aluminum worn rail.
With the sliding glass door out of the frame, I cleaned the track with a toothbrush and
vacuumed debris from the track. I used a large flat bastard file and
trimmed both sides of the aluminum 1/4 inch wide track rail that the roller
wheels rides on which had flared out some. As stated and evidenced by the pixs, there is some
serious wear to the track, but the replacement stainless steel sill cover
should correct that problem.
We have owned our home for about 31 years and the sliding tempered glass
double pane door was
already installed when we purchased our home and no doubt the sliding door
to the deck is 40 years
old.........grin if you must!
The sliding glass door was placed back into the door frame and the roller
wheels were making good contact with the aluminum track and could open and
close the door with ease, however you could feel the divots and worn places
in the track, but this didn't hinder the door from opening and closing
requiring
any extra force.
By raising the sliding door upward by lowering the roller wheels, the door lock
would not properly catch and there was not enough adjustment in the door catch
assembly.
I moved the door latch upward by drilling and relocating the screws that
held the catch in place.

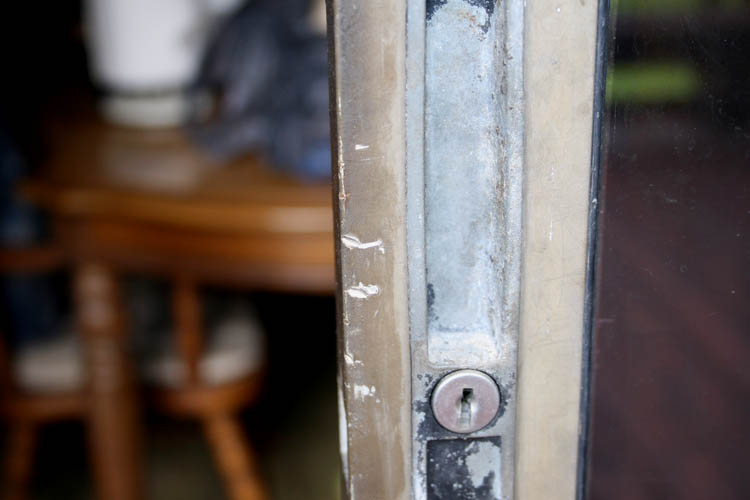
As evidenced by the pix, this sliding door in the past has been forced
open by the bent frame adjacent the locking device that houses the door when
it is fully closed. I will probably take a piece of wood and use a
hammer to straighten the outer flange that is bent toward the left in the
pix.
I believe I was the one that got locked out and this was the easiest way
to gain entry without breaking any glass on three (3) other doors if I am not mistaken. A large grilling fork left on the deck grilling area was used to force the door
off
the locking device. These doors are not security doors for sure!
Spare accessible house keys are a necessity.
To my understanding, there was no key available to the locking device on
the glass sliding door and might try and find a key for it, if there is some
key ID on the locking device. I could remove the locking device from
the door frame, but with spare house keys, it would be a waste of time.
NOTE: On 05-29-2020, I used a C clamp and three (3) blocks
of wood to bend the left portion of the door channel track that was bent
outward at the locking device, however I did not bend the metal too much
since it appeared to be tempered and didn't want to risk breaking the bent
channel.
I went on line and found a replacement sliding screen door since the old
one is worn out and the frame is broken at the door latch; still usable, but
a pain in the rear to use.
I plan to make a trip to Home Depot in Matthews which has the door I need
in stock.
Web page updated by Bill aka Mickey Porter on 05-29-2020.
RECEIVED THE SILL CAP - OUCH!
I received the stainless steel sill cap this afternoon and it reminded
me of landing a big bass on a
fast action tip fly rod with plenty of back
bone.
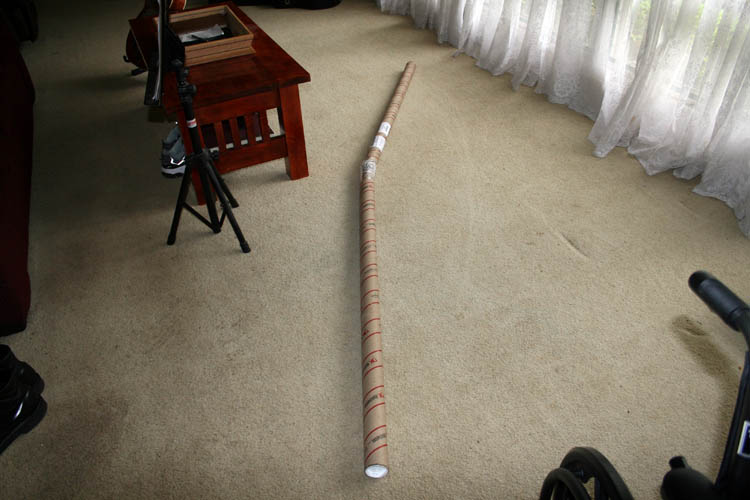
USPS apparently tapped the damaged shipping tube back together.
I was surprised that the supplier had the part loose in the shipping tube
with no additional support.
I sent pixs of the damaged shipping tube and the part to the supplier and
called them on the telephone. Their representative said they have the pixs and would
send a replacement. The guy I talked to stated they had problems with
this item with both USPS and UPS as far as getting damaged in shipment.
The rep said it was cheaper to replace the part than add a piece of
wood to the item in the shipping tube of which I suggested. A 1" x 4"
x 10' pine board costs approx. $ 5.82 and you could easily get 3
strips from one board. I am glad I
do not think that
way. If something is broke, fix it!
I might be able to salvage the part, but there is a risk of crimping the
top, of which I need a good smooth surface for the roller wheels to ride on.
I will put a radius on a piece of hardwood strip the correct width and work
the piece into the channel where the bend is located and see what happens.
Web page updated by Bill aka Mickey Porter on 05-26-2020.
SALVAGING THE SILL CAP
My bride and myself were watching our Gonzales grandkids this morning of
05-27-2020 and after they were picked up by their Mom around mid day, I
decided the see if I could straighten the bent and warped stainless steel
sill cap.
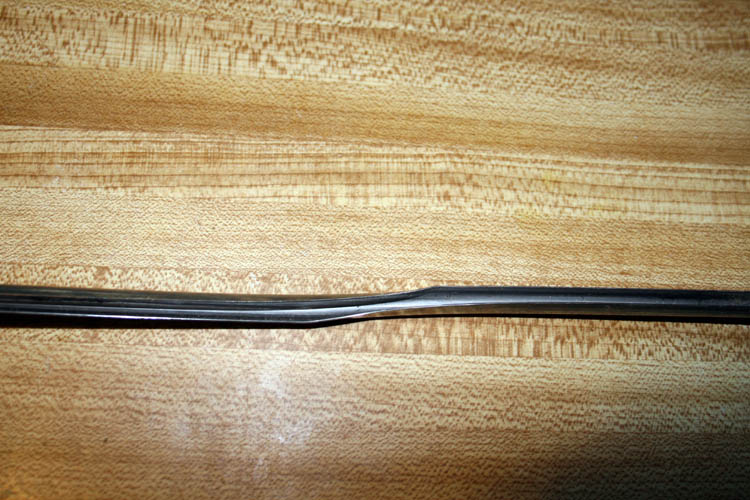
I measured the part with my dial caliber and this is a rough drawing of
the part:
Below a close-up pix of the end view of the sill cap:
I went through some of my scrap aka unallocated curly maple wood strips
and found one that was about .175 inches and figured I could wedge the bent
sill cap onto the wood and try and form it back into shape with a small
hammer.
After getting the part fairly straight even though it still had a upward bend
(bow) in
it, but the warp was about totally removed.
The sill cap raw material was 96 inches in length and I only needed 70.5
inches and the warped/bent place was 51 inches +- from one end and decided
to place that area to the left of the sliding door track.
INSTALLING THE SILL CAP
I removed the safety screw from the top track first and then scotched the
door upward and let the roller wheels into the door channel to offset the
additional thickness of the sill cap and then removed the door, resting it
on a couple pieces of scrap wood to keep the rollers off the floor.

I used my Milwaukee 4 inch angle head grinder to straighten the sides of
the aluminum track and finished off with a couple bastard files without a
handle on them.
The track was cleaned with lacquer reducer and DAP clear silicone was
applied to the inside of the sill cap and gently tapped in place with a
rubber mallet. Since I didn't remove the other side of the fixed door
from that track, I used a small brass/plastic head hammer to tap the sill
cap in place over the original aluminum track.
The left end of the sill cap wanted to ride a little high (spring upward) and had some
upward movement in it. When I installed the sliding door back into the channel, I
slid the heavy door to the far left to apply pressure to the sill cap while
the silicone cures.
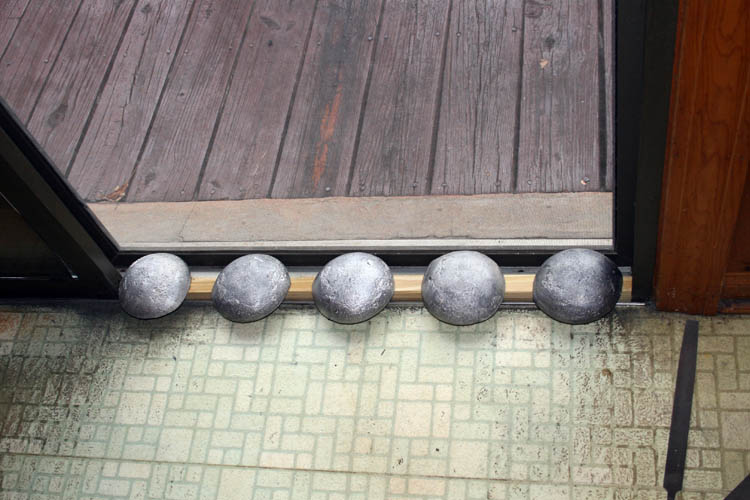
To keep the sill cap in place to the right of the sliding door while the
silicone cures, I used a
block of wood that fit between the U shaped bottom channel, of which I
routed a 3/8 inch radius in the center a little less than 1/4 inch in depth.
I placed the wood strip over the sill cap and added some heavy lead weights
on top of the wood to help keep the sill cap in place. The way the
sill cap is designed, the bottom is narrower than the inside center to center
portion which has a spring action to keep it in place in combination
with the silicone sealant. Some installers use epoxy instead of
silicone.
If there is a problem with the far left end of the sill cap wanting to
raise from the aluminum track, I will cut a piece of wood to length and
scotch it into place from top to bottom inside the left U shaped channel
member since the sliding glass door doesn't have to be slid to
the extreme far left anyway. I am grown and haven't missed too many
meals, but not that grown.....will wait and see after the silicone has
cured.
I am curious if the replacement part will make it here undamaged via USPS
since the part is packaged in a very light duty mailing tube without any
additional packing material around the sill cap.
Web page updated by Bill aka Mickey Porter on 05-27-2020.
NOTE: I picked up the sill cap this morning at the Post
Office and the shipping tube was bent, however the sill cap was still in
tack.....unbelievable for sure!
Web page updated by Bill aka Mickey Porter on 06-03-2020.
SLIDING DOOR TRACK REPAIRS COMPLETED
I removed the lead weights off the right hand portion of the sliding door
track and the stainless sill cover was still in place; the silicone had done
it's job along with the design of the sill cover. I closed the sliding
door and checked the far left portion of the sill cover and it was still in
place and had not moved upward at all. The weight of the sliding door
kept the sill cover in place for the silicone to set. I decided to add
a strip of wood from the top of the inside door flange to the bottom tightly
against the sill cover and will leave it in place. It takes 24 hours
for the silicone to fully cure.
Web page updated by Bill aka Mickey Porter on 05-28-2020.
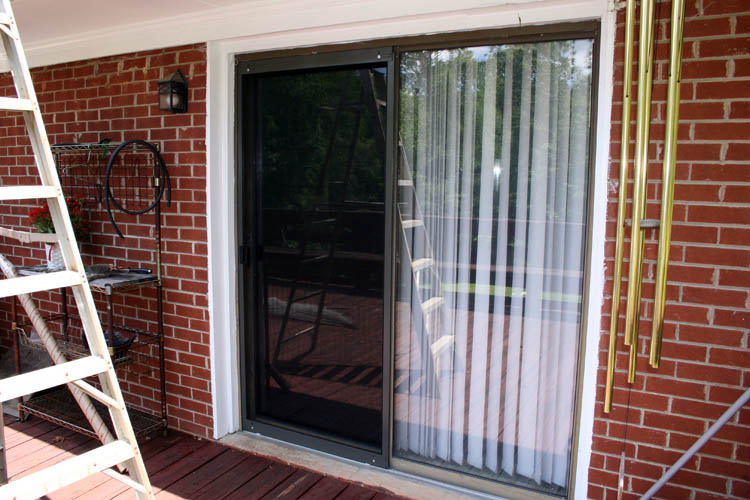
REPLACED SLIDING SCREEN DOOR
As mentioned earlier, Home Depot has in stock a sliding screen door that
has an adjustable height; e.g., 77 3/4 to 80 inches, whereas our screen door
is 36" x 79" x 1/2" thickness.
The sliding screen door doesn't slide as smooth as I desire because the
adjustable U shaped channel member will not fit into the 1/2 inch inside
width track since it is over 9/16 inch thickness, however the door
manufacturer allowed for this by including a couple plastic standoffs that
would fit inside the 1/2 inch width track. The plastic standoffs are
not making full contact with the upper portion of the door channel and will
later measure and make a couple to exactly fit our door frame which will
take out any "seesaw" type movement when sliding the screen door open/close.
The door latch was installed in the U shaped channel left track by
drilling a small hole for a sheet metal screw and the latch body has an
elongated slot for any adjustment needed. I got it right the first try
by double checking the placement of the door lock, etc.
I plan to have a custom made sliding screen door made in the future which
is 36 x 79 x 1/2 inches since I am not satisfied with the adjustable fit
sliding screen door. The problem is the U shaped channel this is on
the bottom and top and slides over the 1/2 inch width screen door frame and
this has increased friction between the upright door frame member. The
sliding screen door will work for now; sometimes you win, sometimes you
lose......grin if you must. I had rather absorb the cost of replacing
the screen door than make another trip to Matthews, NC to Home Depot to
return the adjustable sliding screen door. That is how bad I dislike
driving through Monroe and into the Matthews business district!
This completes the sliding glass patio door to the deck project and will start a
couple more small maintenance projects next week, the Lord willing of
course.
The sliding glass door is operable with one finger to open and close and
rides on the track like greased lightening......grin if you must!
Web page updated by Bill aka Mickey Porter on 05-30-2020.
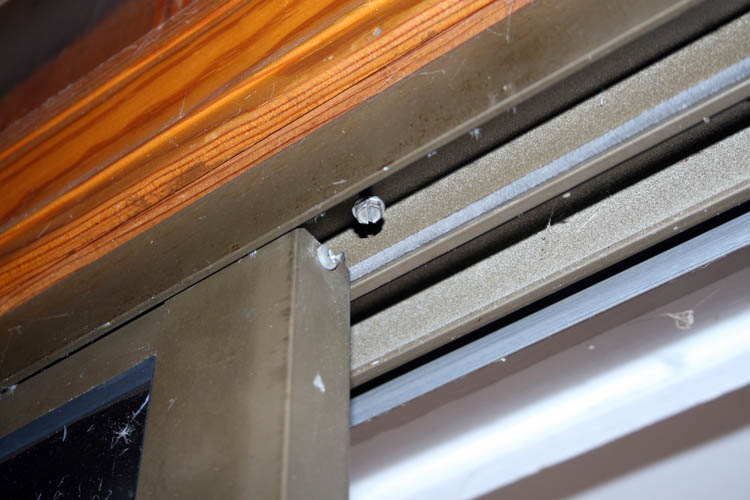
SAFETY TIPS
Many older sliding doors such as this one and new doors as well, has plenty of room in the
overhead track where the sliding glass door can be lifted upward without
having to do anything to the door frame. You can use a pry bar between
the door frame and the locking device or under the door and lift the door
upward off the locking device to gain entry without breaking the tempered
glass.
To prevent this from happening, you simply install a screw inside the
upper door frame and adjust the screw length where the door will open, but will not have any
clearance when the door is lifted upward to come off the track and/or door
locking device.
Another method to keep the door from opening (sliding to the left) is cut
a piece of wood that will fit into the track cut to length that will not
allow the door to slide to the left.
Of course, a criminal with intent to break into your home will not be
deterred by normal security measures; e.g., alarm systems including cameras,
locking devices and
silent alarms which are good "after the fact." Many criminals will use
a technique called
smash and grab. Most law enforcement
response time is way too slow to combat (prevent) robberies and other crimes
of this type,
especially if you are miles away from their station and in rural areas.
DEALING WITH CRIMINALS AND CRIMINAL PSYCHOLOGY
After 33 years of employment (now retired) with the North Carolina Department of
Correction, renamed NC DPS, North Carolina Department of Public Safety,
it is amazing what criminals will do to circumvent doing a honest days work!
I remember talking with one convict that was serving time for larceny and he
stated, "I didn't steal anything, I wanted it
and I took it." That convict is no
doubt still serving time somewhere! This has been said many times
before, "There is no cure for stupid."
When the stainless steel sill cover arrives, I will cut it to length and go over the door
track with my small Milwaukee 4 inch angle head grinder and smooth the sides
up of the aluminum 1/4 inch width track and blend the right hand portion of
the track to the start of the worn area.
The stainless steel sill cover will snap in place onto the bottom rail
with the aid of a rubber mallet and silicone is used to "seal the deal."
Web page updated by Bill aka Mickey Porter on 05-21-2020.
DUKE ENERGY POWER OUTAGE
Yesterday afternoon, we had a serious storm quickly come through with
wind gusts reported at 60 MPH bringing a humongous amount of rain. At
approximately 05:07 PM, our electrical power went off. I waited a few
minutes to see if the power would return, of which it didn't and got the
generator on our home power grid. The generator interlock at our main
200 amp service panel works great and prevents you from back feeding power
from the generator to the Duke Energy grid.
After getting the generator on our home grid, I checked on line with the
pc and they were projecting the power would be off until 8 PM the following
day.
I stayed up until around 1 AM on the next morning (05-23-2020) and turned
the generator breaker off at the main 200 amp service panel and let the
generator cool down for a few minutes and topped the generator fuel tank off
with about 5 gallons of non-ethanol gas, 93 percent octane. I fired the
generator back up and flipped the breaker to get power back onto our home
power grid and stayed up a little while longer and then hit the sack.
I woke up around 05:30 AM and the generator was purring along. The
Craftsman 5K watt generator is a bit noisy, but we can live with that.
Since it was raining, I opted to leave the generator in the open carport and
really no change of getting asphyxiated from the carbon monoxide generator
exhaust.
The power returned ON at approximately 10:17 AM (05-23-2020) and
turned the generator breaker off and flipped the main 200 amp service panel
breaker on which restored power from the Duke Energy power grid. As
stated earlier, you cannot have the 200 amp main breaker on and the
generator breaker on at the same time which prevents any chance of back
feeding power into the Duke Energy power grid.
The 5K watt generator has gotten a workout for sure since Easter Monday
(04-13-2020), six (6) hours usage then and seventeen (17) hours of run time
since yesterday afternoon/evening.
I plan to put the 4200 watt generator on our home grid at the next power
outage and run each generator once a month to ascertain they are
operational.
Web page updated by Bill aka Mickey Porter on 05-23-2020.
HOME GUTTER MAINTENANCE
The torrential rain we had on 05-23-2020 which many folks call a frog
strangler, gulley wash, etc., I noticed that the front gutter system from the
chimney back to the North end (right) was allowing water to come over
the top of the gutter. I have seen this before, whereas there was so
much water coming down, the gutter could not drain all the water into the
down spouts. The front of our home has three (3) down spouts and the
rear of our home has four (4) down spouts.
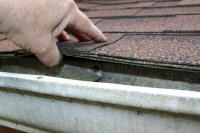
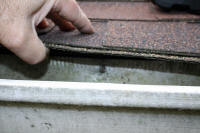
Yesterday, 05-25-2020 I went onto the roof and inspected the gutter
system and did notice there was some debris from the right side of the
chimney to the gutter spout, but it was not clogged up. The debris was
from the large white oak tree in
the front yard that is very near our home. I removed the debris in the
gutter, "tassels" called catkin and
noticed that the gutter was loose, meaning the nails holding it to the facer
board had backed out at least 1/2 inch and maybe one was missing altogether.
I believe the loose nails is the gutter is the problem allowing the front of
the gutter to be positioned more downward causing the overflow.
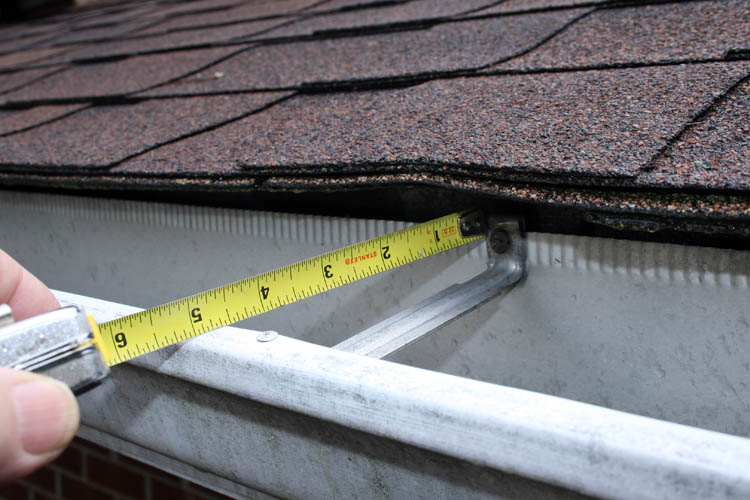
The gutter system has a support bracket that goes from the top outer portion
of the gutter to the inside of the gutter and secured through the galvanized metal
protective strip called an eave strip or drip edge into the facer board and end of the rafter, of which the
rafters are spaced sixteen (16)
inches on center. The ends of the rafters
are boxed in with a facer board and the underside of the overhang (eave) is covered
with 1/4 inch plywood if I am not mistaken.
In the past, I have nailed and screwed the gutters back in place, of
which nails are a poor way to fasten them in place; I believe screws are
much better even though screws have been known to back out over time due to
expansion and contraction due to the temperature fluctuation.
TOOLS AND EQUIPMENT NEEDED
The front of our home requires a 10 to 11 feet A frame ladder due wall height
above ground and the low roof pitch angle and the nearly three (3) feet of roof
(eave) overhang.
A regular fixed or adjustable telescopic length ladder would require a large
stand off to make contact with the roof line and/or below the (eave) overhang
against the wall and as stated with the low roof pitch, really isn't
feasible, but is doable. You definitely do not want to rest your
ladder on the gutter itself.
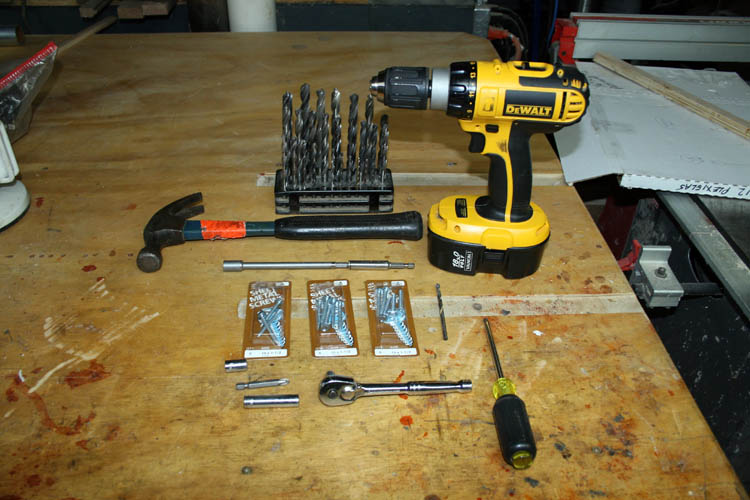
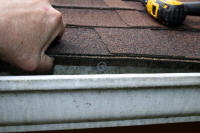
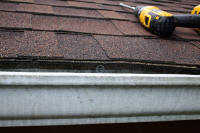
I will be using a 5/16 inch hex head sheet metal screw (self-tapping) size
# 10 with a length of 1.5 inches, however a 1 inch screw should work ok, but
I wanted the screw to go through the facer board which is probably 3/4 inch
or more in thickness into the end of the rafter.
The gutter is 5 inches wide and you need a 5/16 inch hex head
driver with a shaft length of 5 plus inches that extends past the end of the
drill chuck. I had a 6 inch length driver and had to locate an
extension. I went to three places here in Wadesboro, NC and could not
find a driver longer than 6 inches, however I did find a 3 inch extension
that gave me the required length needed.
In the past, I believe I used a flexible drive shaft and 5/16 inch socket
and/or # 2 Phillips driver with a portable
drill and was akin to an inflamed hemorrhoid.
The holding support bracket that strengthened the gutter which as stated earlier
was spaced 16 inch on center, I predrilled the existing hole to 3/16 inch
diameter to match the body of the # 10 steel metal screw.
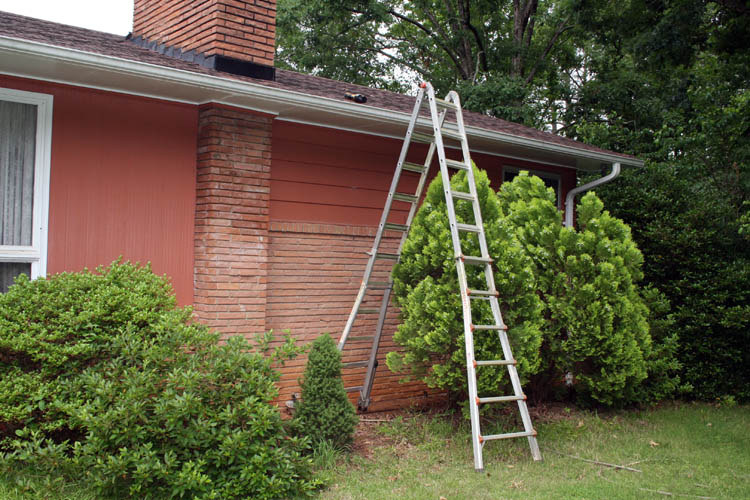
Above pix of the Wing Little Giant ladder model 10126 which is a monster
to use! This ladder weighs 52 pounds and it is
about impossible to use it as an
extension ladder due to the weight and
trying to telescope it out. If you have Gorilla DNA, this ladder might
be a breeze to use.
I did a product review of the ladder hyperlinked here:
http://portercalls.com/wing_ladder.htm
Below are a few thumbnail pixs:
Click on each thumbnail pix for a larger screen view:
There were several nails that were used in between the 16 inches center
to center spacing of the rafters and removed the nails and used a flat
washer on the screw.
The end of the gutter on the far right was a little problem getting the
ladder into position due to the trees and the ground had a slope to it, but
managed. The ladder next to the wall has an adjustable length member
to level the ladder up and used wide pieces of plywood to level the front
right hand side of the lower ladder leg.
It took several hours which included a lunch break and rounding up
additional screws needed; I was a couple screws short. The gutter is
now "tighter than two coats of paint"
against the facer board!
This gutter repair should hopefully last beyond when my bride and myself
are
"raptured" away or we are in the grave, of which I am not rushing the
grave part!
GUTTER REPAIRS DECK AREA
I ordered a 3/16 inch diameter drill bit x 8 inches in length just for
gutter maintenance and used it to tighten up the gutter on the back of our
home.
I used a smaller and lighter A frame aluminum ladder and removed loose
nails from the gutter brackets and installed 1.5 inch length # 10 sheet
metal screws as on the front of our home. The longer drill bit made
the repair very easy since I could keep the drill bit more parallel with the
gutter bracket.
I want to thank God through Jesus Christ our Lord and Savior for his
safety and protection, because ladder usage is high risk, even for a young
man!
Web page updated by Bill aka Mickey Porter on 05-26-2020 and 06-10-2020..
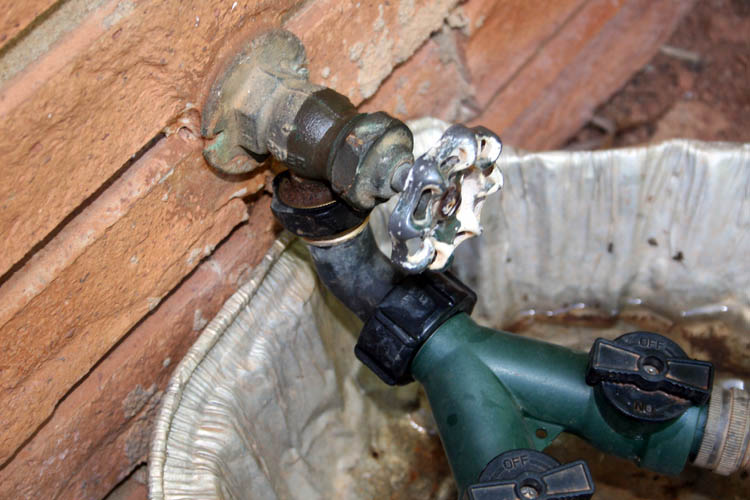
OUTSIDE SPIGOT REPAIRS
The outside spigot on the front of our home has a steady slow drip at
both the valve and the handle.
Our home was built somewhere around 1956 by Ackerman Construction Co. and after about forty (40)
years, the majority of inside and outside plumbing for most homes is in need of
replacement; e.g., sink drain lines, water traps, faucets and fixtures for
bathrooms and/or showers. I believe all but one of the sink drain
lines, traps, faucets, etc. have been replaced over the years. Homes
built during that era in our area used galvanized steel for sink and bathtub
drain lines that were routed into the main 4 inch cast iron sewage line to
the septic tank. The problem with galvanized steel, where the pipe is
threaded leaves raw unprotected metal which will rust out over 3 or 4
decades as with our home. As stated, all those galvanized lines have
been replaced except one in my bride's dressing and therapy room bathroom, of
which I plan to replace the sink, commode and water lines in the future.
We also have all the grey water from all the sinks except one and the
main shower removed from the main septic system and routed into a separate
drain line bypassing the septic system. The removal of grey water from
the septic system doesn't place a strain on its efficiency.
The outside solid brass spigots are soldered and/or screwed into a brass line and would
be a pain to have to replace the entire spigot and wanted
to attempt a repair first. If the solid brass spigot is screwed into a
brass threaded fitting that is soldered onto the copper supply line, it is not accessible
from the outside or inside as far as putting a wrench on it to unscrew the
spigot from the soldered and threaded fitting. I have some experience repairing plumbing
issues and most of the time the part needs replacing versus repairing, but I
felt this spigot might be repairable and understand that items this old will
have rotten or corroded parts such as screws, rubber washers/gaskets, etc.
and was prepared for such.
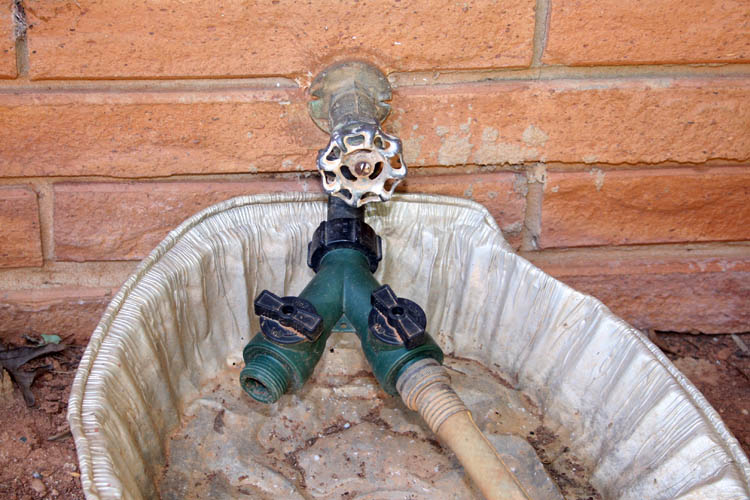
Above is a pix of the outside spigot. I definitely need to upgrade
the disposable baking pan to a more permanent concrete or plastic gutter
drain base.................grin if you must!
REPAIR PROCEDURES
I first cut the water supply off in our basement and opened several faucets inside the
home and one outside spigot to allow the water to quickly drain from the line.
I applied Kroll penetrating oil to the brass bonnet nut, however I don't
think it was necessary.
I used a large adjustable wrench and a pair of large Channellock pliers
to remove the valve stem assembly which includes the handle. I detest
the usage of an adjustable wrench and Channellock pliers, but do not have large open end wrenches
large enough for
such. These tools first mentioned can deform and damage nuts beyond repair
if frequently used.
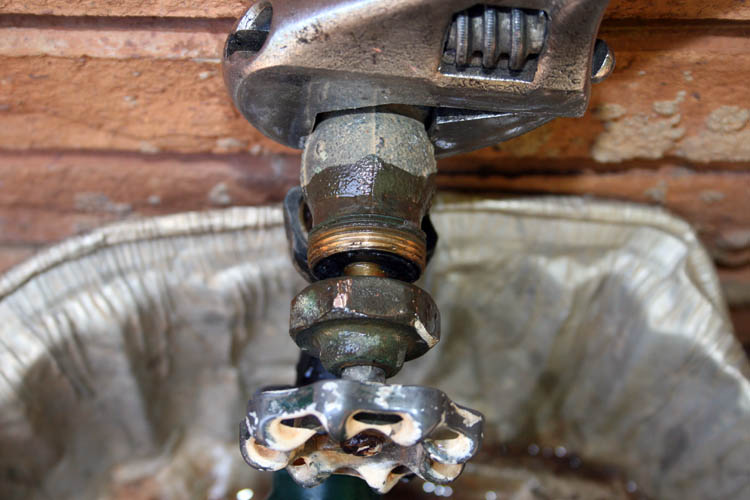
The valve stem was removed by turning the large 1.25 inch diameter
bonnet nut
counter clockwise while holding the spigot brass housing and then turning the valve stem assembly counter clockwise to
remove the entire stem. I quickly noticed that the head of the
screw that held the rubber washer in place in the end of the valve stem was corroded entirely off leaving
only about 3/32 inch length of the screw remaining. The rubber valve stem
washer fell off into the catch pan.
I don't think this spigot had ever been taken apart prior to our purchase
of the home in 1989 in my
humble opinion!
I saturated the screw body with Kroll penetrating oil which is much better than WD40
for loosening things, however the screw would not turn
and broke off, having to drill it partly out.
Below are a few thumbnail pixs of the procedure of which I will narrate:


Click on the above thumbnail pixs for a larger screen view.
I have an assortment of screws and rubber washers that my good friend and
neighbor Johnny Hildreth (now deceased)
which I believe he had given me for this type of
repair many years ago or I had purchased a small repair kit; I can't
remember for sure, but leaning toward Johnny giving the parts to me!
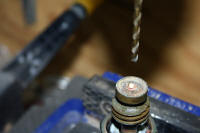
I measured the body of a new brass replacement screw and it was 10-24
threads. I used an antiquated Dremel Moto Tool and grind rock to flush
the screw body with the valve stem. I then used a center punch to mark the approximate center of the
screw body and drilled the screw body with a 120 degree countersink and then with a 9/64 inch diameter
118 degree drill bit. I
then drilled the hole using a # 25 drill bit and used a 10-24 tap to
rethread the hole in the valve stem. While doing so, the remaining
portion of the original screw body came out with the tap. Luckily,
there was plenty of original threads remaining in the valve stem and the
threads just tapped for the
replacement 10-24 brass screw to have a good tight fit with the rubber
washer in place.
I used string type packing material for the packing nut which has
graphite in it and then some round solid Teflon string material.
HISTORICAL NOTE
The small tap and die set depicted above in the bottom right hand pix was
purchased in the early 1970s when I had my mail order
Musical Instrument Repair and Banjo
Company. When I sold the bulk of the woodworking and metal working
tools and equipment to John Bowels of Advance, NC. around 1979-80, I kept my drill bit sets
which includes fractional, letter and number drills and the above tap and die set, of which I have used many, many times since
then along with a Brown and Sharp dial caliper.
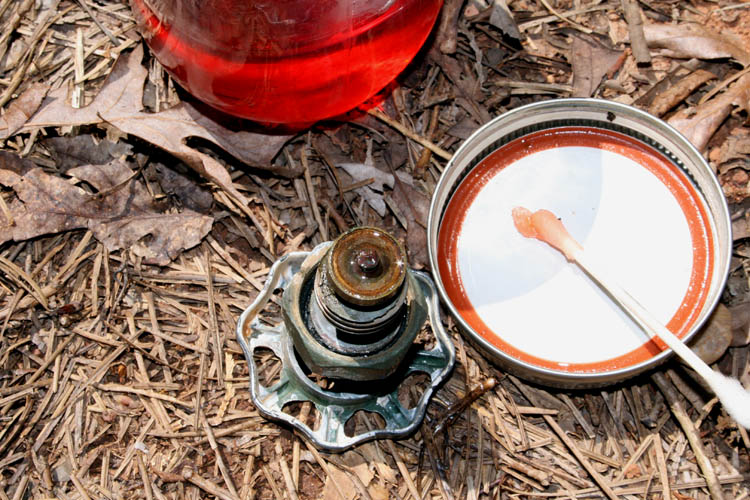
ACID TEST
The valve stem assembly was placed back into the valve body/spigot and hand
tightened the valve and then used the adjustable wrench and the Channellock
pliers to tighten the bonnet nut. I did not want to attempt to remove
the spigot handle and in all probably the screw that holds the handle to the
valve stem would break off. I was hoping the bonnet packing material
would work.
The repair was a success with the leaks stopped at this time. I need to remove the main hose adapter
connection and apply some Teflon tape around the threads of the spigot to not
have any water dripping there when the spigot is in use. The wet area
on the spigot is from the Kroll penetrating oil.
NOTE: Before I repair the other two outside faucets aka
spigots, I will have a small set of easy out extractor tools in case I need
to remove a broken off screw and find the proper bonnet packing washer.
Web page updated by Bill aka Mickey Porter on 06-01-2020.
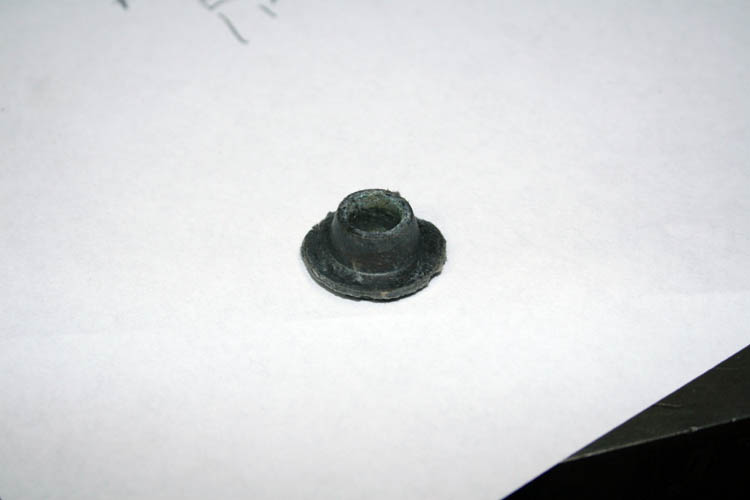
LOCATED ORIGINAL TYPE BONNET PACKING
I attempted to find an original replacement part for the 1956 circa outside spigots locally and on line, but all the major suppliers such as
Lowe's, Home Depot, etc. did not stock the part I needed.
Below is the actual worn out part taken from one of the three (3) spigots, of
which I use two of the spigots regularly.
Below is the part I found on line that is manufactured by Prier and is
for outside spigots/hydrants, etc.:
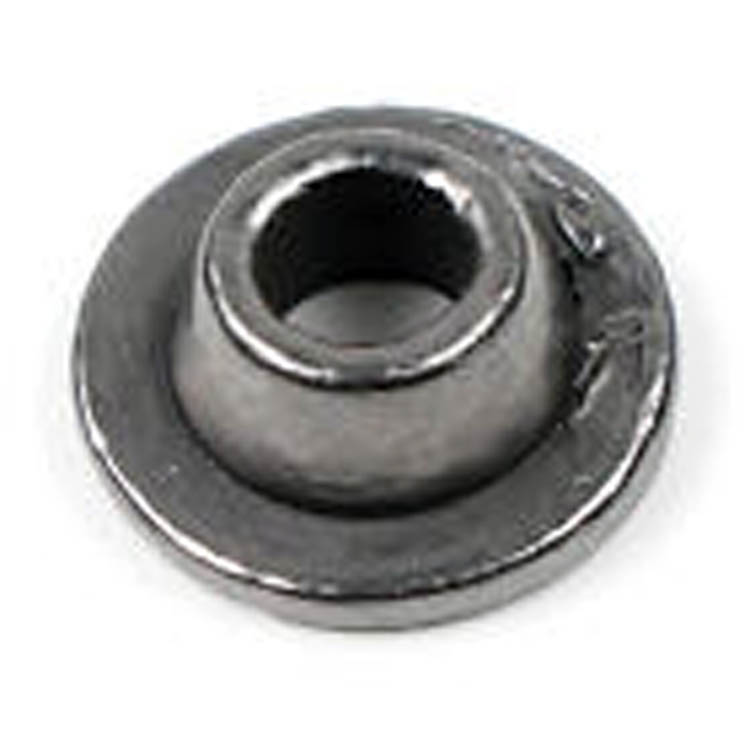
The part number is Prier C-134KT-803 stem packing replacement kit for
C-134/135/144/154. The kit also comes with a flat metal washer.
The part is a little pricy (over priced) at 12 to 14 bucks, but it is what I needed and ordered
a couple of them. I later found one including shipping for $ 9.55.
I contacted one of the vendors to ascertain the actual size of the part
before ordering and it matched the original stem packing on our spigots.
When the parts arrive, I will install the correct replacement part.
Web page updated by Bill aka Mickey Porter on 06-05-2020.
REPAIR UPDATE
The Teflon string stem packing material used as a temporary repair lasted a
couple days and had a slow leak when the spigot was open and I received the
Prier stem packing replacement kit yesterday and installed it on the stem
and it fit like a glove stopping the water drip at the stem when the spigot
was opened. Removing the screw that held the handle in place was touch
and go and was "tighter than two coats of paint",
but it finally yield to the pressure of the screwdriver along with some
Kroll penetrating oil and glad the screw was
steel instead of brass.

Web page updated by Bill aka Mickey Porter on 06-09-2020.
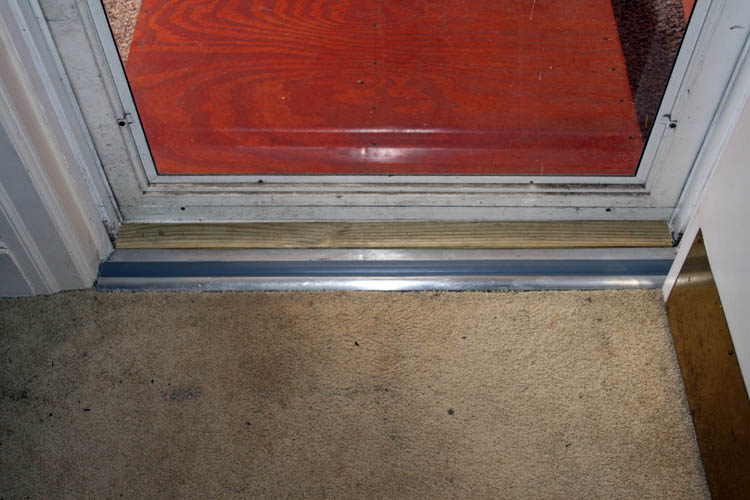
ALUMINUM/VINYL DOOR THRESHOLD WEATHER STRIP
Our front door aluminum threshold with a vinyl center weather strip was
needing the weather strip replaced. Lowe's in Monroe had nearly an
identical threshold and I only had to replace the weather strip insert.
The door to the carport aluminum threshold was banged up pretty bad and
replaced the entire unit, of which I had to cut to length and notch out a
place at each end to fit and drill pilot holes for the Phillip's head wood
screws. I used the original threshold as a pattern and cut it using a
regular hacksaw. Nothing high tech there......grin if you must!

The front door to the living room threshold was perfect; snug as a bug,
however the threshold to the carport was
"tighter than two coats of paint" and will see how
the vinyl seal wears.
It required a threshold that was 3 3/4 inches wide, whereas the front door
width was a shade over 3 inches in width.
NOTE: Using my Milwaukee "skill saw" and home made wooden
saw guide, I removed about 1/8 inch from
the bottom of the door. Doors installed during the 1950s era, the
bottom of the door has about a two (2) degree taper to allow the door when
closing not to draw on the threshold and the gap between the door and the
threshold would tighten up as you close the door.
Web page updated by Bill aka Mickey Porter on 06-15-2020.
TOMATOES BEGINNING TO RIPEN
This past week or more of rain and with the warmer aka hotter weather
pattern, the tomato patch is beginning to show the results of the rain and
the temperature, etc.

The larger tomato on the left is just about ready for our first home
grown tomato sandwich of the season. Can you say "beautimous" out
loud? We did enjoy it for sure!
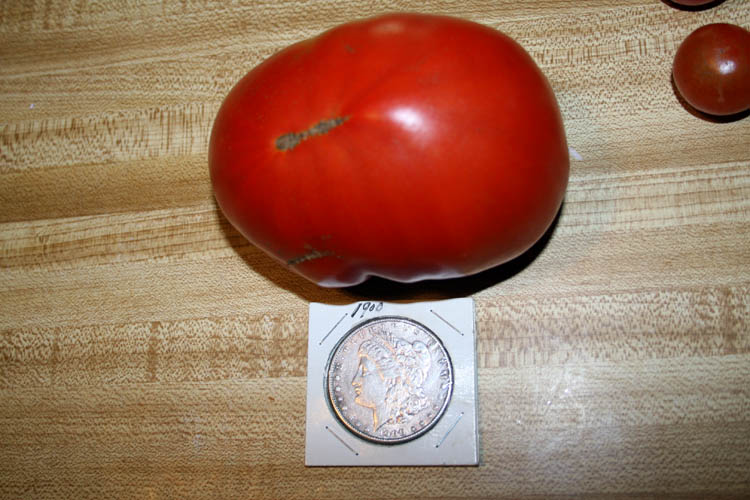
The 1900 silver dollar in the pix for reference size!
We have already been "snacking" on the smaller cherry aka salad tomatoes and they
have a wonderful flavor that a store bought tomato can not provide.

I can visualize a club
sandwich and a
BLT in the future!


Web page updated by Bill aka Mickey Porter on 06-22-2020.
UPDATE: We enjoyed our first club sandwich this
afternoon....outstanding.
Web page updated by Bill aka Mickey Porter on 06-29-2020.
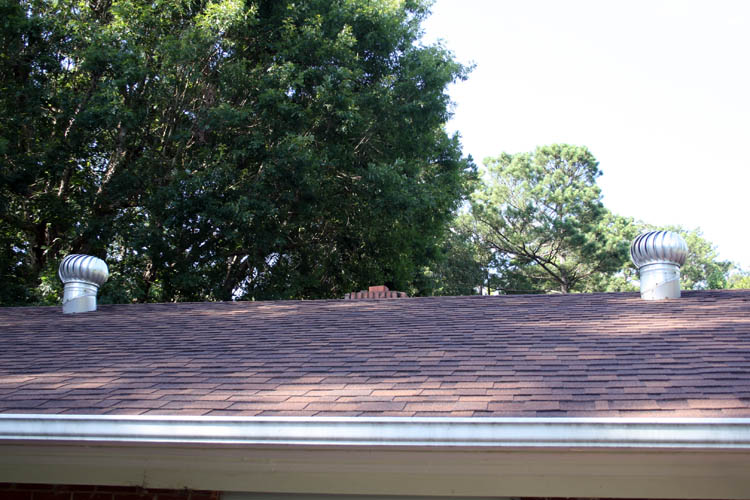
ROOF TURBINE VENTILATOR MAINTENANCE
I noticed today (06-26-2020) in the afternoon that the turbine in the
right of the below pix was turning very slow and had a squeak in it and knew
it needed oiling. I can't remember the last time I applied lubricant
to the ventilators or what type of oil I used. I believe I sprayed oil
on them from the roof instead of going into the attic which reminds me of
sardines in their packaged tin can, because the opening to access the attic
from one of the bedroom closets has a 17 inch square opening and I can
barely get my large frame through the opening. The hard part is
getting onto the top shelf of the closet and then maneuvering yourself
through the opening, of which you can not turn around while on top of the
closet shelf.....getting back down is even more challenging!
I got the light weight A frame aluminum ladder out and a can of RemOil
which has Teflon in it's composition and thought this would be a quick fix
for sure. I had my under shorts on and no gloves and it didn't take
but a second of two to regroup because as soon as I placed my right hand
onto the hot shingles in order to get onto the roof, my hand felt like it
was on fire.
I quickly got off the A frame ladder and went back inside and removed my
shoes and put some long pants on and a pair of gloves. I went back
onto the roof and sprayed the RemOil where the bearings were located, but
the nozzle was to short on the RemOil can to adequately get the lubricant
onto the top and bottom bearing surfaces.
I decided to give it another try tomorrow morning when it is much cooler
without the shingles being super hot and will use an oil can which has some
30 weight motor oil in it sporting a push lever pump which should get the
oil onto the bearings. I now believe that is what I used last time,
but not certain.
Web page updated by Bill aka Mickey Porter on 06-26-2020.
NOTE: I went again onto the roof the morning of 06-27-2020
and applied some 30 wgt. oil to the bearings and the right turbine will
turn, but it is not as sensitive to the wind movement as the left turbine.
In all probability, I will need to lube the turbine from inside the attic
come cold weather.
Web page updated by Bill aka Mickey Porter on 06-27-2020.
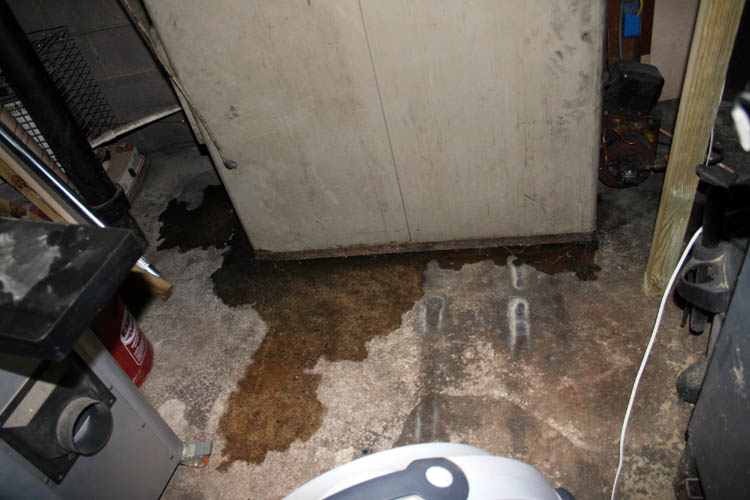
EVAPORATOR COIL DRAIN PAN OVER FLOWING
A few days ago+-, (06-25-2020) I noticed water on the basement concrete
floor and at the base of the plenum
(In building construction, a plenum (pronounced PLEH-nuhm, from Latin
meaning full) is a separate space provided for air circulation for heating,
ventilation, and air-conditioning (sometimes referred to as HVAC) and
typically provided in the space between the structural ceiling and a
drop-down ceiling, of which our heating/cooling system is called a split
system, meaning separate heating and cooling units, utilizing the plenum
air handler for both.
The evaporator coil is located inside the plenum at one end and the Freon
lines are routed to an outside 3 ton unit.
I have experienced one other time (clogged evaporator coil drain) with a very old Sears cooling system
that came with our home purchase of 1989, Many homes back in 1956 when
this house was built, did not have central air as this home did not, only
central heat, whereas our neighbor
Johnny Hildreth (now deceased) installed
the Sears unit along with adding an additional air return
chamber and return duck work, etc.
That older Sears system has since been replaced with a larger more efficient unit
manufactured by Trane, however the original 3/4 inch PVC piping that went
from the evaporator coil drain pan to the cast iron drain clean out plug access in the
basement concrete floor was used, or at least most of it anyway.
The PVC drain line does not have a way to access the evaporator coil
drain pan or the cast iron
drain line clean out plug to the septic tank without physically cutting the PVC in order to
ascertain if the evaporator coil drain pan is clogged up or the line going into the
cast iron clean out plug is clogged and/or the cast iron drain line itself
to the septic tank. The cast iron port just
mentioned is also called a clean out plug.
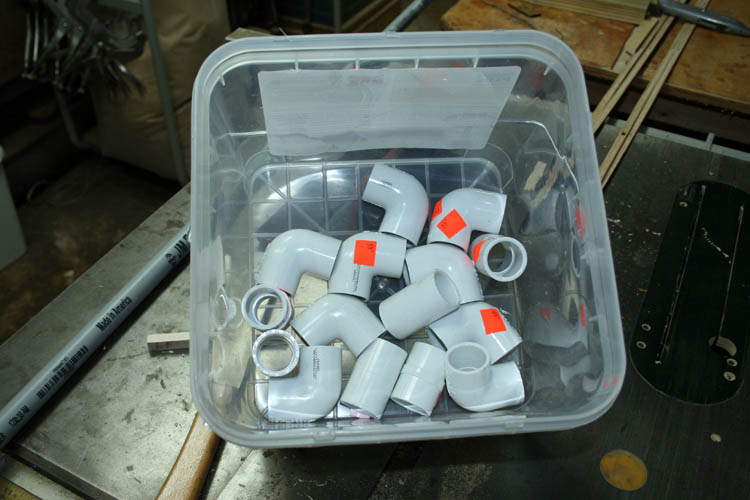
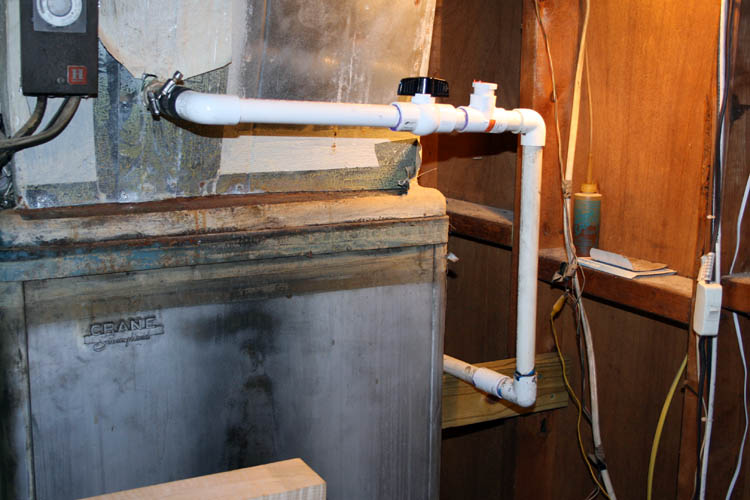
Below is a pix which looks like a plumber with excess PVC fittings......grin
if you must
The above PVC drain line has a built in trap to keep sewer gases from
entering into the plenum. As evidenced from the pix, you can see where
the PVC has been cut before and joined back together to access the cast iron
sewer port. The above is in one corner of the basement that was
originally a basement garage, but I turned it into a work shop. The
PVC tubing is actually hanging down on the right side because I cut it loose
at the evaporator coil drain access.
I used a
large fan to dry it out to ascertain if the problem was the evaporator coil
pan or the PVC drain line, of which the evaporator coil pan had a
restricted
flow and freed the obstruction buildup with a wood dowel rod and
length of wire. A wet/dry vacuum would be much better hooked directly
to the evaporator coil drain pan line.
Water dripping pretty good now from the evaporator coil drain pan and exit line.
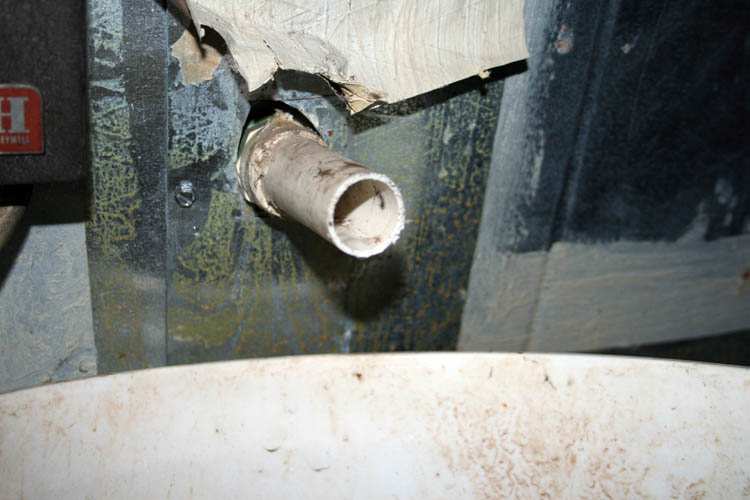
I have a five (5) gallon bucket under the evaporator drain output to catch the water
which started flowing real well. Since yesterday, I have emptied the 5
gallon bucket a few times and keep watch on it until I complete the repairs.
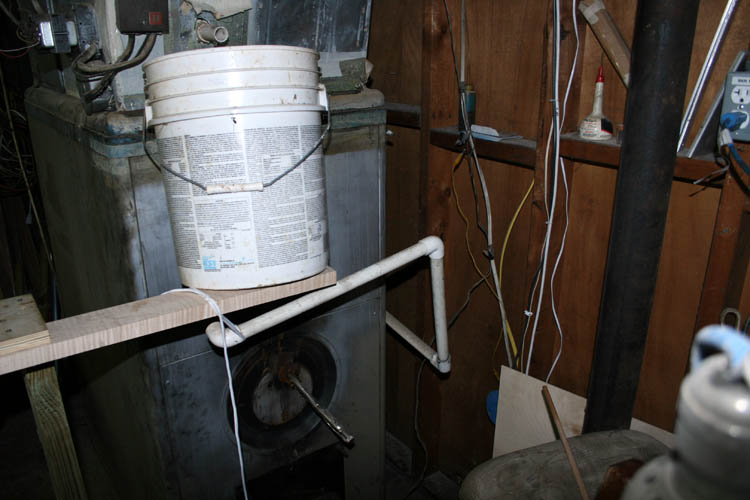
I used the extension from my miter saw which was perfect for holding the
bucket in place. I have the PVC drain line secured to the board with a
shoe string.....grin if you must! I just noticed that the board above
is curly maple; man what was I thinking when I used that piece of high
dollar wood!
The entire evaporator drain line was supported only by the output stub
PVC at the evaporator drain pan and will correct that later.
I went by The Wadesboro Lumber Barn which is our local building supply
and purchased a 20 feet piece of 3/4 inch PVC and enough fittings to redo
the entire drain line if necessary, however I have to go to Rockingham, NC to Walmart for
some grocery and medical supplies and will pick up additional connectors
at Lowe's where I can disconnect the line from the evaporator coil and the cast iron
drain line port without having to cut the PVC pipe and reconnect it.
I also plan to add an in line cut-off valve and affix an adapter on the
side away from the evaporator coil where I can attached a hose pipe and
flush the drain line system if needed in the future. I plan to use a flexible
rubber coupling (radiator hose) from the evaporator drain pan output PVC pipe with a couple
stainless steel hose clamps where I can remove the PVC drain line as needed.
I will also add a flexible rubber coupling near the input to the cast
iron drain port if needing to remove the line to access the cast iron drain
port/plug. However, I decided not to do it at this time.
I will gather the required materials and complete the job on Monday.
I don't like doing any work on Sunday, unless it is an absolute emergency,
whereby honoring God's Holy day of worship.
Web page updated by Bill aka Mickey Porter on 06-27-2020.
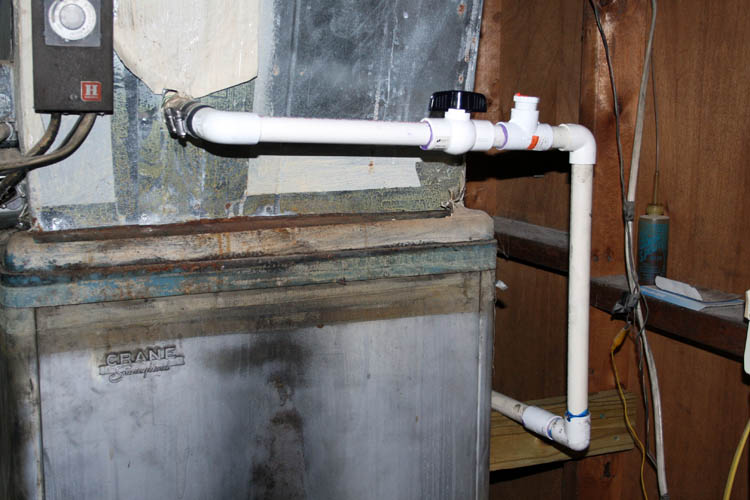
EVAPORATOR DRAIN LINE REFURBISHED
With water flowing freely from the evaporator drain pan, I wanted to
ascertain if there was a problem with the PVC drain line going into the cast
iron sewer clean out plug which was originally adapted with a couple fittings
for the 3/4 inch PVC drain line.
As stated earlier in what I planned to do to the line, I obtained a piece
of radiator hose which has a one (1) inch inside diameter which tightly fits 3/4
inch PVC pipe which has an outside diameter of 1.058 inches manufactured by Charlotte
Pipe PVC. I added a PVC ball cut-off valve in line and added a
tee fitting which had a threaded port for an adapter for a standard hose
pipe to flush the drain line system out.
A section of 2 x 4 was screwed into a wall stud to support the weight of the PVC drain line,
relieving pressure from the evaporator drain pan connection and adjusted the
line for a downward tilt for proper drainage.
I added another 2 x 4 support at the other end of the drain line.
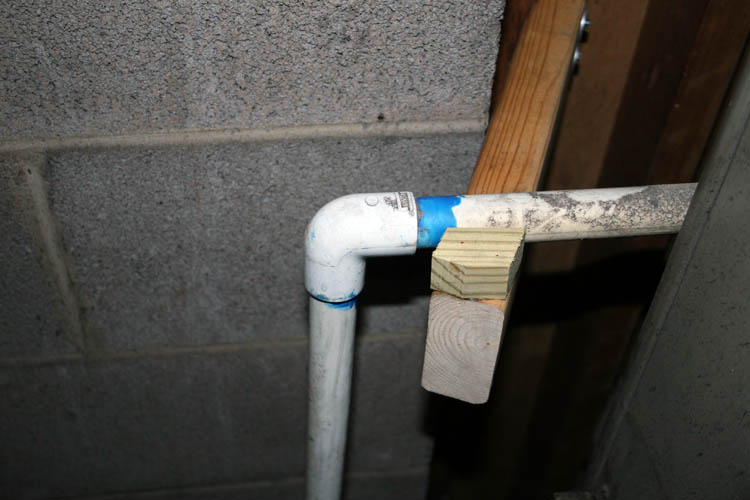
I did not glue the section of PVC to the right angle elbow on the left at
the hose connection at the evaporator pan to make certain everything was
draining properly before I glued it in place. I hooked the garden hose
to the tee fitting adapter port, turned the ball valve to the closed
position, turned the water on and ran water through the line. I also
added some cleaner to the line as well.
I turned the water hose off, removed the tee fitting hose adapter, placed a plug in the threaded tee port,
opened the in line ball cut off valve and
turned the AC back on. So far the evaporator drain pan and drain line
are working ok, but will keep watch on it every hour or two to be certain
there is no back up and/or overflow from the evaporator drain pan.
One of the stainless steel hose band clamps was a little small and will
replace it with a larger one. I don't like the alignment of the two
hose clamps...........grin if you must.
I like the looks of the hose clamp placement now.
I will later clean off the area where the plenum rests onto the furnace, wire brush it down
and spray some protective paint on the rusted surfaces.
Web page updated by Bill aka Mickey Porter on 06-29-2020.
UPDATE: I located a PVC uni-coupling for the above drain
line which allows you to disconnect the line in the event you need to clean
out the drain pan and/or service the evaporator coils, whereas I am using
the radiator hose and clamps to accomplish the same thing at this time.
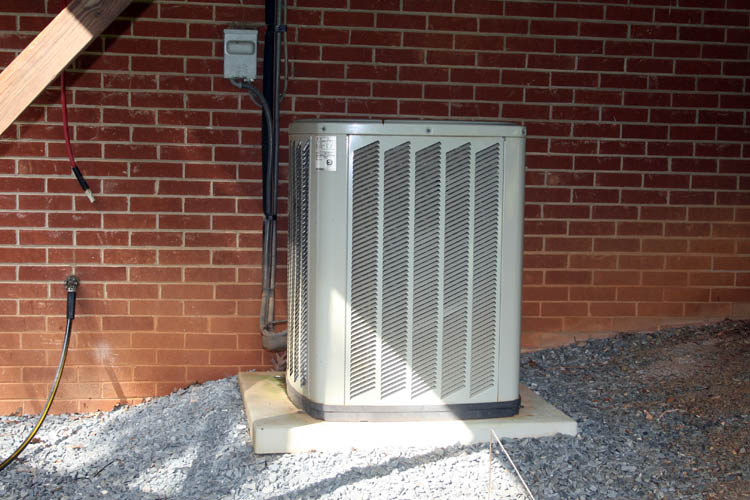
MARVIN GOODWIN CLEANED OUTSIDE UNIT COILS
I contacted Marvin Goodwin and he came by on 07-16-2020 and cleaned the
coils on the outside unit. I have done it in the past, but Marvin has
access to much stronger professional coil cleaner that I do and is a pro in
the heating and air business. Marvin sold/retired his business Goodwin
Heating and Air and now maintains his own rental properties, but does do
work for some of the customers he has installed units for.
Web page updated by Bill aka Mickey Porter on 07-16-2020.
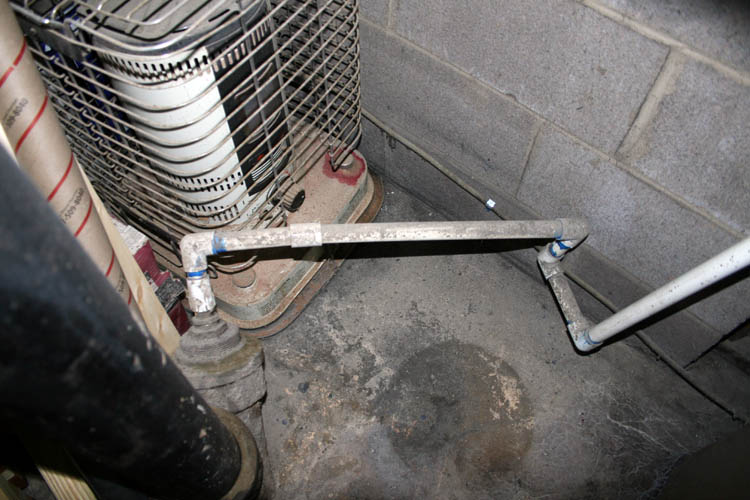
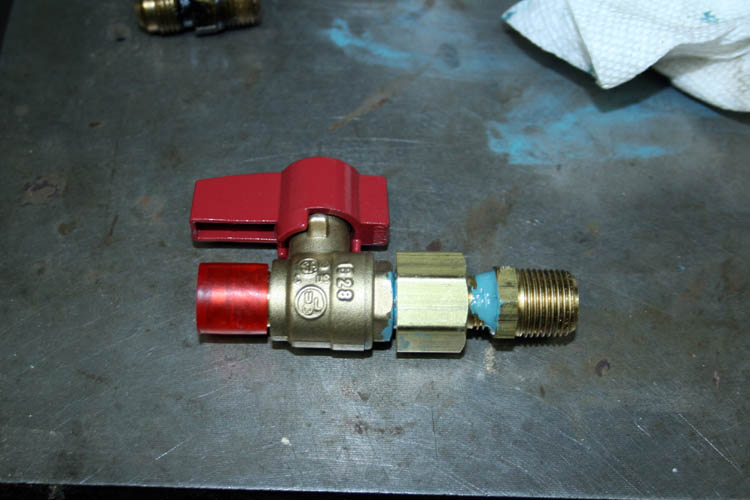
FUTURE PROJECT FOR FALL OF THE YEAR
When it gets time to do the maintenance of our fuel oil furnace, I plan to change
out the
jury aka jerry rig fuel cut-off valve that is placed right ahead of the
fuel oil pump. The line that goes into the in line cut off valve is
right in the way and if you bump or step on it, a leak will occur, of which
the fittings are about as tight and as close together as you can get them.
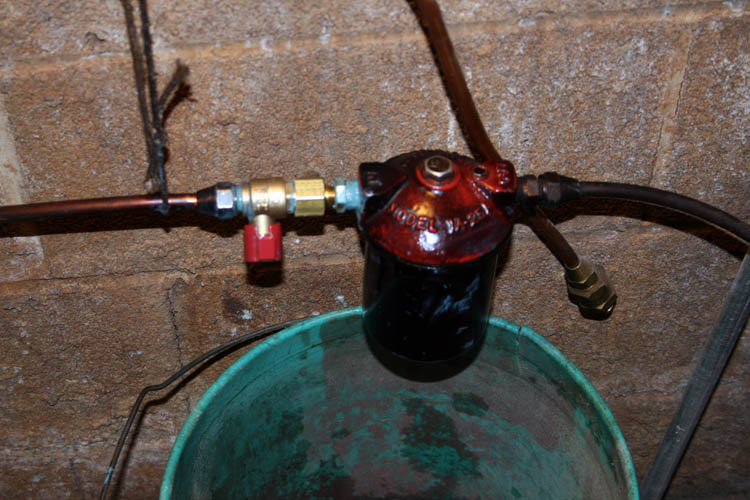
Close up view of the fittings mentioned above. Need the shopvac for
sure!
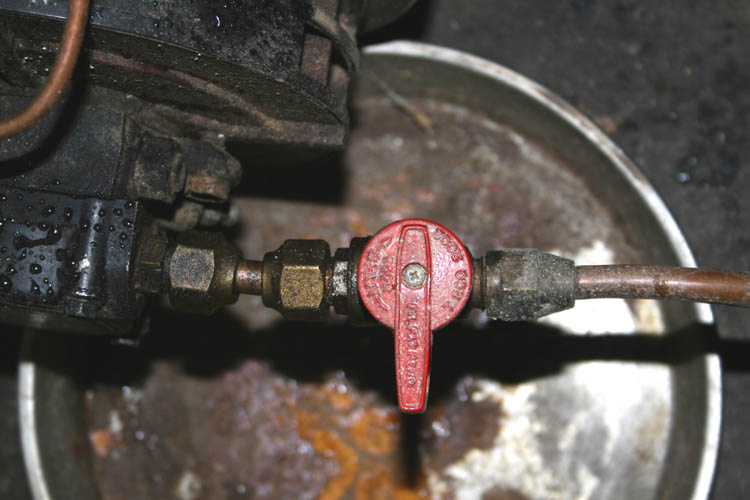
As you can see, the 3/8 inch flare fittings are close together and that
is where a slow leak will happen if you move the line, etc. BTW,
I did not install that
jury aka jerry rig......grin if you must!
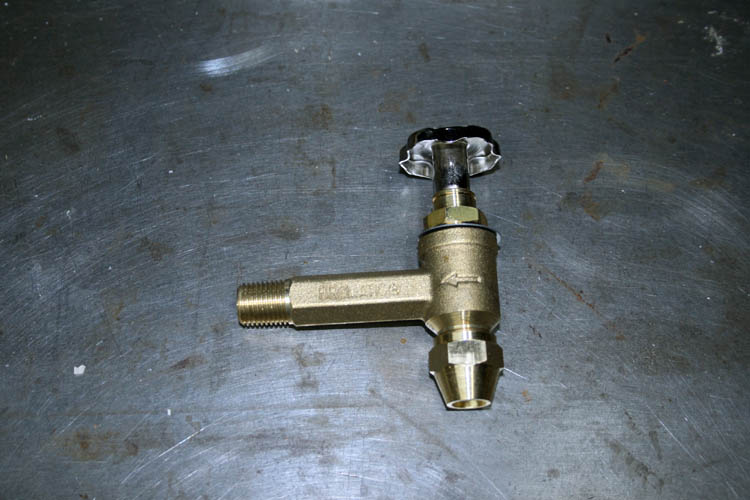
I plan to install a Firomatic safety cut off valve which is a code
requirement in some states.
I will probably reuse the current in line fuel cut off valve and place it at the
output of the in line General fuel filter which is located in the far corner of the
basement behind the furnace. Most installs, place the fuel filter at
the output of the fuel oil tank, but we have two above ground tanks feeding
into one incoming line and each tank has its own cut off valve. In
super cold weather, fuel oil has been known to get to the consistency of
pancake system, of which definitely restricts its flow.
Most homes and buildings up north have their fuel oil tanks in the
basement to prevent the fuel oil from freezing or jelling up as I just mentioned.
Web page updated by Bill aka Mickey Porter on 06-30-2020.
GETTING ANTSY
Today is Thursday July 9, 2020 and we have had some rain off and on the
past couple days and getting a little antsy being inside.
I had the above fuel oil project scheduled for fall of the year when I
will do my annual maintenance on the fuel oil furnace, however I decided to
go ahead and install a couple cut-off valves of which the one next to the
fuel oil pump on the burner will be the safety cut-off valve above pix which
is made by Firomatic. I knew it was going to be close work on the
Firomatic cut-off valve because the burner is very close to concrete floor
not leaving much room to bend the copper tubing. BTW, 3/8 inch copper
tubing made fifty (50) or more years ago is very difficult to bend into a
tight radius without some type of mechanical tube bender. The current
tubing is very soft and easy to bend.
My first project was to add a regular cut-off valve next to the General
1A-25 in line fuel filter. The cut-off valve I have has a 3/8
inch flare fitting at both ends and didn't want the cut-off valve away
from the fuel filter which would require a short length of tubing plus a
couple 3/8 inch flare fittings, of which they do have available as installed
on the cut-off valve next to the fuel pump, of which I do not like the arrangement. I got a couple adapters at one of our
local automatic parts supply houses, C& M Auto Supply here in Wadesboro, NC.
Below is pix of the General 1A-25 fuel oil filter in the far
corner of the basement:
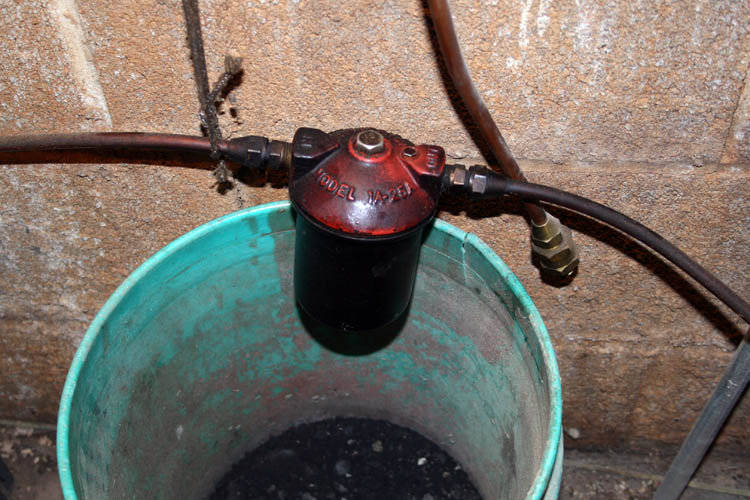
I have a 5 gallon bucket underneath the filter to catch what remaining
fuel oil is in the line coming from the fuel oil tanks, although I have a cut-off valve at each fuel oil
tank that is hooked in parallel with the fuel oil line coming into the
basement to access the furnace.
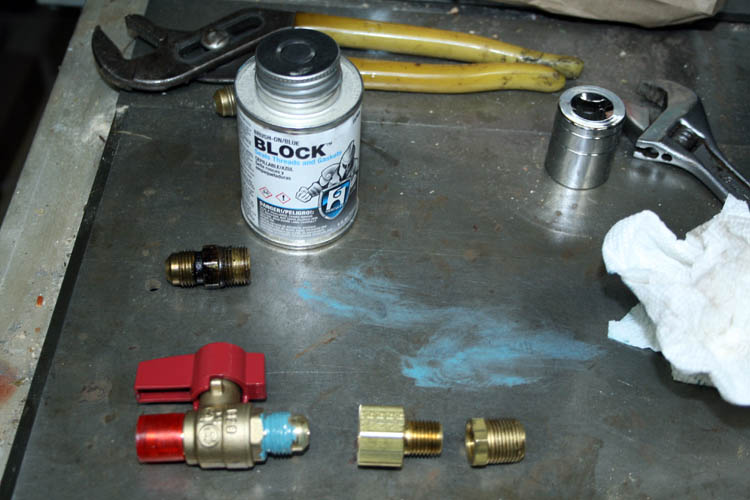
I used some blue liquid Teflon by Block to the fittings. I later
poured about half the container out onto the concrete floor where the
General filter is located....my bad for sure since that stuff is not cheap!

I will get some cat litter and soak up the wasted liquid Teflon and scrap
it off the concrete floor.
The adapters allows you to go from a 3/8 inch flare fitting to a 3/8 inch
NPT fitting, of which the 3/8 inch NPT outside diameter of the fitting is
approximately .675 inches.
Once the cut off valve was installed into the General 1A-25 filter
housing, the fuel oil supply line was attached to the other side of the
cut-off valve. I could not orientate the cut-off valve to the vertical
position which would look much better; didn't have enough strength to move
it any further.
I changed the replaceable filter which was still in pretty good shape, but it is best
to change the filter each year, whereas they are not that expensive and do
catch a lot of "muck" aka sediment, water, etc., from the fuel oil tanks.
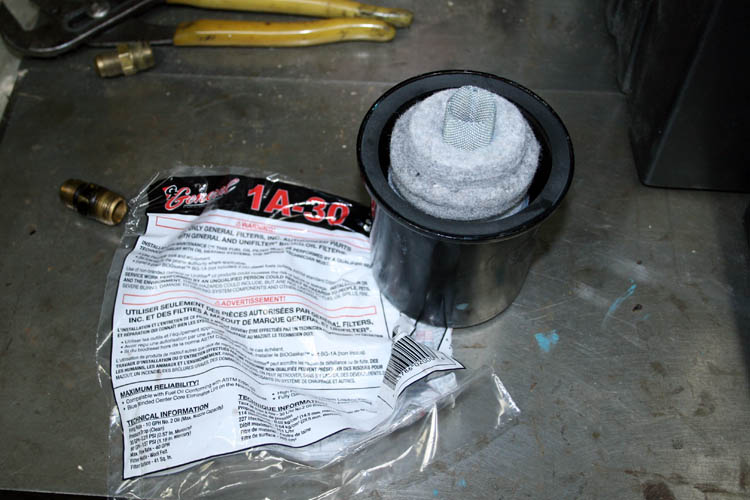
The filter comes with a new black rubber gasket and two smaller red gaskets.
I opened one of the cut-off valves at the fuel oil tank and opened the
cut-off valve just installed, bled the filter of air and tightened the small
bolt that allows air to escape from the filter housing and checked for fuel
oil leaks, of which none were detected.
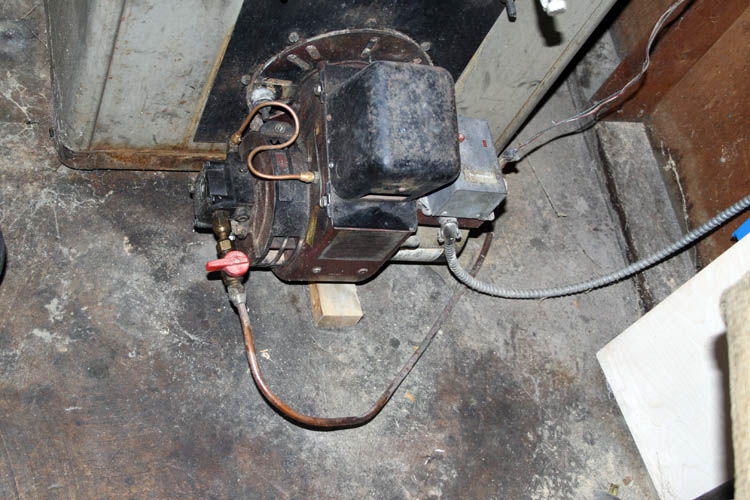
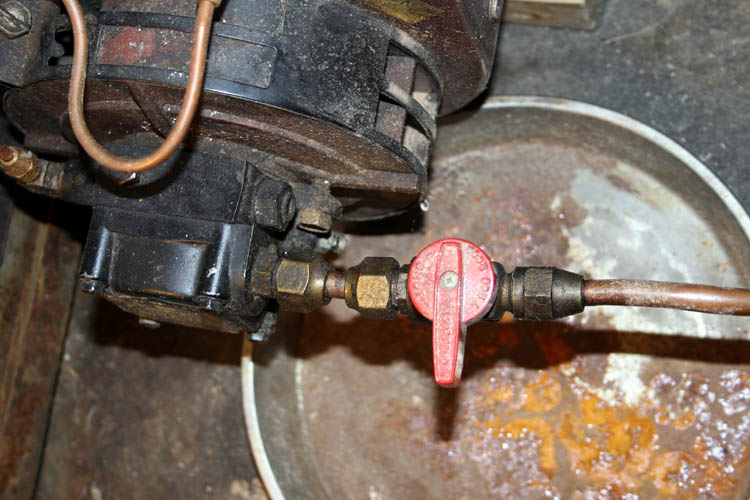
FIROMATIC SAFETY CUT-OFF VALVE INSTALLED
Below is the fuel oil burner assembly with the old cut-off valve
installed:
I found out very quickly that the 3/8 inch diameter copper tubing
manufactured fifty (50) years or more ago is a lot stronger (tensile
strength) than current
manufactured copper tubing. It was about impossible to make a tight
radius in the tubing even with an Elcheapo hand bender. I plan later to add a
right angle adapter to the bottom of the Firomatic safety cut-off valve.

I
opened the in line fuel oil cut-off valve next to the General oil filter and
did not detect any leaks. Come fall of the year, I will no doubt
change the above fitting to a right angle, but if there is not a problem, will
probably leave everything as it is. There is an ole saying,
"If it ain't broke, don't fix it."
I closed the cut-off valves at the fuel oil tank, General fuel filter and
the Firomatic cut-off safety valve.

The copper fuel oil supply line is not in the way as before.
Web page updated by Bill aka Mickey Porter on 07-09-2020.
NOTE: I bled the fuel oil system to the pump, oiled the
drive motor and squirrel cage blower fan. The blower motor has sealed
bearings. The unit fired right up and was running clean, therefore
didn't change out the nozzle or mess with the electrodes. I did this
routine maintenance sometime in early October 2020, but didn't log an exact
date.
Web page updated by Bill aka Mickey Porter on 10-26-2020.
FUTURE TREE REMOVAL
This year, I noticed an American Sweetgum tree on our property that started dying
and it is now dead which presents a future safety hazard since I park my truck in a
couple places on our lower gravel drive that would be in its fall path
depending on high wind direction and other variables.
In its natural fall path are some small Crepe Myrtle trees and also a
Magnolia tree that I have cut back over the years and it keeps coming back
and decided to leave it alone.


I believe I can change the tree's fall path by attaching a chain about 30
feet up the tree using one of my foot climber tree stands to get me to that
elevation and using a chain drive coffin hoist come-a-long anchored to
another tree to the left of the sweet gum tree, pull the tree in that
direction.
I have done that many times in the past on our property and have only had
to use a tree removal service only two (2) times during the past thirty one
(31) years that we have been here.
See my Star
of David Pine Tree short story which depicts how I will go about
cutting this tree down.
Thinking back about 25 years ago, I remember letting some home heating
fuel heating oil # 2 escape from an oil tank that a friend had given me, of
which I eventually gave the oil tank to my brother Allen Porter to make a
BBQ cooker. There was a very large
Pine tree that also succumbed to
the fuel oil leakage and when it fell, went straight down the gravel drive
way and caused no damage.

I will post pixs here when I start and complete this project.
Web page updated by Bill aka Mickey Porter on 08-08-2020.
NEED A COMMON SENSE REFRESHER COURSE
Around 0754 this morning, I gathered up the required items needed to
complete the tree removal which consisted of a Husqvarna model 55 chainsaw,
a couple heavy chains, coffin hoist type chain drive hoist, foot climber
climbing tree stand, gloves, rope and a small folding saw.
I used my US Patent 4,953,662 hunting foot climber tree stand I made many moons ago for a very large
tree at the
Anson County Airport on the land that was owned by Pines Davis, now deceased
and it has definitely been used for a couple or more
tree removals
on our property. I believe this tree stand will go around a 24 inch
diameter tree if I am not mistaken.

The chain I have used in the past with much success is 75 feet long, but
can't remember the tonnage, but it will do the job for sure pulling trees in
the direction that I need them to fall.

I have the chain attached to the end of the red rope and climbed up the
tree about 25 to 30 feet and had to remove a few small limbs that were in
the way as I ascended the tree. I definitely said a prayer before
tacking the climbing.
I hooked the chain off and used a piece of rope to go around
the chain hook to hopefully prevent it from coming loose from the chain.
I had a couple class 8 bolts and nuts for this type of job to secure the
chain instead of using the chain hooks which can come loose, however I
placed it somewhere; grin if you must!

I believe I might have had enough chain to pull from a
direction to the left and behind the Sweetgum tree, but didn't think that
far ahead. The tree probably would have fallen exactly where I wanted
it by not allowing the tree to swing in an arch as it fell to the
ground....my bad!

Before doing any serious tightening up on the chain, I cut a
wedge from the Sweetgum tree and then tightened up on the coffin hoist.
I completed the back cut on the tree and it easily fell
without hanging up in the large white oak tree. It didn't fall exactly
where I wanted it to by about 5 or 6 feet, but close enough for Govt. work
as they say.

The tree would normally have fallen facing the camera
direction.

With the tree on the ground, the ole Husky got a good
workout, not to mention yours truly for sure. I was soaking wet with
sweat in no time flat. A chainsaw will whip a fat man in a manner of
minutes!


The base of the tree had a large hollow cavity in it and was
rotten several feet upward being an accident fixing to happen.
The next time I am out back, I will pull a tape across the tree to ascertain
the diameter.

The tree is 16 inches in diameter and you can see the rotten
hollow center portion.

The base of the tree is hollow as well.

I worked about four (4) hours and left the larger blocks cut
to further dry out before relocating them in a gulley beside this
dirt/gravel lower driveway which is used to access the basement woodworking
shop and my deer hanging white oak tree I nick named
Tom Dooley aka Dula.
I loaded all the gear onto the truck instead of hauling it
back using the hand truck. That is about the only
working smarter not harder that I
did this morning!
Web page updated by Bill aka Mickey Porter on 08-10-2020 and
08-11-2020.
MORNING MEDITATION
I have a couple short stores titled
morning meditation,
of which I enjoy setting on our
front yard swing and reflecting on how
great and wonderful God is and thank Him for his many blessing through Jesus
Christ our Lord and Savior.
After my daily morning Bible reading and study, I will
head to the swing depending on the weather of course and/or other priorities
and it is such a peaceful and relaxing time early of the morning before the
sun rises in the East. Normally, the wind is calm and the birds
continue their morning "singing" as well, of which they start sometime
before and around daybreak.
This morning, I decided to water the front lawn and the
hillside lawn after I watered our tomato plants which has not produced many
slicing tomatoes this year, but have enjoyed the cherry tomatoes.
Hopefully, those late tomatoes will bear some good tomatoes for a few
wonderful tomato sandwiches,
BLTs and of course my bride's favorite
Club Sandwich
and is slowing becoming my favorite too!
While watching the sprinkler in the front yard adjusted for
a circular path of water, I decided to take a pix or two of the droplets of
water falling very near where I was sitting on the swing and brought the ole
antiquated Canon 35MM DSLR camera and "snap" a few pixs.


As evidenced by the pixs, it doesn't take too much to make
myself happy and entertained with a good grin going in the process.
The small things in Life go unnoticed by the hustle and
bustle of the busy crowd and I enjoy taking time out to
"smell the roses."
It reminds me of a sermon our
Pastor Sam Abee gave titled,
"The Crowd or the Cloud."
Web page updated by Bill aka Mickey Porter on 08-13-2020.
LEAVING ON A
SPIRITUAL NOTE
If you do not know Jesus Christ as your Lord and Savior, please take
this moment to accept him by Faith into your Life, whereby Salvation
will be attained.
Ephesians 2:8 - 2:9 8 For by grace are ye saved through
faith; and that not of yourselves: [it is] the gift of God: 9 Not of
works, lest any man should boast.
Hebrews 11:1 “Now faith is the substance of things hoped for,
the evidence of things not seen.”
Romans 10:17 “So then faith cometh by hearing, and hearing by
the word of God.”
Open this
link about faith in the King James
Bible.
Romans 10:9 “That if thou shalt confess with thy mouth the
Lord Jesus, and shalt believe in thine heart that God hath raised him
from the dead, thou shalt be saved.”
Open this
link of Bible Verses About Salvation,
King James Version Bible (KJV).
Hebrews 4:12 “For the word of God is quick, and powerful, and
sharper than any two edged sword, piercing even to the dividing asunder
of soul and spirit, and of the joints and marrow, and is a discerner of
the thoughts and intents of the heart.”
Romans 6:23 “For the wages of sin is death; but the gift of
God is eternal life through Jesus Christ our Lord.”
Romans 3:23 “For all have sinned, and come short of the glory
of God;”
Micah 6:8 “He hath shewed thee, O man, what is good; and what
doth the LORD require of thee, but to do justly, and to love mercy, and
to walk humbly with thy God?”
Philippians 4:13 "I can do all things through Christ which
strengtheneth me."


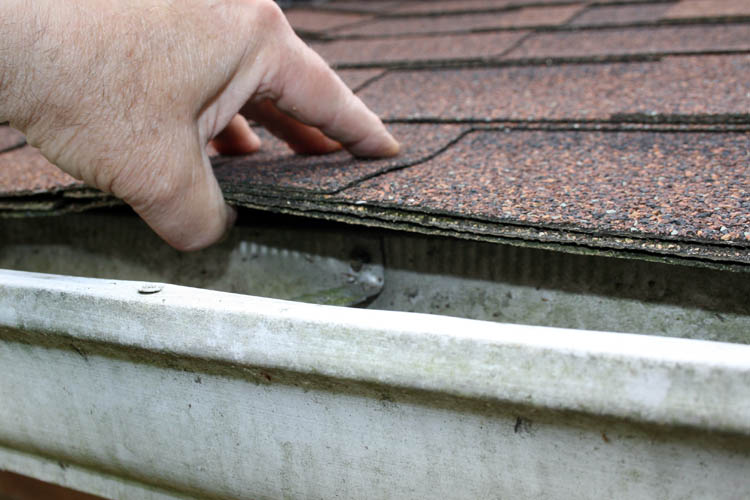


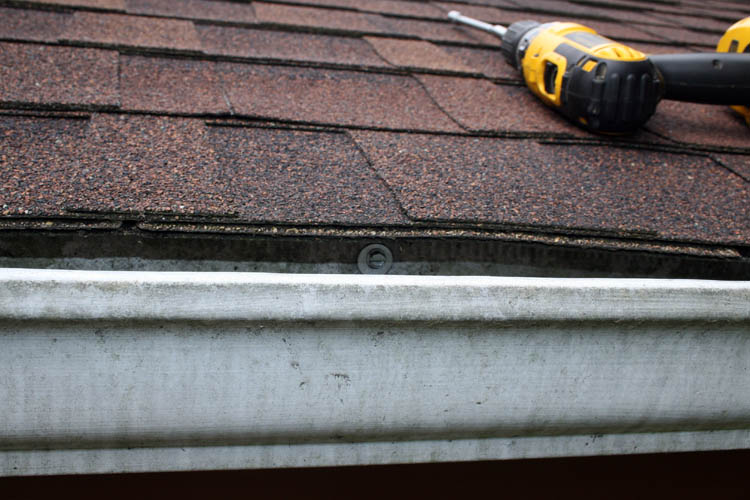
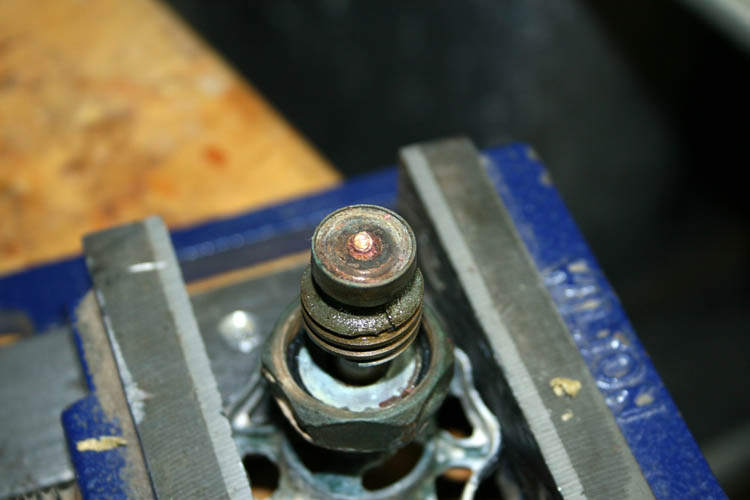

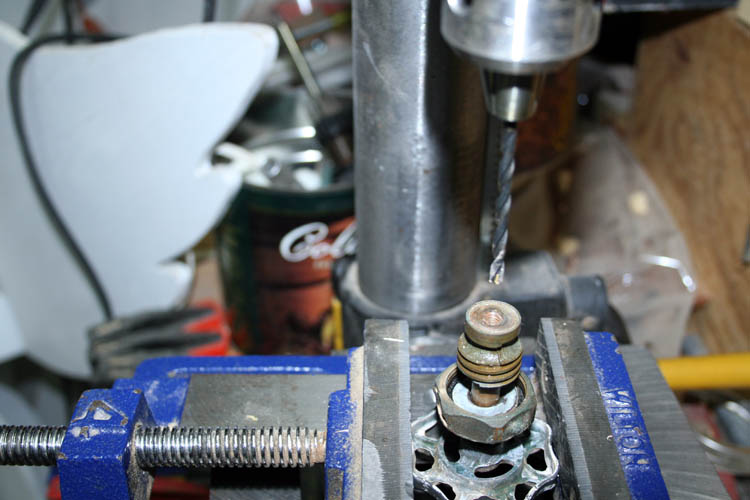

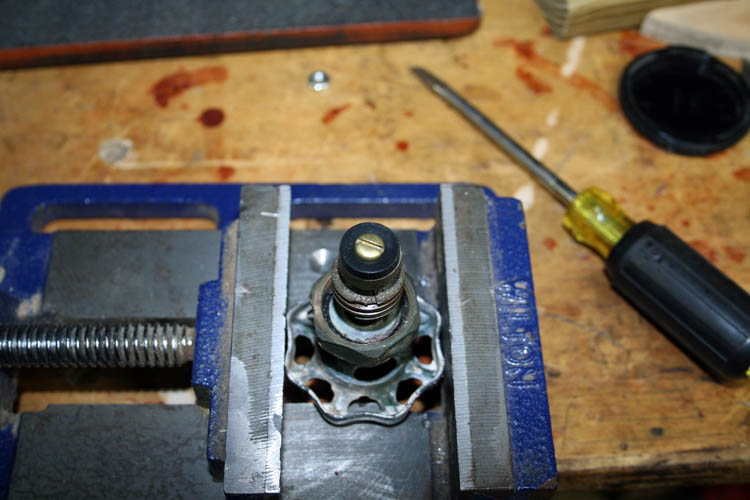

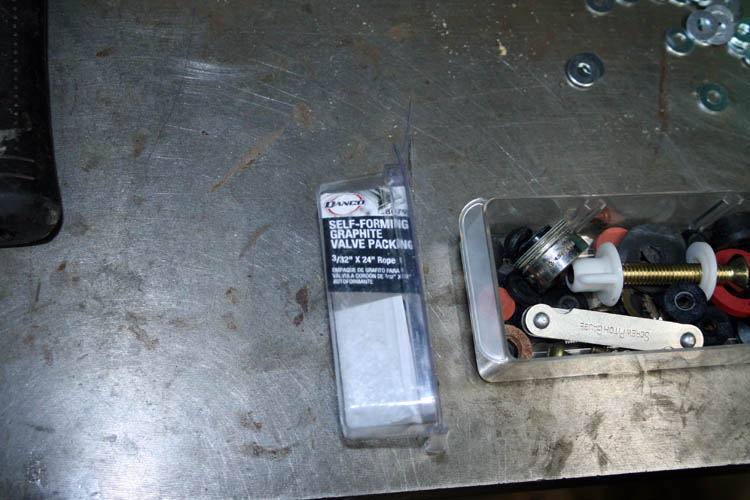

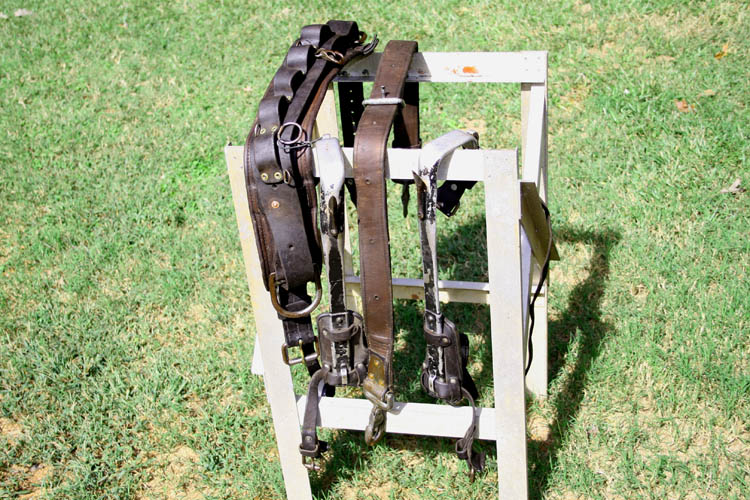
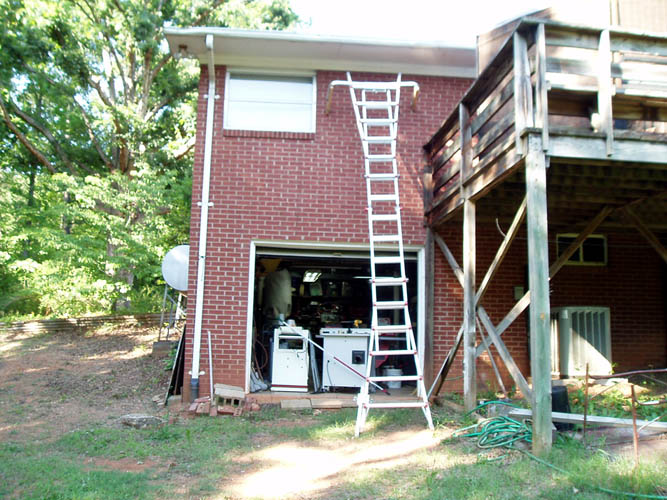
.jpg)