YARD PROJECTS & REPAIRS 2018
The summer is getting gone rapidly and today is September 10, 2018.
I have done my normal spring yard projects such as aerating the lawn, applying
fertilizer and with the amount of rain we have had, there has been a
tremendous amount of on going lawn work trying to keep up with the growing grass and
yes the weeds, especially the dandelions.
ENJOYED SOME HOME GROWN TOMATOES
I planted eleven (11) tomato plants and we enjoyed some good ole home
grown tomato sandwiches, BLTs and
Club sandwiches. I plan to work up
the soil real good adding additional fertilizer, Miracle Grow garden soil,
lime
and sand to help the rock solid red clay soil in hopes of a better harvest
of home grown tomatoes next year, the Lord willing of course! I had
better luck with the tomato plants adjacent our carport in 2016 as evidenced
by the pix below:

LEANING PINE TREE OF WADESBORO, NC
Around the first of the year, we experienced some tornadic winds which
caused a large pine tree on our upper property to lean over at about a ten
(10) degree angle. Eventually it fell to a forty-five (45) degree
angle and lodged in a large willow oak tree within the edge of our property.
From the position of the tree, if and when it would fall, there wasn't any
danger of doing damage to the adjacent property.
The leaning pine tree brought to mind images of the
Leaning Tower of Pisa.
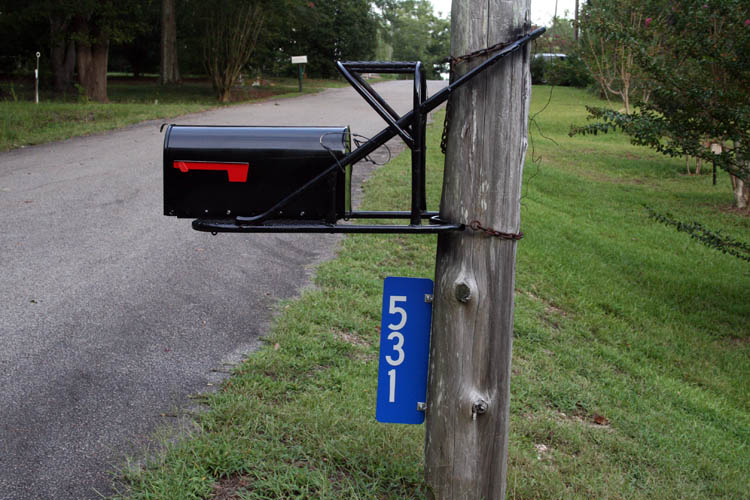
NEW MAIL BOX AND 911 EMERGENCY SIGN
The latter part of August, I ordered a 911 number sign from our local
Fire Department and after installing it, I purchased a new mail box from our
local hardware, H. W. Little, Inc. I also repainted my
patented
Hunter's Dream
Tree Stand, upper platform which secures the mail box to the
post. Below is a pix of the mail box and 911 sign. Looks great
even if I do say so myself! "It is a poor frog that want croak on his
own pond"....now your turn to grin.
CREPE MYRTLE AND IRON PIPE INSTALL
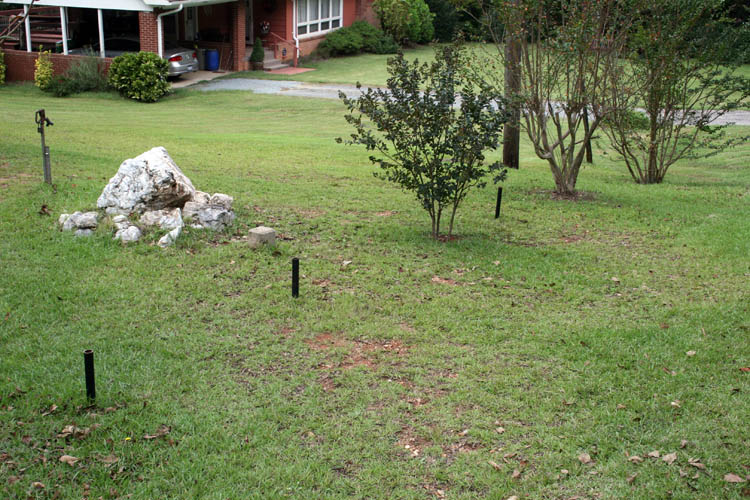
The morning of July 9, 2018, I noticed that someone had entered our drive
way from the street and drove across our side yard and went up the hillside
to access the street instead of backing out onto the street to effect a turn
around. In
essence, they used our upper yard as a cul-de-sac since our street is a dead end
and we are the last house on the dead end street.
I was in the back yard and heard the vehicle spinning which about got stuck as it
entered onto the paved street, by the marks left in the wet grass. My primary suspect was the town garbage
pickup vehicle, but since I didn't eye witness the event, it could have been anyone.
However, it was trash pickup day and about the time of their normal run
which is circumstantial evidence only.
The weather had been very dry and if we had experienced any recent rain, the vehicle
would have gotten stuck in our yard since water drains beside our drive way
and to the left side of our carport to exit via our back yard.
There was enough opening between an existing crepe myrtle tree and a rock garden to
allow this to happen. We have been here for twenty-nine (29) years and
I believe this is a first.
Murphy's Law never sleeps. We have had dirt bikes and regular bicycles
on our property and an occasional four wheeler and finally had to block off
access at the end of the paved road onto our property with the usage of a
chain and lock to help prevent such and reduce any would be liability
issues. The State has a red warning
sign at the end of the paved road. The 1952 plat for this
property showed the road access going about another 200 feet +- beyond
the paved road, however it
was never dragged any further, no doubt due to the extreme terrain drop off
on the right side. When we purchased the adjacent property below us which has
the road access that was never dragged, we were deeded 1/2 of the road right
of way adjacent our property. We have a lower gravel driveway going beyond the end of the
pavement, whereby we can access the rear of our property if and when needed.
There is plenty of real-estate on the paved road from the end of our drive
way to effect a vehicle turn around.
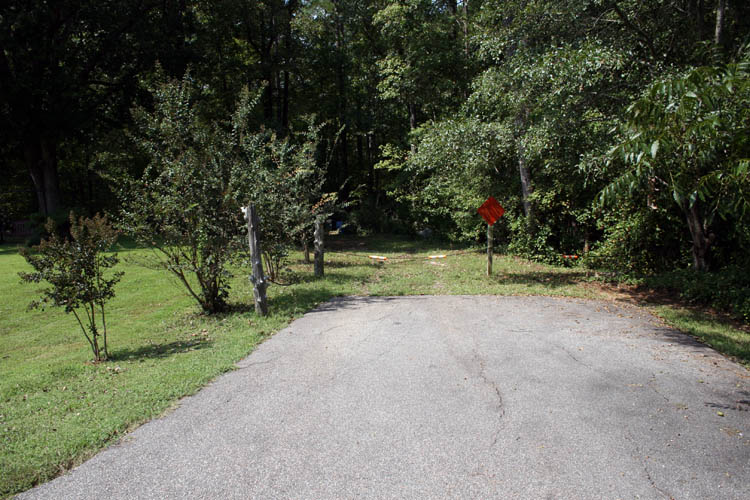
To help curtail further such
trespass, I went to Lowe's in Rockingham, NC and purchased a couple 10 feet
sections of heavy wall 1 1/4 inch black iron pipe and a crepe myrtle tree to fill in
the gap mentioned above. The iron pipe is driven very deep into the
hard packed red clay ground.
Also, our security system was updated to 24/7 video surveillance preserving a
record on the cloud and instant alerts when motion is detected in specified
zones.
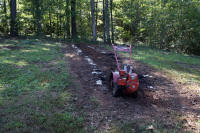
Below is a pix of the installation of the iron pipe and the planting of
the crepe myrtle tree with just enough room for my lawn tractor access between
the crepe myrtle tree and the iron pipes.
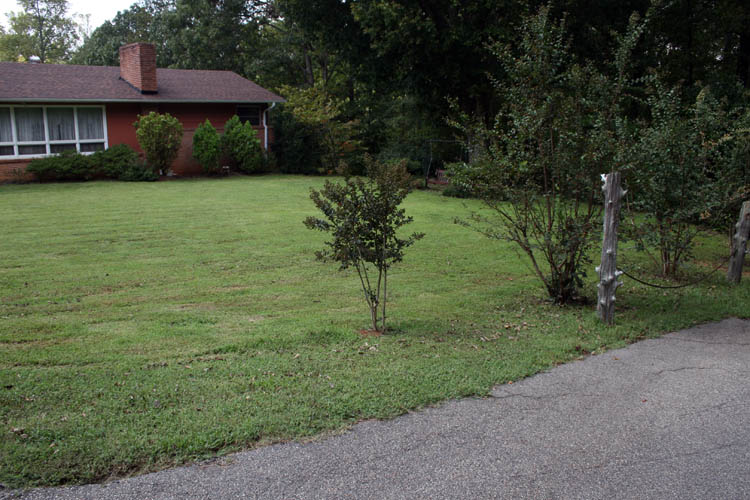
I planted another crepe myrtle tree on the other side of our drive way to
help fill a large gap between the last crepe myrtle tree and our drive way
and will plant another one or two in the spring, the Lord willing of course.
Web published update by Bill aka Mickey Porter on 09-21-18.
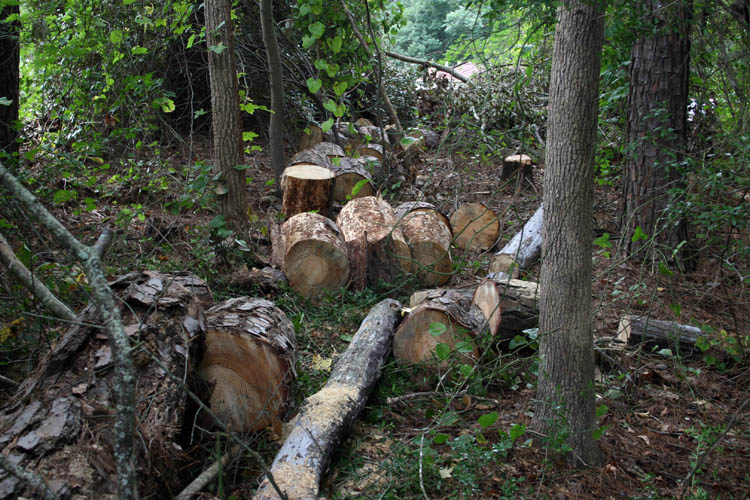
WORKOUT WITH THE CHAIN SAW AGAIN
On September 7, 2018, I noticed that the leaning pine tree mentioned in paragraph
three above had fallen and the upper
portion was barely across our property line onto the adjacent property and decided to cut it up
into manageable lengths. I tossed the upper portion onto our property which has some
undergrowth, small bushes and trees along the perimeter growing which
would be able to conceal the firewood lengths cut.
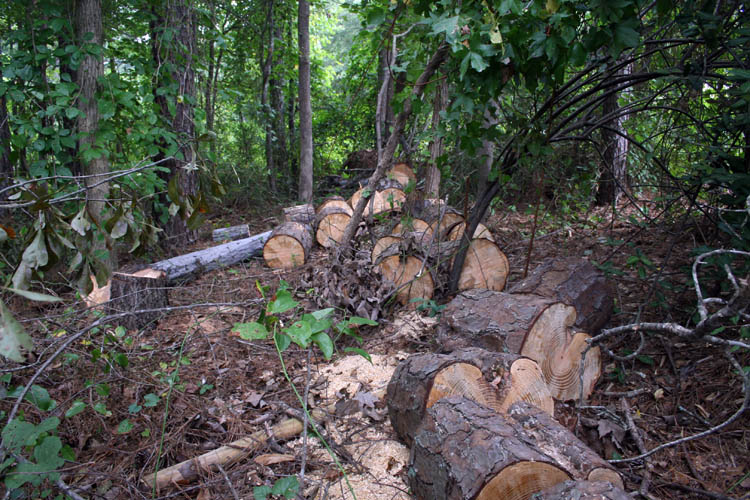
Below are some pixs taken of the downed tree.

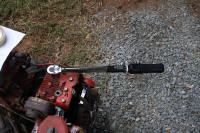
My eighteen (18) inch Husqvarna Farm model 55 bar chain was maxed out near the base of
the tree due to the tree's diameter. Pine wood is normally no good for
firewood and will let the insects recycle the large tree back to nature
which no doubt will be completed after I am long gone!
I also cut down the standing portion of a tree that tornadic winds had
broken the top out a few years ago and insects had did a good job in
rendering the tree easy to cut.
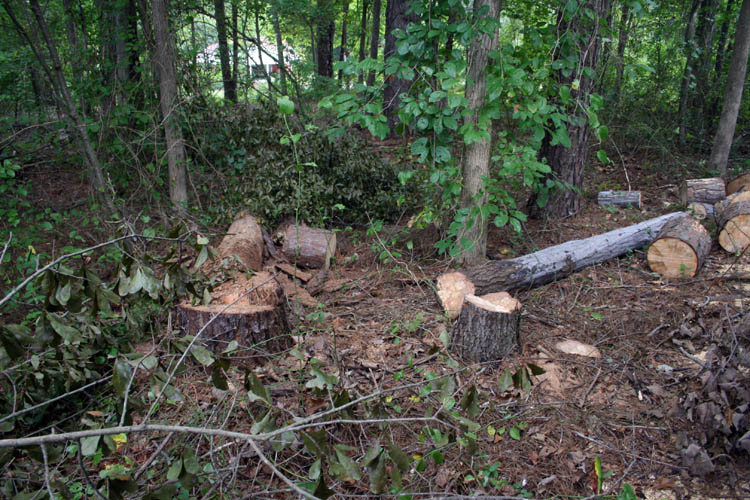
In the right hand side of the pix is an oak tree that had also died, but
was still solid as a rock. It was leaning in the wrong direction and
had to use a chain and a chain drive come along to pull it in the direction
I wanted it to fall. After cutting the initial wedge and tightening up
on the chain come-along, I cut the back side of the tree and it made no
effort to begin to fall. I started back to where I had the come-along
anchored to another tree to tighten up on it, when I looked back and the
tree was beginning to fall without making a sound. I did no doubt a
world record 10 yard dash to safety and I give thanks to Jesus Christ my
Lord and Savior for looking out for me. Praise the Lord!
I noticed that all my cuts were at an angle and not cutting parallel
which is bad chain sharpening; e.g., filing more off one side of the chain
than the other side. I will have the chain sharpened on a machine to
correct the problem. I have a new spare chain and I believe have only
used a couple chains since purchasing the chain saw in 1999. I
basically use it for tree removal since we don't burn firewood in either the
upper and lower level fire places.
I have a couple more trees to cut down which doesn't constitute an
emergency and/or safety hazard and will tackle those come cold weather, the
Lord willing of course.
As soon as I purchase two tires for the aerator, my next order of yard
work is the aerate the entire lawn, broadcast fertilizer and over seed the
front, back and side yards.
Web published by Bill aka Mickey Porter on 09-10-18.
AERATOR REPAIRS NEEDED
Back in the spring, our lawn aerator tires were basically dry rotted,
however I was able to fix a flat
them, of which one finally came apart at the end of aerating our yard.
I found replacement tires available at Harbor Freight and decided to go
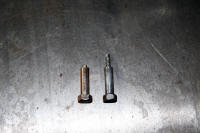
with the solid tires. The specifications on the original tires were 10
inches in diameter with a 1/2 inch diameter bolt used as an axle and with an
offset hub. The replacement tires had a 5/8 inch diameter hole for the
axle bolt and ordered 5/8 inch outside diameter x 1/2 inch inside diameter
bronze bushings. I could have just as easily bored the mounting hole
in the wheel aerator bracket to 5/8 inch diameter, but didn't want to take
the bracket off the main shaft of the aerator.
I purchased the tires above at Harbor Freight in Rockingham, NC and the same day received the bushings from a
vendor in Ashville, NC, however they sent 3/4 inch outside diameter bushings
which would not work. I emailed the vendor via EBay and they are
sending the correct bushings. They said I could keep the bushings
received. It would cost them more to send a prepaid envelope than the
value of the bushings.
Back in the spring, I took one wheel assembly off the aerator and as of
yet been unable to locate where I stored it. The only thing usable was
the 1/2 inch diameter bolt and two nuts, of which one was a locknut with
plastic insert. I will no doubt locate the wheel assembly after I
purchase another bolt and nuts unless I placed it in the trash dumpster.
After I receive the correct size bronze bushings from the vendor, I will add a
few pixs and get to work aerating, fertilizing and over seeding the yard to
create more grass cutting for next year....grin if you must!
I received the correct bronze bushing from the vendor in Ashville, NC
this afternoon and it didn't take long to get the aerator ready for usage in
the morning.
I had to cut one of the bushings in half with an abrasive disc using a
Dremel tool and fine tuned its length with the sanding machine.
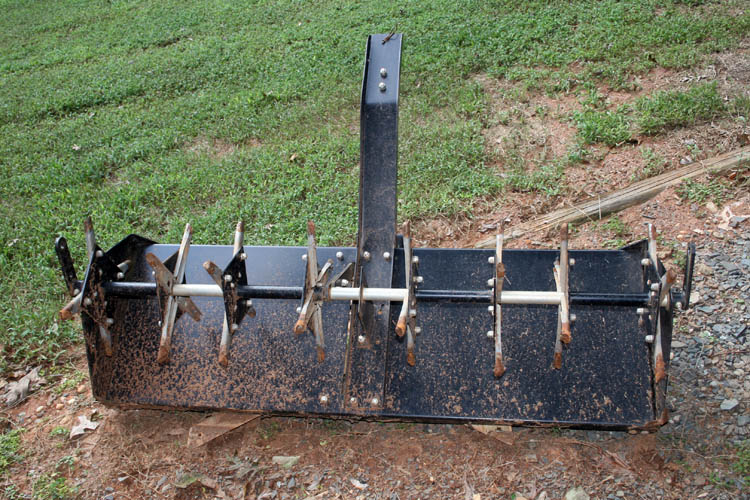
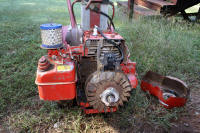
The aerator upside down with the wheels and axles off.
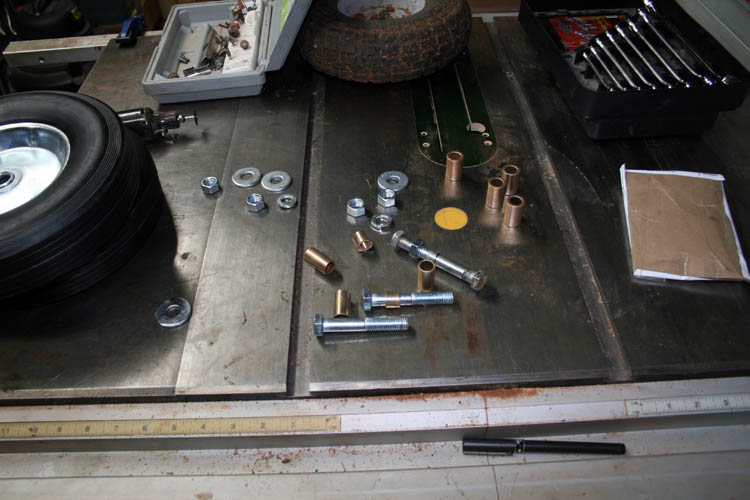
Wheels, hardware and bushings.
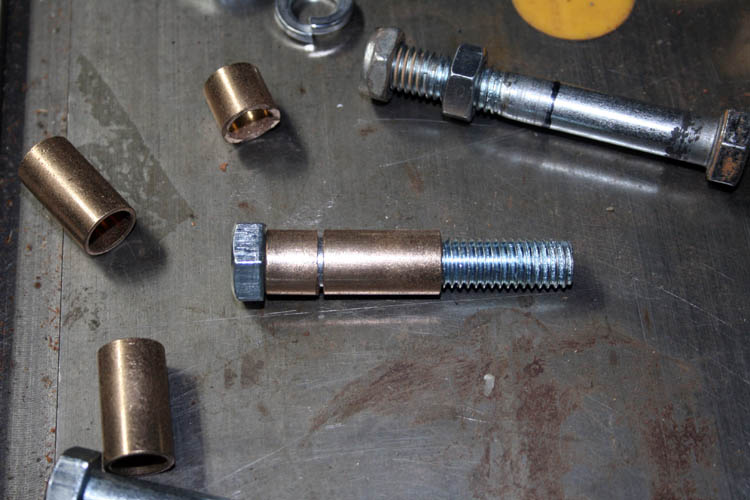
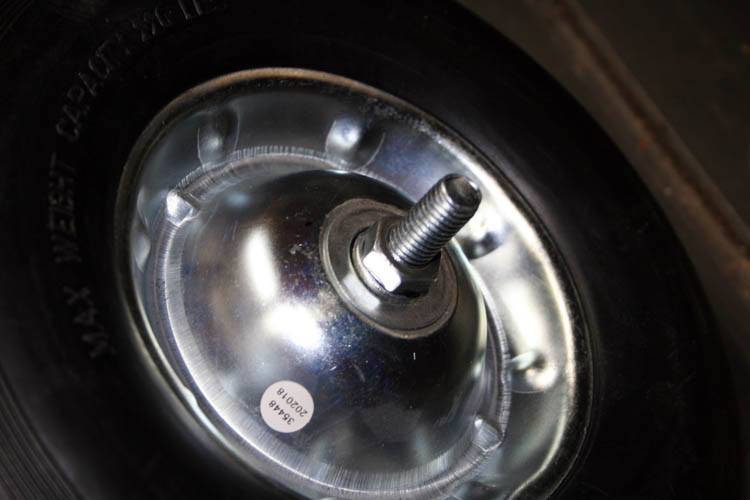
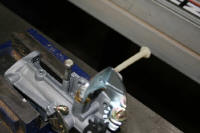
Wheel with the bushings bolt and nut ready for the bracket on the
aerator.

Aerator ready for a workout!
Web page updated by Bill aka Mickey Porter on 09-21-18.
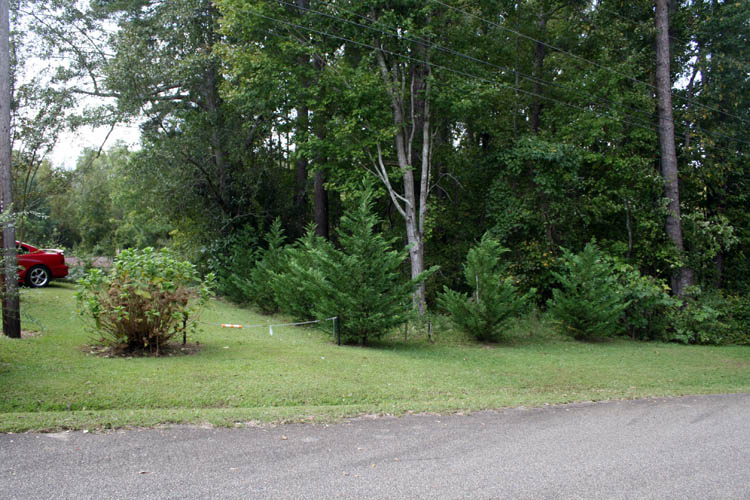
LEYLAND CYPRESS TREES GROWING
Back in April 2015, I planted six (6) Leyland Cypress trees on the adjoining
property we purchased to hopefully fill in the gap and below is a pix while they were still in the nursery pots:

The florescent orange/white PVC pipe behind the white mailbox is the SE
corner of the parcel of land purchased. Our land purchase consumed a
lot of the adjacent owners
homesteaded yard facade.
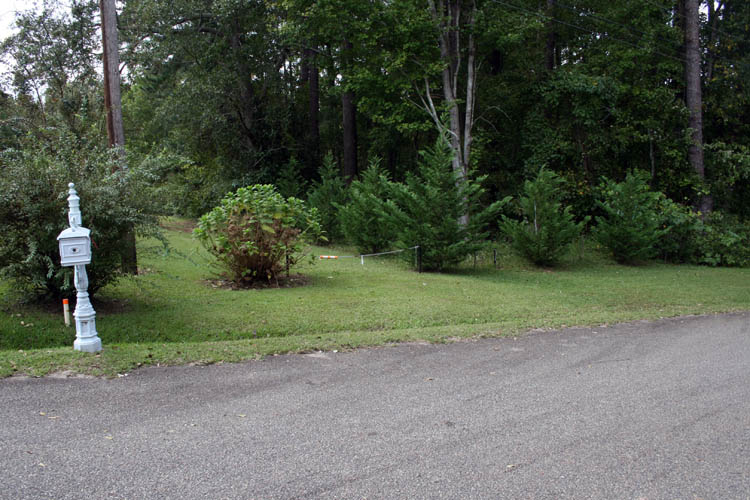
Above and below, current pixs of the planted trees:
Web page updated by Bill aka Mickey Porter on 09-21-18.
AERATING YARD, FERTILIZING AND OVER SEEDING
Today is one of those days that you could classify as a low biorhythm day.
In other words, things just didn't peak out as they should. Seems like
I started off fumbling and dropping things in the kitchen doing a recipe I
have done many times, being
Belgium Waffles. They did turn out
wonderful with the home made strawberry sauce. I usually let my bride
do the beating of the egg whites until they are stiff and she didn't fumble
around like I was doing......grin if you must!
After breakfast, my first thing on the agenda was to aerate the entire
upper, lower and side yards. I planned to take a pix of the lawn
tractor attached to the aerator, but that idea or thought never materialized
and I remembered after putting the aerator and lawn tractor up which was too
late then.
The aerating of the yard went well since
Hurricane Florence left a good
amount of rain here last week, guesstimation between 11 to 13 inches and the
high winds from the tropical storm Florence dried our yard out real well.
I had a good amount of weight on the platform of the aerator being two
concrete construction blocks aka
cmu blocks and two that were made from
cinder construction materials, not as heavy as the concrete ones.
After getting the entire yards aerating, I went to Beachum Landscaping
Company here in Wadesboro, NC and purchased 150 lbs. of 10-10-10 fertilizer,
bag of lime and 2 bags of sand, with the sand destined for my tomato plot
for next season.
I then headed to Lowe's in Rockingham, NC and purchased 5 lbs. of Bermuda
grass seeds packaged by Scotts and a couple other items and headed back
home.
FERTILIZING YARD
I got the ole Scott's material spreader out and went to work broadcasting the
fertilizer and a little bit of the lime on the front and side lawns.
After the fertilizer was spread, I broadcast the 5 lbs. of Bermuda grass
seeds in the front yard. Later this afternoon, I plan to water the lawn
to help jump start the seeds since no rain is forecast for several days.
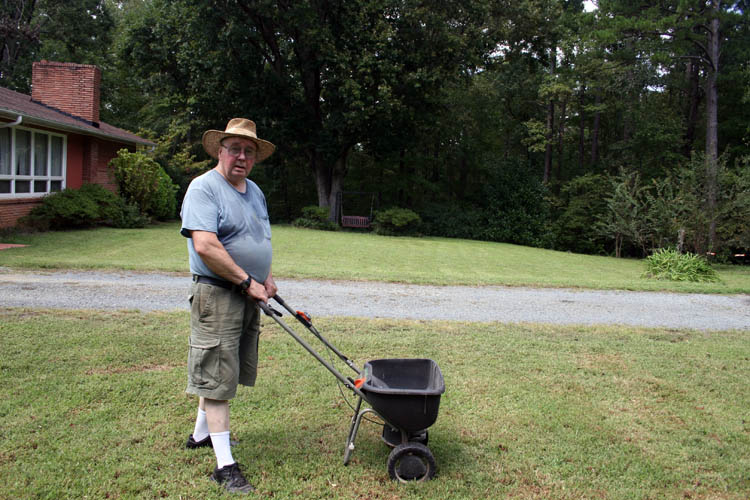
Self portrait with the ole antiquated Canon 30D 35MM DSLR camera using the
timer....no
Obamaphone
for me yet, other than the 20 dollar TracFone with no picture taking
capability! Looks like my Tee shirt has sprung several leaks. I
am still tight as a tick from the Belgium waffles.
Our security camera captured a pile of short video clips of my yard work
since I forgot to turn it off while broadcasting the fertilizer and Bermuda
grass seeds, but did remember to turn the system off before aerating
the yard.
Click on the hyperlink
here and
here.
You might need your sunglasses on to keep from getting blinded by the snow
white legs!
When it cools down some this afternoon, I am thinking about spreading
fertilizer on the back yard.
Web page updated by Bill aka Mickey Porter on 09-22-18.
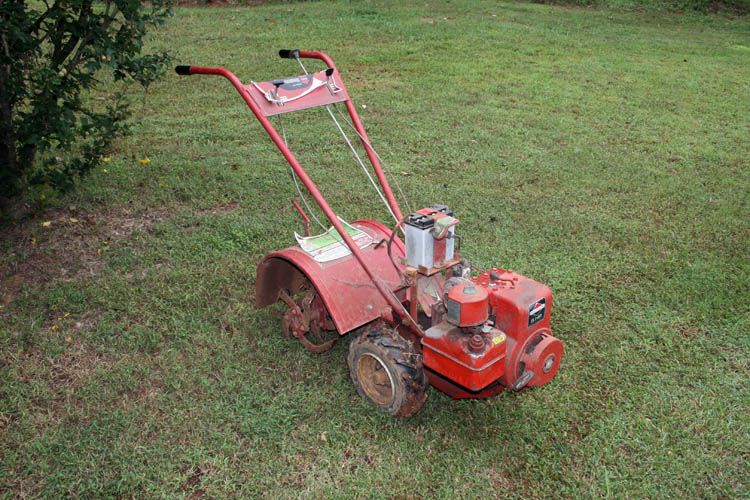
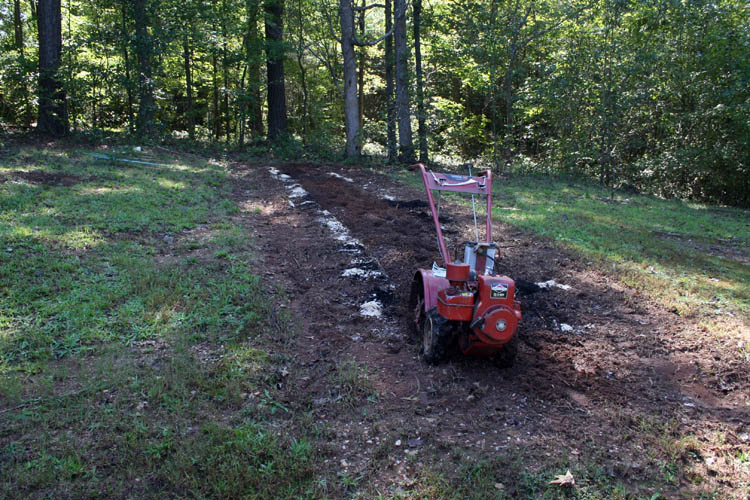
TILLING TOMATO PATCH
Today is September 24, 2018 and the temperature is a pleasant 70 degrees.
About day break we had a very light misting rain that didn't last too long.
After driving to Lilesville, NC and picking up our youngest Daughter Lisa's
trash, I got the ole Troy Bilt Pony tiller out and it fired up after a few
pulls.
I tilled in some 10-10-10 fertilizer with a mixture of pellet lime and all
went well until I was just about finished and the Troy Bilt Pony tiller died
on me; e.g., lost power. I finally got it started again, however it would not rev up to full
throttle or would run when I put it in gear and a load on it.
I finally managed to get it to run at very low throttle and got it back to
its normal storage location to work on it later and try to ascertain the
problem.
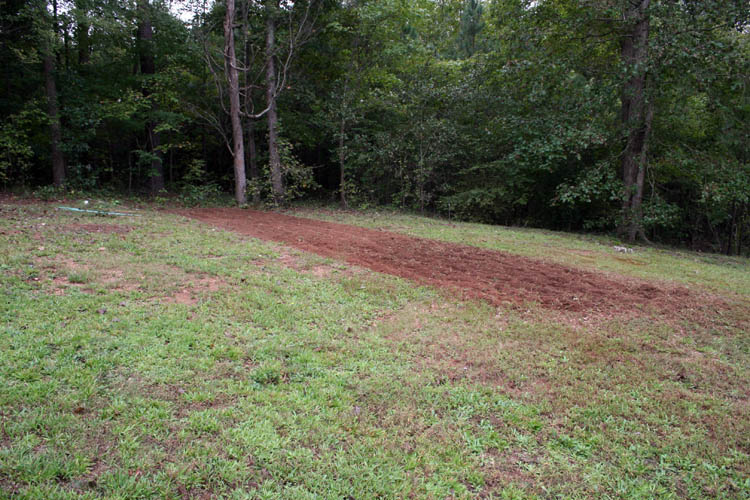
Above pix of the little tomato patch area. I still need to till in
some sand and also some Miracle garden soil before the next coming Spring,
the Lord willing of course.
Web page updated by Bill aka Mickey Porter on 09-24-18.
5 HP BRIGGS & STRATTON ENGINE
It is way to hot outside to be messing with the Troy Bilt tiller which is
powered by a 5 horsepower Briggs and Stratton single piston flathead engine
manufactured sometime in the middle 1980s, whereas my common sense factor
didn't work for me this time! I should have waited until the weather cools
down.
I talked with my Brother Allen Porter who is a whiz at working on small
engines and regular car engines as well and has done many tear downs and
rebuilds. That is way above my level on gasoline engines and he gave
me some pointers on the best approach to ascertain why the engine will not
start. I had tried all the easy fixes and finally wanted to look at
the piston and valves to see if they were working ok and the cylinder wall
was not scarred. I remembered that when the engine died down during
the last leg of tilling the tomato patch and got it back to its normal
storage place, I started checking it, The engine oil level was very
low and hopefully wasn't the major issue, of which it appears it isn't.
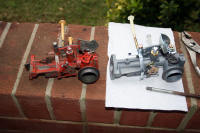
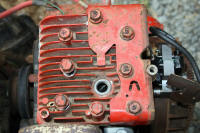
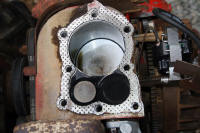
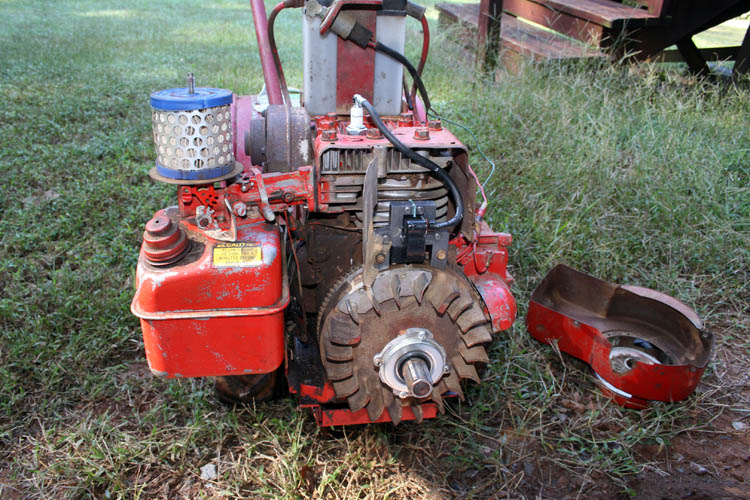
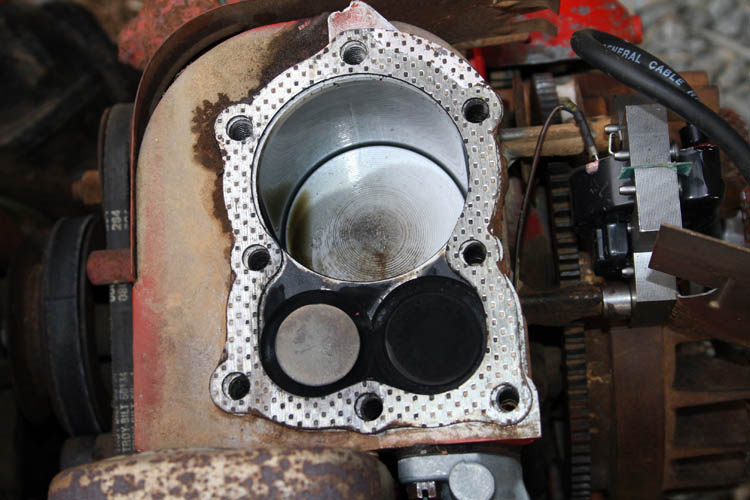
On September 26, 2018, I took the head off the block and the piston looked
pretty good and the valves were working. There was a good amount of
carbon build up on top of the valves and scraped them off. I rotated
the flywheel and put a thin shim under each valve and they were making a
good seal when closing.
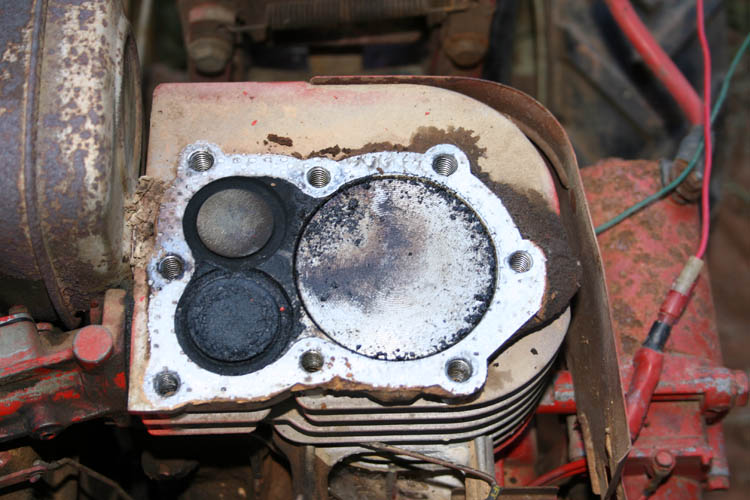
Below pix after some cleaning and scraping:
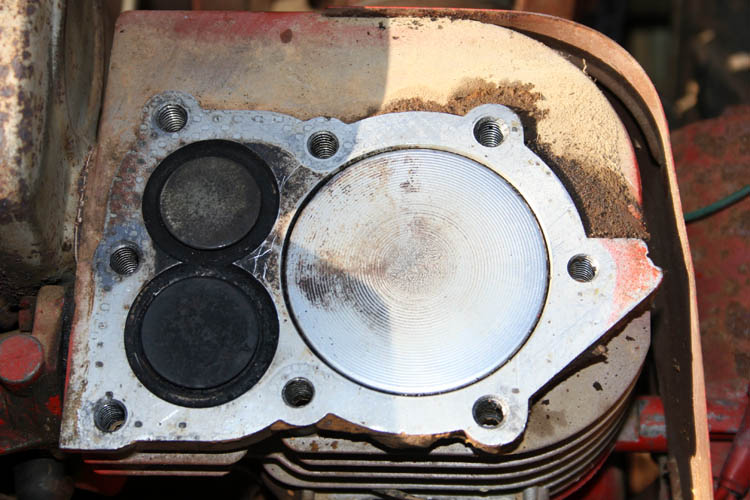
I checked the cylinder wall which was not scarred and there was good compression
felt by placing my thumb over the spark plug hole and pulled the start cord
before I removed the head.
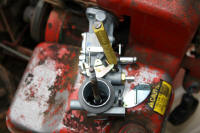
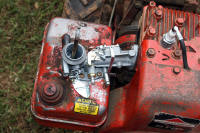
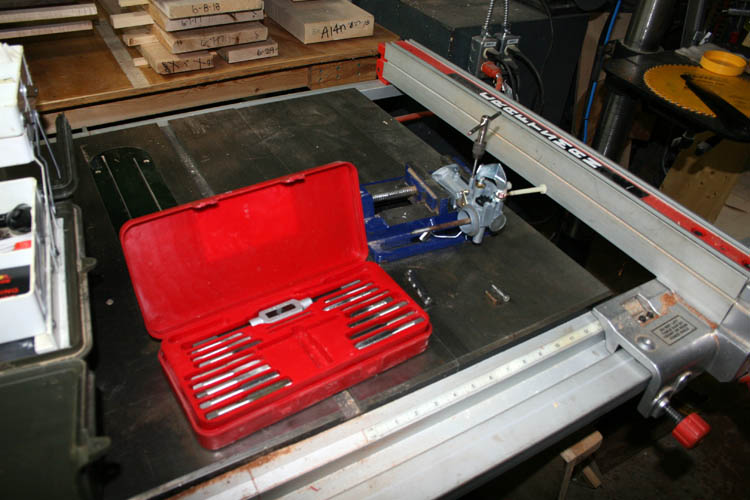
I took the carburetor loose from the gas tank and the side of the engine and
gave it a good cleaning using carburetor cleaner.

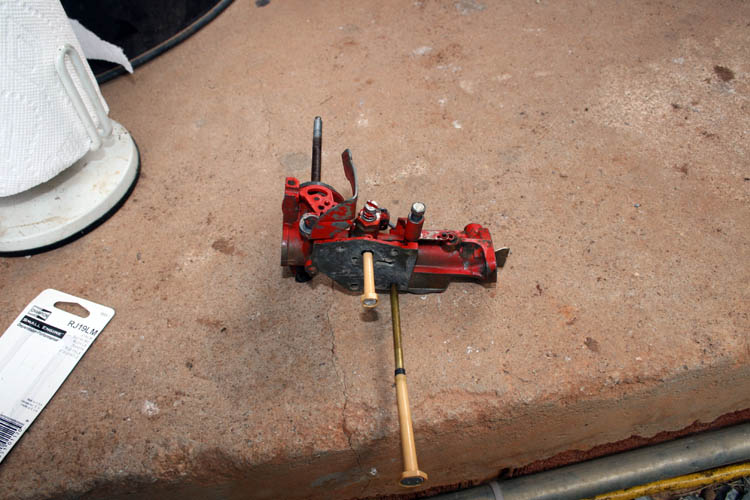
I had to take the muffler off in order to get the left bolt aligned from the
carburetor to the cylinder housing.

I replaced both the intake carburetor gasket and the gasket between the
carburetor and the gas tank.
I also sanded the magnets in the flywheel with 400 grit wet/dry paper.
ENGINE STILL NOT RUNNING
After getting it put back together, it still was not firing and I know I
have a weak spark and will replace the magneto and pull the flywheel off the
crank shaft to make certain the shear pin hasn't partly sheared throwing the
engine out of time.
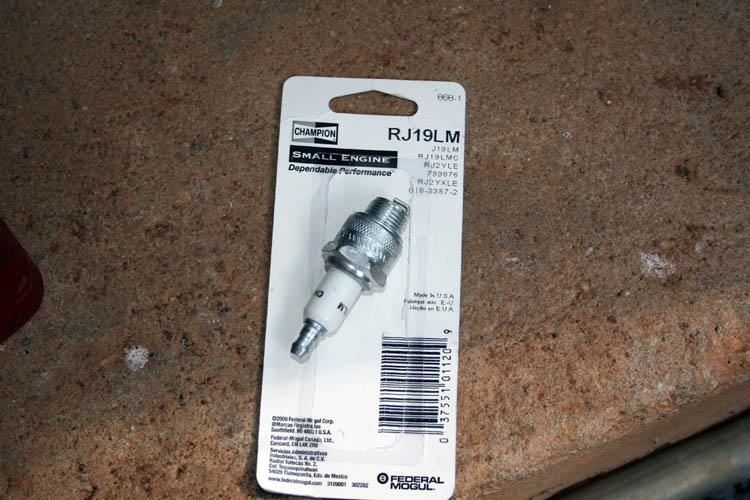
The proper spark plug for this engine according to our local small engine
repair shop is a Champion RJ19LM, whereas there was a Champion CJ8 installed
which was working ok before the engine died.
I think I will wait for the weather to cool down before "messing" with this
engine further.
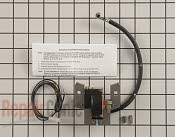
I ordered a replacement coil off EBay and hopefully the coil will be a fix.
NO SMALL ENGINE REPAIRMAN
It is very evident that I am definitely NO SMALL
ENGINE REPAIRMAN, but I might get lucky and get this one
running yet. As the ole saying, "Every
blind hog will find an acorn once in a while", grin if you
must!
Web published update by Bill aka Mickey Porter on 09-26-18.
RECEIVED THE WRONG PART
I received an after market coil on 09-29-18, however the coil was not
compatible with the original Briggs and Stratton part #
397358, whereas the mounting bolt holes
were in the wrong location enough to where the coil could not get within the
.012 clearance of the magnets in the flywheel.
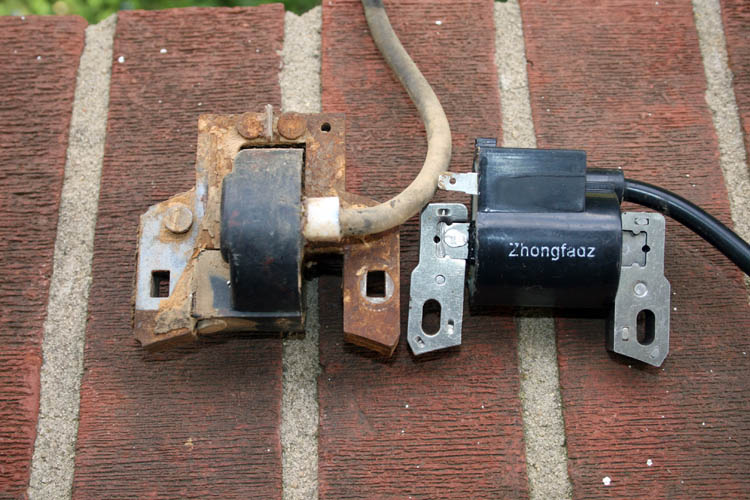
Also the metal shield would not work on the after market coil either.
Using an old deck cushion as knee pads......grin if you must!
I emailed the EBay seller and requested a refund and will get a prepaid
envelope to get the part back to him since it was no fault of my own this
part will not fit as advertised in the sale.
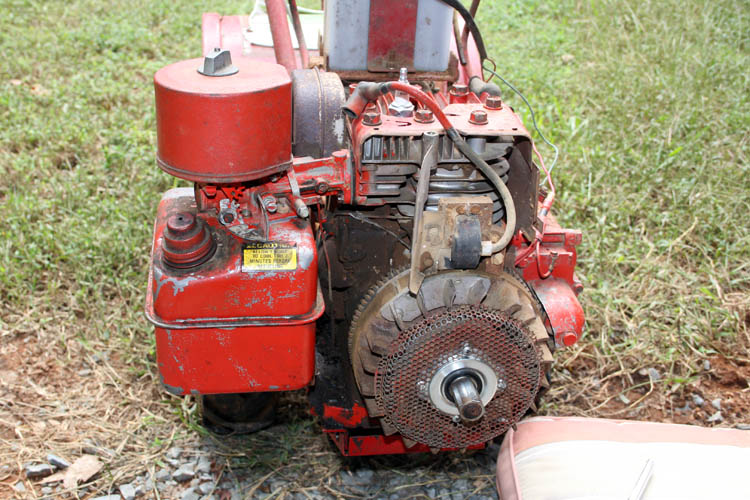
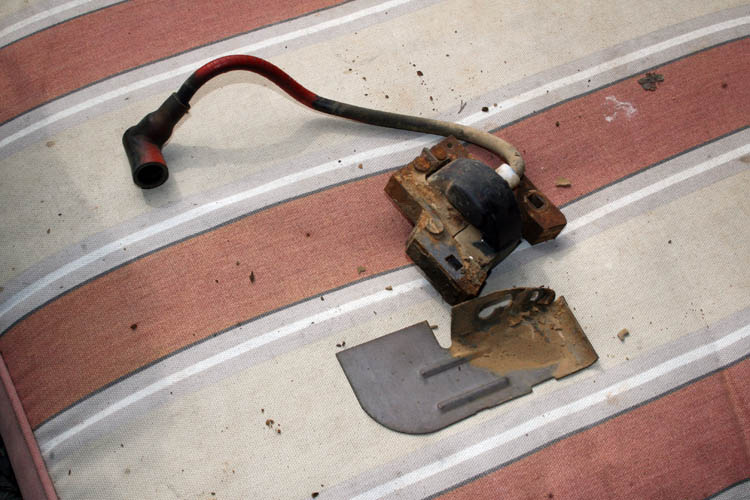
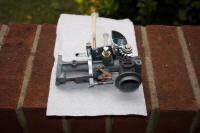
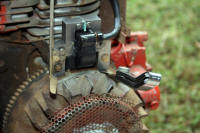
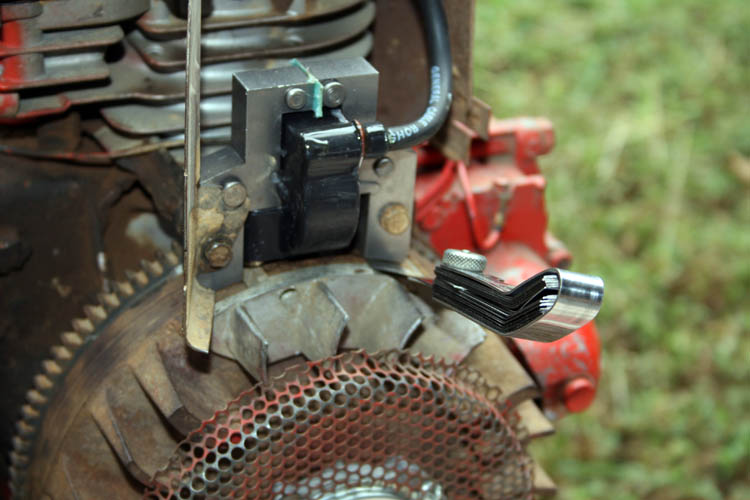
Pix with the shroud aka cover and pull starter removed exposing the coil.
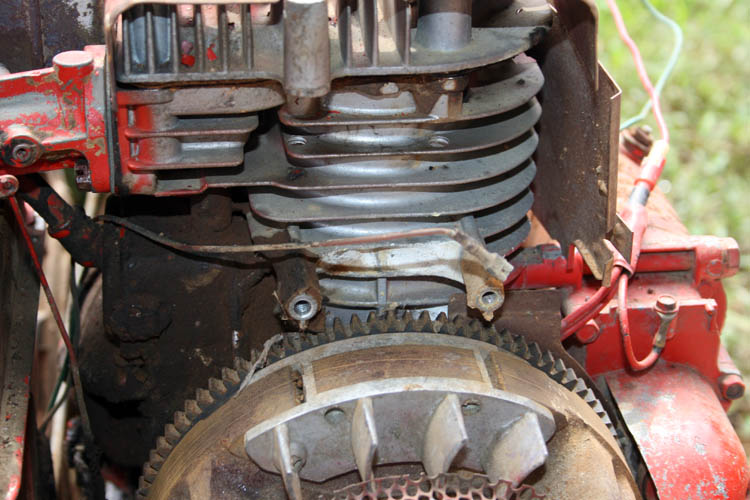
Close up of the engine minus the coil.
I think I will spend the extra bucks and get an original Briggs and Stratton
part from our local small engine repair facility and stop being so frugal
since frugality didn't work on this project. As I have posted many
times of this website, "Most of the time, you
get what you pay for" and it certainly is true in this case.
Web posted update by Bill aka Mickey Porter on 09-29-18.
TROY BILT TILLER RUNNING
Today is October 1, 2018 and purchased an OEM Briggs and Stratton
coil part # 397358 from Pinkston's, Inc. It came with a shear pin and
glad it did as I will later explain.
I made two stops this morning with the little Red Ranger Extended cab truck
I nick named Little Red. I stopped off in Lilesville, NC and picked up
our youngest daughter Lisa's trash. I then stopped at Pinkston's and
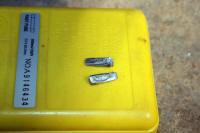
purchased the coil. I remember when digging in my right hand pants
pocket for the truck keys, I dropped my Swiss Army knife on the ground.
When I got home and deposited the trash in our dumpster, of which today is
trash pickup day for our street, I could not locate my car and house keys.
I keep a set of spare entry keys for the house hidden away and retrieved
them and got my back-up set of car keys and house keys and started back
tracking. I stopped at Pinkston's and looked in their parking lot and
didn't see them. I went inside and asked if anyone had turned a set of
keys in and the person behind the counter said No, and he said there was only one other person in the
place since I left.
I called our daughter and she looked for the keys around her trash cans,
etc. and could not locate them. I now remember that I left the truck
running, therefore would not have gone into my pants pocket.
SIDE TRACKED BY THE LOST KEYS DRAMA
After no luck with locating the missing set of keys, I started to work
installing the coil which was a perfect match. I set the gap between
the coil and the flywheel magnets to .020 inches and replaced the shroud.
I later went back and set the gap to .012 inches. The engine still would not fire although it put, putted a few times. I
took the shroud back off and removed the spark plug and could not see a
visible spark. I then removed the ground wire from the coil
which goes to the cut-off check switch on the throttle cable and checked it
with an ohm meter and the throttle switch worked ok.
I then removed the clutch and flywheel and sure enough the shear pin was in
two pieces and explains why the engine would not start/run. After putting
the new shear pin in place and everything back together, the engine would
run, but it would cut off as soon as I moved the choke to the
off position.
I run it with the choke on and fine tuned the air adjustment on the
carburetor and will ascertain what is going on with the carburetor after I
get the tomato patch tilled up.


The ole tomato patch is good to go and will let mother nature do its thing
with the sand, fertilize, lime and Miracle Grow garden soil tilled into the
soil. The soil should be much looser come planting time next Spring,
the Lord willing of course!
I noticed a fresh set of deer tracks in the tomato patch since the last rain
we had before I tilled the soil.
Hopefully, the missing keys will turn up, but I am very glad I have a
back-up set of keys.
The EBay seller sent me an email stating that he credited my account for the
part and I didn't have to return the non-usable part to him. I left
the seller positive feedback on EBay.
I have a dead tree to cut down on the upper lot and one adjacent the tomato
patch, but will wait until cold weather gets here.
Web published update by Bill aka Mickey Porter on 10-01-18.
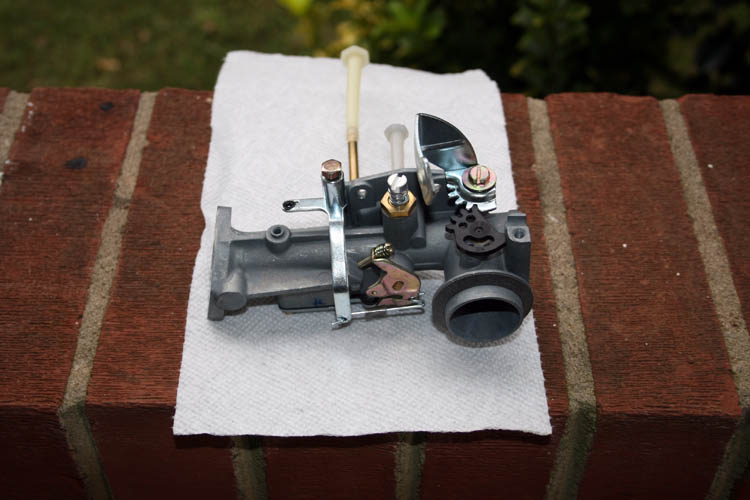
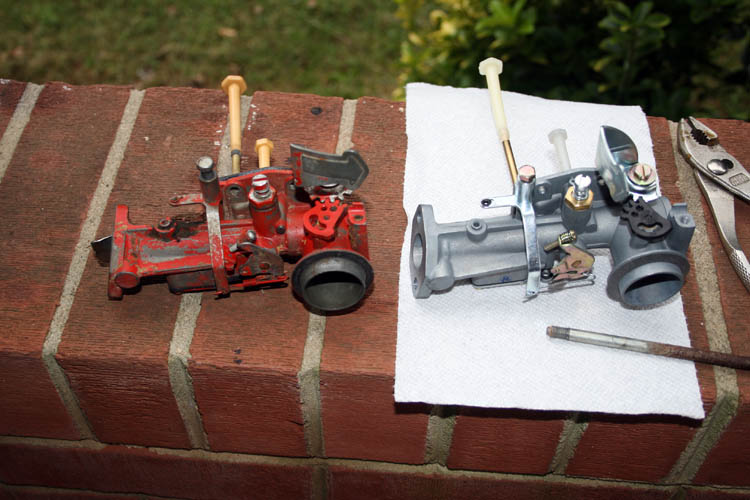
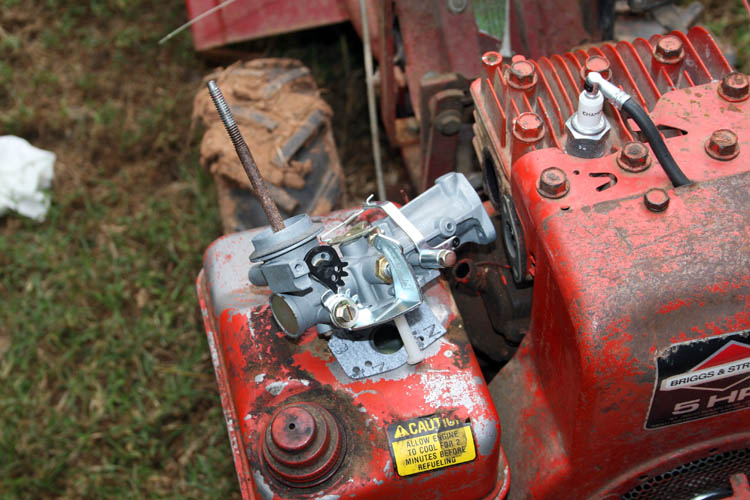
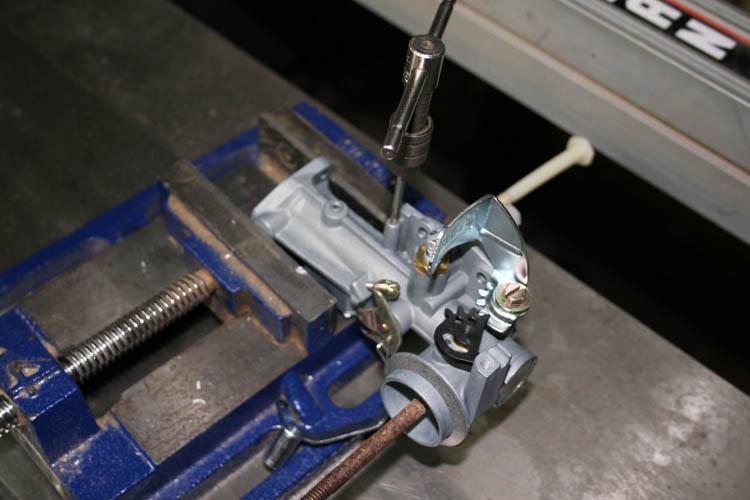
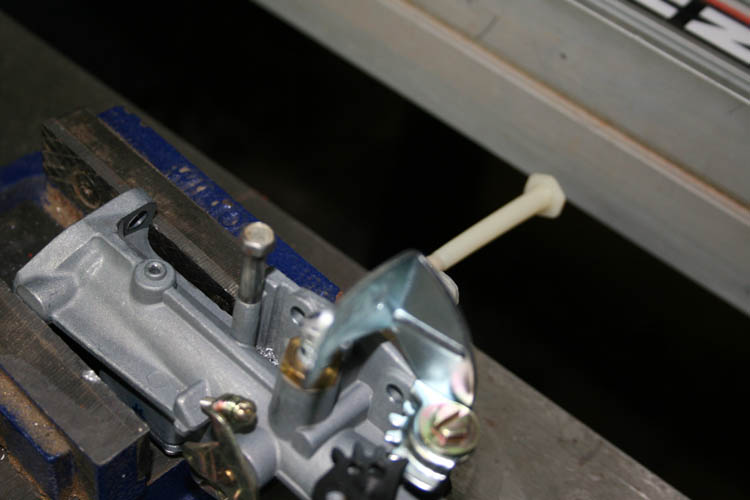
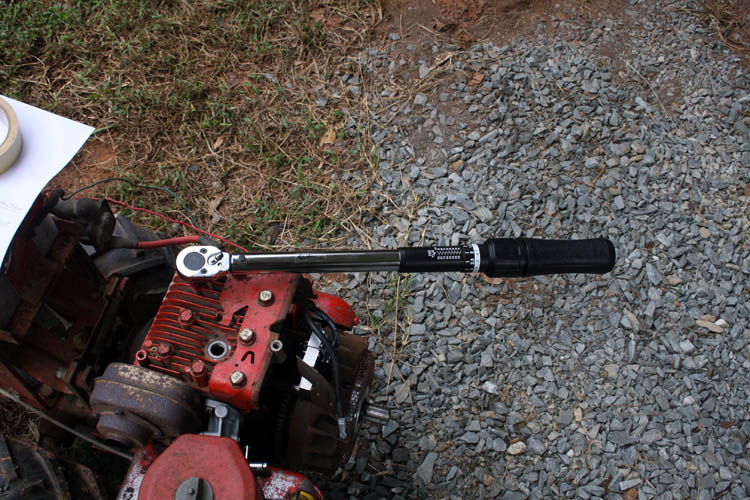
TROY BILT SAGA CONTINUES
I ordered an OEM Briggs & Stratton carburetor # 397135 (new in box) off EBay
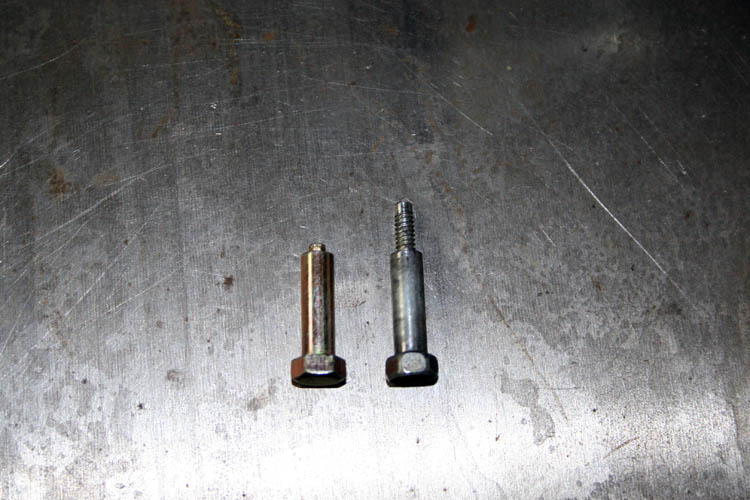
and when removing the 1/4 inch hex head screw/bolt that holds the throttle linkage
to the carburetor housing, it broke off. A Gorilla on steroids must
have tightened that bolt! I drilled the screw out and tapped new
threads which worked fine. I was careful not to get any metal drill
fragments inside the carburetor and blew it off with the air hose.
I had much difficulty getting the lower bolt from the carburetor to the
intake on the engine installed. I dropped it at least two different
times and it was wanting to cross thread, but finally got it tight. It
is a good thing the bolt head has four slots cut into the hex head since you
can hardly get a 3/8 inch open end wrench on the lower right bolt head due to the
closeness to the carburetor housing, however you can use a slotted screw
driver to turn it about a quarter turn from the side.
The gap between the magneto and flywheel was reset from .020 to .012 inches
per factory specifications. I can't remember where I came up with the
.020 gap which was incorrect...my bad.
After getting the carburetor, muffler and engine shroud installed, the gas
tank was drained and put some fresh non-ethanol gas in the tank.
I primed the new carburetor and got the engine running, however it still
would not run with the choke in
the off position. I checked
the engine head and could feel exhaust coming between the head and gasket near
the exhaust muffler and will replace the head gasket this coming Monday,
the Lord willing of course. I used the original head gasket which is a
no no and still trying to be frugal which isn't working out so
far....grin if you must. I could be wrong, but the air exhaust I
was feeling might be coming from the air that is drawn in from the front of
the engine shroud and directed across the top of the head of the engine by
the way the shroud and side cover metal encloses in the engine.
Click on the below thumbnail pixs for a larger screen view:


I hope I can get this engine running properly since I have spent enough on
parts to about purchase a replacement engine and hope it doesn't come to
that.
Web page updated by Bill aka Mickey Porter on 10-06-18.
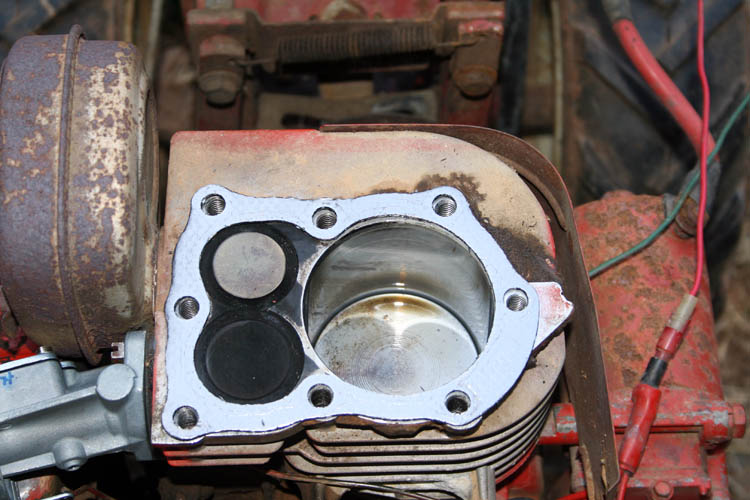
REPLACED HEAD GASKET
I replaced the head gasket on 10-08-18 and still have some air flow
around the back side of the head, unless it is air being pulled into the
shroud from the flywheel turning.
As before, the engine will run with the choke wide open and I plan to let my
Brother Allen Porter take a look at the engine. The mechanical works
of the tiller are still in good shape and a new set of tines were put on it
before the last owner sold it to me. I have gotten 200 dollars worth
of usage out of the tiller, but some times old horses are put out to
pasture......grin if you must!

Will let my Brother see what he can come up with. I noticed some oil
on top of the piston which might indicate worn rings too. My brother
has a compression gauge and can eliminate another probable cause.
Web published update by Bill aka Mickey Porter on 10-08-18.
ENGINE RUNNING FINE - DYSLEXIA MAYBE?
Notice early on, I stated that "I am not a small engine repairman!" I do
believe I have a small amount of dyslexia as far as writing numbers
backwards, however sometimes I will see things reversed when putting things
back together. This probably
doesn't fit the clinical definition of dyslexia, but it might be a good way
of trying to explain why I had the choke on and choke off concept totally
reversed in my mind. In a nutshell, with the
choke on, you choke off (restrict) the airflow
to the throat of the carburetor, whereas the choke valve reduces the pressure inside
the throat, which causes a proportionally-greater amount of fuel to be
pushed from the main jet into the combustion chamber during cold-running
operation. I viewed some YouTube videos where the person had
the air breather off the carburetor and couldn't find a stop or kill switch
and simply placed his hand over the opening at the throat of the carburetor and it cut the
air flow off and the engine stalled out. Still, the light bulb didn't
come on as to the way the choke functions! Even the word
choke should have been a direct
clue as to what it does.....I am certainly grinning at myself on this one!
With that said, I spent 79 bucks for a carburetor that I really did not need
and now I have a spare.
There is a problem with the recoil starter pull rope not retracting as it
should and should not be a difficult fix, but will try some lubrication before I jump
the gun and order replacement parts.
In summation, the choke is
working exactly as it should. When the choke is on, it restricts
airflow to the throat of the carburetor allowing more gas into the combustion
chamber and when the
engine starts, the choke is moved to the off position which removes the air
restriction to the throat of the carburetor. To reiterate, I had the choke concept
totally backwards, but did learn something even though it cost some
sawbucks
to do so.
Web page updated by Bill aka Mickey Porter on 10-09-18.
YARD PROJECTS EQUIPMENT MAINTENANCE
I reserved 10-13-18 to do routine
maintenance on the Troy Bilt Tiller and the Generator. I changed oil
and filter plus the spark plug in the generator. I will pull the air
filter off next week, the Lord willing of course and locate a replacement.
I changed the oil in the Troy Bilt Tiller. I was impressed this
morning with the tiller. It fired on the second pull and let it run at
least 10 minutes to get the engine block warmed up before changing the oil.
Too busy to take any pixs today.
Web page updated by Bill aka Mickey Porter on 10-13-18.
ELECTRIC CHAINSAW SHARPENER
I have some upcoming chainsaw work to do and decided to purchase an
inexpensive electric chainsaw sharpener sold by Harbor Freight. I have
definitely learned over the years, "Most of the time, you get what you pay
for." Without purchasing this tool as a
pig in a poke, my friend
Robert Webster in Hamlet, NC was recently given one and he stated it worked
real well, therefore making it mentally easier to commit to purchasing one.
Most places charge you $ 5.00 for sharpening a regular chainsaw chain and
the little electric chainsaw sharpener should pay for itself in no time at
all.
After my bride and myself enjoyed lunch at the Pizza Inn in Rockingham, NC,
I drove to Harbor Freight which was a mile or so going East on Highway 74
and purchased the chainsaw sharpener. The tool retails for 29.99 and
with a 20 percent discount, the total was $ 25.61 which included tax.
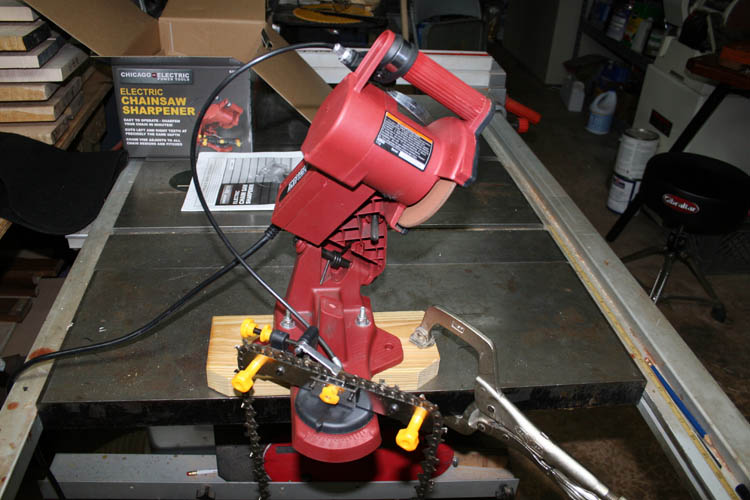
I gave it a test run after mounting the base to a piece of scrap 1 inch thick pine
decking material and clamped it to my table saw top. After a few
adjustments for the depth of cut and setting the chainsaw stop for minimum
material removal from each cutter, it was very easy to grind each cutter on
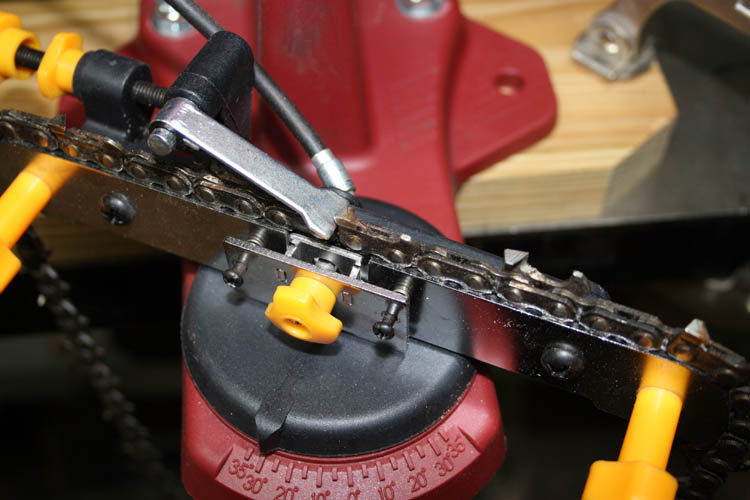
the chain. You grind 30 degrees (depending on your chain) one way and rotate the holder to 30
digress the opposite way and finish the cutters in that direction. The
chain moves from left to right, you only change the angle on the base that
holds the chain in position. Squeezing the handle lever, it pulls a
bar against the chain and secures it in place while the chain cutter is
ground.
The above chain is practically worn out, but believe I can get a couple more
sharpening out of it before it is retired to the landfill. The cutters
are worn down about half way in length due to sharpening by hand and a
couple times on an electric sharpener. Many of the commercial places
will grind far too much off each cutter which shortens the chains life span
which spells more money for them in the long run!
I will give the chain a test run in the near future.
For someone who does a lot of chainsaw usage, something like the
Oregon 410-120 bench grinder would be
applicable.
I can sharpen a chainsaw chain by hand, but sometimes I will cut more off
one side of the chain than the other which renders the chainsaw chain not
cutting straight up and down or parallel as shown on this web page.
Web page updated by Bill aka Mickey Porter on 10-25-18.
AZALEAS BLOOMING 11-03-18
The weather has been unseasonably warm for late October and early November
and below a couple pixs of azaleas bushes blooming.
A close up pix taken on 10-18-18.

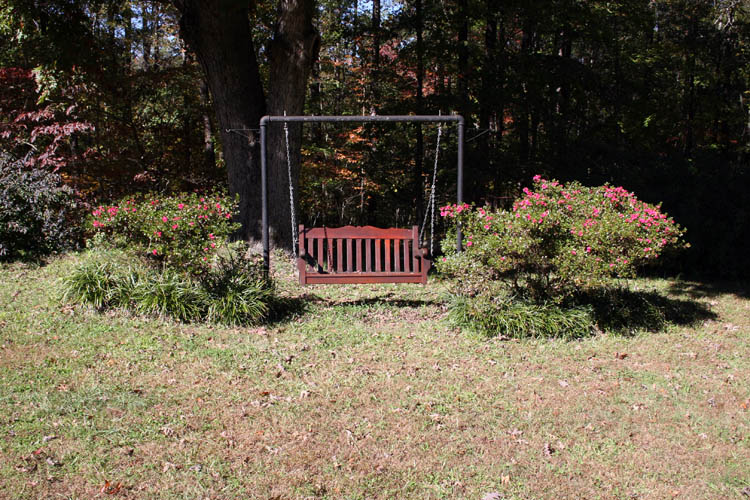
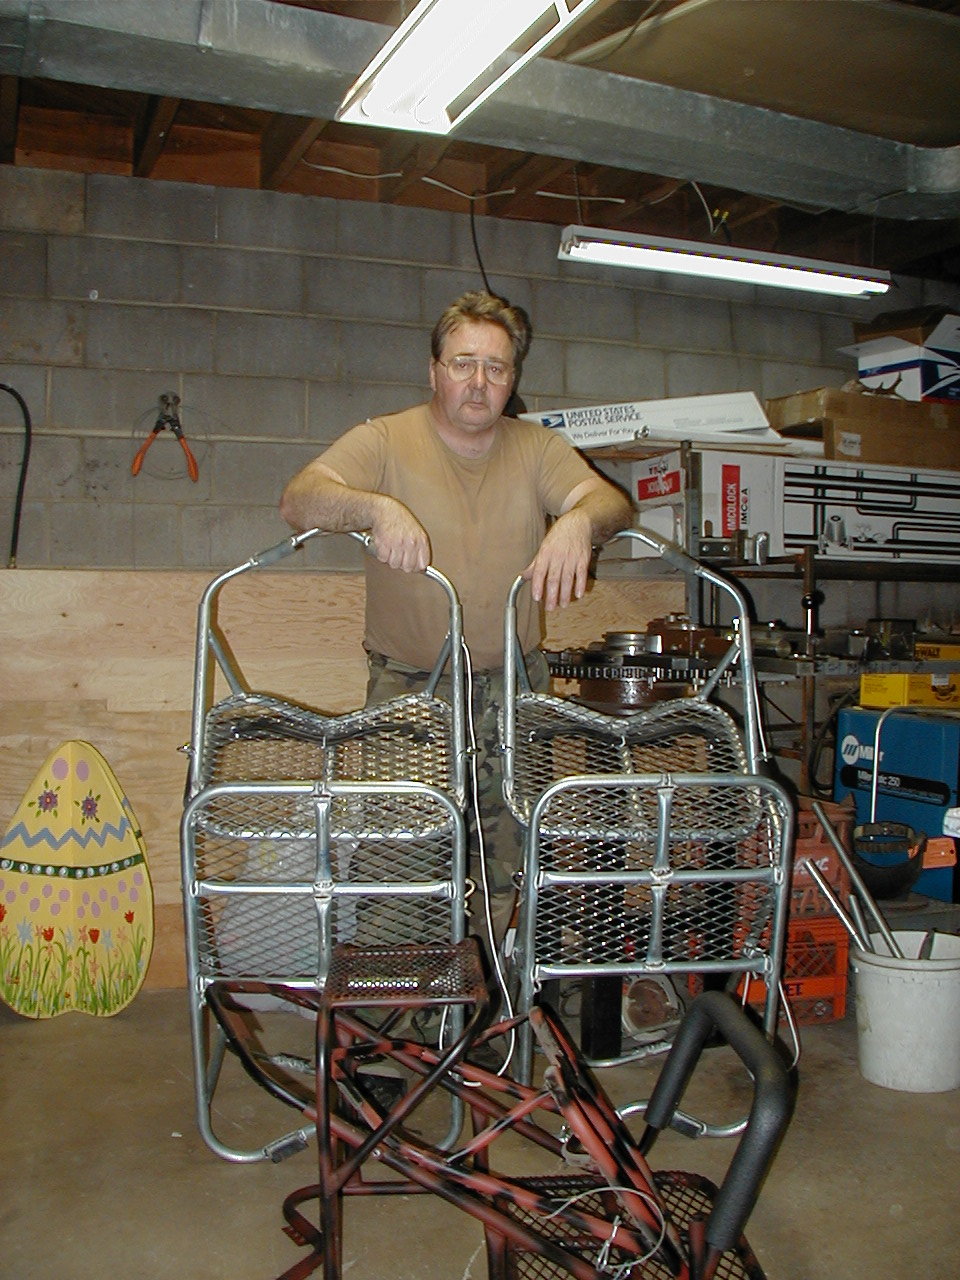
It is getting about time to relocate the yard swing to the basement workshop
to ride out the winter months and a fresh coat of varnish the coming Spring,
the Lord willing of course.
Web page updated by Bill aka Mickey Porter on 11-03-18.
LEAF BLOWING
I started blowing the multitude of fallen leaves from the front and back
yard a week or so ago and have about one more session with the Husqvarna
leaf blower to wrap up the leaf removal.
I also brought our hanging swing in for the winter and have to clean the
gutters and that should hopefully catch up my outside projects for 2018.
Web page updated by Bill aka Mickey Porter on 12-18-18.LEAVING ON A
SPIRITUAL NOTE
If you do not know Jesus Christ as your Lord and Savior, please take
this moment to accept him by Faith into your Life, whereby Salvation
will be attained.
Ephesians 2:8 - 2:9 8 For by grace are ye saved through
faith; and that not of yourselves: [it is] the gift of God: 9 Not of
works, lest any man should boast.
Hebrews 11:1 “Now faith is the substance of things hoped for,
the evidence of things not seen.”
Romans 10:17 “So then faith cometh by hearing, and hearing by
the word of God.”
Open this
link about faith in the King James
Bible.
Romans 10:9 “That if thou shalt confess with thy mouth the
Lord Jesus, and shalt believe in thine heart that God hath raised him
from the dead, thou shalt be saved.”
Open this
link of Bible Verses About Salvation,
King James Version Bible (KJV).
Hebrews 4:12 “For the word of God is quick, and powerful, and
sharper than any two edged sword, piercing even to the dividing asunder
of soul and spirit, and of the joints and marrow, and is a discerner of
the thoughts and intents of the heart.”
Romans 6:23 “For the wages of sin is death; but the gift of
God is eternal life through Jesus Christ our Lord.”
Romans 3:23 “For all have sinned, and come short of the glory
of God;”
Micah 6:8 “He hath shewed thee, O man, what is good; and what
doth the LORD require of thee, but to do justly, and to love mercy, and
to walk humbly with thy God?”
Philippians 4:13 "I can do all things through Christ which
strengtheneth me."


