XANDER'S TOY BOX AKA BLANKET CHESTOur
youngest daughter Lisa Dianne Gonzales asked last year or earlier if I would
build our youngest Grandson
Xander a toy box of which I agreed to do so. I
started the project in the middle of February 2016 and taking my own time
since I am in the retirement mode and try not to get in too big a hurray,
however time waits for no one!
PERSONAL SAFETY AND LIABILITY ISSUES
My goal will be to keep Safety
paramount because hand and power tools can do serious bodily harm and death
if not used properly, therefore these pages are solely for
entertainment purposes only from
a personal liability standpoint. Please read the
Legal Stuff
page for additional information concerning liability issues
before going any further.
LETS GET STARTED
I researched the internet for some ideas on the design of which there are
numerous types ranging from very simple to some very ornate. I decided
to go with something above just a simple box with a design where it could be
used later on in life to store other things since the toy storage stage will
be quickly outgrown in due time. Another thing I had to consider, was a design
that would allow me to utilize what available equipment and tools that I
currently have and with the small tight quarters of my basement garage woodworking shop
which has a large percentage occupied by storage shelving units, etc, I am
definitely limited in the size of the project!
I also wanted to use something besides birch plywood as the main body of
the box desiring to see some wood grain pattern and went with 3/4 inch pine board glued up panels that were 2 x 4
foot in size and available at our nearest Lowe's in Rockingham, NC. I
have capability to glue up such panels but no use reinventing the wheel on
this one; maybe for using some other wood than pine. I
initially decided to use the same 3/4 inch thick pine board panel for the
lid but after I started to install the top banding and edge trim around the
box, I was a little short on
the width of the panel which I will detail later on. I could have used
the panel with a border but the panel developed a serious bow in it. I went with a
heavier 1 inch thick pine board panel which is probably an overkill on my part
but that is part of my DNA profile. One of my friends Robert Webster
of Hamlet, NC told me that no one could ever accuse me of under building
something. I didn't have a
formal drawing for the toy box but more or less
winged it which will
likely cost
you a few mishaps along the way as I just mentioned earlier and
Murphy's Law
quickly rises to the occasion.
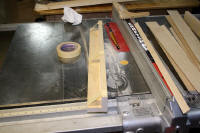
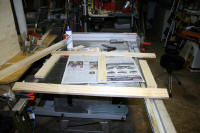
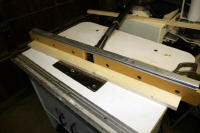
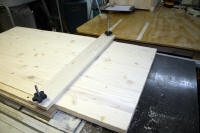
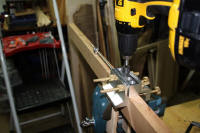
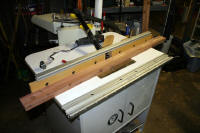
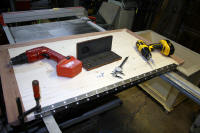
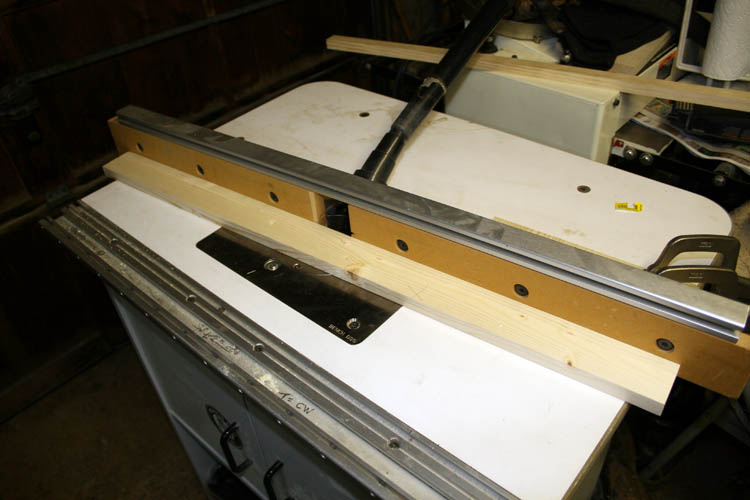
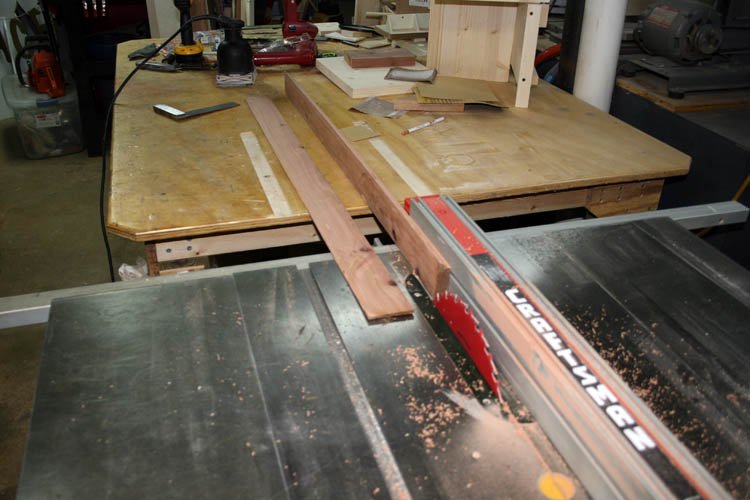
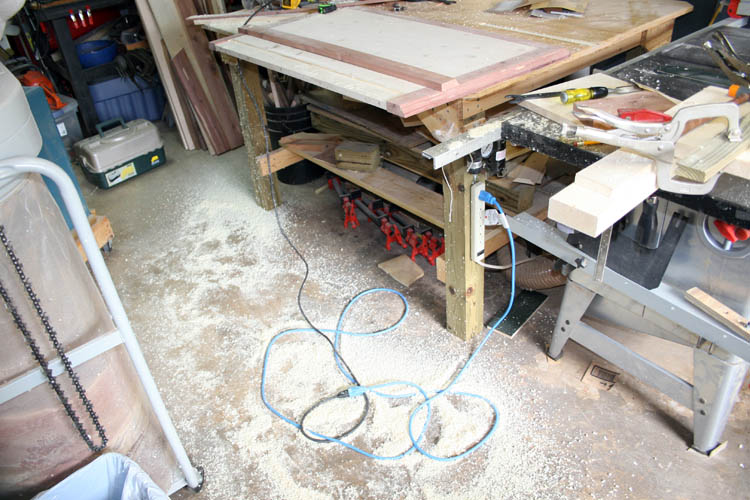
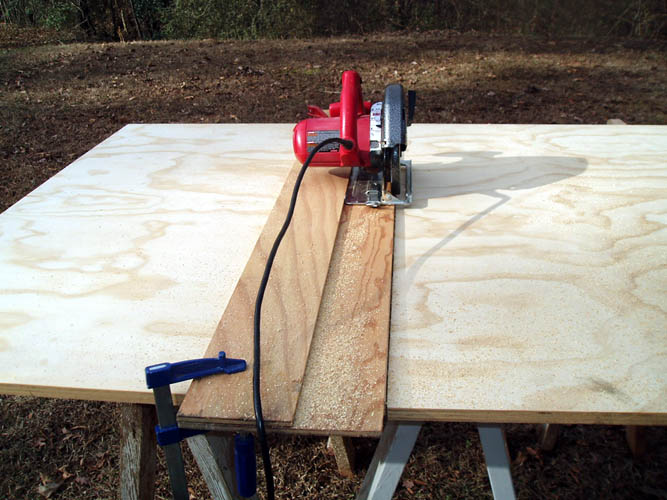
My woodworking shop is barely large enough to handle a 2 x 4 foot box and
my table saw is taxed to try and cut panels any larger than 24 inches in
width of which I
have to use a couple saw horses outside, circular saw and
saw guide
to get a larger panel cut down to a manageable size. The usage of my home
made panel sled for the table saw can then get the panels cut to size and
square. My out feed table doubles as a work
station and I can rip 8 feet length stock up to 24 inches wide which is
near the limit of the table saw adjustable fence.
As noted on my last
woodworking project, I found that most of
the framing squares and tri-squares are not perfectly square unless they are
manufactured by someone like Starrett who makes precision measuring
equipment but it is high dollar....most of the
time, you get what you pay for!
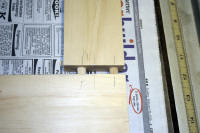
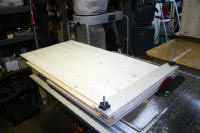
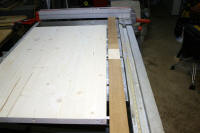
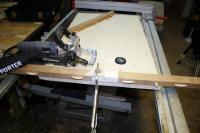
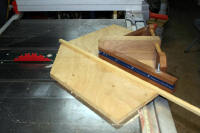
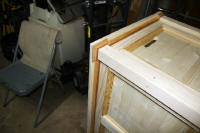
CUTTING THE PANELS TO SIZE AND ASSEMBLY
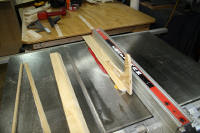
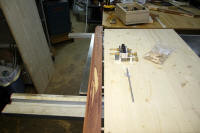
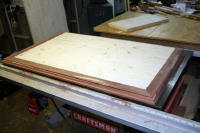
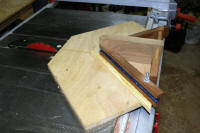
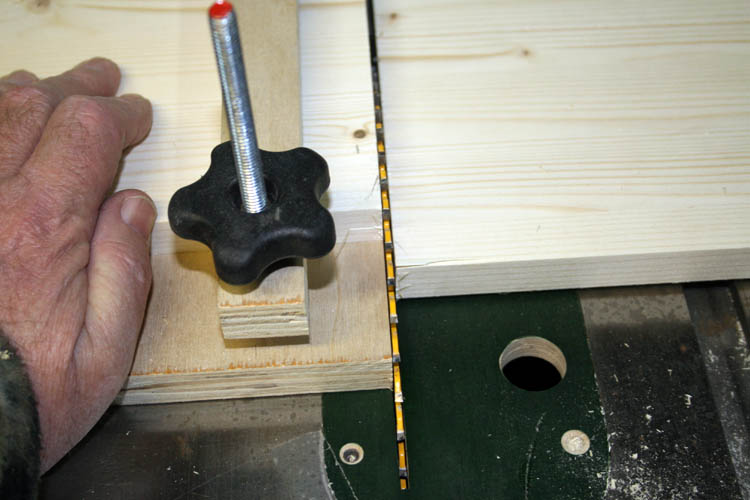
I started the project off by cutting the 2 x 4 foot glued up pine board panels to size:
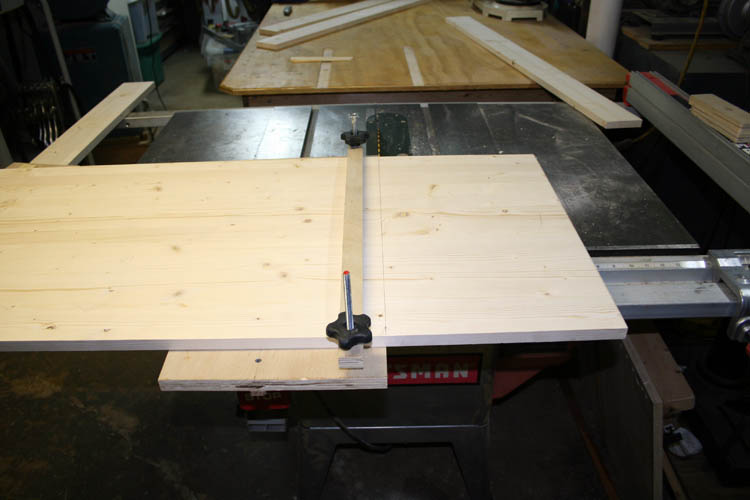
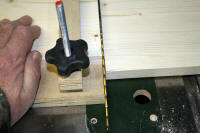
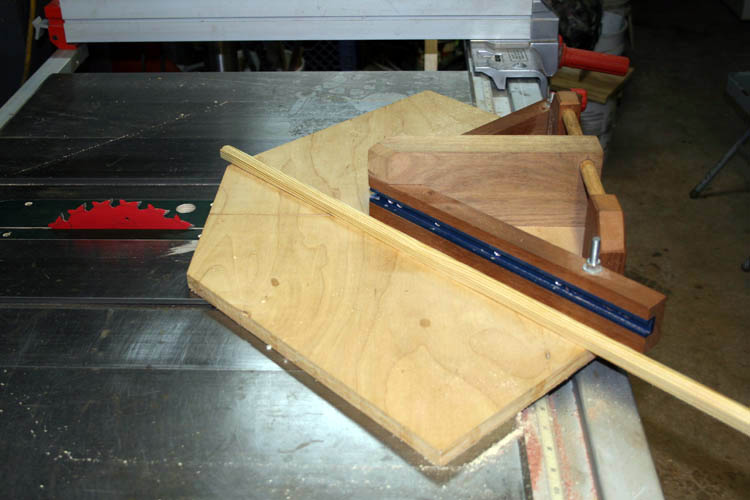
I used the above home made impromptu crosscut sled to cut the panels to length
because it was not square and used the rip fence to cut the panel to the width needed. I later
made a much more accurate crosscut sled just for 90 degree crosscuts and
have sleds for forty-five degree
crosscuts and a miter sled.
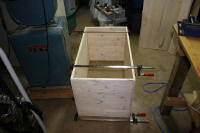
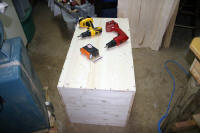
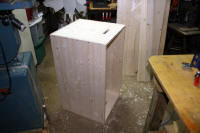
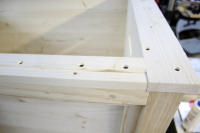
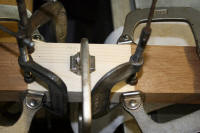
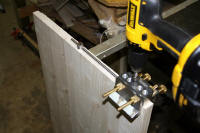
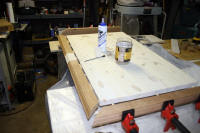
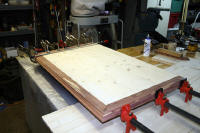
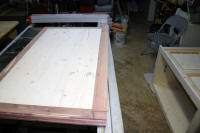
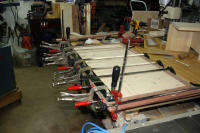
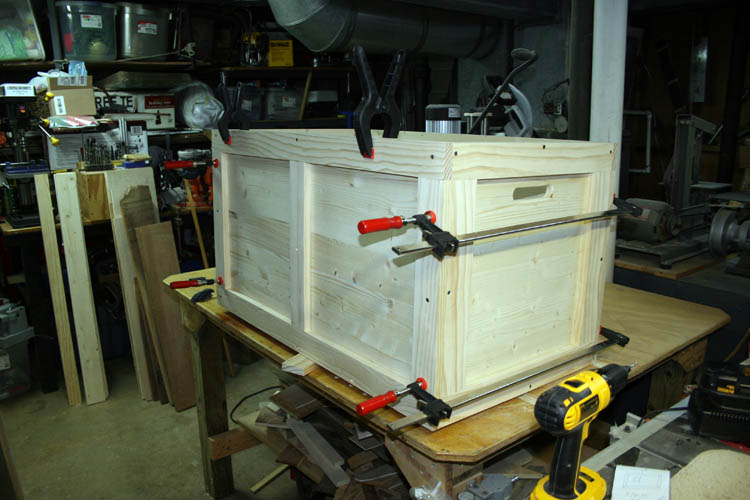
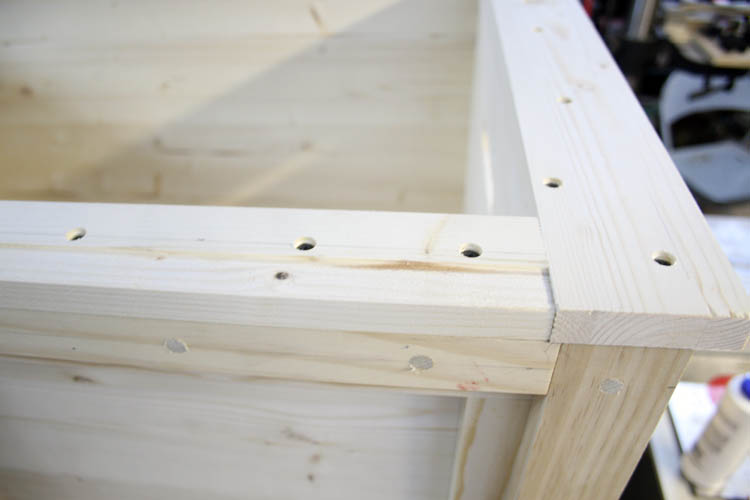
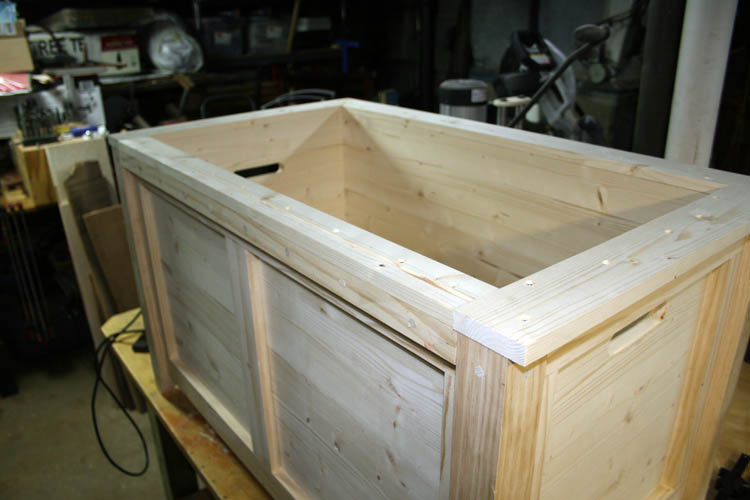
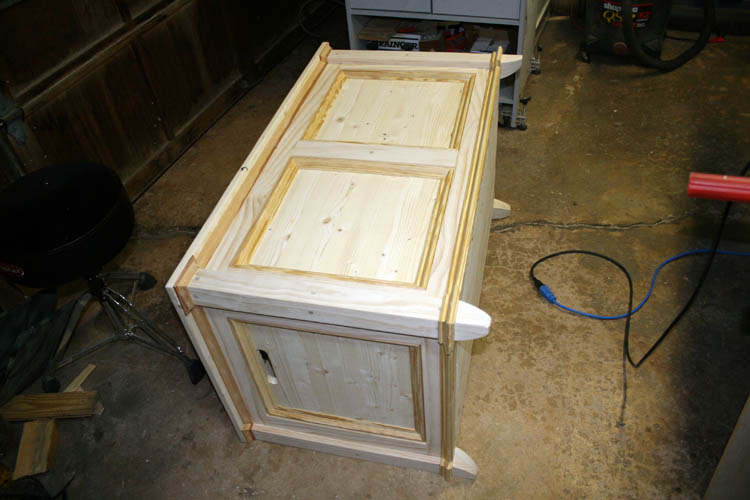
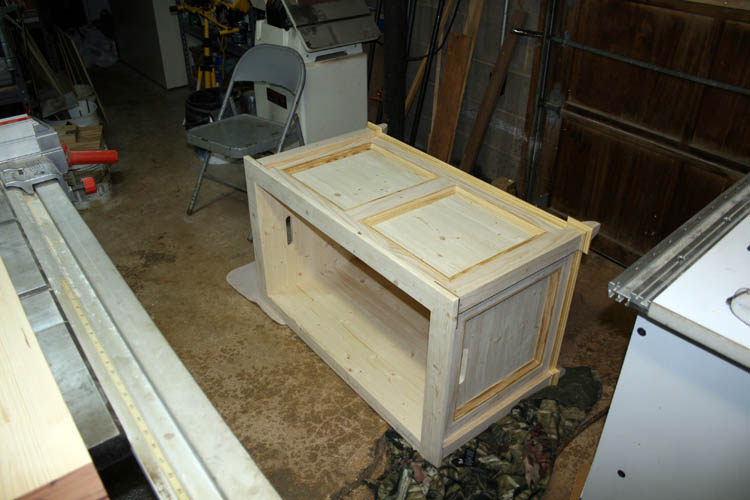
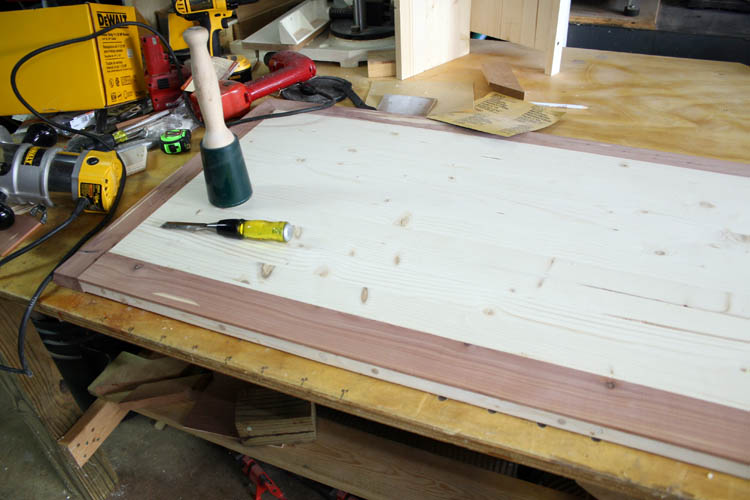
After the panels were cut to size, the five panels were glued and screwed
together using 1 1/4 inch drywall screws. I should have installed the
bottom panel with it resting on a
ledger board on the sides and ends but there is enough wood
screws and glue to hold it in place along with the corners resting on the
inside portion of the legs which act like a ledger board.
Click on below thumbnails pixs for a larger screen view:
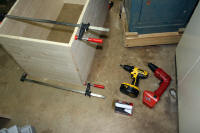
A
Fuller brand combination tapered drill bit and countersink was used to pre-drill the holes to
prevent the wood from splitting since the screws were only 3/8 inch
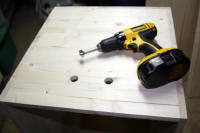
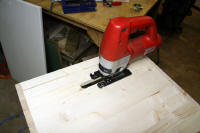
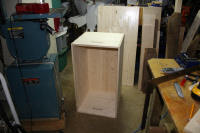
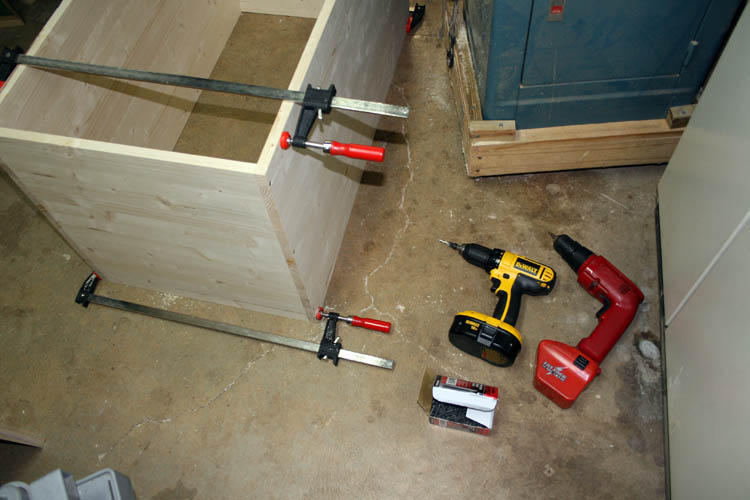
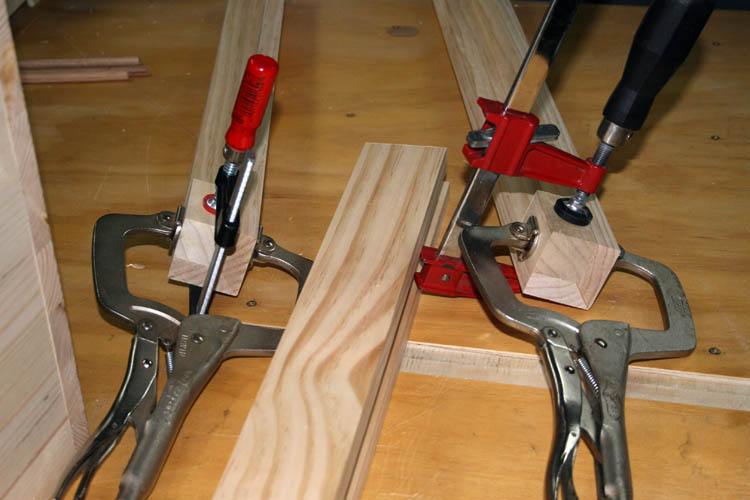
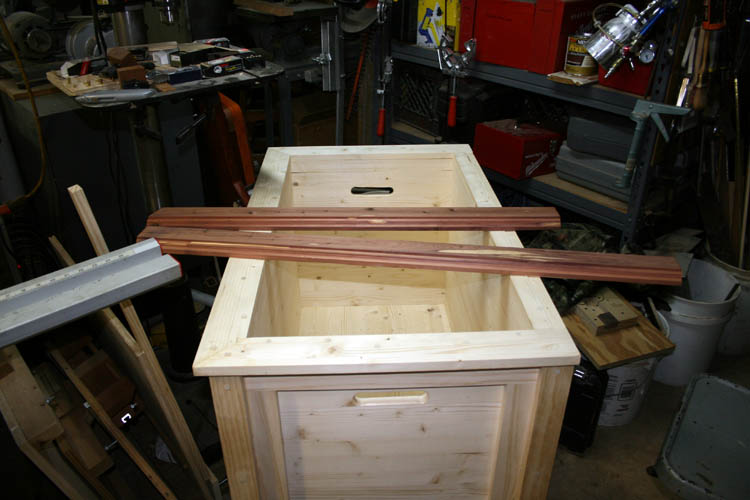
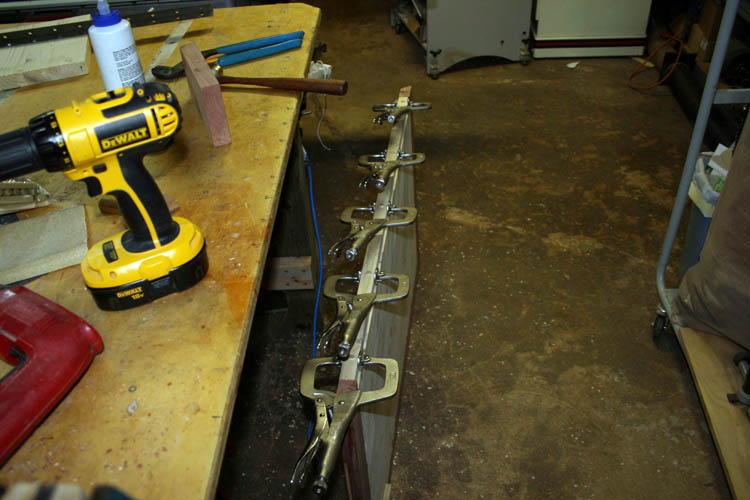
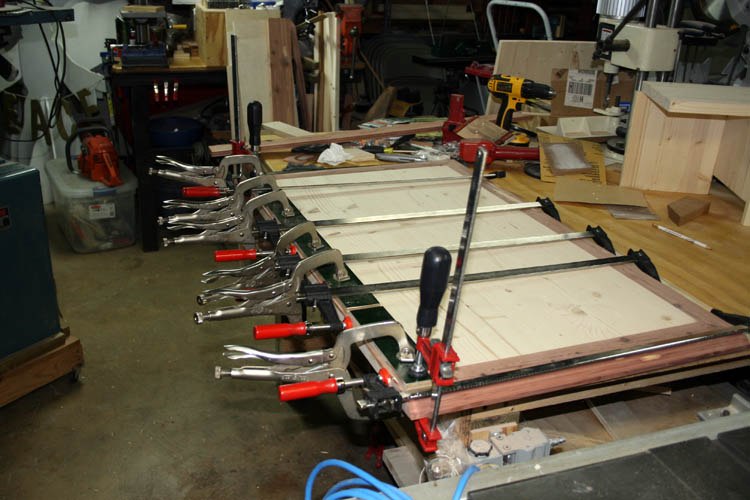
from the edge of the material. After the box was glued and screwed
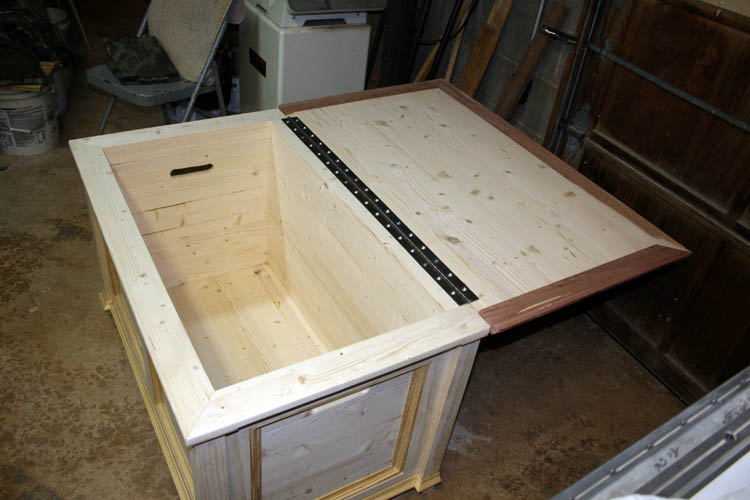
together with the aid of some long bar clamps, a handle opening on each end of the
box was cut using a forstner bit and jig saw. The handle openings will
also double as a safety feature
allowing air to circulate into the box in case Xander decides to play inside
the box with the lid closed which could very well easily happen.
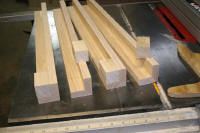
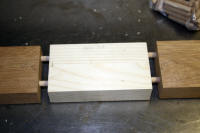
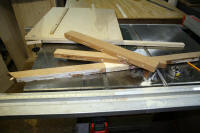
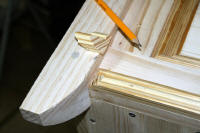
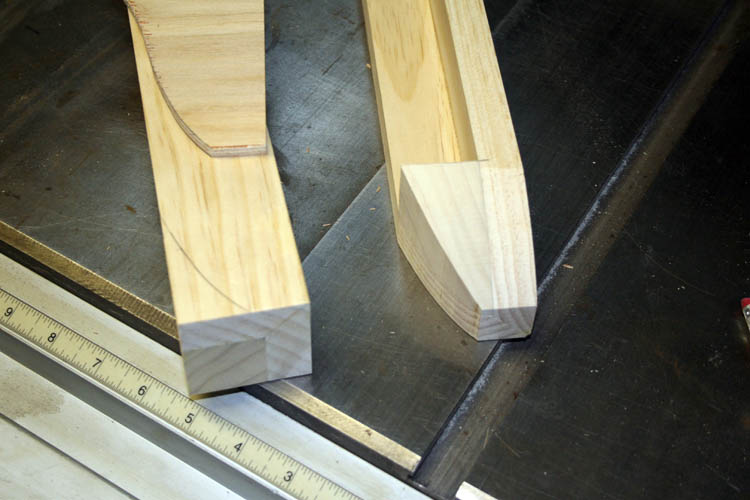
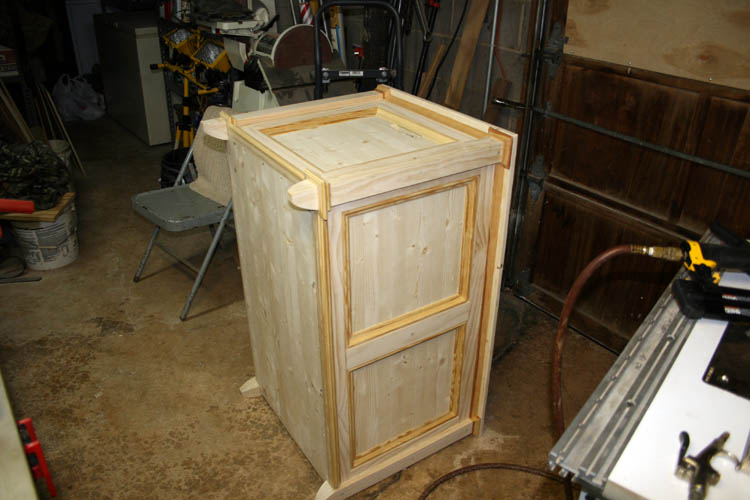
LEG CONSTRUCTION
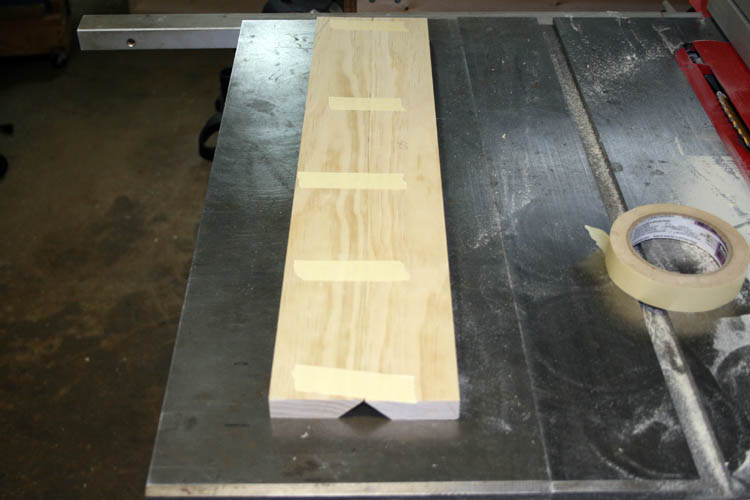
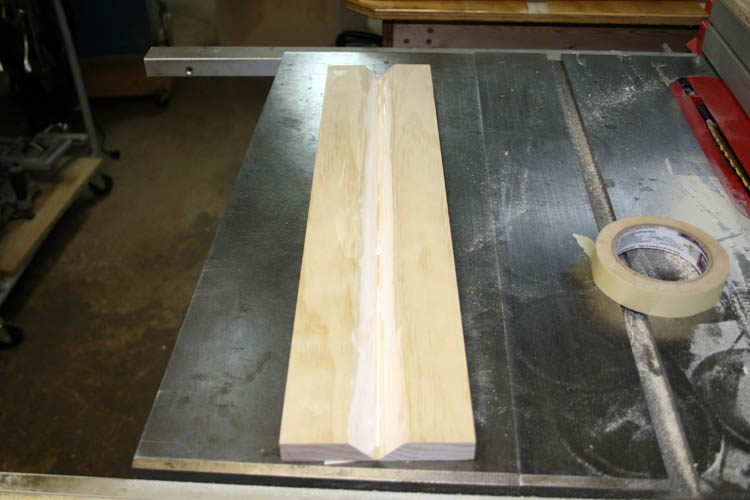
The next order of construction was the legs which were made from clear
pine 2 1/2 inch width boards ripped down to 2 inches and decided to put a
forty-five (45) degree miter on two adjoining sides instead of just abutting
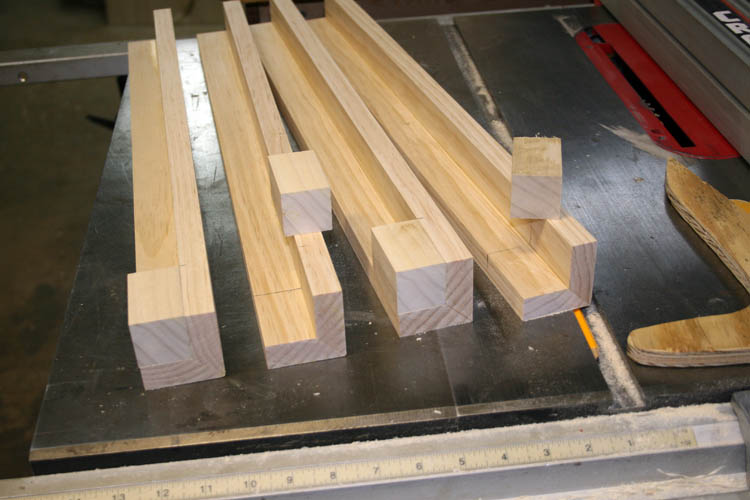
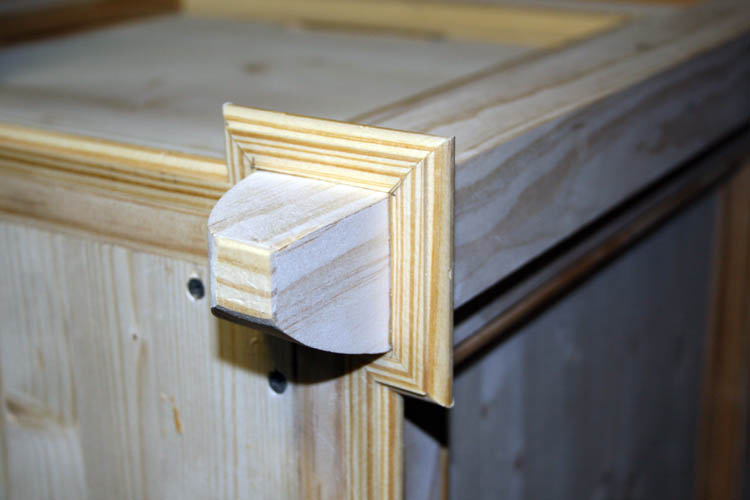
them together which should give a little more eye appeal. The finished
legs attached to the corners of the box will give the illusion of being
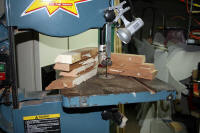
solid since the end of the leg will have a solid square glued in place and
later the lower portion of each leg will be tapered using the band saw. Face frames
aka stile and rails will
be added to the box before the legs are attached for the additional layer of
depth perception.
Click on the below thumbnail pixs for a larger screen view:


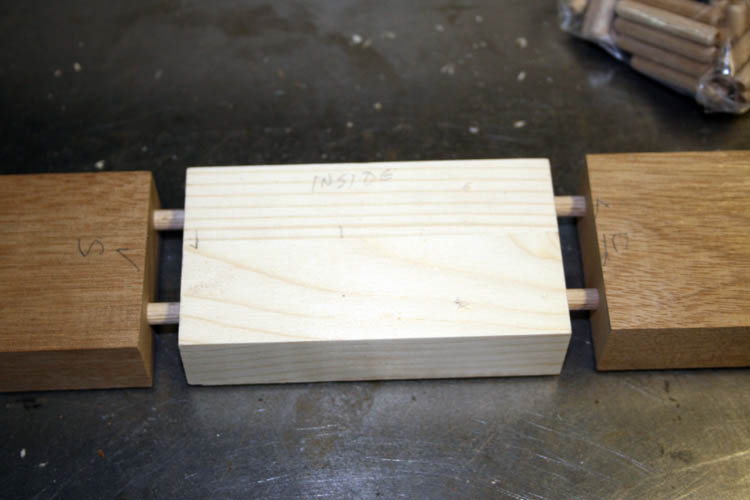
I thought I was going to have to make a glue up jig for the legs but
remembered a technique that was used by box builder Doug Stowe who authored
Basic Box Making which utilized masking
tape to hold the pieces together for the glue up which works great if your
parts fit together as they should. Each ninety (90) degree portion of
the leg will be also be glued and screwed to each corner of the box with the
screws countersinked and covered with poplar dowel rod inserts. The
usage of the legs on top of the face frames will give one more element of
depth perception for the recessed style panel construction. I am not
concerned with the extra amount of material used on this project.
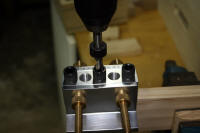
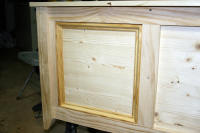
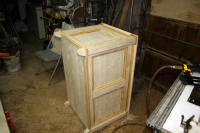
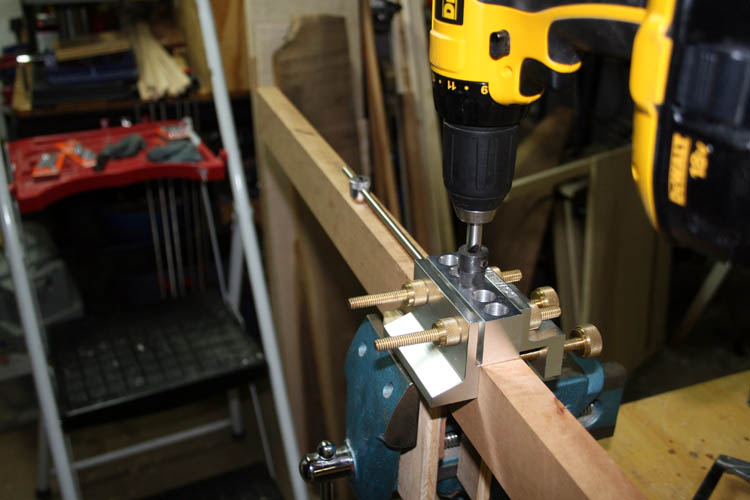
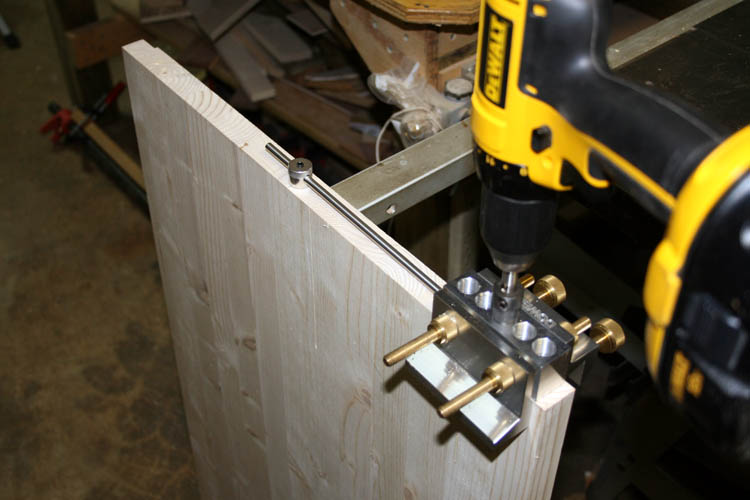
RECESSED PANELS
Since I do not have router cutters to produce raised panels to dress the
box up, face frames were made using the same material I used for the legs
being 2 1/2 inch width clear pine boards to give some depth perception and
eye appeal to
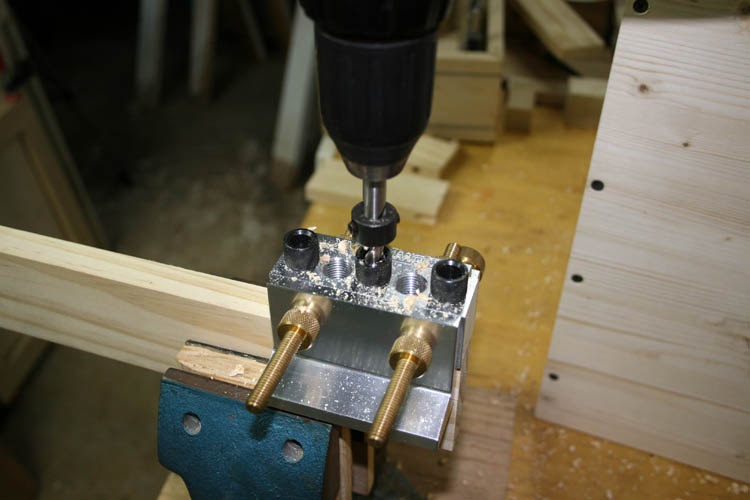
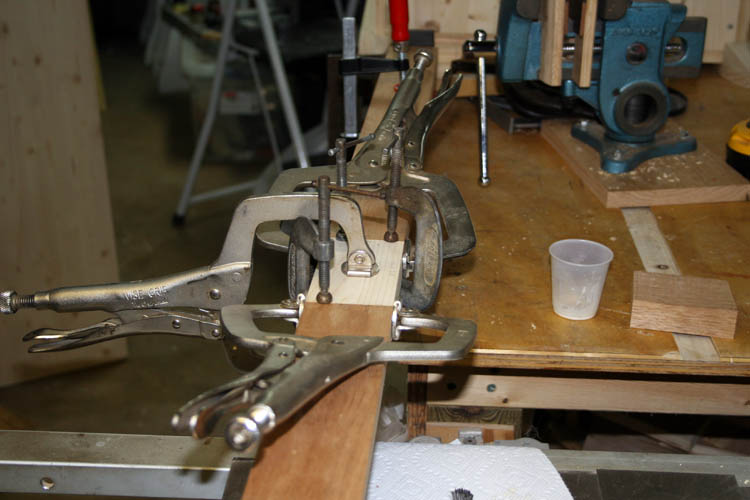
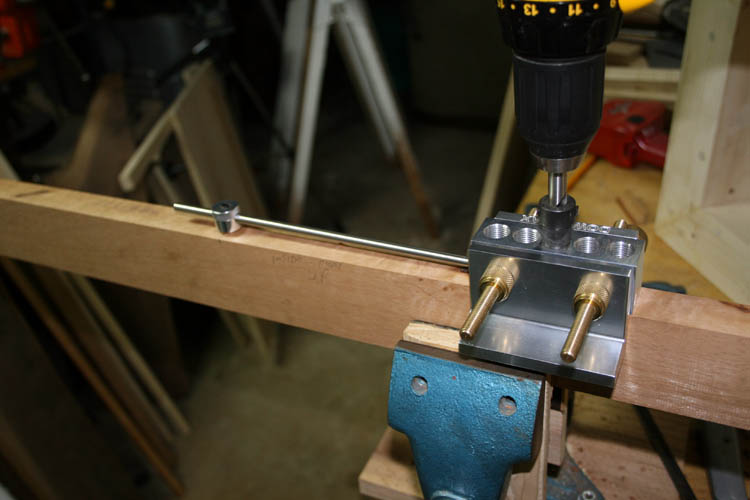
the box. They were cut to length and
used the
Dowelmax jig
system to install a pair of 3/8 inch dowels into each
stile where it connects to a rail. A
Kreg pocket hole jig would
be the tool of choice for this since it is much faster than the Dowelmax
system and the screw hole pockets would not be seen anyway, whereas joint strength is
not an issue here since the face frames will be glued and screwed to the box.
I plan to add a Kreg pocket hole system to my shop in the near future since
I have a few more projects in mind that could utilize the pocket hole screws.
For strength, reliable test have problem dowels are a much stronger joint
with the mortise and tenon topping the list.
Click on the below thumbnail pixs for a larger screen view:


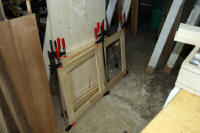
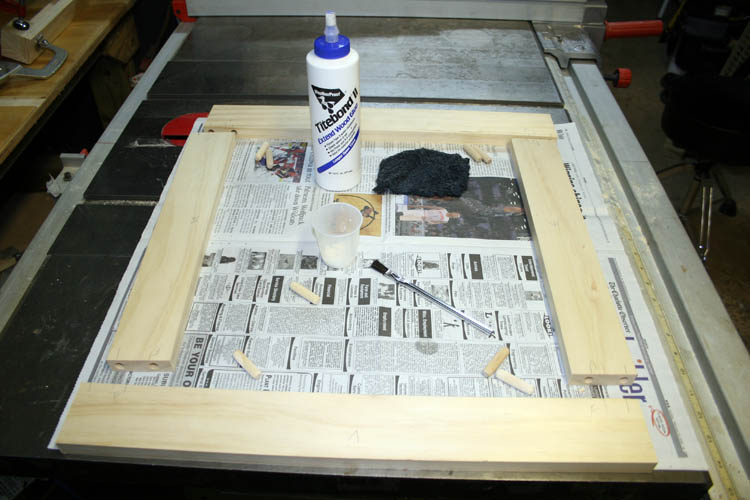
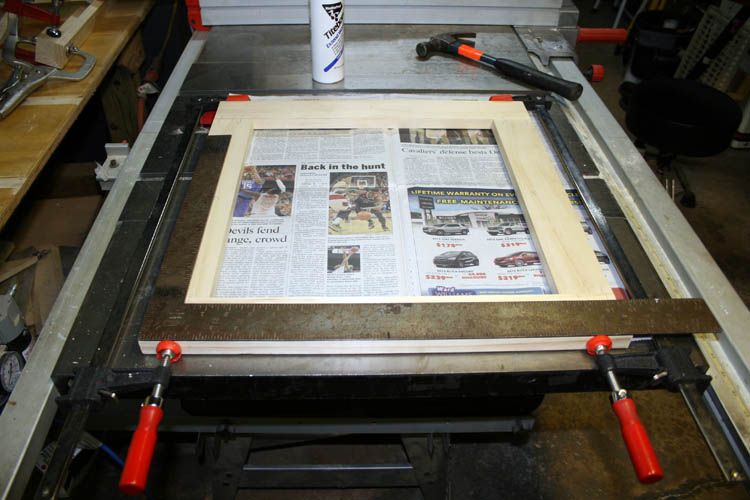
After the face frame panels were allowed to dry overnight, they were attached to the
box using Titebond II glue, drywall screws and countersunk the screws that would show and
added poplar 3/8 inch diameter dowel plugs to hide the screws.
Click on below thumbnail pixs for a larger screen view:

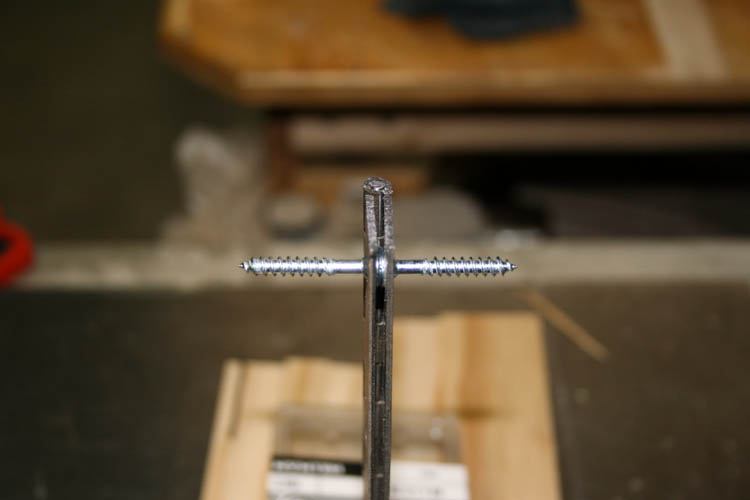
BOSCH ORBITAL SANDER BIT THE DUST
After the poplar dowels were added over the screws and allowed to dry
overnight, it was time to sand
them down flush using a Bosch 5 inch diameter orbital sander of which the
socket head bolt that secures the pad broke requiring a complete disassembly of the tool
in order to get to where I could drill and remove the broken portion of
the socket head bolt inserted into the end of the motor shaft that drives the pad.
Murphy's Law
never sleeps.
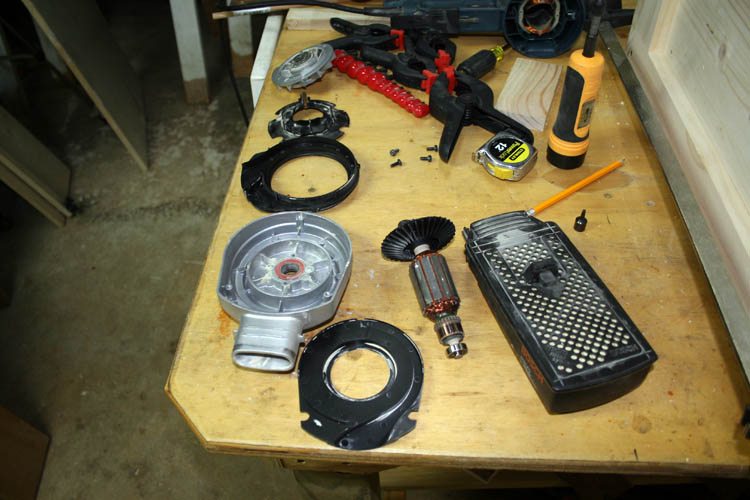
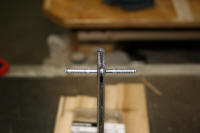
After drilling out the center of the bolt in the end of the motor
armature which came out without having to use an EZ out extractor
tool, there was not a replacement size 7 x 16mm socket head bolt to be
found locally and had to order a replacement on line. Below is a pix
of the broken bolt:

I had to order the part from Utah and ordered the wrong bolt; my bad
since the parts schematic diagram shows the correct parts.....grin if you
must....had to order the correct part and the shipping was about three times
the value of the bolt but things like that happen when you don't pay
attention to detail. Anyway, got the bolt in and put the sander back
together and it worked fine; image that!
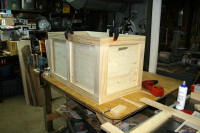
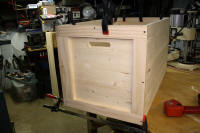
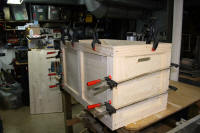
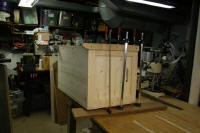
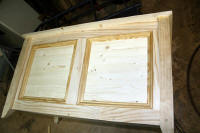
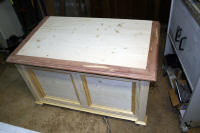
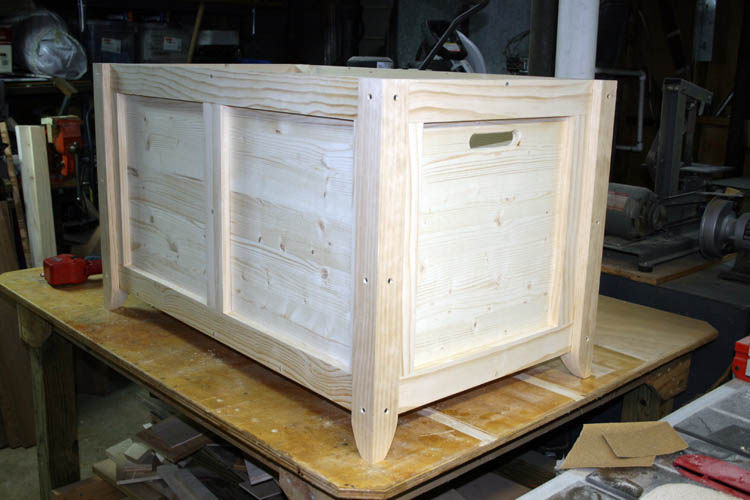
LEG INSTALLATION
It was time to install the legs after band sawing the taper on two sides
of each leg.
The legs were glued and screwed in place over the face frames with the drywall screws and the countersunk
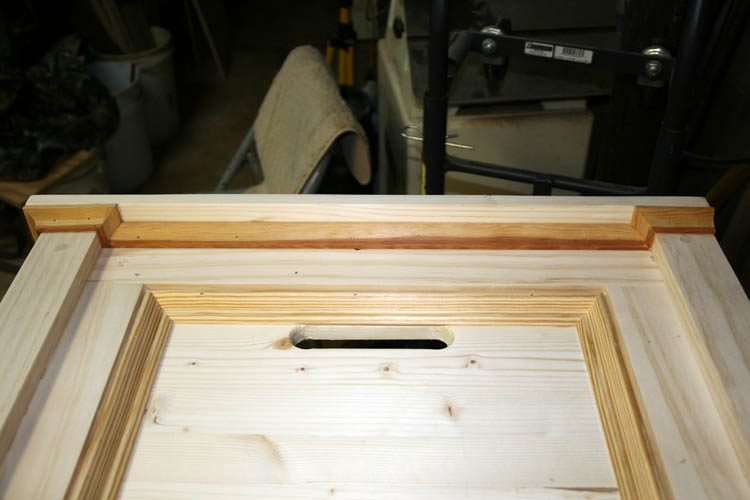
screws had poplar dowels added to hide the screw. A top border was added to the
box with forty-five degree miters with an overhang to give a little more
depth perception to the upper portion of the box.
Click on below thumbnail pixs for a larger screen view:

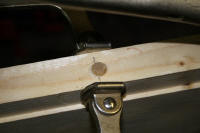
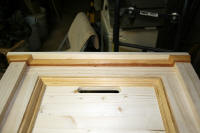
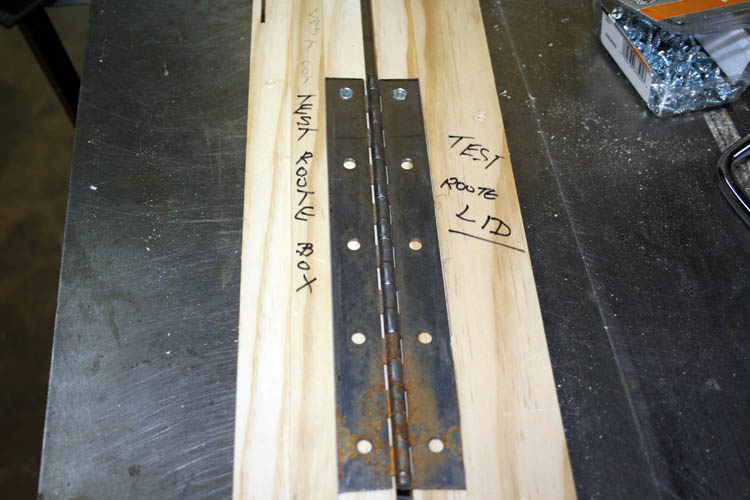
The rear portion of the top border was routed for the piano hinge prior
to gluing and screwing it into place which is flush with the back with no
overhang. I did a mock up test with the
cut-off portion
of the hinge to ascertain the proper depth needed for both the
lid and the box with thumbnail pixs below:

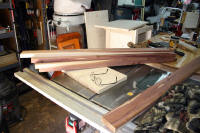
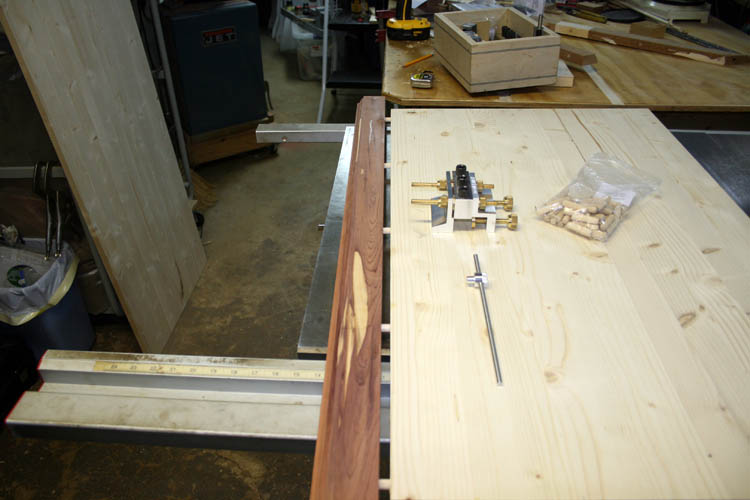
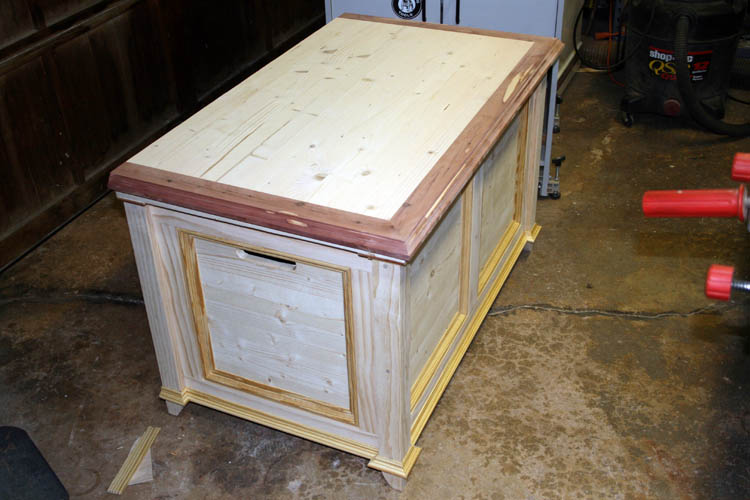
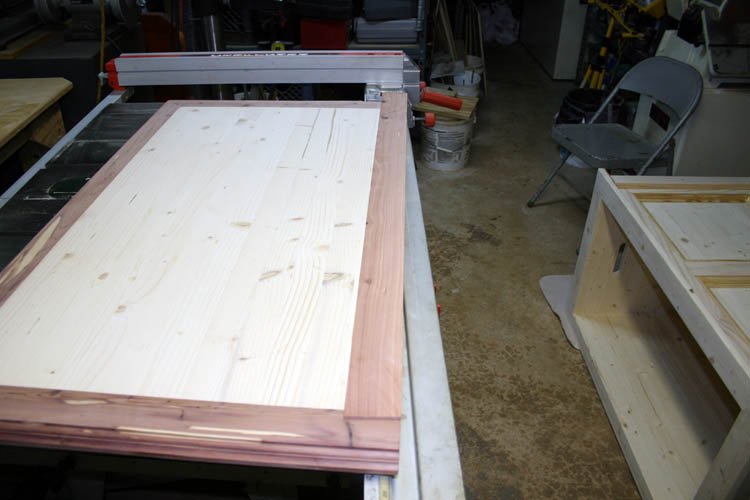
FIRST MAJOR "MISHAP" OF THE PROJECT
After getting the 1 inch thick lid cut to size, I had some scrap walnut and
wanted to place a border around the front and sides, however the walnut was
too short and added a piece of pine in the front center so the border
would be long enough. After getting the front border glued up and
dried overnight, the
front and side pieces went to the router table where a decorative edge was
milled into it. Forty-five degree miters were cut, dowels fitted along
with some # 20 size biscuits. Everything fit like a glove and tried
and do the glue up for the front and sides at one time which was a major
disaster/mistake. Before I could get all the dowels, biscuits, etc., in place,
the Titebond II extended time glue set up, whereas it was impossible to get
the left side border to pull together with the bar clamps and the aid of a hammer. I
had to cut the walnut border from the lid, re-square the lid back up and start
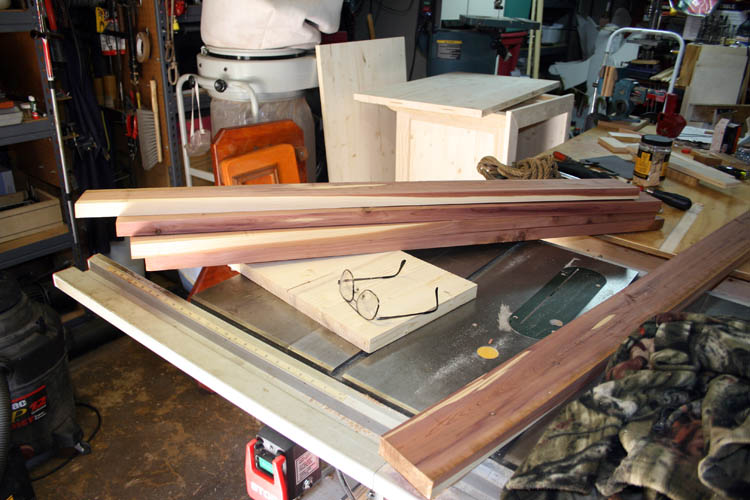
over on another border. I had some 6/4 cedar boards and decided to
use them as I needed 1 inch finished thickness to match the lid thickness.
After getting everything redone; e.g., planed down to thickness, cut to size, border routed, dowels
and biscuits re-cut, it was time for another glue up. This time, I
decided to glue the front up first and let it dry overnight and do the same
thing for each side border which worked out very well. After the lid
border was dry, I installed additional longer dowel rod pieces into the back
of the lid for additional support.
Click on below thumbnail pixs for a larger screen view:


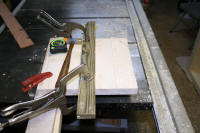
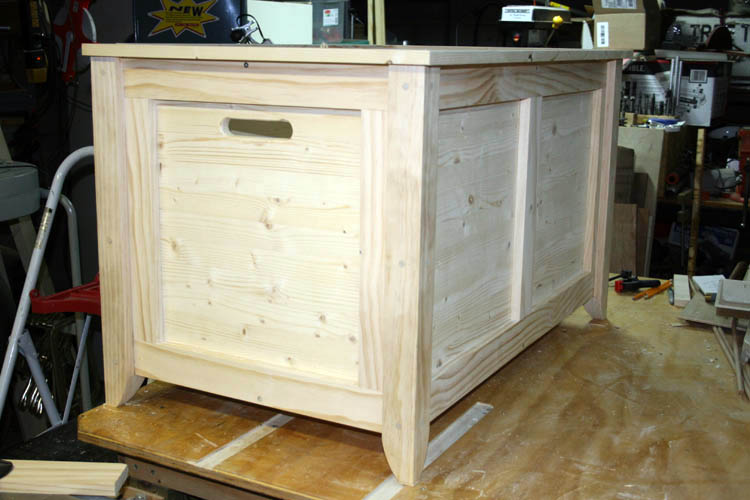
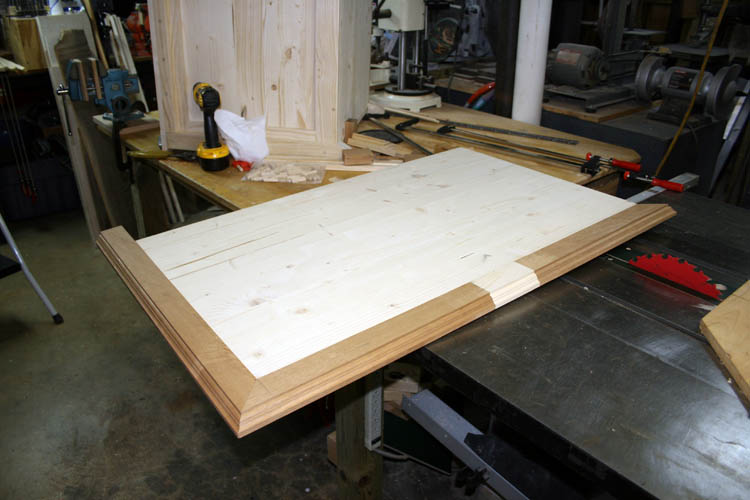
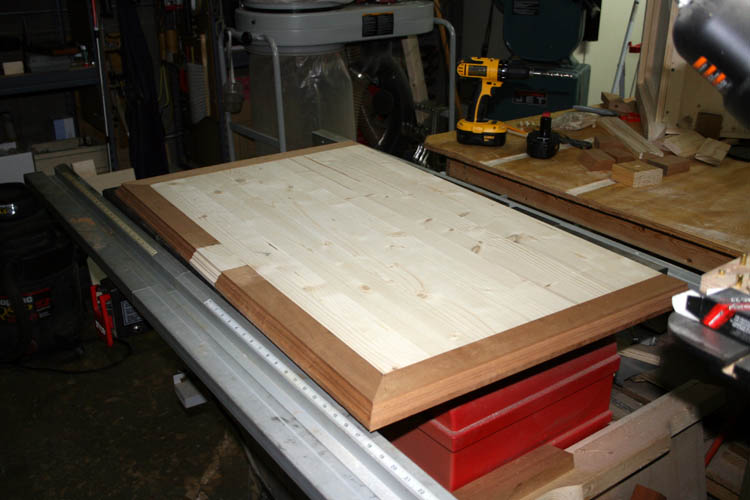
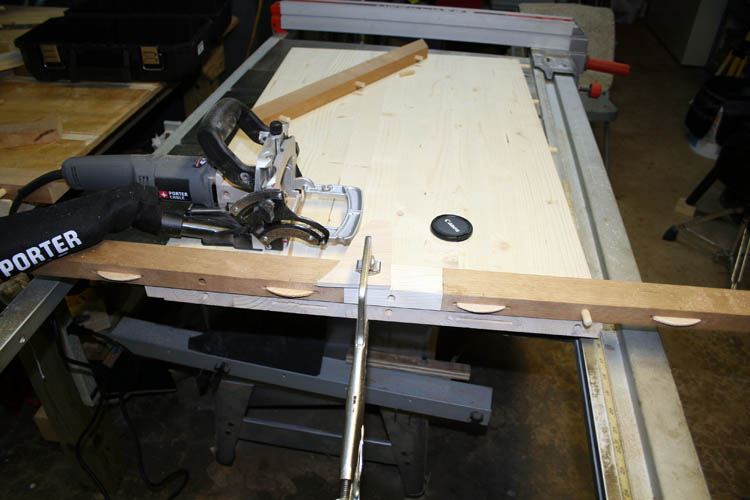
MOLDING TRIM ADDED TO THE PANELS
Two types of standard moldings were used being a
cove molding under the top
band and a base board
cap molding for the panels and base
available from Lowe's and our local H. W. Little, Inc. Hardware. I
used my home made forty-five (45) degree miter
sled on
the table saw and miter saw to cut the
moldings. The molding was installed using 18 gauge wire brad nails driven by a
pneumatic
DeWalt DWFP12233 brad nailer
and Titebond II glue to secure the molding trim in place.
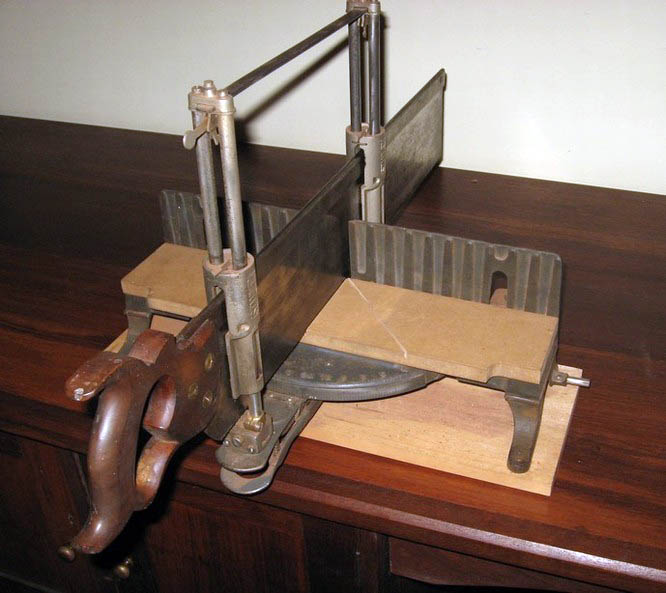
I remember as a young lad, during the summer months my Uncle
Doug Coley
would "hire" my brother and
myself to help him in his masonry construction
business and observed how the finish carpenters cut and applied moldings
and most used a home made
wooden miter box and a few had a much nicer
metal
miter box all powered by a thin hand trim saw. That was
an era when a carpenter carried his tools in a large open style wooden tool
box. Things has really changed since then.
Click on below thumbnail pixs for a larger screen view:

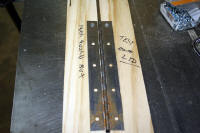
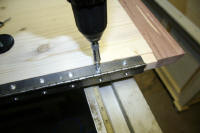
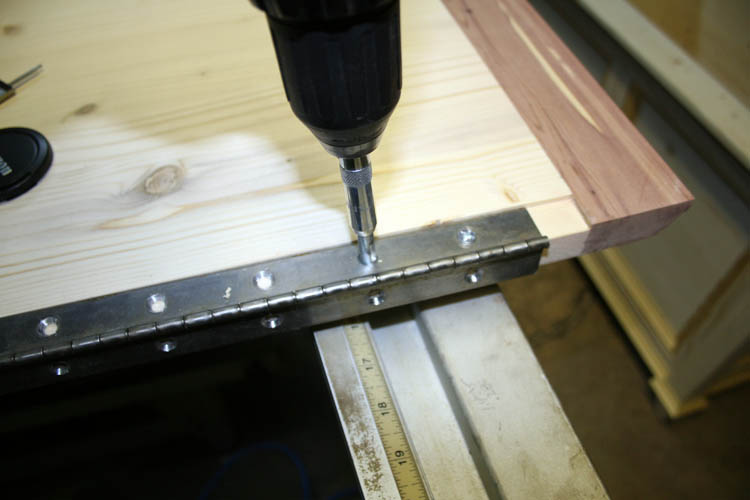
LID HINGE INSTALLATION
The heavy duty steel piano hinge was cut to length earlier and a 82
degree countersink was used to taper the factory punched holes for size # 10 flat head
wood screws to allow the piano hinge to lay fairly flush. As
stated earlier, I already did a mock up test install on a scrap piece
of wood to ascertain the proper depth needed for the hinge and
pre-drilled the holes in the box and the lid using a self-centering 9/64"
Vix bit for # 8, 9 and 10 wood screws.
Click on the below thumbnail pixs for a larger screen view:


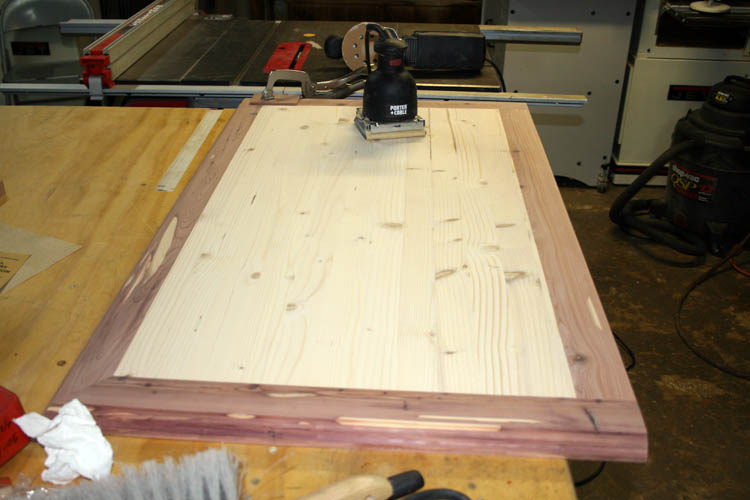
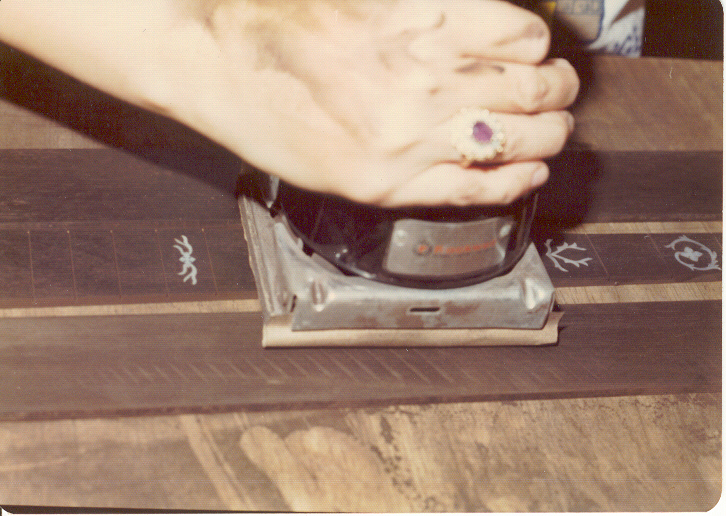
The lid was removed after the test installation and everything sanded to
220 grit using a Porter Cable 330
palm sander. I finally had to replace
my 1969 Rockwell Speed Bloc 330 palm sander which is the same exact
model as the Porter-Cable. I definitely got my money's worth out of
that palm sander which was still working but had gotten far too noisy and
too much extra vibration. In the hyperlinked pix circa mid 1070s, my bride has an
awkward hand position on the Rockwell palm sander wanting to
"show case" a ring while she was
sanding a Gibson RB5 Pre-War Banjo Wreath
pattern fingerboard recently cut and inlaid by
yours truly.
RETHINKING THE LID DESIGN
I can't remember why I decided to use only the mitered cedar border on the front
and sides instead of mitering a matching piece for the rear unless strength
was an issue which I don't think it would have been a problem. Like I
said earlier, I have been somewhat "winging it" on this project without a drawing,
blueprint or diagram and it has come along pretty good so far. After
looking at the top of the lid, it just didn't balance out and lacked the eye
catching quality I was looking for and
decided to add a strip of matching cedar inlaid into the back of the lid.
Now I remember why I didn't use walnut for the rear of the lid; I didn't
have enough 1 inch thick walnut to add to the lid......CRS (clean version,
"Can't Remember Sometimes" kicked
in earlier....grin if you must! However, I did have enough cedar but
had already routed the channel for the piano type hinge and pre-drilled the
holes. It is best to
do it right the first time!
Click on below thumbnail pixs for a larger screen view:

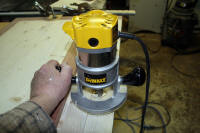


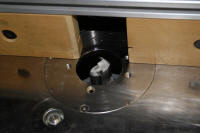
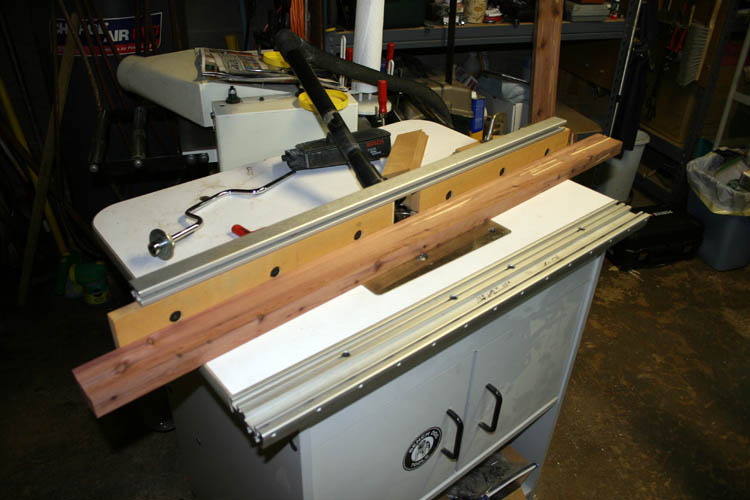
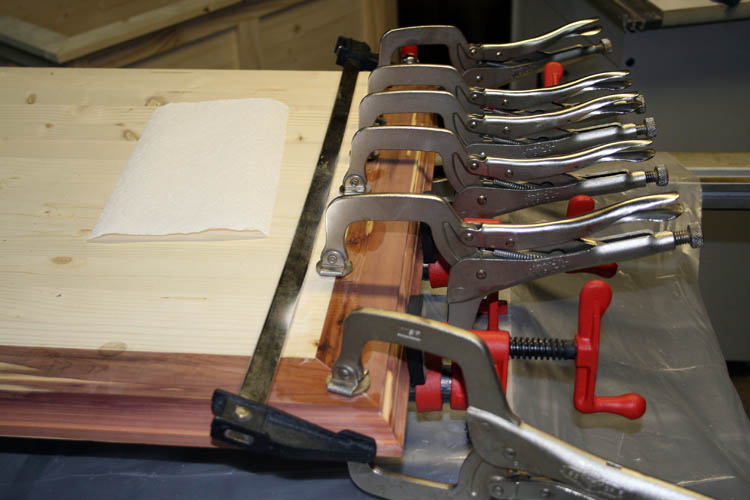
I had a piece of the cedar molding long enough and ripped a piece a little
over 3/16 inch thick to fit between the two cedar side pieces at the rear of the
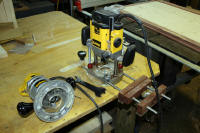
lid. I got a couple routers out and decided to use the smaller 1.5 HP
DeWalt router and used a straight edge as a guide for the router to control
the maximum width of the cut into the top of the lid. I set the router up using a
1.125 inch diameter two fluted carbide tipped cutter which cuts flush on the
bottom. I also set up a scrap piece of material and did a test run on
it to get the router depth adjusted and the straight edge width needed from the edge
of the rear of the lid. Routers work great but most of the time you need some type
of means to control its path whether it is with a guide bearing, guide
bushing, straight edge or fixture which controls and limits the movement of the router.
Those items are like a road map or GPS to the router to get you where you need to be.
Using the plunge router with the edge guide would have required more
set-up time using a longer auxiliary board for the edge guide to ride
against and there would be some clamping issues too and the smaller router
with the board used as an edge guide worked fine.
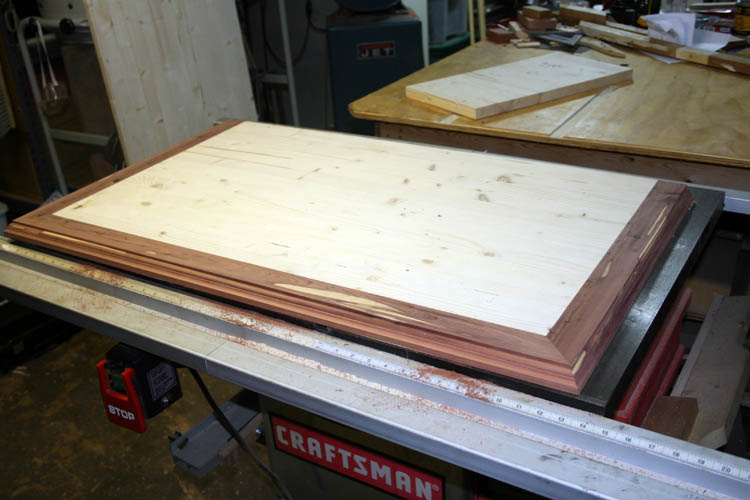
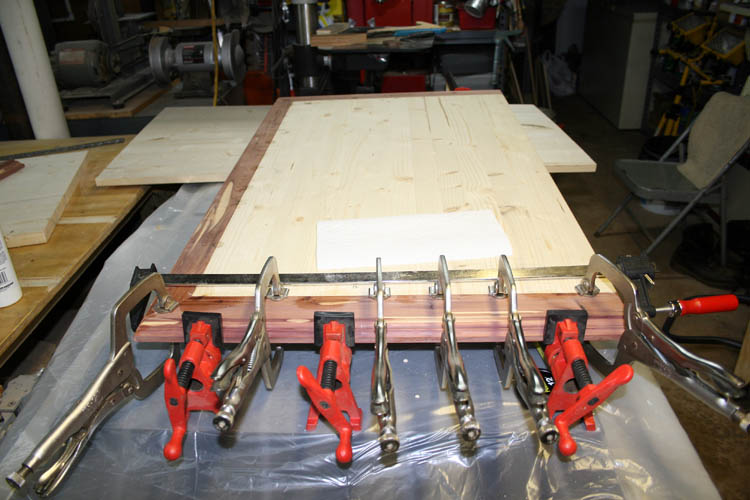
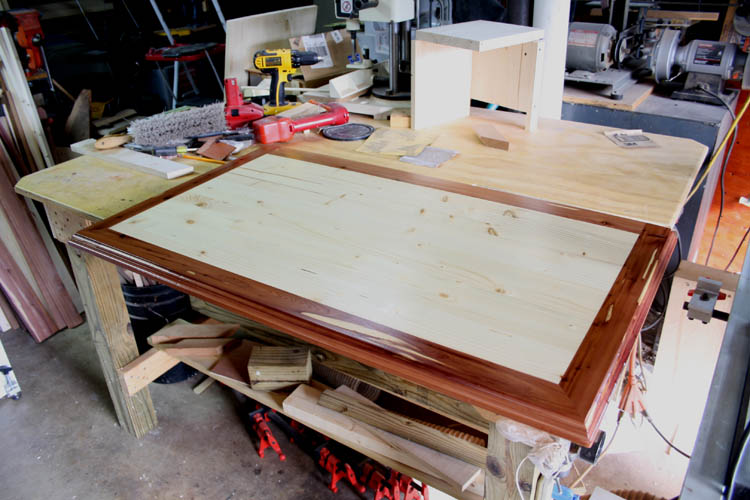
After the channel was routed, everything went along fine and freehand
routed the end of the channel and finished squaring the corner of the routed channel with a
3/4 inch chisel and mallet. I glued and clamped the cedar board in place and
after drying overnight, I will remove the
clamps and finish sand the cedar insert board. Below pix of the lid:
I like the lid much better now with the pine totally surrounded by the
cedar.
I ordered a pair of
Stabilus 150N Lift-O-Mat Gas Springs for
the lid support since the lid weighs 16 lbs. which are on back-order.
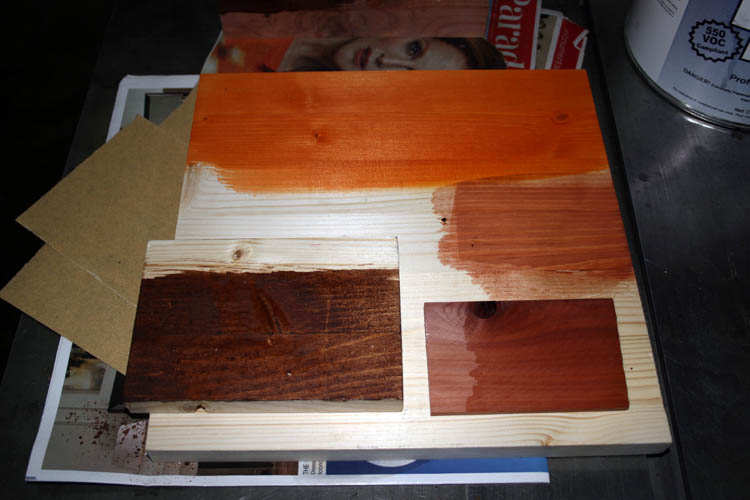
STAINING AND FINISHING
My bride was looking at the pixs taken so far and wanted to know why the wood
molding trim was more gold colored and I told here it was the color/hue or
shade of the pine molding (apparently two different species) which should stain and match the pine cabinet once
the stain/poly is applied. I am going to test out Min-Wax Polyshade
Chestnut color combination stain and polyurethane on scrap material and see
how it looks. If I don't like it, I will go with a separate stain and
polyurethane finish.
Web published by Bill aka Mickey Porter on 03-05-16.
FINISHING STARTED ON 03-07-16
I tested out the Min-Wax Polyshade and didn't like it. I did a test
panel or two with a couple different alcohol based stains but decided to
finish the toy box with clear musical instrument lacquer to show the natural
grain pattern of both the pine and the cedar. There are three
different species of pine in the box with each having a different hue and
grain pattern which is ok too.
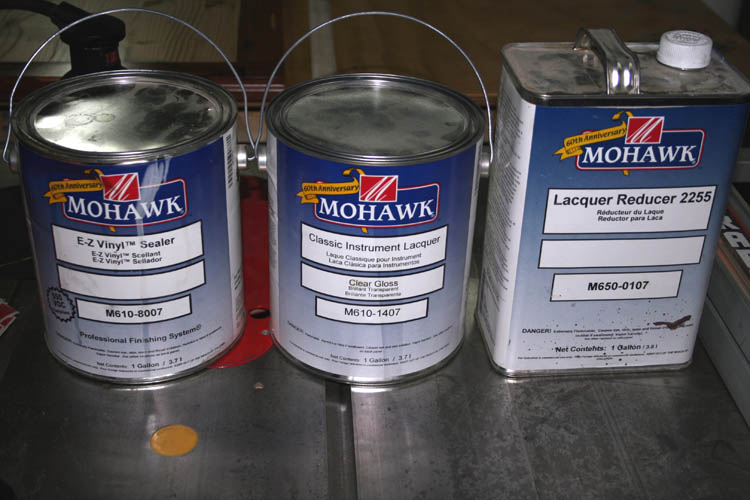
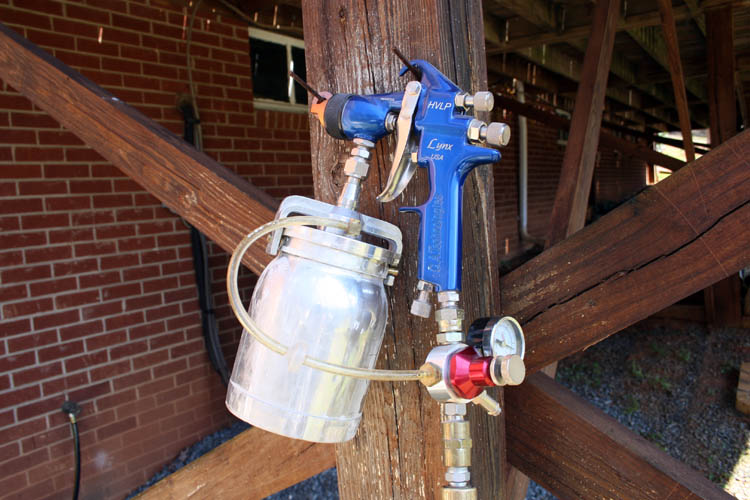
I have left over sanding sealer, lacquer and lacquer reducer from my
banjo construction
project and hope the ole
Lynx L300H CATechnologies HVLP spray gun is still
operational.
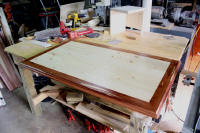
I used my summer sausage
drying rack to support the lid and used a four
wheel pull cart for the toy box and applied a coat of sanding sealer to the
lid and the box. They were allowed to dry and lightly buffed with
a Scotch Brite green pad. I do not have an inside spray booth and have
to work with the weather conditions and do my spraying in front of the basement garage
entrance to the shop. The weather was fantastic today with a
light breeze blowing and got a couple coats of lacquer applied. I will
spray a couple more coats of lacquer on tomorrow and let it harden a few
days to a week before buffing it out. All I want is a protective coat
of finish and not going for a musical grade type finish.
Click on thumbnail pixs below for a larger screen view.


Web published by Bill aka Mickey Porter with update on 03-07-16.
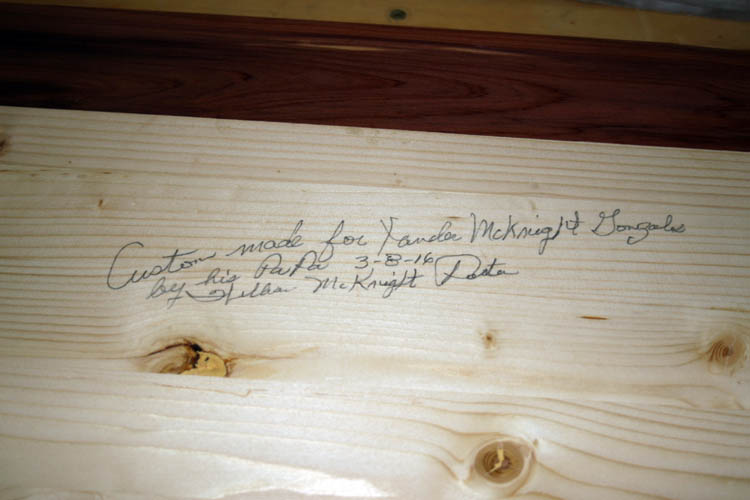
SPRAYING LACQUER CONTINUED 03-08-16
Around mid-day, the temperature was in the low 70s with the humidity
around thirty-four (34) percent per a Google check and was time to add a
couple of clear coats to the underside of the lid. Our daughter wanted
me to sign and date the box for Xander of which I did prior to spraying on
the first coat; pix below of the inside of the lid:
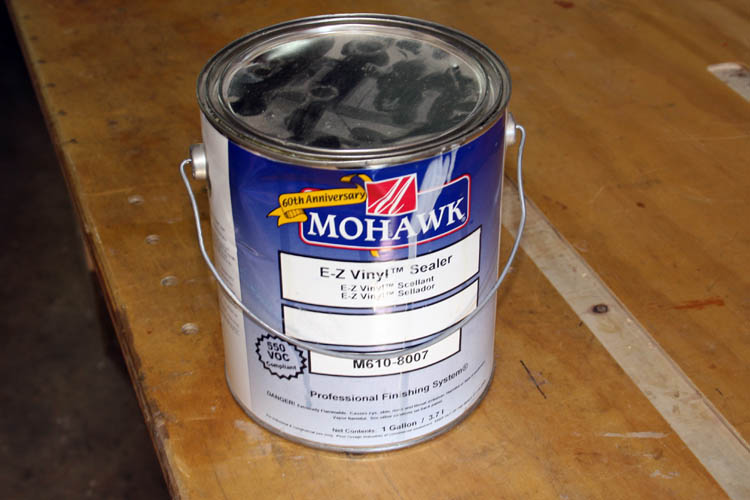
I applied two coats of lacquer to the lid and one or two coats to the box
and will let it dry before any additional top coats are applied. My
lacquer reducer for the
Mohawk nitrocellulose lacquer was getting
very low and ordered four (4) gallons to keep from having to pay a
surcharge for less than their minimum order standard. I am sure it will get used on my woodworking projects;
besides, it doesn't eat anything......grin if you must! The lacquer is
manufactured in Hickory, NC and Mohawk-Finishing also produce and sell other labeled
musical instrument finishing products as well.
Web published update by Bill aka Mickey Porter on 03-08-16.
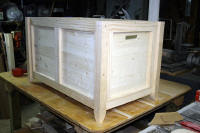
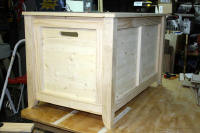
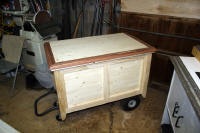
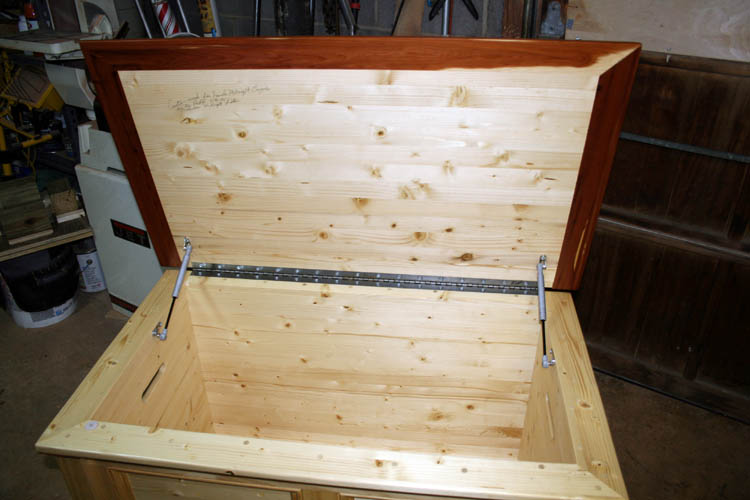
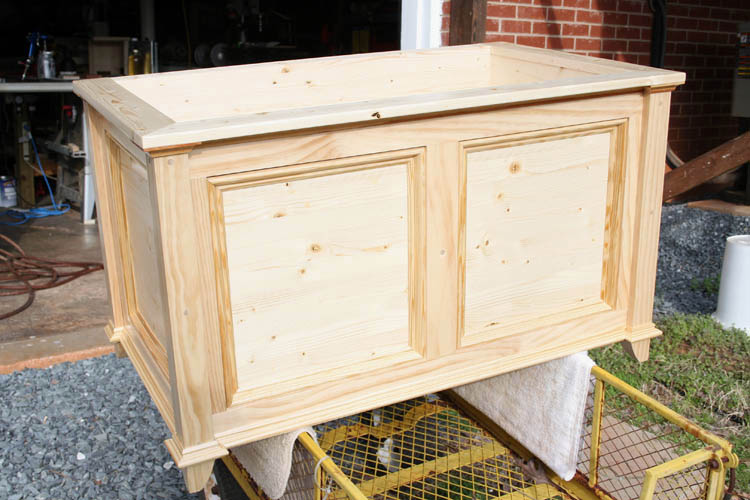
WAITING ON THE
Stabilus 150N Lift-O-Mat Gas Springs
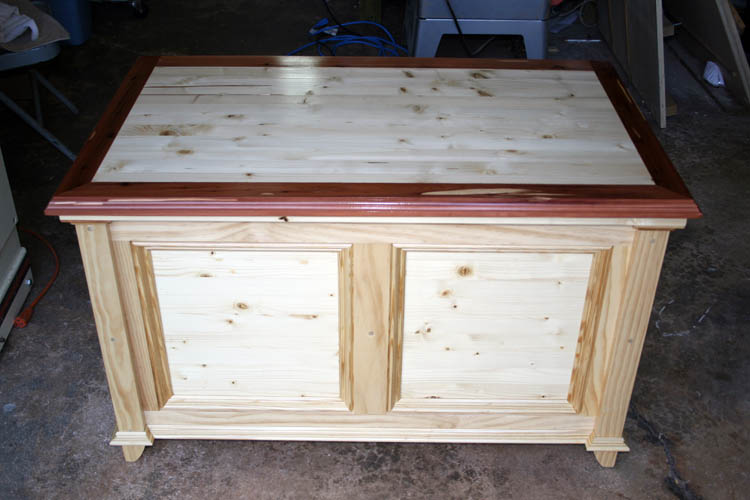
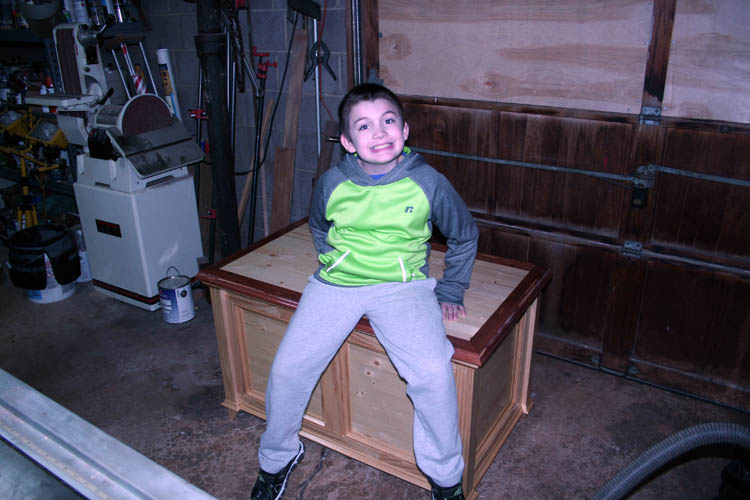
The toy box is completed except for lift-O-Mat Gas
Springs. Below pix with the lid installed:
Web published update by Bill aka Mickey Porter on 03-14-16.
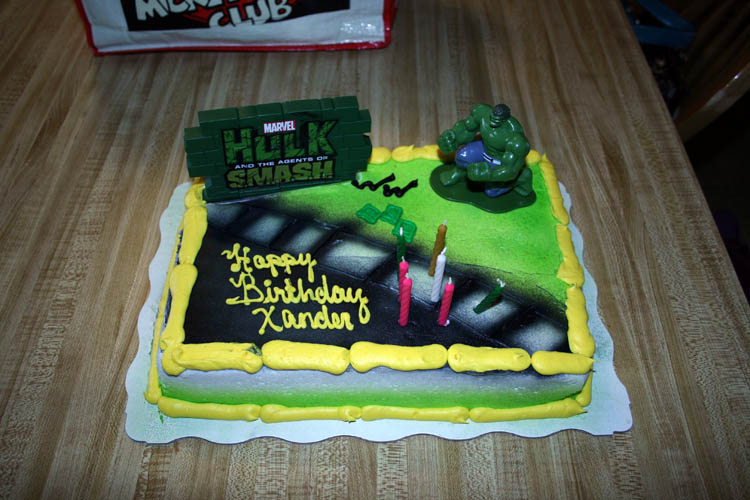
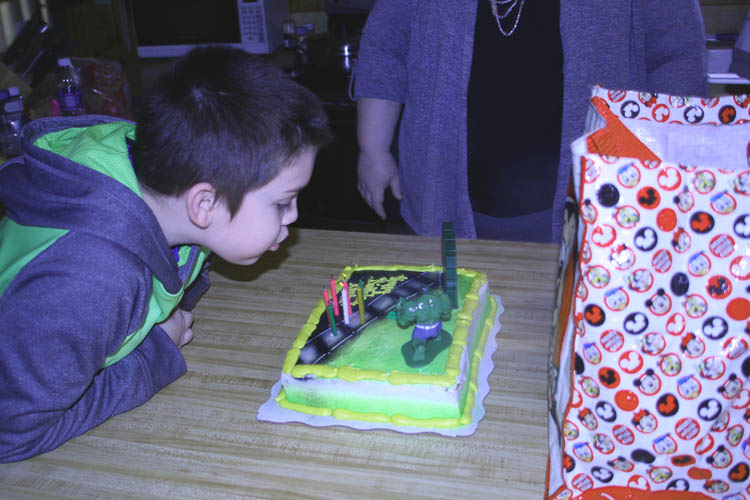
XANDER'S BIRTHDAY PARTY
Today is March 20, 2016 and still waiting on the gas springs for the
Xander's toy box aka blanket chest. Xander's birthday is tomorrow and
his Dad has to work so Steve, Lisa, Xander, my bride and myself met at the
Pizza Inn in Rockingham, NC for an early birthday lunch celebration.
After the lunch, we met at our home and Xander got his birthday cake, ice
cream and some birthday gifts. I forgot my camera mode was set for an
outside sunny day setting and the WB setting was incorrect for using in the
auto mode inside but things like that happen, especially more so in the
Senior Citizen mode.....grin if you must!
Click on below thumbnail pixs taken for a larger screen view:


We had a great time and Xander was in over drive this afternoon.
Hopefully, the next picture will be the installation of the lid gas
springs.
Web published update by Bill aka Mickey Porter on 03-20-16.
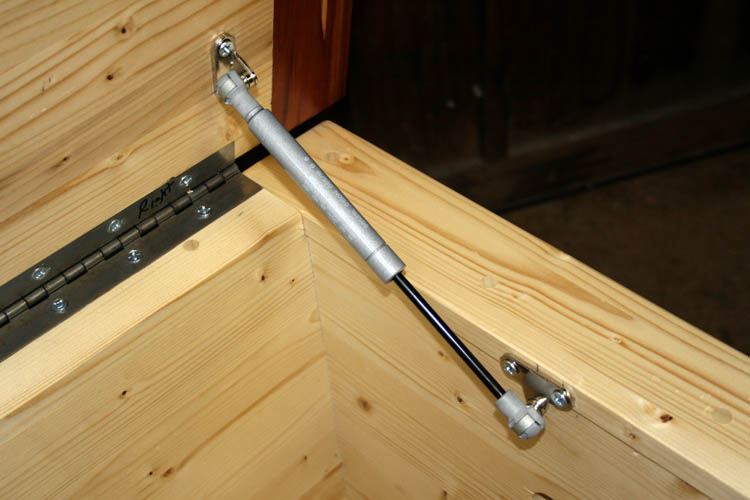
Stabilus 150N Lift-O-Mat Gas Springs
finally arrived on 04-19-16
The Stabilus gas springs finally arrived and
installed them on 04-20-16 and plan to deliver the toy box aka Blanket chest
tomorrow. The springs works very well even though it might get a
little ones fingers when the lid closes but the force is greatly reduced by the
gas springs, whereas the lid weighs sixteen (16) pounds. I placed a felt pad under one corner to take give some
space between the lid and the chest. As soon as you raise the lid
upward a few inches, the gas springs take over and raises the lid in slow
motion to its maximum opening position which is a little less than 90
degrees. In closing, the springs will slow motion close the lid except
the last few inches which has some force to it which could get a little ones
finger but like I said earlier, the force is greatly reduced.
Below a couple pixs taken:
I am very pleased with the finished toy box and it was another learning
experience. I found out the hard way that
all squares
are not square and one of the ole Marine Corps sayings,
"Adapt and Overcome" and that is
exactly what I did.
I am currently building additional
napkin holder boxes for gifts; might sell a
few and learning new things in the process.
Web published update by Bill aka Mickey Porter on 04-20-16.
LEAVING ON A
SPIRITUAL NOTE
If you do not know Jesus Christ as your Lord and Savior, please take
this moment to accept him by Faith into your Life, whereby Salvation
will be attained.
Ephesians 2:8 - 2:9 8 For by grace are ye saved through
faith; and that not of yourselves: [it is] the gift of God: 9 Not of
works, lest any man should boast.
Hebrews 11:1 “Now faith is the substance of things hoped for,
the evidence of things not seen.”
Romans 10:17 “So then faith cometh by hearing, and hearing by
the word of God.”
Open this
link about faith in the King James
Bible.
Romans 10:9 “That if thou shalt confess with thy mouth the
Lord Jesus, and shalt believe in thine heart that God hath raised him
from the dead, thou shalt be saved.”
Open this
link of Bible Verses About Salvation,
King James Version Bible (KJV).
Hebrews 4:12 “For the word of God is quick, and powerful, and
sharper than any two edged sword, piercing even to the dividing asunder
of soul and spirit, and of the joints and marrow, and is a discerner of
the thoughts and intents of the heart.”
Romans 6:23 “For the wages of sin is death; but the gift of
God is eternal life through Jesus Christ our Lord.”
Romans 3:23 “For all have sinned, and come short of the glory
of God;”
Micah 6:8 “He hath shewed thee, O man, what is good; and what
doth the LORD require of thee, but to do justly, and to love mercy, and
to walk humbly with thy God?”
Philippians 4:13 "I can do all things through Christ which
strengtheneth me."


10-26-03.jpg)