JENN-AIR GAS GRILL 720-0061 LP REBUILDI
purchased a Jenn-Air propane gas grill model 720-0061 LP from Lowe's in
Rockingham, NC sometime in early 2004 and believe the purchase price was $
800 or 600 bucks, but not sure of the price.
My bride nicknamed the grill "Chicken Grill"
because I only prepared a
Sprite Can Chicken recipe
for a while on the grill. I grilled our steaks and venison loin aka
back straps on a Weber kettle charcoal grill because it is hard to top the
charcoal flavor imparted versus a gas grill. Opinions widely vary,
however I can certainly taste and smell the difference between gas and
charcoal prepared foods. Those than cannot, my reply is that you have
a diminished sense of taste and smell in my humble opinion!
My main usage of a gas grill is for convenience, especially for things
needed in a hurry and there is enough real estate on cooking surface.
SMOKE & FIRE
The Jenn-Air grill suffered a internal cabinet fire (grill unattended for at
least 30 minutes) from a ruptured gas line hose that put
the gas grill out of commission a couple years ago and just now getting
around to finding replacement parts; e.g., replacing the gas valves that were locked up from the excessive
heat generated. I soaked the internals of the gas valves with Kroll
Oil, but they remained seized up. The side burner valve was working
and only one (1) of the main gas valves was still working.
NOTE: When I observed some serious black smoke coming from
the grill as viewed from our Kitchen window, my thoughts were,
"No way the food is being burned."
Black smoke was coming from the hood rear vent louvers like a wood burning
locomotive engine climbing a steep mountain grade with
Jesse James and his
gang in hot pursuit! I opened the grill lid and there was no visible fire, however when I opened
the cabinet doors, the gas tank hose was ruptured and spitting fire out like a WWII
flame thrower! I retrieved a glove/mitt and managed to turn
the gas tank supply valve off without getting burned, but the damage to the
controls aka gas valves, igniters was already done.
REPLACEMENT PARTS A NIGHTMARE
One thing is for certain, I have gotten my moneys worth from the usage of
this grill in my humble opinion! However, Jenn-Air licensed/outsourced
their grills to Lowe's, Nexgrill overseas and there has been very
bad reviews for their grills with getting replacement parts a
nightmare for sure which I am
personally experiencing, especially the main gas valves which are
discontinued along with most of their earlier model grills!
If you get ten (10) years of service from some of the name brand Chinese
made
gas grills, you are doing good and fifteen (15) years might be the
exception as in my case!
One of the major complaints was the usage of light gauge stainless steel
below the burners and the thin stainless steel
heat shields aka flavor
enhancers which is .026 inches thickness. The idea behind the heat shields is to keep dripping grease
directly off the cast iron burners and sending "flavor" back from the grease
hitting the hot heat shield and preventing a grease fire flair up!
I believe the gas valve for the rear
rotisserie burner is
still working, but not sure. If not, I will not attach it to the gas
tube manifold and/or seal off the manifold opening to that gas valve since I
rarely if ever used the rear burner which is above the regular cooking
grids.
APPLIANCE FACTORY PARTS
I found one excellent on line source for grill parts at Appliance Factory
Parts in Denver, Colorado hyperlinked
here.
I looked on line and the exact replacement gas valve I needed being part #
Nex09000510A0 was no longer
being manufactured and
did find two valve types that "might" work, but not an exact match. I
received the first valve ordered and it will work, however I had to relocate
two blind rivets at each valve location on the front panel
Bezel (control Knob Seat) and the metal gas
line manifold was about 1/2 inch forward, whereas the original main gas valve that
was still working would not work with the replacement valve on the manifold
together and the rear rotisserie burner gas valve.
I placed an order for the
other valve Nex09000138A0 mentioned and will see how it matches
with the original main valve. Which ever gas valve works the best, I can
return the other valve for a refund/credit and/or swap and go ahead and purchase
one
more valve needed for a total of three (3) new gas valves.
The gas valves are not overly expensive, however I could purchase another grill
for what I will have
invested in parts, but after looking at similar manufactured grills; e.g.,
Charbroil, Weber and Nexgrill with a price tag less than $ 600 dollars,
being light duty in construction with tube style main burners and what I call "Rube Goldberg"
or Cloverine Salve in comparison to the Jenn-Air model 720-0061 LP grill
which has its pros and cons, I wanted to rebuild this grill. American manufactured gas grills
prices range into several thousand dollars with about 4 to 6K being the norm
for the higher end models and I
definitely don't do that much gas grilling to rationalize such an investment
for home use and definitely don't care about trying to impress someone
either with a high dollar gas grill!
I plan to replace the cast iron main burners and the heat shields aka flavor
enhancers over them also, however the original cast iron burners and heat
shields are still
operational, but need to be replaced. One of the heat shields has
succumbed to the effects of the propane gas which can certainly be corrosive
even to thin stainless steel when the flame is close enough to the stainless
steel. BTW, exact replacement specification cast iron burners
and heat shields are still available for the above model grill.
While waiting for the other main gas valves to arrive, I will add some pixs
of what I am doing. I believe I originally took pixs when I started
disassembling the gas grill last year or earlier, but was not able to locate the
pixs on any of my
back up external drives.
LETS BEGIN
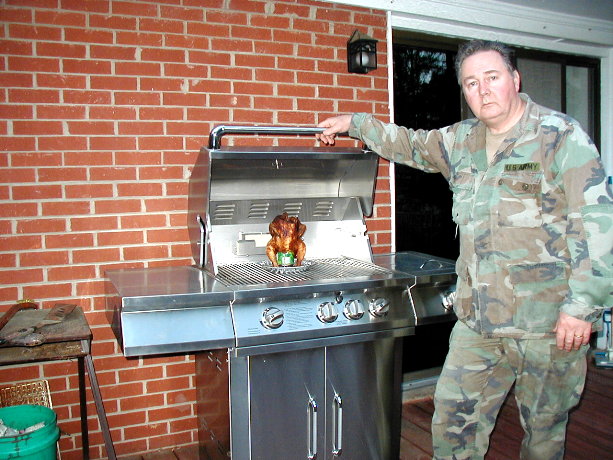
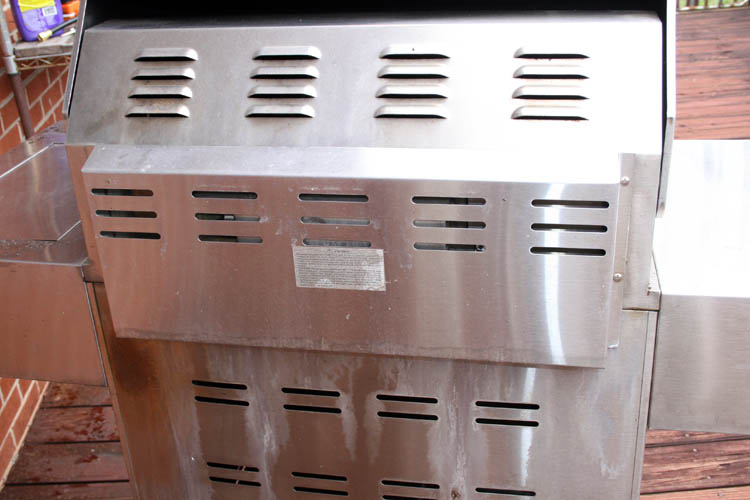
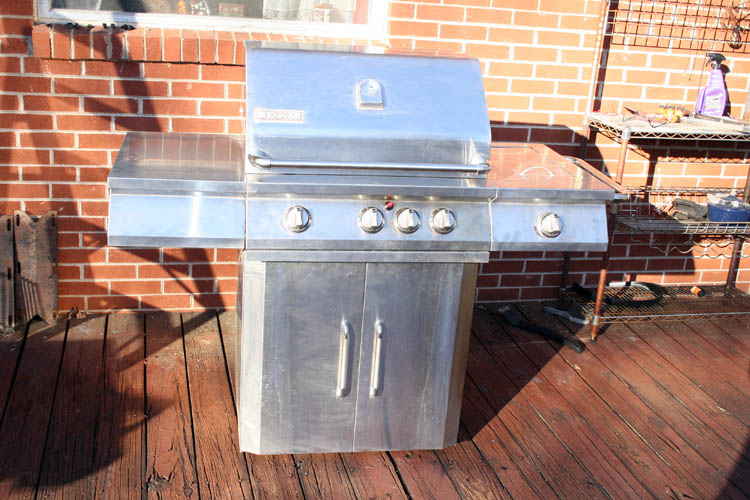
Above pix is what the new grill looked like in 2004 when new.
Remember the Sprite Can Chicken?
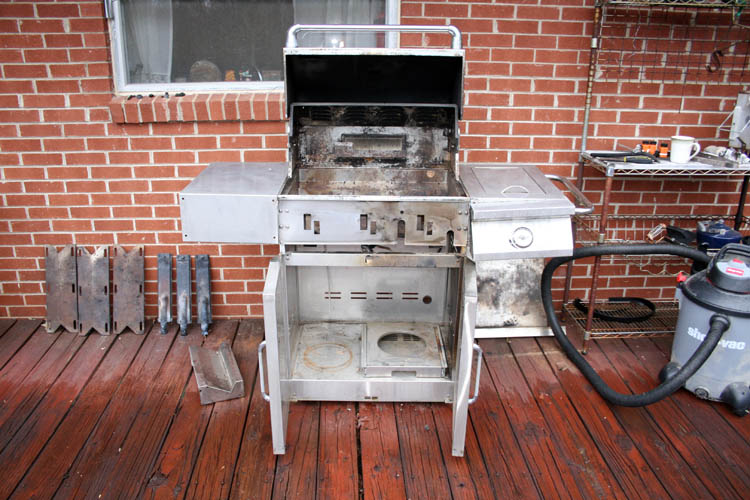
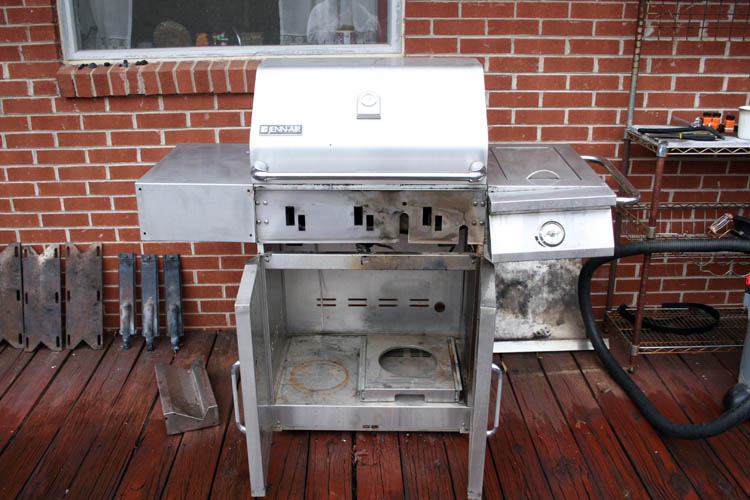
AFTER THE GRILL FIRE
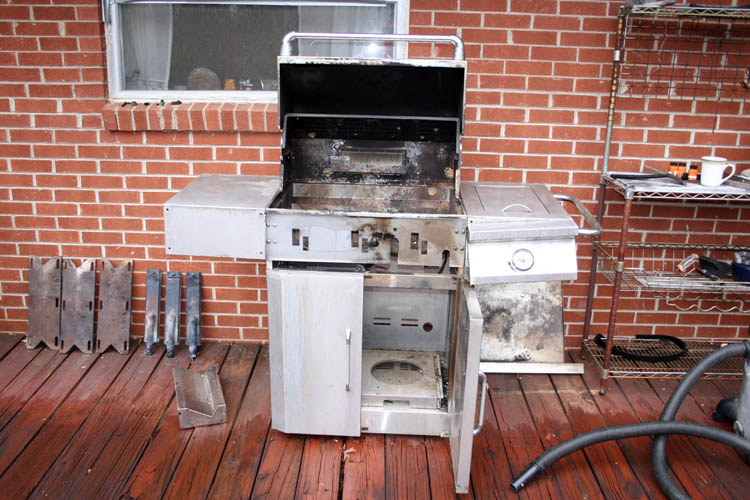
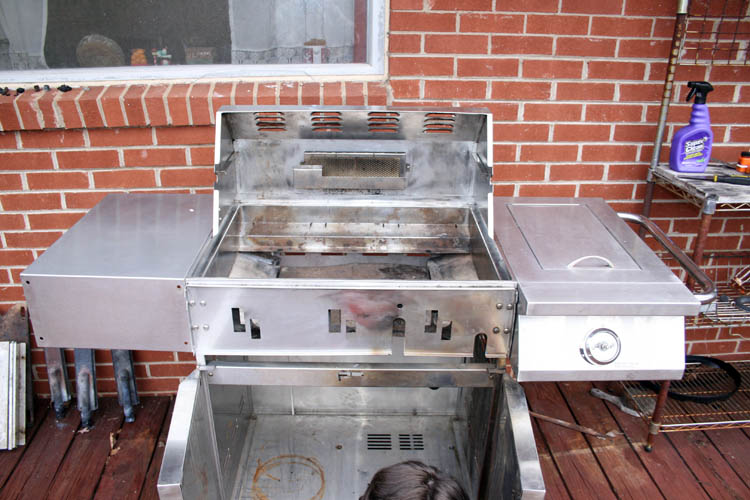
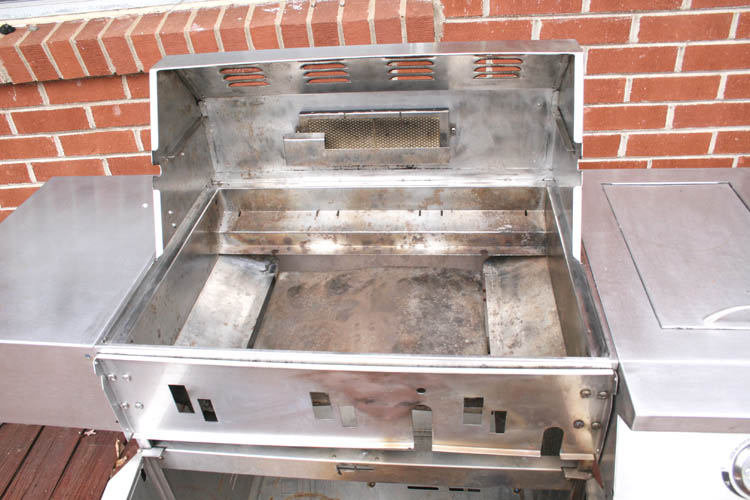
As stated earlier, I basically removed, left side cover, the front cover
that housed the gas valves, tube gas manifold, removed the cooking grids, the burners
and heat shields. I started taking the side burner loose, but didn't need to take
it all the way off to remove the burner gas line hose.
The grill looks worse than it actually is due to the accumulation of
black soot from the burning rubber hoses and plastic igniter housing for the
rear rotisserie burner.
The stainless steel should clean up with some elbow grease applied and
good strength cleaner in combination with my hand held polisher/buffer and
appropriate compounds. I am not that concerned with the inside of
grill, but will get all the loose debris and soot scraped and vacuumed out
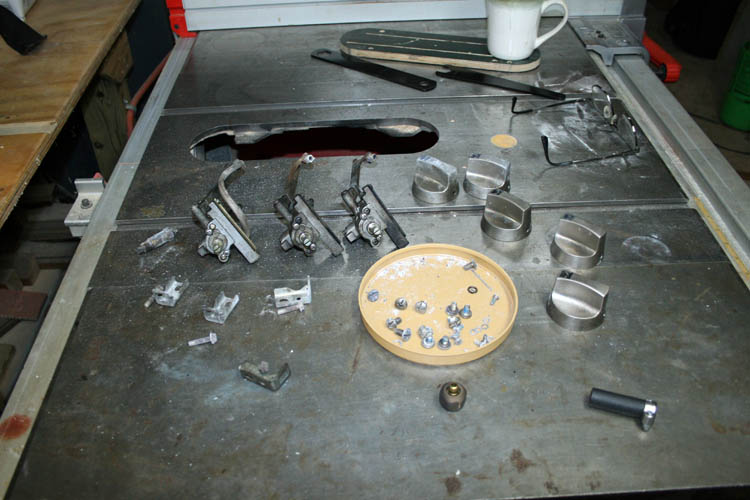
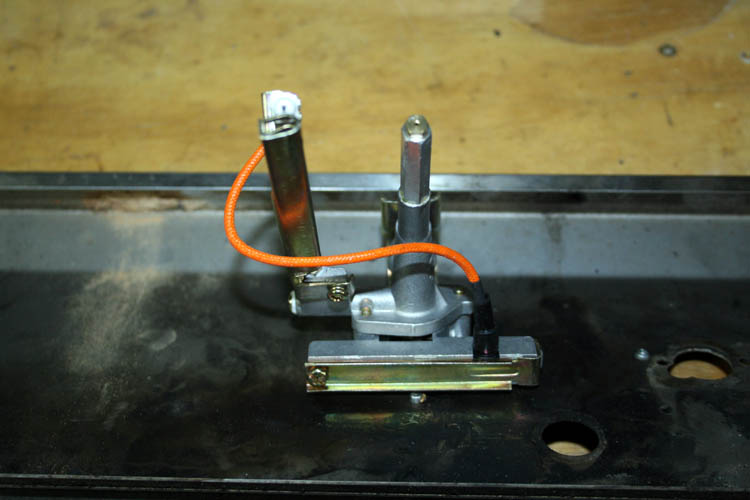
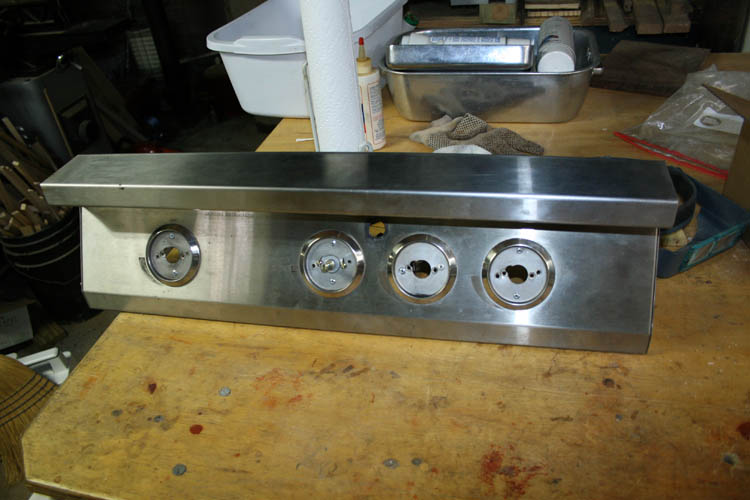
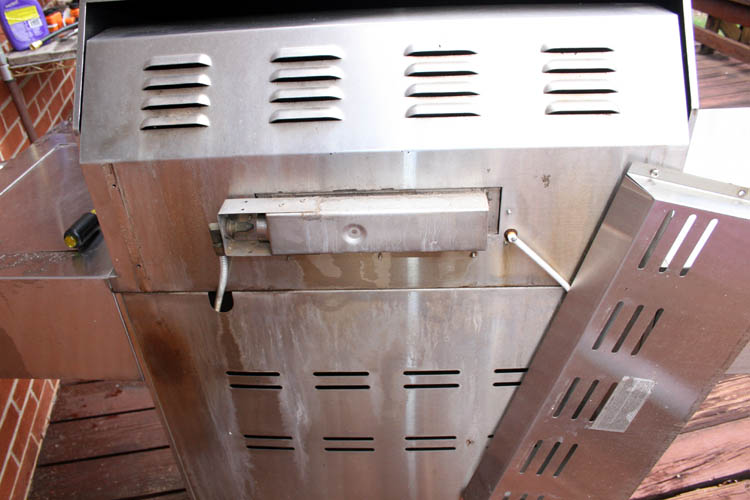
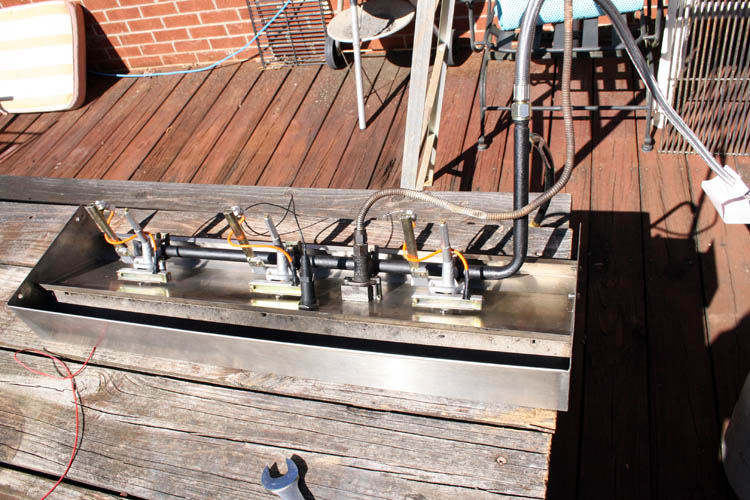
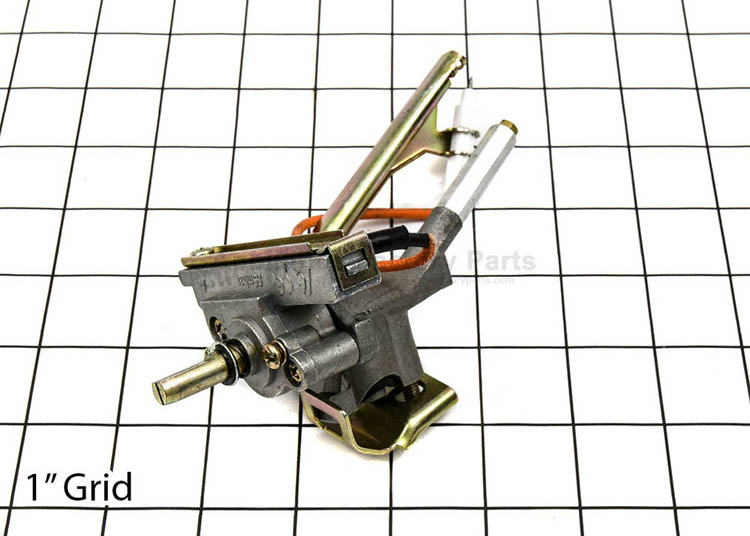
Pix of the three (3) main gas valves, knobs and small assembly hardware.
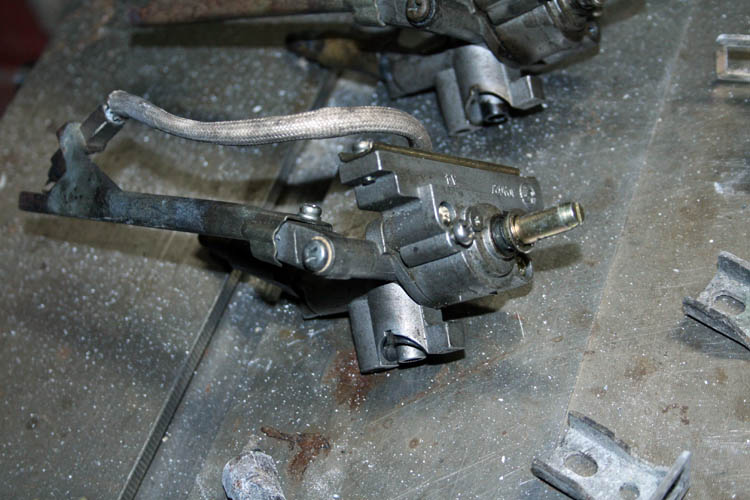
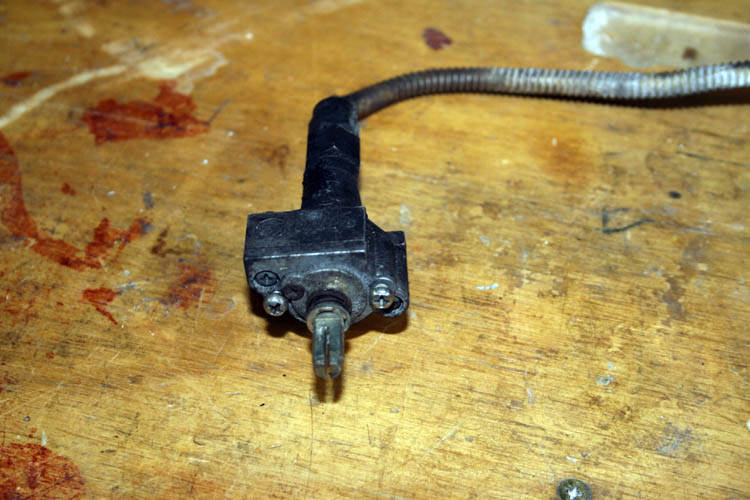
A close-up pix of the one main valve that still works properly. This
valve assembly has the built in igniter, whereas one of the replacements
ordered did not have the built in igniter.
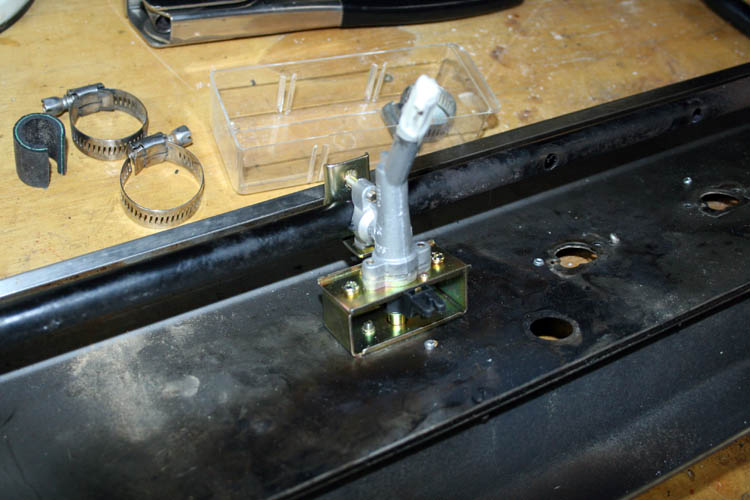
Replacement valve attached to the front panel and attached to the gas
manifold. The space showing on the gas valve is where the the igniter
assembly would be housed, etc.
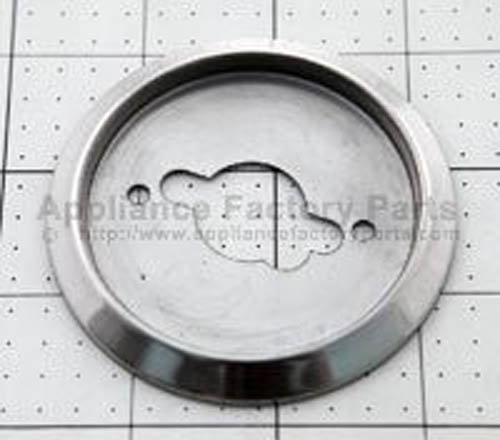
I had to relocate two rivets that attached the Bezel to the front panel
in order to mount the above gas valve.
As stated earlier, I did locate a replacement main
gas valve Nex09000138A0 that fits the Jenn-Air model
720-0062 LP which has the built in igniter and hopefully it will work with
the front panel and the gas manifold. Per the manufacturer's
specifications, it should fit this manifold which is .625 inches outside
diameter. The main difference between the Jenn-Air 720-0061 LP and the
Jenn-Air 720-0062 LP, whereas the Jenn-Air 720-0062 LP has four (4) main
burners.
As soon as the other main gas valves ordered arrives, I will post
additional pixs and information.
RIGHT CHOICE OR NOT
As to whether I made the right choice to rebuild this gas grill or find a
similar replacement grill, remains to be seen; the jury is still out! I have certainly made
some bad choices in the past on purchasing products and you definitely
cannot fully depend on product reviews which are one sided and biased to say
the least with some of the large internet sellers doing their own product
reviews to enhance product sales!
I am certainly thankful to God through Jesus Christ our Lord and Savior
that I did not get burned or harmed while turning off the gas valve to the
propane gas tank and no other property damage!
Web page published by Bill aka Mickey Porter on 03-09-2021 and updated on
03-10-2021.
RECEIVED CORRECT GAS VALVE
I received the
gas valve Nex09000138A0 ordered that would fit the Jenn-Air model
720-0062 LP grill and it fit like a glove and the body was indexed the same as the
original gas valve that fits my model Jenn-Air 720-0061 LP. The
orifice tube assembly might be 1/4 inch shorter, but that will not be a
problem fitting into the cast iron gas burner opening since there is plenty
of length available for the gas valve assembly. The igniter is upside
down, but this is fine and will not affect the functionality of the valve.
With this gas valve, I didn't need to relocate the bezel rivets, but that is ok
too.
The original rear rotisserie burner gas valve should fit on the gas tube
manifold since the spacing between the mounting and the gas tube manifold appears to
be the same, otherwise if it doesn't fit, will leave it off since I rarely
ever used the rear rotisserie burner anyway and seal the opening to the gas
tube manifold. I could not locate a replacement gas valve for the rear
burner.
I placed an order for another
gas valve Nex09000138A0 and as stated, returned the other
gas valve to swap for the correct gas valve needed. The one original
gas valve that was still working will be used as a spare aka backup and
hopefully will never need it!
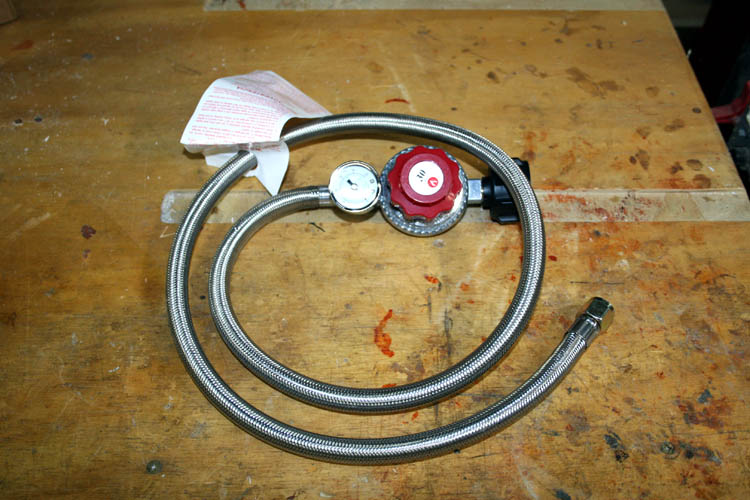
I also ordered a set of cast iron gas burners and stainless steel heat
shields aka flavor enhancers and the high pressure regulator and supply line arrived
today.
The grill body is in need of some serious cleaning and polishing and will
tackle that job next week, our Lord willing of course. I will check
and see if our local auto parts store can swedge fit brass hose ferrules to
the 3/8 inch gas supply line fittings to the side burner, otherwise I will
use an adjustable tubing hose clamp.
NOTE: Our local auto parts store does not swedge fit brass
hose ferrules and ordered a 18 inch length hose with female 3/8 inch flare
fittings on each end via the internet.
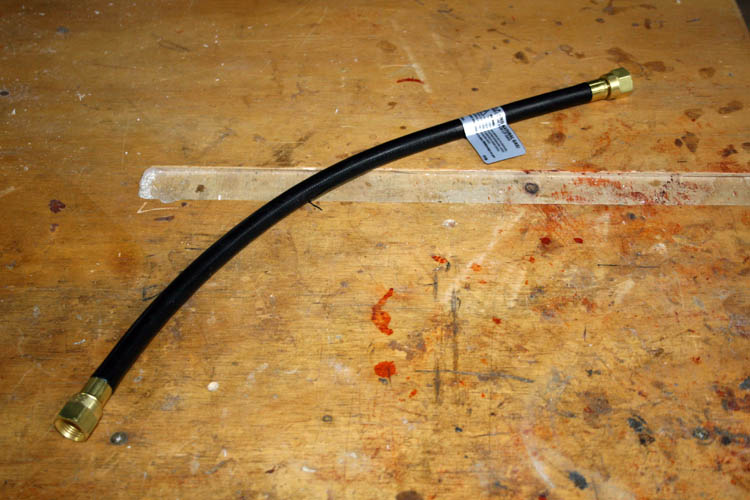
NOTE: Received the gas hose on 03-18-2021.
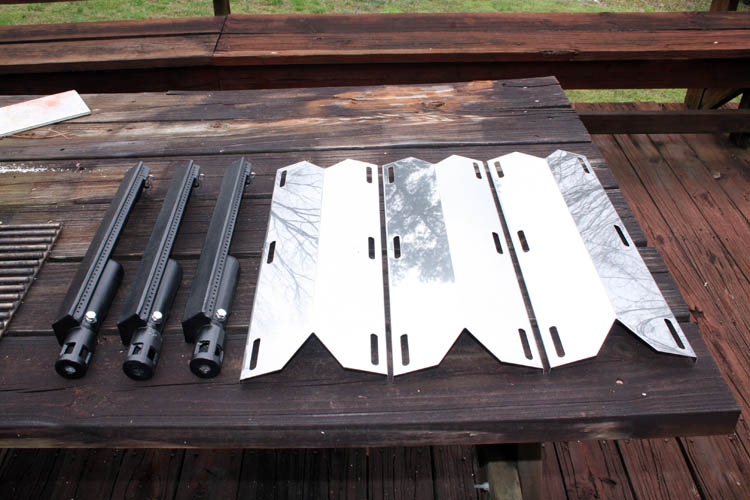
NOTE: Received the cast iron burners and stainless steel
heat shields on 03-19-2021.
REMOVED ROTISSERIE BURNER GAS VALVE
I removed the rotisserie burner gas valve from the grill which will make
it easier to install onto the front panel. I remember it was a
"dawg" to get it loose from the
gas manifold when I removed the front panel that houses the gas valves and
the gas manifold.
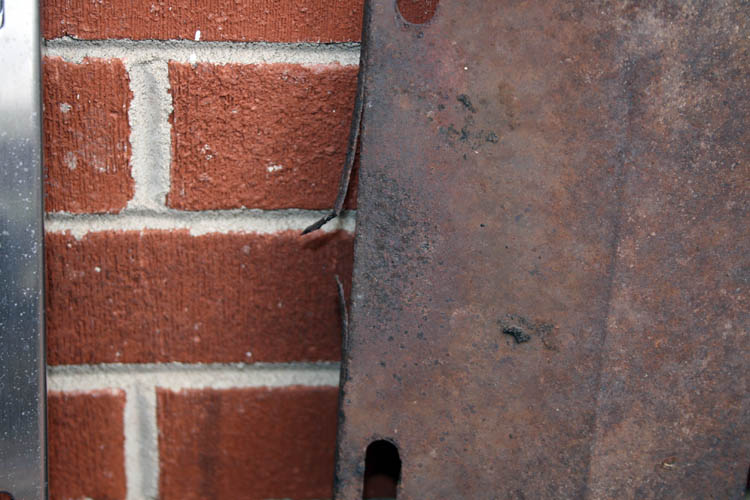
The rear panel had to be removed from the grill to access the flexible
metal gas line coming from the gas valve.
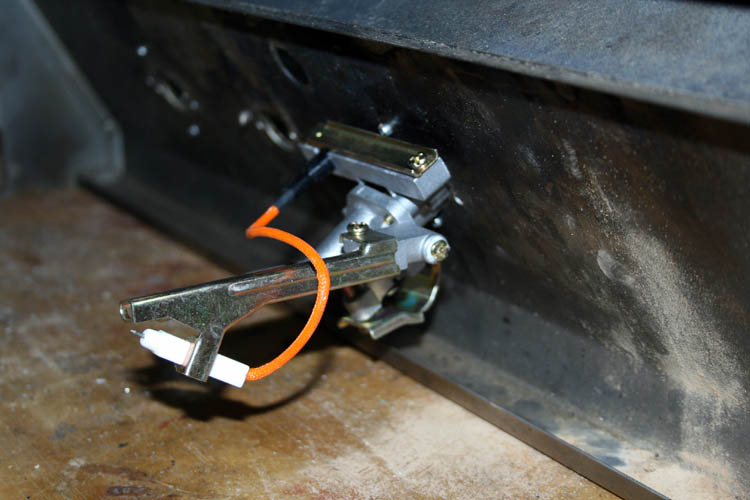
Pix with the rear panel out of the way.
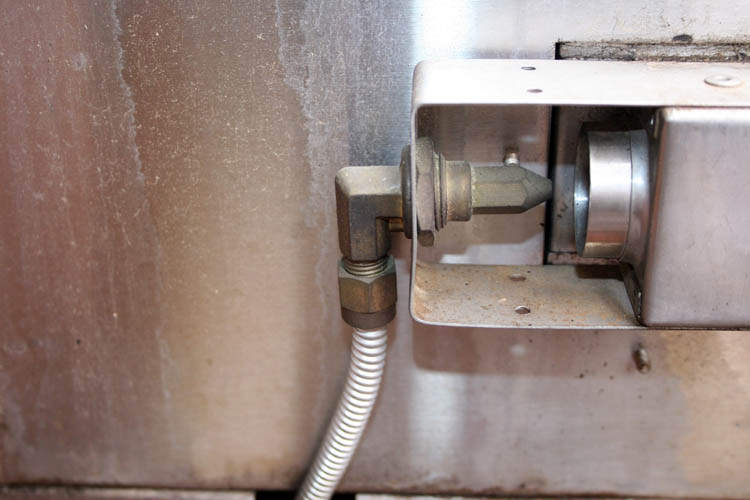
Close up of the flexible gas line connection to the rear rotisserie
burner.
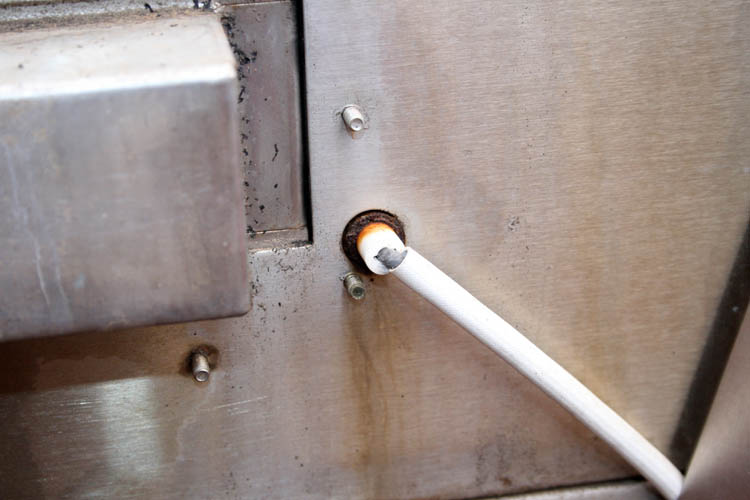
Insulated wire from the front panel Igniter that was cremated in the
fire. I might try and find a replacement, however I don't plan to use
the rear rotisserie burner at this time.
Rotisserie gas valve with the flexible metal gas line attached.
As stated earlier, the rotisserie burner gas valve is still working and
have a rubber gasket/seal on order with the other two main gas Nex09000138A0 valves.
All the gas valves will need to be installed onto the front panel and
the gas manifold connected to each valve before attached to the grill body which is held in place by four (4) screws; two at each end.
I am waiting on two (2) main gas valves to arrive, a couple rubber
gaskets for the manifold; only need one for the rotisserie gas valve and
several wire cone brushes in order to complete this project.
Web page updated by Bill aka Mickey Porter on 03-12-2021, 03-18-2021 and
03-19-2021.
GRILL DEEP CLEAN STARTED
While waiting on the gas valves to arrive, I decided to start the cleanup
on the grill body. I didn't soak down the inside of the grill with any
type of cleaner yet, but used a flat putty knife to remove the caked up soot and
vacuumed the residue left.
It was drizzling rain and didn't get too much done, but took a few pixs
of the progress.
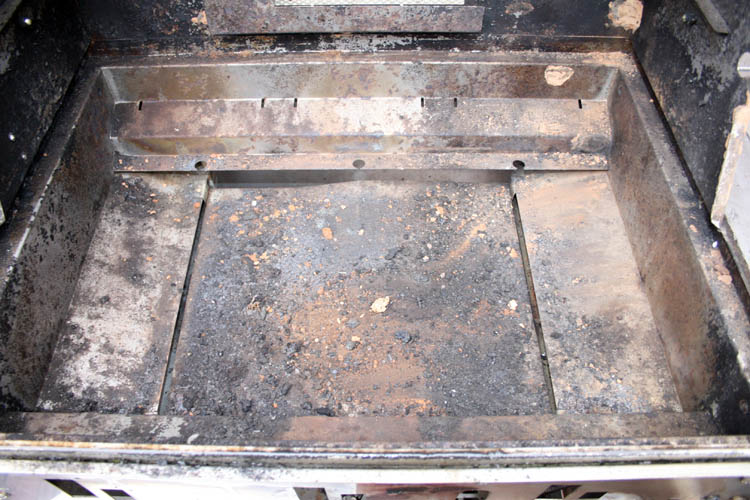
The above shows the accumulation of soot and grill debris and definitely
cannot remember the last time this grill had a thorough deep cleaning.
If you look closely you can see the lower bottom of the rear frame that has three
holes that the rear of the cast iron burner locator pin fits into and the
gas flame/temperature has eroded the front portion of the round hole out
which really isn't a problem. The locator projection from the rear of
the gas burner has a hitch pin that keeps the burner in place.
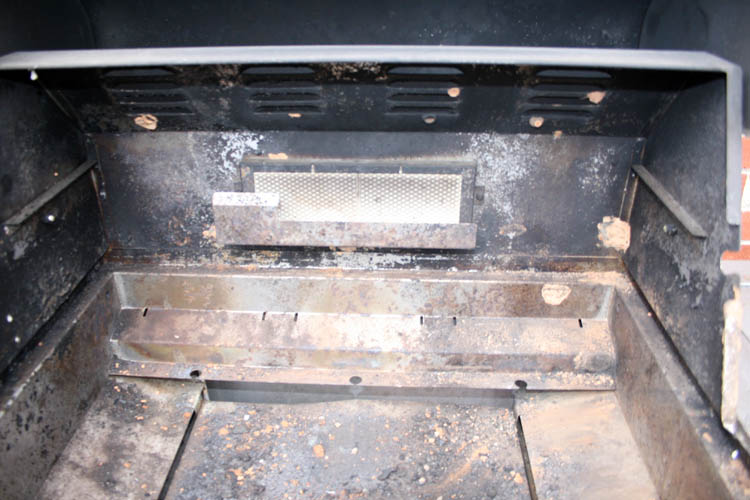
There is an after market replacement fix for the lower stainless steel
sheet metal below the three (3) main burners that is held in place by four
(4) drop down stainless steel tabs at each corner which has a gap all around for proper air
flow and provide heat protection to the lower cabinet which houses the
propane gas tank. Grease will also flow off the tapered sheet metal
onto the grip catch pan pull out tray below it. The above stainless
steel sheet metal part is definitely light gauge in
my humble opinion and should have been a thicker gauge, but it is still
holding after about fifteen (15) years of usage which isn't too shabby!
Thinner materials used equals more profits for the manufacturers.
There is a after market replacement strip that will go over the top of
the existing metal that houses the locator protrusions from the three (3)
gas burners also, but don't see a need for it.
The rear rotisserie burner and "mud dobbers" nests since the grill has
been sitting idle.
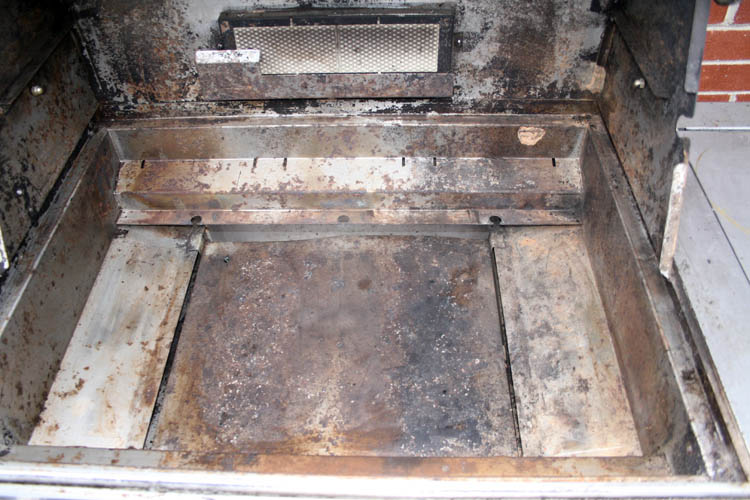
The initial scraping with the putty knife got most of the soot and debris
loose and vacuumed it out. It will look much better once I give it a
good soaking with some cleaner, however I might just use a home made
solution of water, vinegar and baking soda to not leave a chemical smell
since this grill has been well seasoned, not discounting the fire from the
burning gas line hoses and plastic igniter housing which no doubt cancelled
all the years of good food seasoning present.
I just noticed when I uploaded the pixs from my camera that the grill
drip catch pan in the right background hasn't been cleaned yet
either............grin if you must!
I later soaked the grease catch pan with some purple Super Clean grease cutter along
with the stainless steel grids. I plan to wire brush the inside of the
grill using a 4 inch and 3 inch cup brush in my 4 1/2 inch Milwaukee angle
head side grinder and wire brush the stainless steel cooking grids as well.
I attached the side burner front control panel to the grill body frame
and started cleaning the stainless steel cooking grids and the side burner
components. There are few replacement parts for the side burner
available.
I removed the four (4) screws that held the slide out gas tank holder in
place and will move it over to the left side of the cabinet since I prefer
the tank in that position for whatever reason.
GRILL DEEP CLEAN CONTINUED
I received a couple 3 inch diameter wire brush cone wheels for the
Milwaukee 4 1/2 inch angle head grinder and started wire brushing several of
the components including the stainless steel cooking grids which were very
"nasty" looking. I had prior soaked them with Super Clean and brushed
some of the heavier stuff off with the grill brush.
The grids were badly pitted in some places, but they did clean up pretty
good.

You can see the difference between the front grid that has been wire
brushed and the rear grid.
I also removed the grill hood and soaked it with Super Clean, wire
brushed it and rinsed it off with the water hose.
The grill hood inside wasn't pitted much at all and went over the inside
with my buffer/polisher using a foam pad and McGuire's liquid polishing
compound.
The grill is cleaning up very well after fifteen (15) years of usage.
I have brushed the grids and heat shields off in the past, but have not done
a deep clean, of which you should do at least once a year.
I moved the slide out tank tray to the left of the cabinet and secured it
in place with blind rivets.
A close-up pix of the inside of the grill after deep cleaning and will
probably not try and remove any of the heat discoloration which would take
some serious polishing and metal removal which would really not serve any
useful purpose except "eye appeal"
and that would be eliminated after a few times of grill usage!
The right side of the cabinet suffered a good amount of discoloration due
to the heat from the "flame thrower" e.g., ruptured gas line hose which was
pointed in that direction.
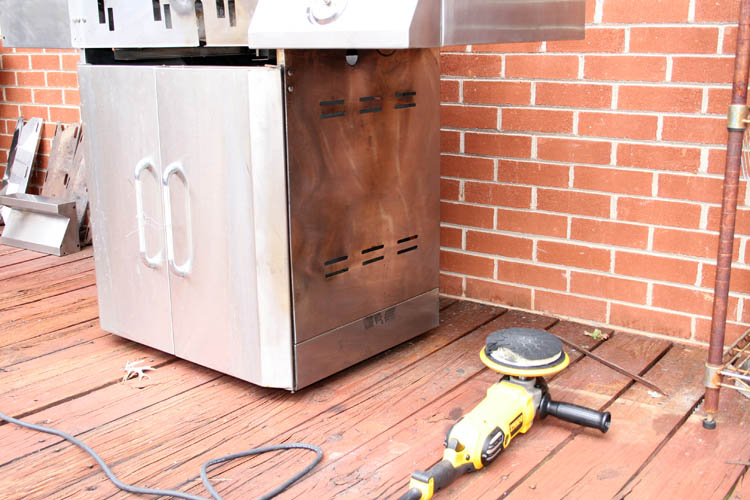
I will do some additional hand polishing to the right side of the
cabinet. The foam pad is junked up with grease and is headed for the
trash.
I am waiting on one (1) gas valve from Appliance Factory and will place
the gas manifold onto the gas valves and pressure test it before installing
the front panel to the grill body which houses the gas valves and the manifold.
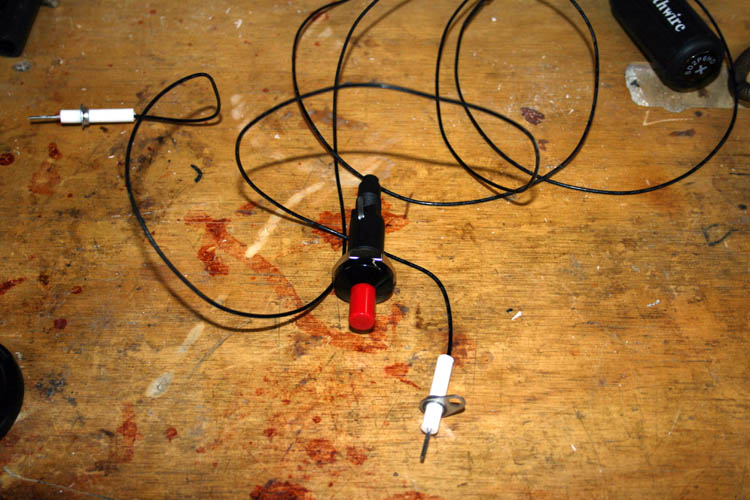
I received a Piezo Spark Ignition Push Button Igniter Kit and installed
the push button Piezo Spark Igniter onto the front panel and will splice the insulated ignition
wire to the existing wire for the rear rotisserie burner when I attach the
front panel to the grill body.
Web page updated by Bill aka Mickey Porter on 03-23-2021.
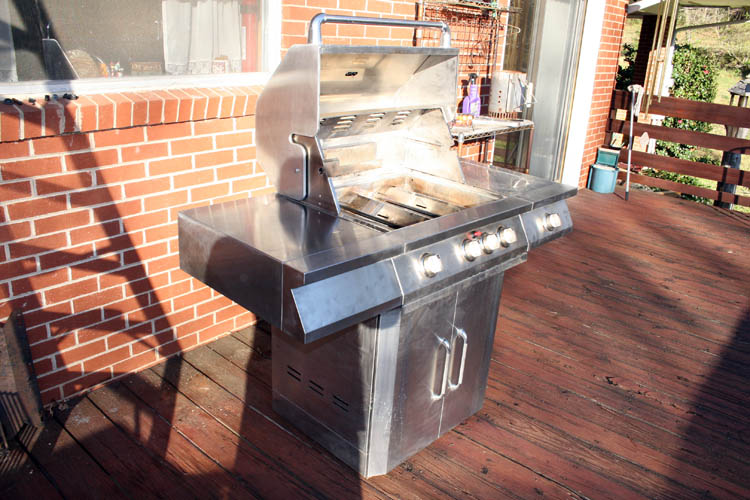
GRILL IS BACK OPERATIONAL AGAIN
I received the last gas valve ordered this afternoon and got it installed
on the front panel along with the rotisserie burner gas valve.
I then installed the gas manifold to the gas valves and pressure tested
everything. I closed off the side burner manifold connection to
complete the test. There was an initial slow leak at the input
connection to the manifold from the gas tank and the manifold tapered
fitting was pitted and had to use a rubber gasket that was supplied with the
gas tank valve manufacturer. I used soapy water to ascertain the
leaks.
The piezo ignition spark generator body was too long and cut in back
where it would not interfere with the front panel going in place on the
grill body. I left the housing in tact strictly for looks since I do
not plan to use the rotisserie burner anyway and if I do, I can always use a
lighter.
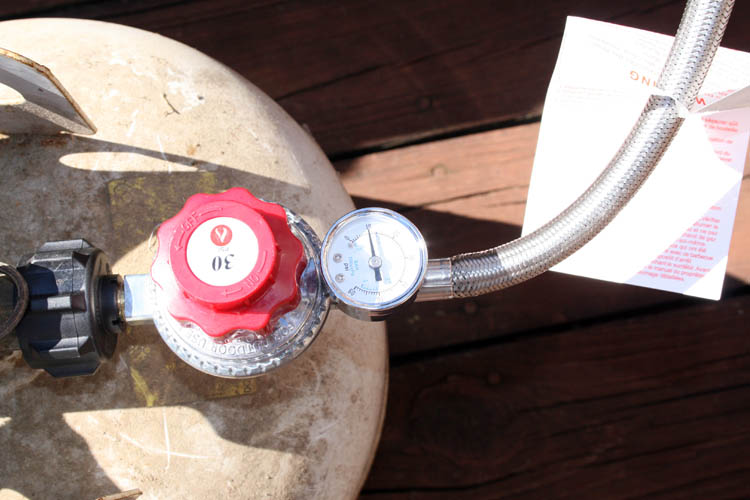
I really didn't need the high pressure adjustable regulator and cut the
gas output down to probably 1 pound of pressure, but had it set at 10 PSI
for the test.
As stated earlier, I let the grill heat up to around 550 degrees F. to
burn off any chemical cleaning residue. It didn't take the grill long
to reach the temperature of 550 degrees F.
I didn't put the cooking grids in place, my bad.
I am well pleased with the results of the gas grill rebuild and as
stated, the parts were a little over 400 bucks and hopefully I will pay
closer attention to routine annual maintenance and test for gas leaks.
Web page updated by Bill aka Mickey Porter on 03-29-2021.
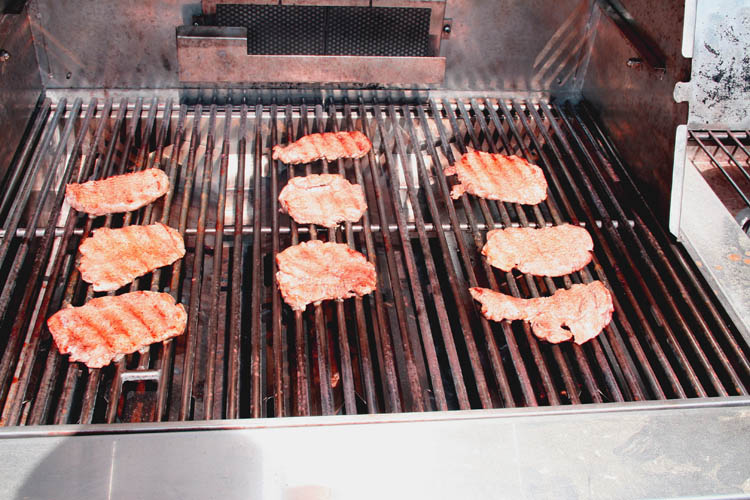
VENISON BACK STRAPS AKA LOIN STRAPS
We had a "winy" roast for the Gonzales Grandkids on April 4, 2021
and Xander and myself grilled a few
venison back straps, of which is one of
Xander McKnight Gonzales favorites. The sun was very bright and not
the best for getting a decent pix of the back straps, but took one any way.
I soaked the venison back straps in a brine solution consisting of 1
quart of regular tap water, 1 tablespoon of salt and one tablespoon of brown
sugar and placed in a plastic zip lock type bag and removed as much air as
possible, sealed it and placed the bag in my basement game refrigerator for
about five (5) hours.
I then rinsed the back straps under running cold tap water, hand cubed
with a mallet and gave each a good sprinkling of
Wild Bills Meat Rub and let
sit for about 45 minutes at room temperature. The back straps were
dipped in melted butter and Worcestershire Sauce, then grilled at high
temperature around 450 degrees until medium rare.
Xander and myself helped ourselves to the grilled venison back straps immediately off the
grill.
Today is Easter Sunday and The Wadesboro Church of God had a wonderful
morning service followed by Communion. Please read my comments under
the LEAVING ON A SPIRITUAL NOTE section
below. Jesus Christ has risen and He is coming back again!
Web page updated by Bill aka Mickey Porter on 04-04-2021.
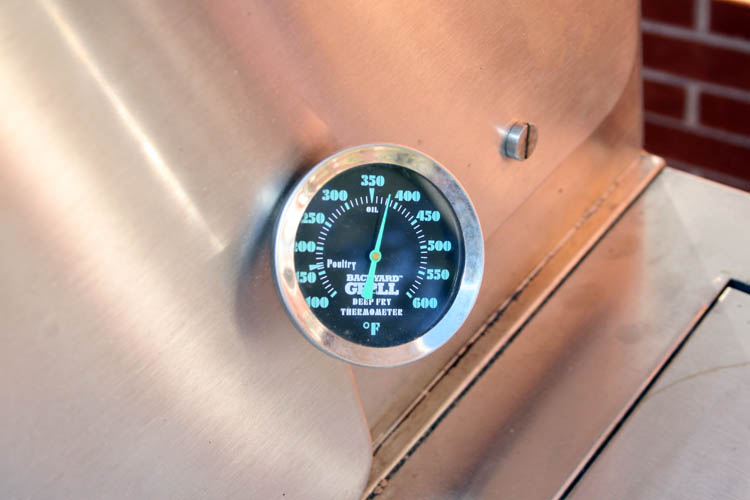
REPLACED TEMPERATURE GAUGE

I replaced the grill temperature gauge that was inoperative and fired up
the three burners for a while and the new gauge is working great. I
believe the original gauge went bad before the grill fire.
Web page updated by Bill aka Mickey Porter on 04-05-2021.
Web page updated by Bill aka Mickey Porter on 03-12-2021, 03-18-2021,
03-19-2021, 03-23-2021, 03-29-2021, 04-04-2021 and 04-05-2021.
LEAVING ON A
SPIRITUAL NOTE
If you do not know Jesus Christ as your Lord and Savior, please take
this moment to accept him by Faith into your Life, whereby Salvation
will be attained.
Ephesians 2:8 - 2:9 8 For by grace are ye saved through
faith; and that not of yourselves: [it is] the gift of God: 9 Not of
works, lest any man should boast.
Hebrews 11:1 “Now faith is the substance of things hoped for,
the evidence of things not seen.”
Romans 10:17 “So then faith cometh by hearing, and hearing by
the word of God.”
Open this
link about faith in the King James
Bible.
Romans 10:9 “That if thou shalt confess with thy mouth the
Lord Jesus, and shalt believe in thine heart that God hath raised him
from the dead, thou shalt be saved.”
Open this
link of Bible Verses About Salvation,
King James Version Bible (KJV).
Hebrews 4:12 “For the word of God is quick, and powerful, and
sharper than any two edged sword, piercing even to the dividing asunder
of soul and spirit, and of the joints and marrow, and is a discerner of
the thoughts and intents of the heart.”
Romans 6:23 “For the wages of sin is death; but the gift of
God is eternal life through Jesus Christ our Lord.”
Romans 3:23 “For all have sinned, and come short of the glory
of God;”
Micah 6:8 “He hath shewed thee, O man, what is good; and what
doth the LORD require of thee, but to do justly, and to love mercy, and
to walk humbly with thy God?”
Philippians 4:13 "I can do all things through Christ which
strengtheneth me."


