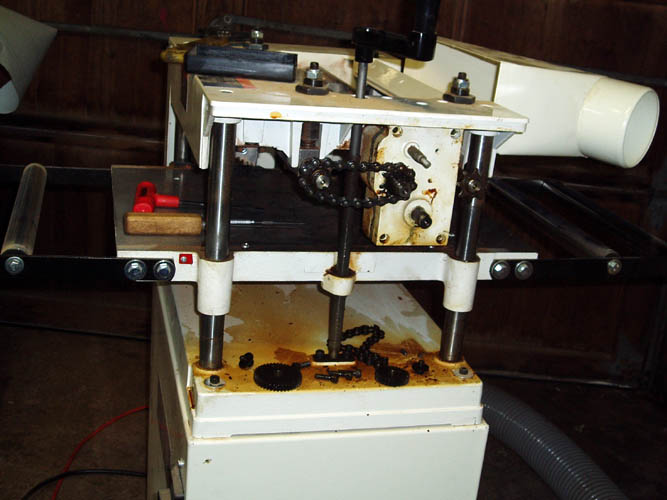
SANDING PEGHEAD AND FINGERBOARD
After allowing the peghead and fingerboard epoxy filler to cure at least
24 hours, I opted to sand the back side of each down and get them ready
for the final coat of epoxy filler to the front of the inlays. My 6 x
48 inch belt sanding station has a good 1/16 inch plus gap between the
platen and the belt and I could have added an auxiliary wooden platen abutting
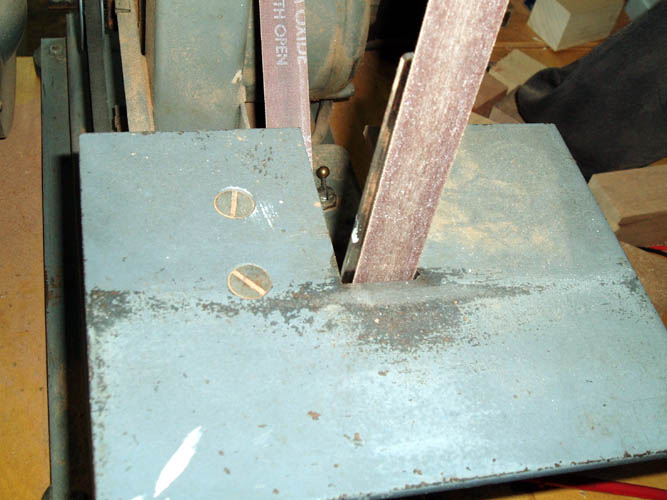
it flush against the sanding belt, however I chose to convert the little
1" x 42" belt band sander since it is more "fail safe" as far as the
thin peghead
overlay getting trapped between the platen and the sanding belt which could ruin your
peghead if that happens. I cut a scrap piece of mahogany and C clamped
it to the small belt sander table after removing the metal backing support
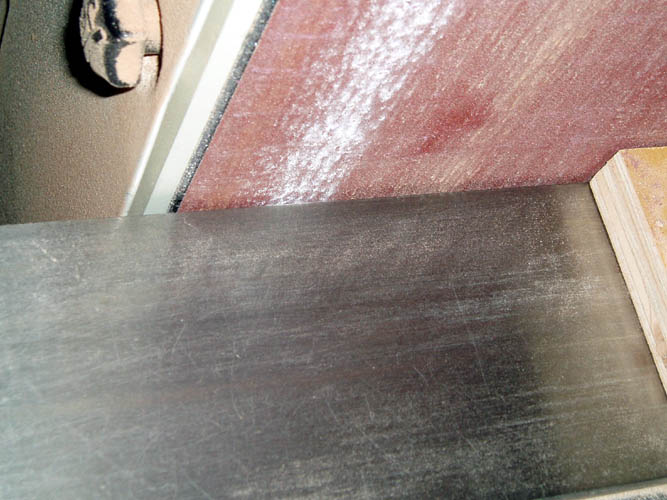
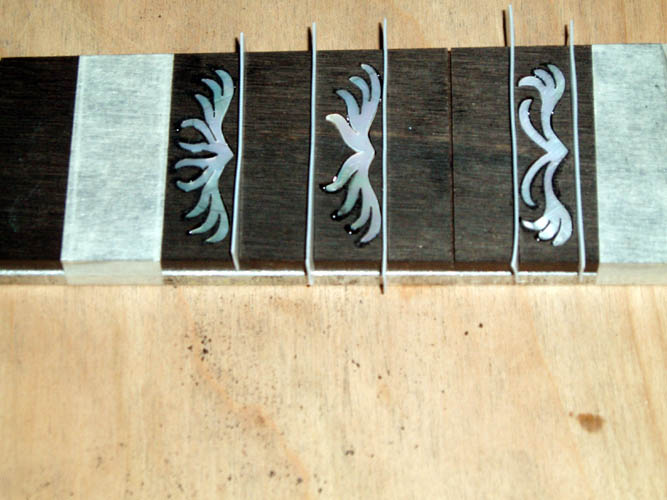
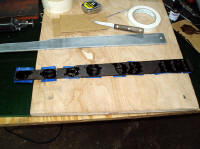
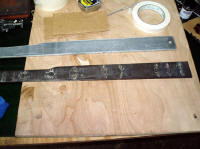
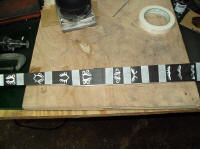
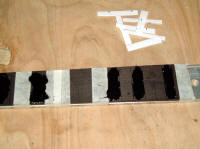
by loosening a couple bolts on the lower frame. The above pixs shows
what took place and the far upper right pix shows the fingerboard removed
from the aluminum support and removing the blue painter's tape in
preparation to sand the back side of the fingerboard flush.
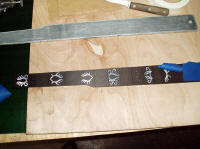

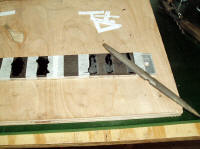
Above pixs with the tape being removed from the front of the fingerboard
checking to see if all were flush with the top of the fingerboard of which
they were and sanded the reverse (back of the fingerboard) and finally
checking the peghead after a rough sanding and I don't think the peghead
will need any additional filler as it cleaned up very well.
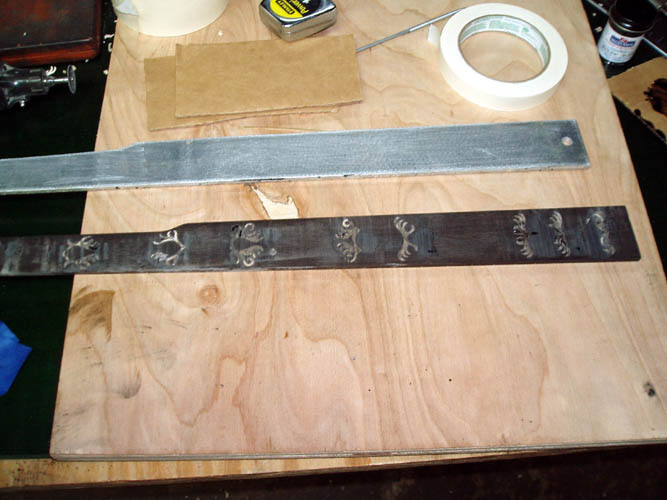
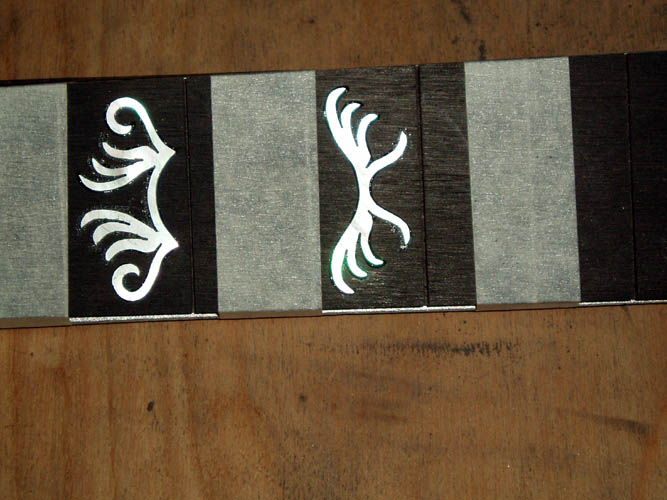
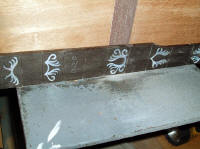
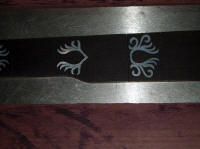
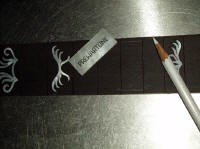
I did not take any "pains" with the fingerboard inlays and they should
look excellent when I get the epoxy filler mix added to the top side filling
the void spaces that need filler. I could have cut much closer but did
not want to go to the extra trouble of doing all the filing and grinding to
fit the inlays. The camera was zoomed in fairly close and the gap
looks much bigger between the actual inlay and the fingerboard cut out and
should look extremely well once completed. I did find one thing that I
overlooked due to not doing this procedure in 10 years and some of the
inlays of my Flaming Claw design abut next to the fret slot very close and I
don't think the masking tape will do a good enough job to keep the epoxy
filler from leaking into the slot and do not want to risk it. My
solution in the mid 1970s for inlays such as this was to use a piece of
stainless steel the thickness of the fret slot and about 1/2 inch in width
and longer than the width of the fingerboard. The epoxy filler would
not adhere to the stainless steel material and did a great job of preventing
the epoxy filler from leaking into the fret slots. Stewart MacDonald
markets a material called
Teflon Fret Dam
that is .020 x 6 inches square and easily cut with a
pair of scissors which would be perfect for this job, however I plan to
check with the auto parts stores and see if I can find some "feeler gauge"
material that will work in a pinch. If not, I will go to plan B and
order the Teflon material from StewMac. The fret slots in this
fingerboard are .020 whereas my slots way back when was .023 for the fret
wire that I used and sold. The few pieces of stainless strips that I
located this afternoon are too thick for this fingerboard; a couple
thousands makes a big difference!
No one locally had any stainless material shim material available,
therefore went to plan B and ordered what I needed from Stewart MacDonald
and a few other things to help defray the shipping charges....so much for
advance planning but being a personal fun project it really doesn't matter
except for the extra shipping expense. It is no wonder I could not
find the stainless steel feeler gauge material locally because I looked at
one of the pieces and it was manufactured by Starrett who is big into
measuring and calibration instruments and tools.
A few observations concerning
this style of cutting and inlaying; it certainly seemed to work better
decades ago when I would work on twenty or thirty inlay patterns at a time
which was the average yield using the .040 thick material first quality
blanks. Also, I kept plenty of inlaid fingerboard and pegheads in
stock of the most commonly used patterns, mostly in Gaboon ebony, however
there were calls for Brazilian rosewood too. By preparing a wide
assortment of those commonly used inlay patterns, less mother of pearl was
wasted by being able to fit the smaller pieces in with the larger designs
which saved some money on the raw materials cost. It is hard for me
now to realize the amount of time that I devoted to the inlaying part of my
mail order business and I guess the fastest money was to be made in stocking
and resale of items you only had to order from a manufacturer and/or vendor.
I believe I am correct in saying that it was possible to average between 40
to 60 bucks an hour cutting inlays back in the 70's doing inlay work when
minimum wage was around $ 1.60 per hour in 1968. Of course this
doesn't take into account for all the overhead but when mother of pearl
blanks were around 35 dollars per pound and with a yield of about 20
patterns or more per lb. of the .040 material, I wasn't too concerned about
the raw material cost them with the amount of return. My bride would
help boil the inlays to remove the balsa wood backing and there were many,
many nights we worked past mid-night filling inlay orders. I can say
for sure that I cut my share of inlays and then some when the custom banjo
business was booming. It is hard to believe I sold a standard pattern
for around 40 dollars and inlaid for 60 dollars in the early 1970s and a
dollar sure went a long way then too.
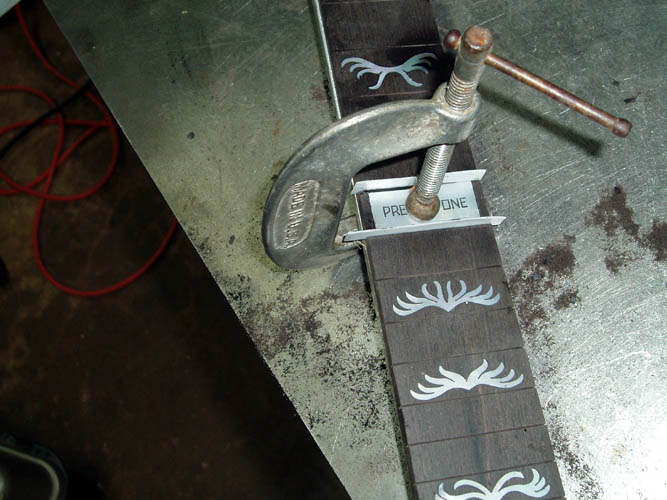
I will use the "traditional" router technique to
inlay the PREWARTONE mother of pearl block at the 15th
fret, however the Dremel model 280 tool is on it's last leg....I used it to
touch up a few of the outside curves of some precut inlays and noticed the
small bearings have a great amount of chatter. I had it rebuilt
several decades ago and have now gone to an air die grinder which has more
precision but you need a good supply of air to run one and also a good
moisture trap or two in your air supply line.
This project will be on hold until we get back from our Texas vacation
and will have to work on this project as time allows since I still work a
full time "day" job and with the upcoming yard work aka grass cutting, etc.
Keep checking back for future updates!
Bill aka Mickey Porter 03-13-10.
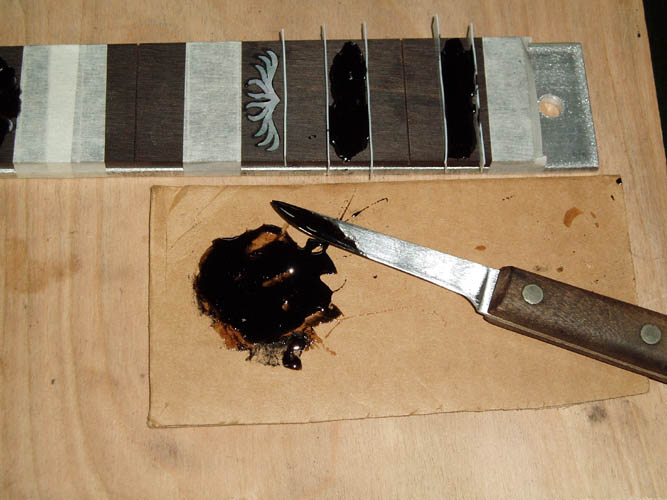
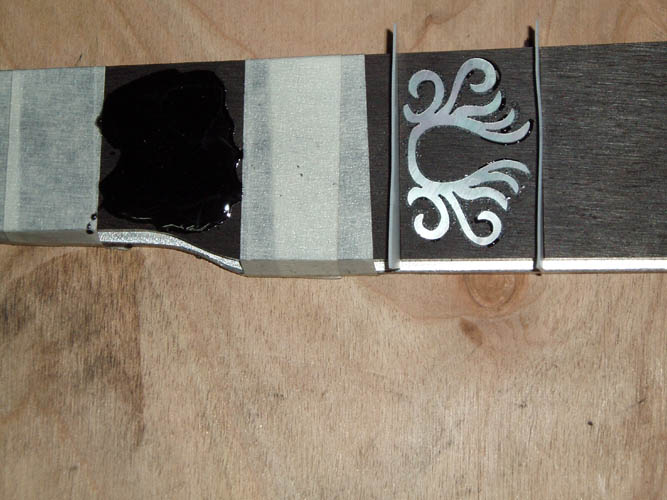
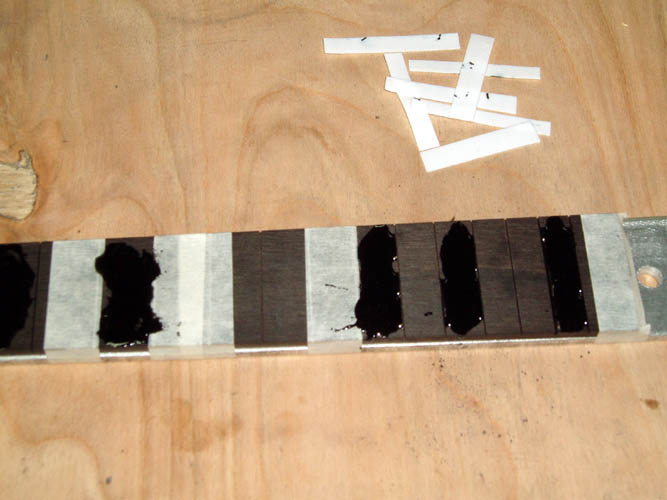
The Teflon Fret Dam material arrived from StewMac while we were in Texas
and used the material yesterday (03-24-10) and it worked very well.
The Epoxy 330 filler mix did not adhere to the Teflon strips and took very
little effort to remove them from the fret slots; Pixs below:


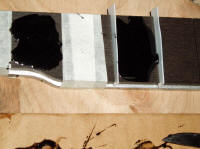
The Teflon material was dead on .020 inches in thickness as advertised
and cut like warm butter with the Kitchen Aid scissors. Epoxy 330
filler mix was applied liberally to the inlays and will allow to cure at
least a couple days before sanding the fingerboard.
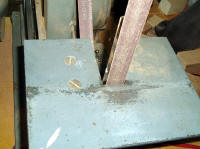
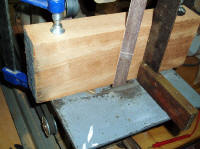
Update on March 27, 2010....while waiting
for the epoxy filler mix to cure, I decided to square up a beautiful piece
of Honduras Mahogany that is many decades old and ole Murphy's Law came out
of retirement. I have a small Jet model 13cs planer/molder that was
set up for cutting the radius on turkey box call lids and have a special
wooden platen added with trough down the center to align with the molding
cutter blades and it doesn't leave too much room on either side for any
regular material. Apparently, the 2 x 4 plus raw neck blank got hung
up against the trough area and the feed rollers got into a bind and heard
some horrific noise before I could shut the machine down. After
checking things out, the feed rollers did not have any power to them and
after tearing into the gear box, one of the drive sprockets was broken in
three pieces. After digging out the manual and locating the part, I
ordered the part plus a spare and a few other small parts that are prone to
go out. The shipping charge was the same or a little greater than the
actual parts cost but that is the way companies add to their profits.
As I have stated many times in the past, "Most
of the time, you get what you pay for", but now, well known companies for quality
machines and tools are using the Chinese manufacturing market to increase
their profit margin and
"six of one and half a dozen of another!".
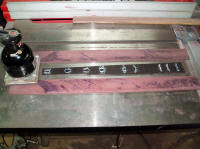
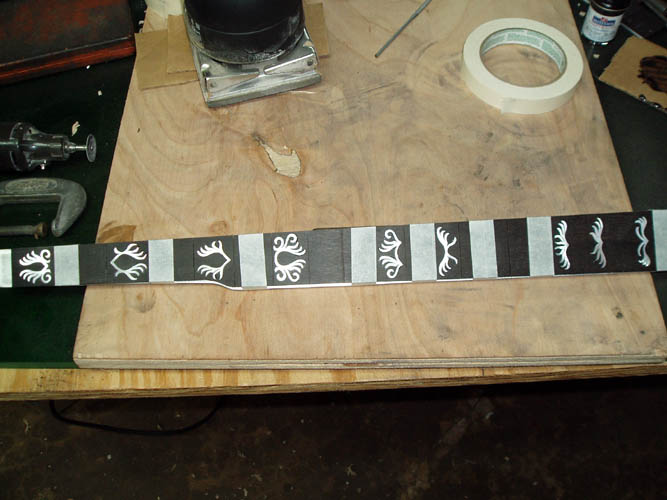
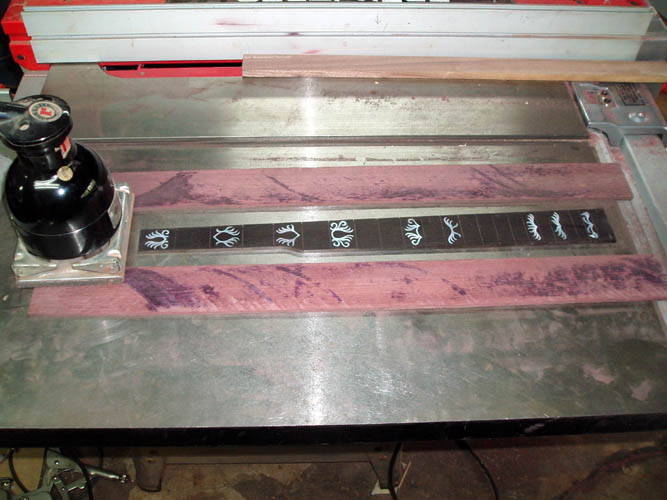
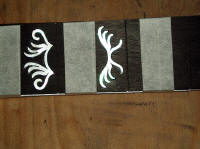
Above pixs of the Flaming Claw fingerboard starting with
the pix on the upper left, I did the final sanding with an antique Rockwell "Speed
bloc" hand sander starting out with 100 grit paper and switched over to 320,
however I have gone to much finer grit in the past. Without the
benefit of a thickness sanding machine and/or fixture, I improvised by cutting
a couple pieces of Purple Heart wood the same thickness as the fingerboard
which is around .190 or about 3/16 inch and placed each piece on both sides
of the fingerboard to keep from rounding over the edges of the fingerboard. The Speed
Bloc sander has a synthetic cushion support which will give if you apply any
pressure on the sander at all and this will certainly round over the edges
of the fingerboard if you are not careful. The wood strips on each
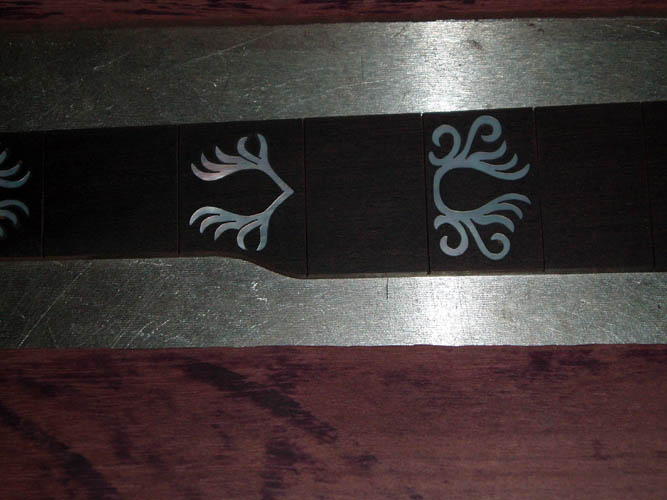
side does prevent the round over problem. I found a mid 1970s Porter
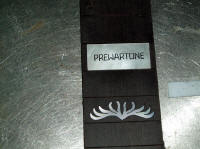
PREWARTONE mother of pearl block I engraved in the old style
MASTERTONE font to inlay at the 15th fret inlay position
and since it will fit between the inside of the frets at the 14th and 15th
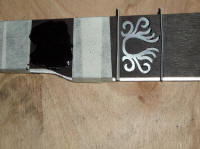
fret, I used a regular white pencil sharpened to a fine point and marked a
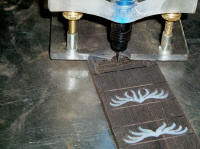
line at each end of the mother of pearl block. I used the small
mini-die grinder and base I purchased from David Nichols of Custom Pearl
Inlay and used a small solid carbide 1/32 inch diameter router bit to route
out the cavity for the mother of pearl block. For this application, I
could have switched to a 1/16 inch diameter router bit but didn't want to
change the setting since it was about the right depth of cut already. The small air mini-die
grinder with the Plexiglas base is the state of the art for hand routing inlays.
The tool has more precision as far as tool run out and the extra rpms with
the carbide bit makes easy work of eating away ebony or rosewood. The Dremel or
Foredom type tools have their place but are in the stone age compared to the air mini-die grinder
and I don't care who is using the Dremel tool; there is a better tool and
the air mini-die grinder is it. I scuffed up the back side of the
mother of pearl block and also the routed cavity and applied a thin coat of
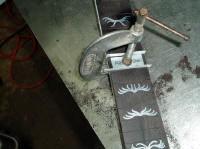
Epoxy 330 mix and clamped the block in position. Before installing the
mother of pearl block, I angled each longitudinal side inward to aid in
installing the frets later on. I used Stew Mac's
Teflon Fret dam material to keep the epoxy from getting into the fret slots,
however I believe the more rigid stainless steel Starrett feeler gauge
material works much better since it doesn't flex any.
I will sand the peghead down and start working on a simple jig to shape the
neck heel to fit the tube and plate flange wood rim pot assembly before I glue the
fingerboard and peghead overlay onto the neck blank. I am sure there
are other ways of doing this but in the past, I shaped the entire neck blank
heel with a profile cutter in a single pass secured in a radius fixture but do not have the luxury of
that tooling and equipment anymore. I will see what kind of "Rube
Goldberg" rig I can come up with.....grin if you must!
Bill aka Mickey Porter 04-24-10.
LEAVING ON A
SPIRITUAL NOTE
If you do not know Jesus Christ as your Lord and Savior, please take this
moment to accept him by Faith into your Life, whereby Salvation will be
attained.
Ephesians 2:8 - 2:9 8 For by grace are ye saved through faith;
and that not of yourselves: [it is] the gift of God: 9 Not of works, lest
any man should boast.
Hebrews 11:1 “Now faith is the substance of things hoped for, the
evidence of things not seen.”
Romans 10:17 “So then faith cometh by hearing, and hearing by the
word of God.”
Open this
link about faith in the King James Bible.
Romans 10:9 “That if thou shalt confess with thy mouth the Lord
Jesus, and shalt believe in thine heart that God hath raised him from the
dead, thou shalt be saved.”
Open this
link of Bible Verses About Salvation, King
James Version Bible (KJV).
Hebrews 4:12 “For the word of God is quick, and powerful, and
sharper than any two edged sword, piercing even to the dividing asunder of
soul and spirit, and of the joints and marrow, and is a discerner of the
thoughts and intents of the heart.”
Romans 6:23 “For the wages of sin is death; but the gift of God is
eternal life through Jesus Christ our Lord.”
Romans 3:23 “For all have sinned, and come short of the glory of
God;”
Micah 6:8 “He hath shewed thee, O man, what is good; and what doth
the LORD require of thee, but to do justly, and to love mercy, and to walk
humbly with thy God?”
Philippians 4:13 "I can do all things through Christ which
strengtheneth me."
PREVIOUS PAGE
NEXT PAGE
BANJO CONSTRUCTION HOME PAGE