POTATO AND ONION STORAGE BIN
For nearly five (5) decades, we have stored onions in our refrigerators and most culinary
folks will tell you, it is best to store them in a cool dry place that
allows some air flow around them as well. The same goes for potatoes
too! Onions left in the refrigerator too long will definitely get
mushy. Many, many years ago, farm folks had some type of
root cellar to store such items. My Grandma Coley used an
area underneath the back porch which was shaded and cool to store sweet
potatoes, etc.
I surfed the internet looking for some ideas and free plans to build such a
storage bin and what I decided on was a set of plans (not
free of charge) from
Woodcraft. I ordered the plans which
basically was one large folded sheet of paper 22 x 34 inches with a cover
sheet. I did have a little difficulty in getting the plans locked into
the ole brain; might be a product of maturity. The plans were not
that costly and I didn't have to take out a loan or mortgage our properties
to purchase the plans.....grin if you must. Since the plans are
copyrighted, I will not include a detail photo of them, but linked to the product
above in case you desire to purchase a set. BIN SIZE: 10
inches deep by 15 inches wide by 11 inches tall. OVERALL SIZE:
40 inches tall by 19 inches wide by 12 inches deep.
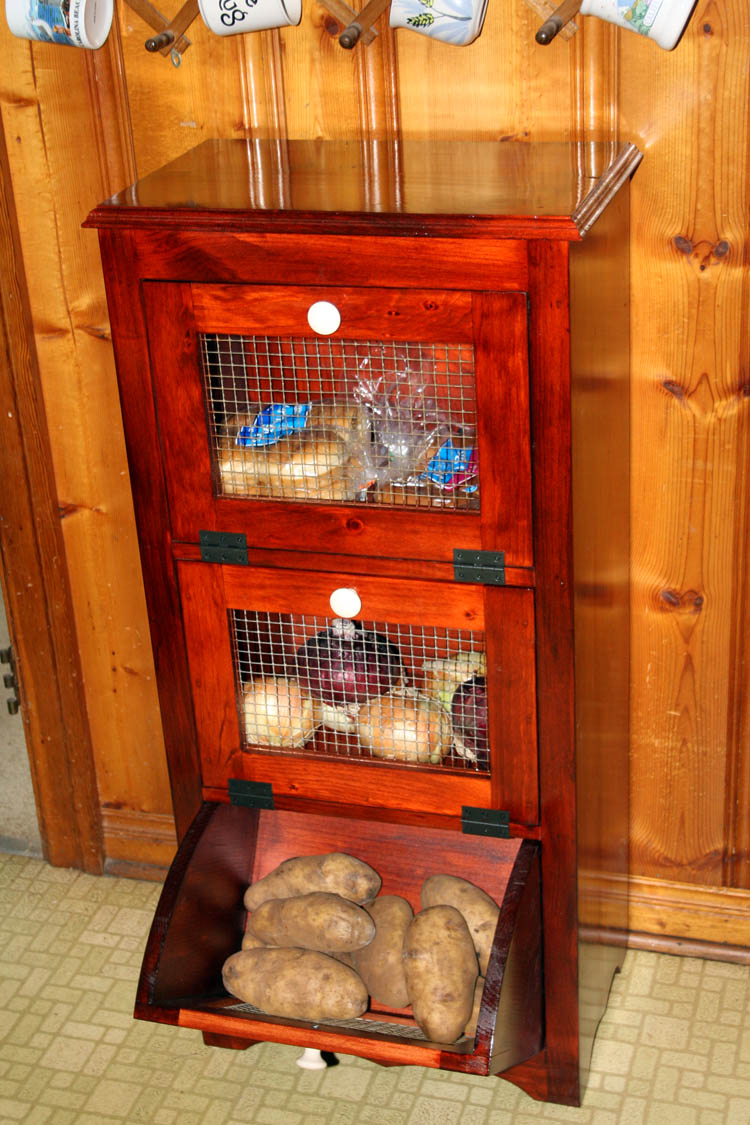
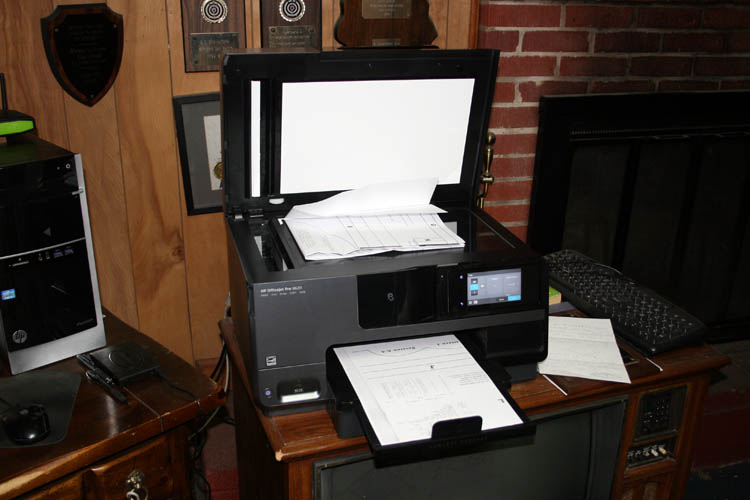
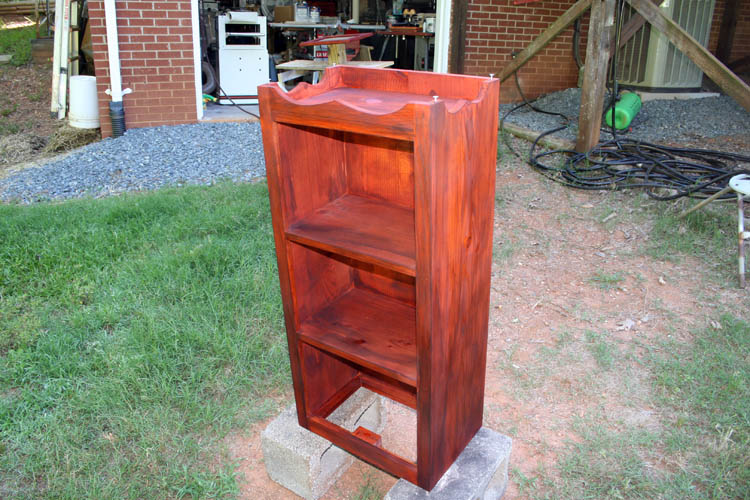
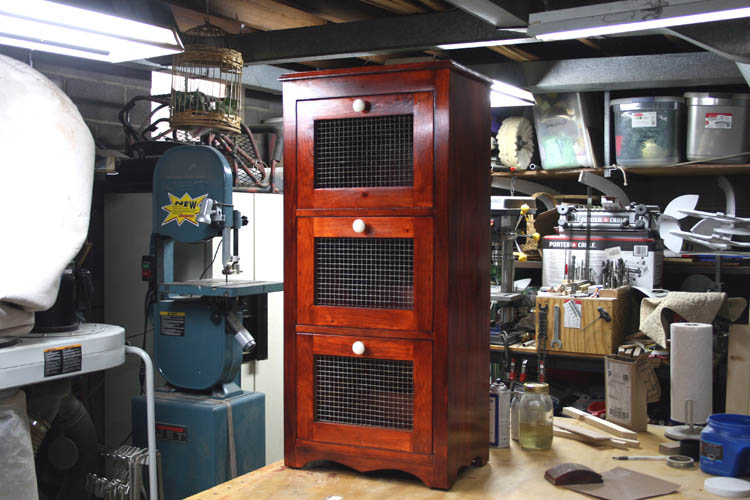
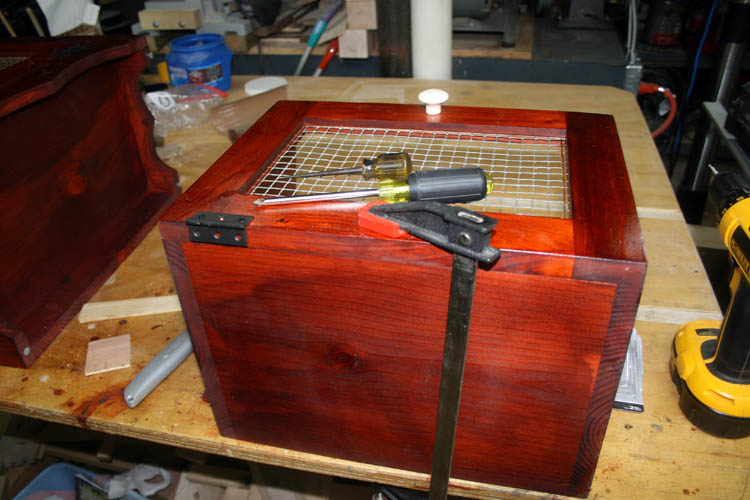
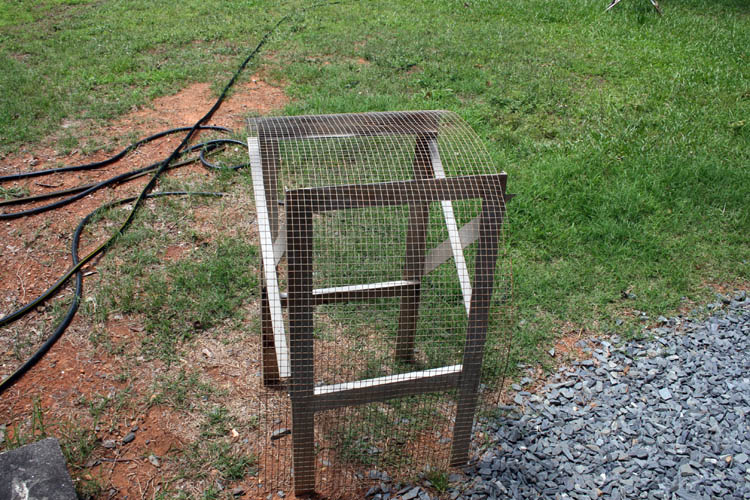
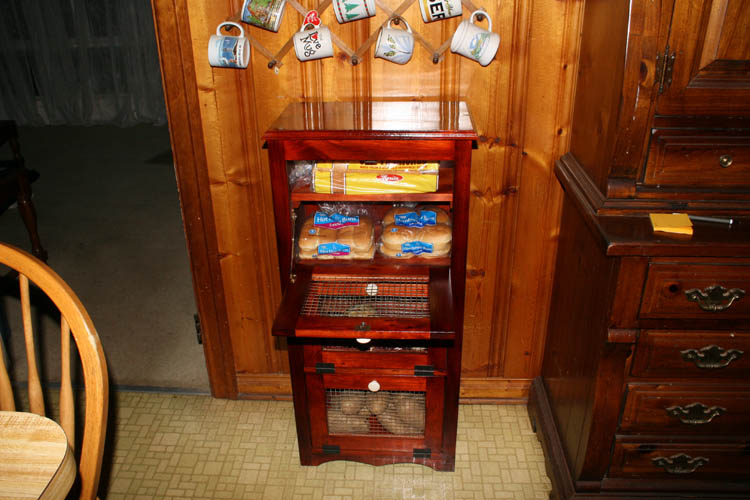
Pixs below of the finished potato and onion storage bin getting some usage on 05-24-17!
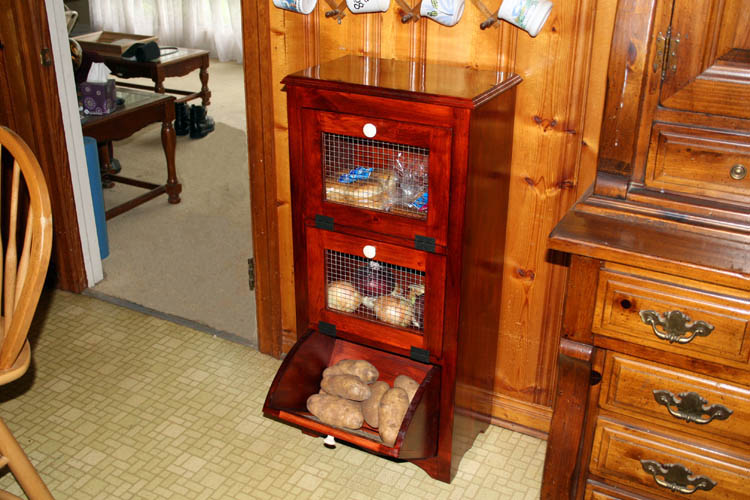
Below, a closer look at the Potato and Onion Storage Bin. I
purposely chose the stain not to match the dining room buffet and the original pine
paneling which is the real wood; 9", 7" and 5 inch width tongue and groove
boards at least 3/4 inch thick. The medium walnut color makes this project
"stand out" from the
surroundings, otherwise it would blend right into the color scheme of the
kitchen and dining room.
I am very pleased with the outcome of this fun woodworking project! I
made one boo boo which I corrected.
PERSONAL SAFETY AND LIABILITY ISSUES
My goal will be to keep Safety
paramount because hand and power tools can do serious bodily harm and death
if not used properly, therefore these pages are solely for
entertainment purposes only from
a personal liability standpoint. Please read the
Legal Stuff
page for additional information concerning liability issues
before going any further. Safety glasses and hearing protection is a must,
although I do forgo the hearing protection many times; my bad!
MATERIALS
The plans called for using 1 inch pine shelving boards which are planed down
to 3/4 inch in thickness that are from 8 to 12 inches in width in clear pine
and high dollar; ranging up to 40 bucks per board 8 feet in length at some
retail locations. As with most woodworking projects, you have to let
the materials acclimate to your workshop storage conditions; e.g., humidity
to stabilize.
The door frames for the storage bin are made from 2 inch width pine boards.
I will check and see what common pine shelving boards that Lowe's in
Rockingham, NC has in stock and will pick through their stuff and find
something decent.
The joinery used is mostly butting the pieces together and held by glue and
some 1 1/4" finish nails. End grain does not glue well, but I guess it
is strong enough for this application with the usage of the finish nails.
This is not the most secure method, whereas cutting dados would change the
length of the inner shelve members, however would be much stronger. In
all probability, I will install wood
dowels in the door frames (stiles
and rails) and the face frame component. You could use
pocket hole screws for the door frames and
the face frame, but I am not a big fan of pocket screws. I might get a
Kreg pocket-hole screw system in the future, but I have managed many decades
without one. The plans do not show a routed edge around
the perimeter of the top and that is another possibility. It is normally my mode of operation, (modus
operandi) MO, to over build something, but I want something to last
and strong as the
Rock of Gibraltar....grin if you must!
Will add pixs and narrative as I work on this project.
Web published by Bill aka Mickey Porter on 04-22-17.
WOOD PROCUREMENT
It was misting rain on 04-24-17 and decided to drive to Lowe's in
Rockingham, NC and check their pine shelving material inventory out and below is a pix
of what I brought home. I got extra pieces, because there is usually a
need for extra, since there were knots on some of the pieces I
purchased. I did pick through what they had on hand and obtained the
best of the best. I normally find a usage for any scrap aka
unallocated materials (as my
friend Frank Schoepf
of Hampstead, MD) calls
left overs from a project and I do keep the ole "pack
rat" theme alive and well.
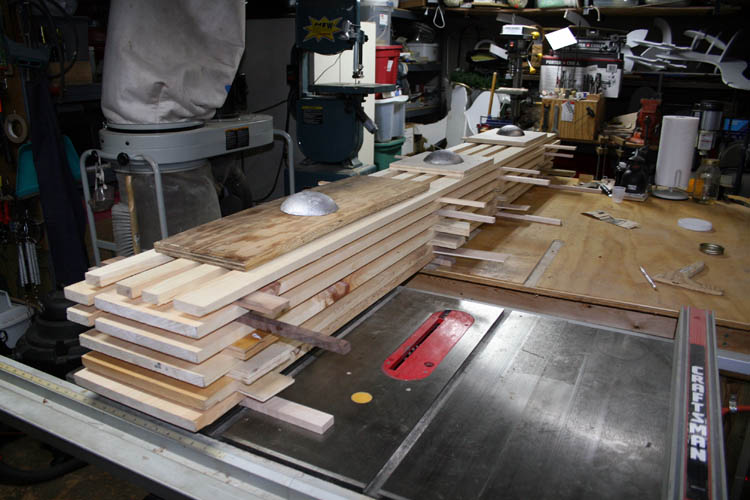
I put scrap wood stickers between the boards to facilitate acclimating to
my normal/average workshop humidity. I also found a use for the heavy melted
lead spheres.
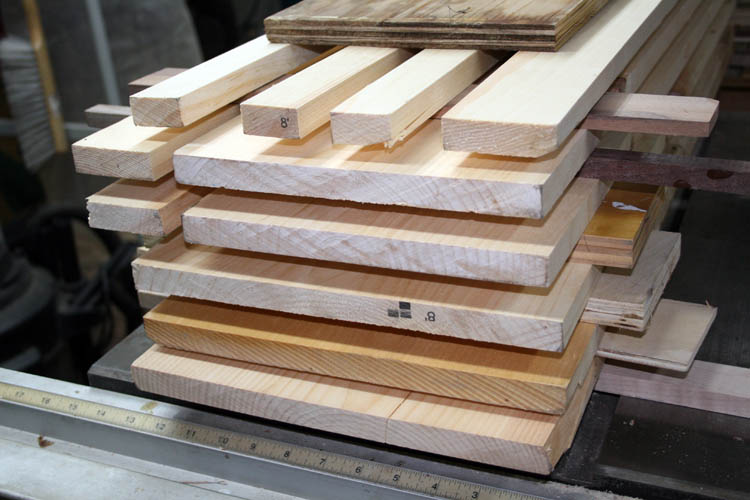
A close up of the end boards which will have to be trimmed to get rid of
the non useable portions:
I purchased three knobs for the bins and a magnetic latch. I didn't
like what hinges that Lowe's had in stock and will see what H. W. Little Hardware,
Inc. has in stock locally and/or do some internet shopping.
While the wood is stabilizing, I will round up the butt hinges, support
friction arm for the upper storage compartment, appropriate stain and check
my inventory of 15 gauge angled finish nails for the pneumatic nail gun.
I thought I had a gallon or two of
Mohawk nitrocellulose classic instrument
grade lacquer, but only have a few gallons of the reducer, therefore will
order a gallon of the Mohawk brand lacquer. Mohawk, sent me to
one of their distributors for such a small order.
NOTE: I have to add 1 1/4 inch length 15 gauge angled finish nails to
my procurement list. I ordered a gallon of the Mohawk nitrocellulose classic
instrument lacquer from
Klingspor's Woodworking Shop in Hickory, NC
and received it in one day via UPS.
Web published update on 04-27-17.
CUTTING MATERIALS TO SIZE
The plans comes with an excellent cutting chart and copied that section
off the plans and placed on a clipboard.
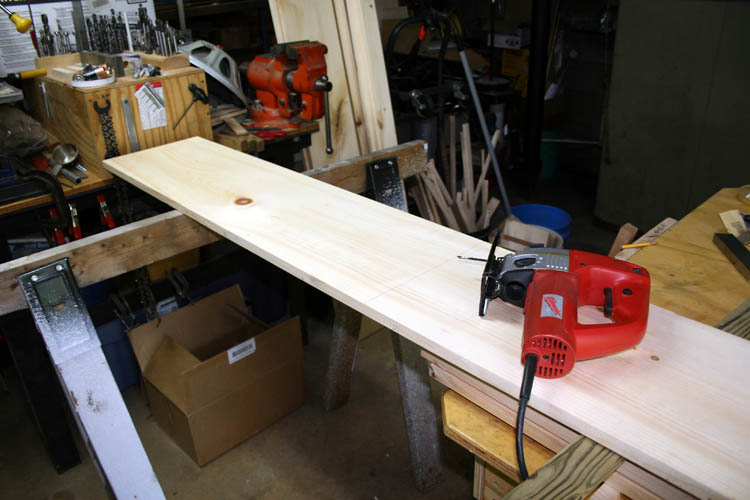
First on the agenda was to cut the 8 feet length boards to a manageable
length since my shop is very crowded and don't have out wings extending from
either side of my table saw to allow working with an 8 ft. length of material which is a
handicap, but I do manage as the need arises. 05-08-17.
Click on thumbnails for a larger screen view:
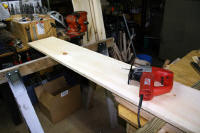
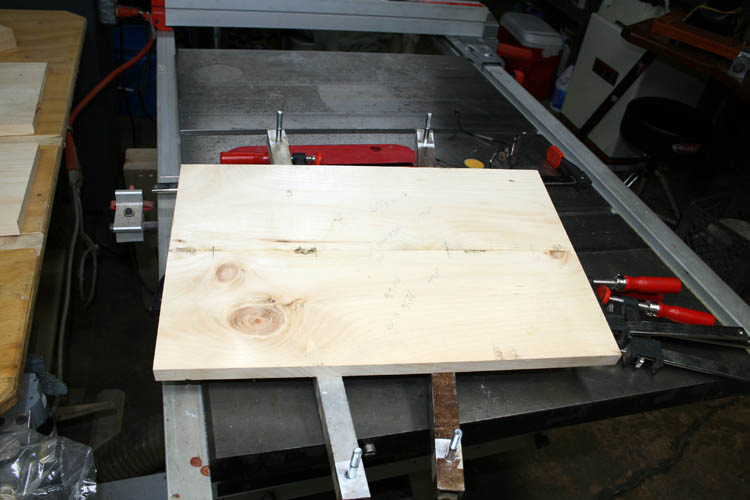
After getting the material to manageable lengths without much waste, it
was time to use the table saw. I used a rip blade, zero tolerance
insert and fence to get
boards to the proper width as needed.

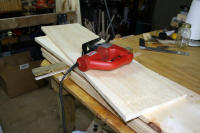
I used an impromptu crosscut slide I made when constructing a
toy/blanket chest
for our youngest Grandson to handle the 12 inch width boards which are
actually 11 1/4 inches in width. The slide will handle a 24 inch wide
panel and makes it easy to square up
the ends, etc. I squared up to length a couple 10 inch width boards
which are actually 9 1/4 inches in width. I changed the blade to a
crosscut blade.
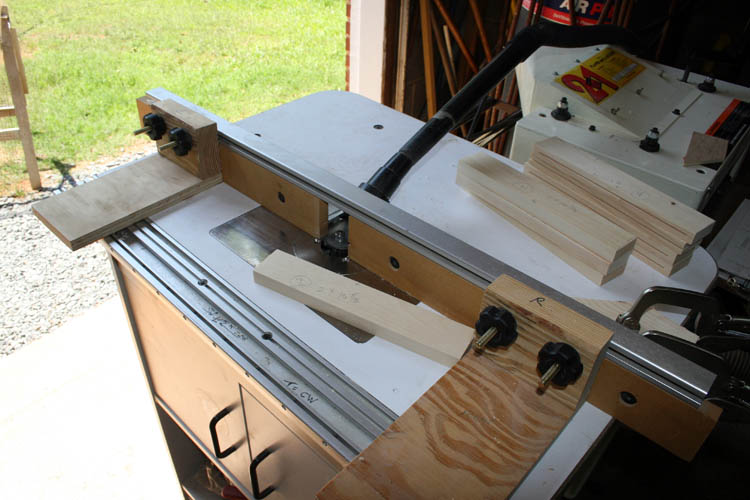
I used the above smaller crosscut slide to cut the 2 and 3 inch boards
used.
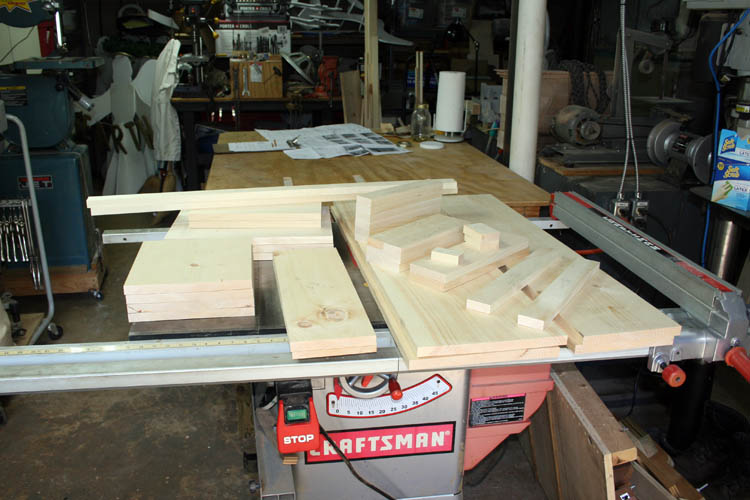
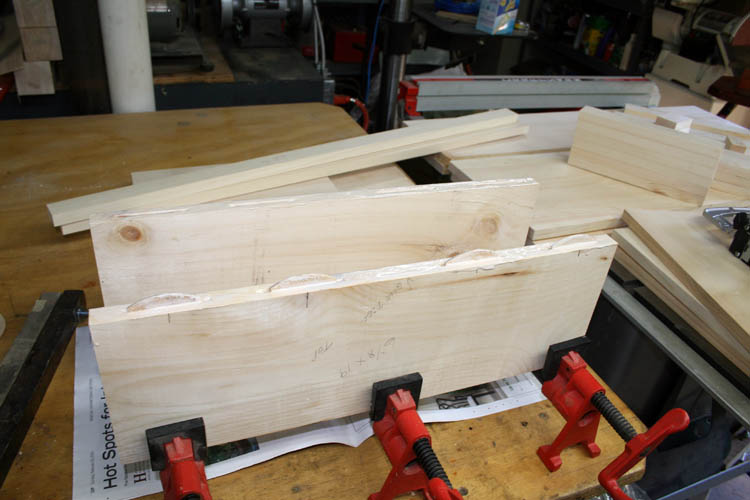
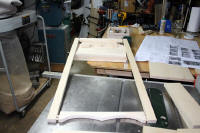
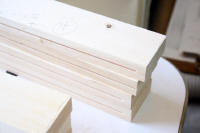
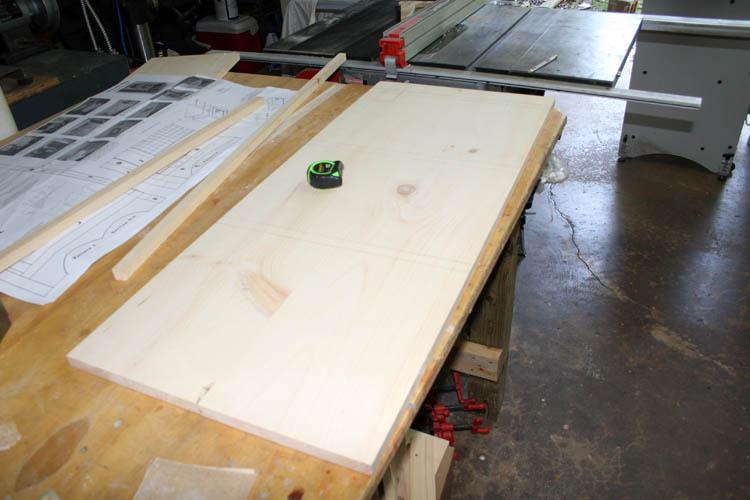
Above pix of the wood cut to the proper width and length and ready to
start a glue up for the top and back member.
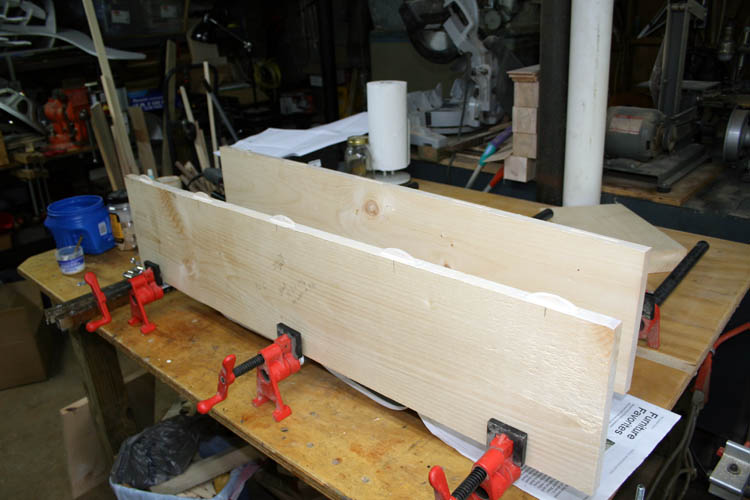
USING BISCUITS FOR THE TOP AND BACK MEMBERS
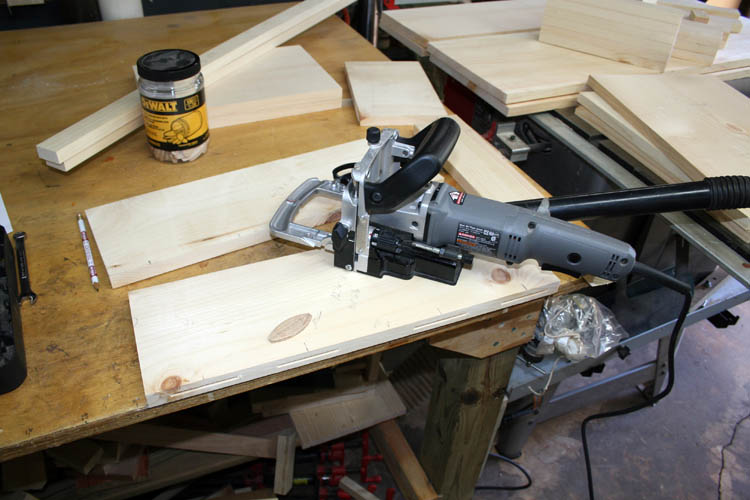
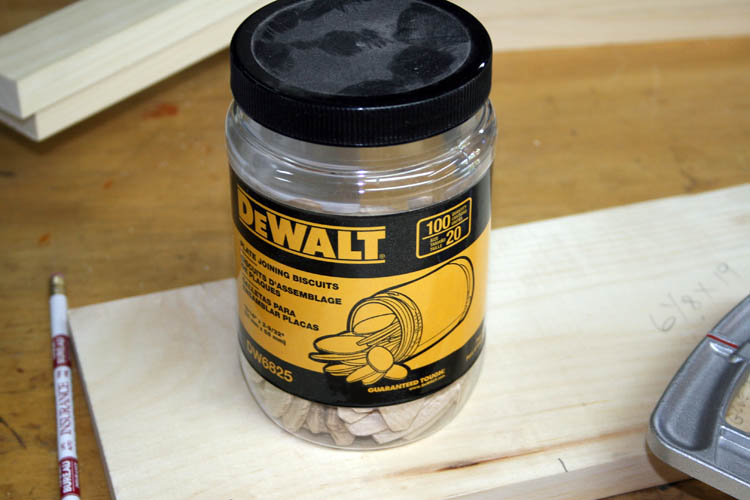
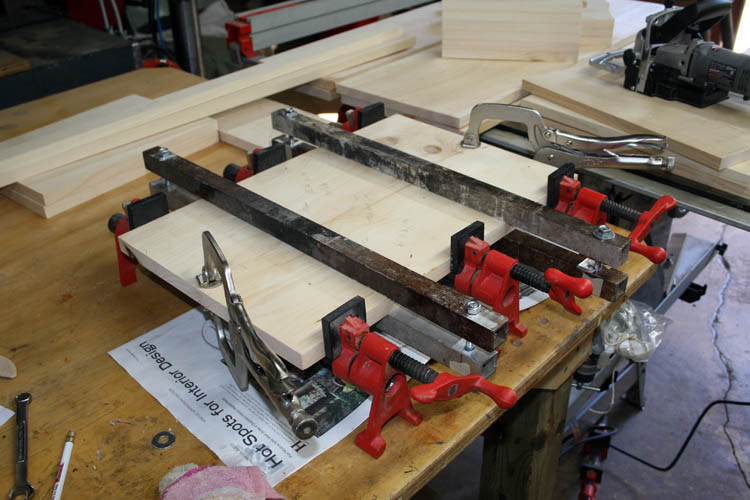
I got the Porter-Cable biscuit jointer out and used # 20 biscuits and
Titebond Ultimate III glue. The dust collection bag with the biscuit
jointer is worthless, therefore I use the hookup from my Shop Vac.
The plans do not call for the
usage of biscuits or wood dowels in this project; keeping it simple as many
woodworkers do not have a biscuit jointer or a doweling jig/fixture, but you
know my MO by now!
I used three 18 inch length 3/4 inch diameter pipe clamps and a couple 1
inch square aluminum cross brace members to keep the wood from bowing under
pressure. A couple C clamps at the end,
"sealed the deal".....grin if you must!
Tomorrow, I will use the same procedure for the back member, but will use
four 24 inch bar clamps, since my other pipe clamps are at least 5 feet in
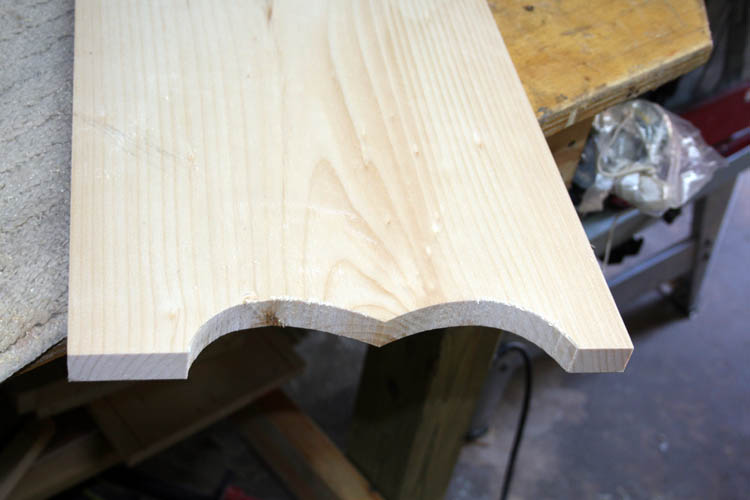
length and cramped for room using them on the above outfeed aka work table.
I will also make the cut outs on the side pieces and the front bottom
band.
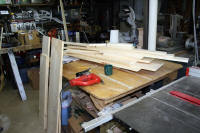
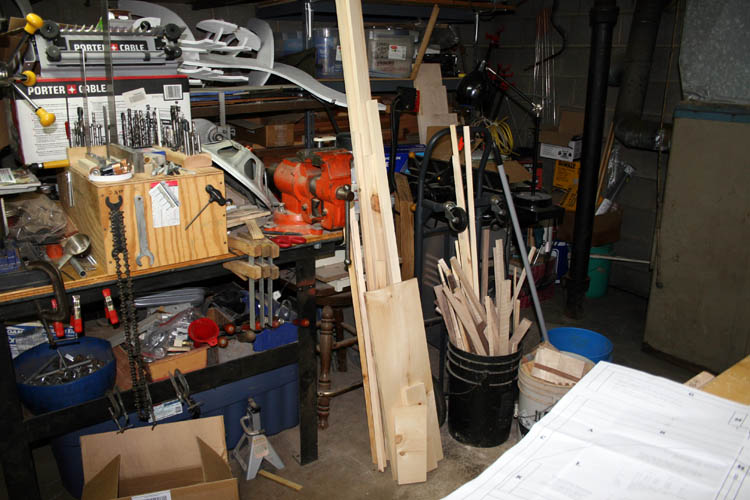
UNALLOCATED AKA SCRAP MATERIAL
Below pix of some of the scrap aka unallocated material left over that is
to the left of the 5 gallon bucket which also has unallocated material from
other projects....a pack rat for sure!
Web published update by Bill aka Mickey Porter on 05-08-17.
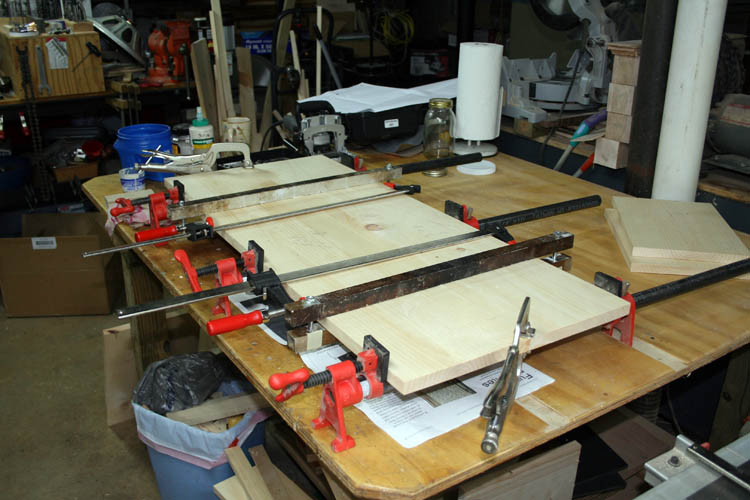
SHOP WORK ON 05-09-17
I removed the clamps from the glue up for top of the storage bin and did
the glue up for the back member.
I used # 20 biscuits and glue for the back member as well.
My 3/4 inch pipe clamps I used for the top member were too short to use
for the back glue-up and I have four that were at least five feet long and
too large to easily maneuver on the table saw outfeed aka work table and
rarely use the five feet clamps. I used the PortaBand saw and shortened the 3/4
inch pipe to manageable lengths......I can purchase addition threaded 3/4 inch
black iron pipe if needed for other projects in the future.
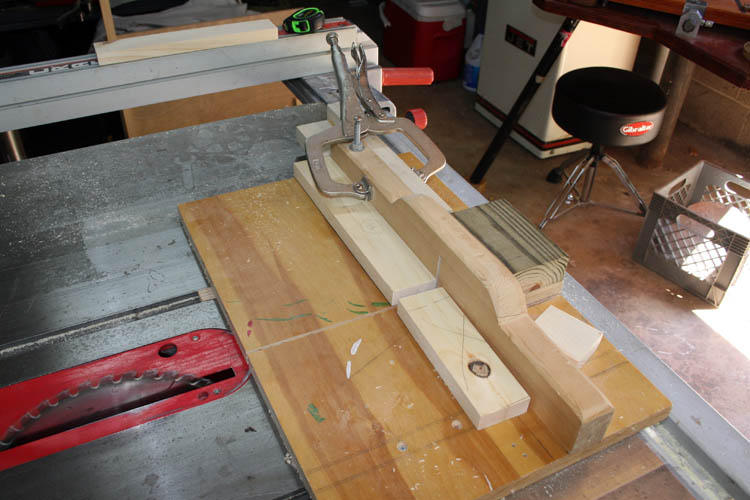
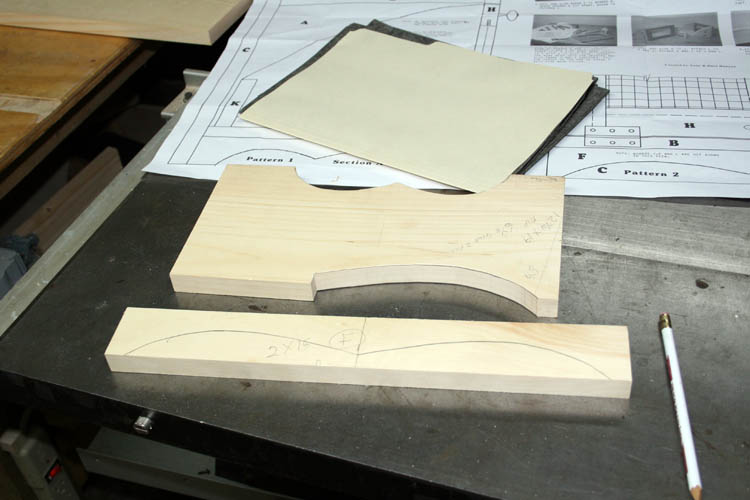
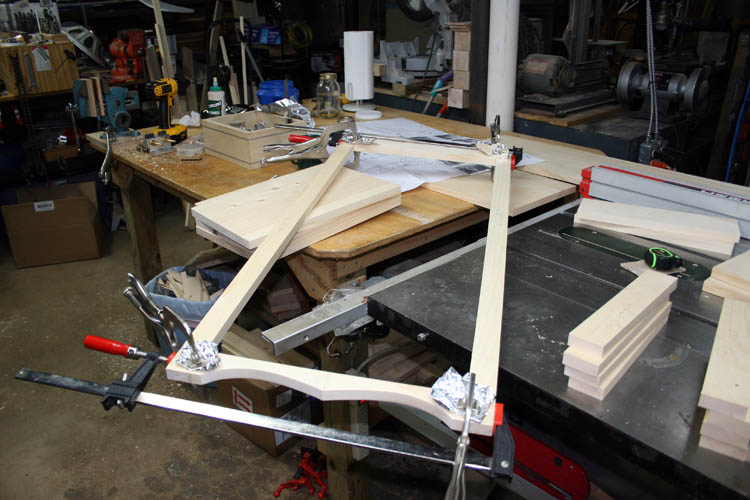
I got around to getting my patterns transferred for the side, front and
the two curved storage bins onto scrap wood and made a wood template in case
I decide to do another one for someone else.
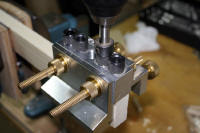
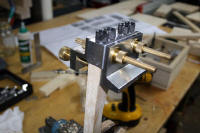
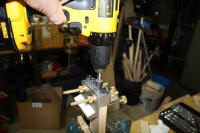
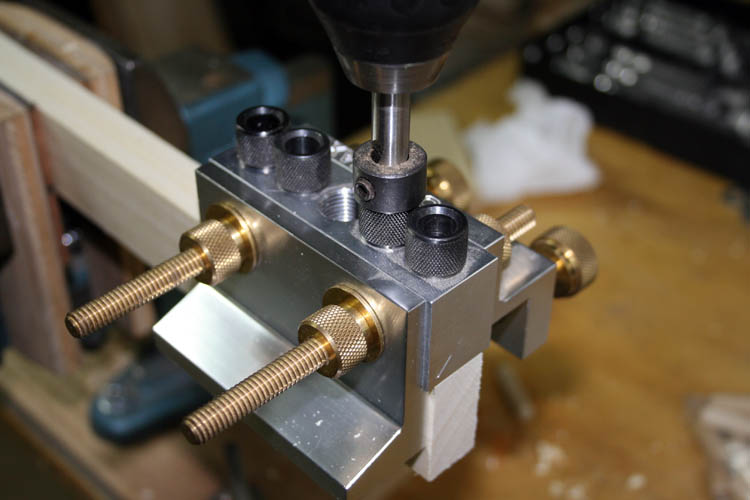
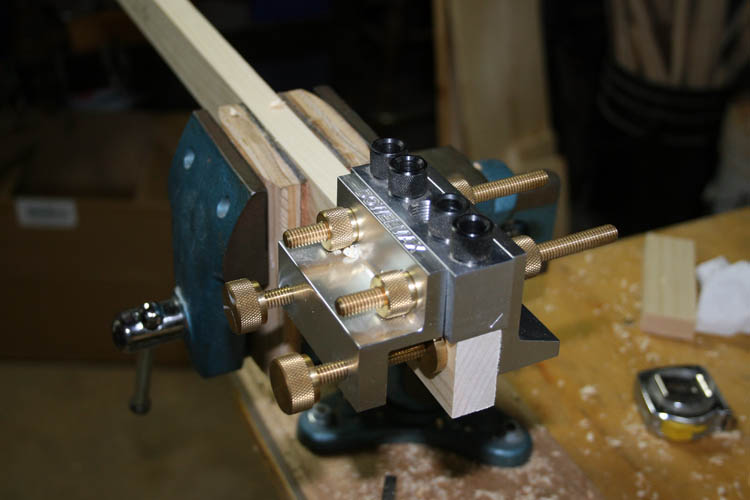
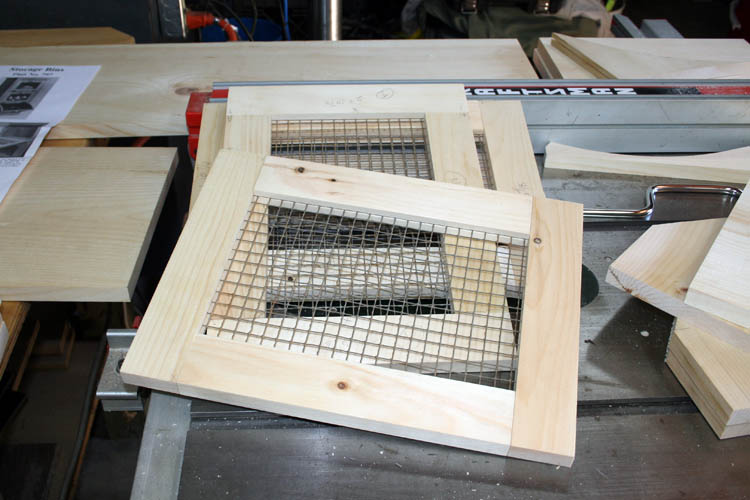
STORAGE BIN DOOR FRONTS, ETC.
The storage bin door fronts use nails and glue for their attachment, but
since I have the Dowel Max dowel system, I like going the extra step for
building something that will last. While it definitely takes more
time, I don't mind doing it. One could use a small biscuit or even
pocket screws, but the pocket screws would be visible on the backside of the storage bin
when you open it, but not from the frontal view.
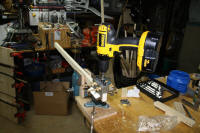
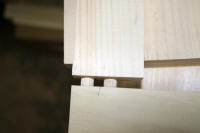
Also, slots have to be cut into the members to allow for the 1/2 inch
square mesh galvanized wire to fit and the inside edges need to be stained prior
to assembly. I used my router table with a .097 slotting cutter and
set it up where the end of the vertical stiles would not show the slot by
using a couple stop blocks to limit the travel of the slot cut. The
plans call for .125 inch slot, but I have my slotting cutters dedicated for
something else using the .125 inch width slotting cutter. A table saw would work, but
I wanted to stop the slot on the
stiles, otherwise you have to fabricate and glue a filler strip in the
end of the stiles.
I also used dowels in the face frame instead of just
nailing and gluing them to the sides and lower front.
Click on the below thumbnail pixs for a larger screen view:


SHOP WORK ON 05-10-17
I got a chance to work some more on the potato and onion storage bin and
made pretty good time. I did find one boo boo of a part that didn't
fit just right and according to the cutting chart, the part was
correct....misread something somewhere, but able to fix it. The
problem was the orientation of the lower shelf onto the back member......my
bad!
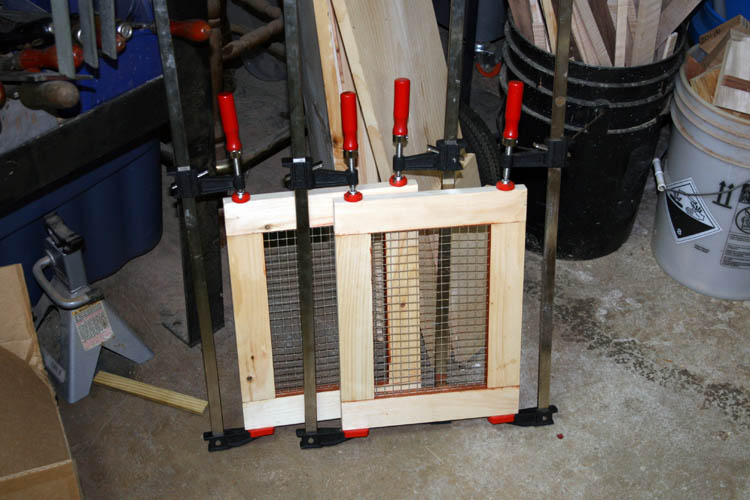
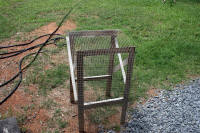
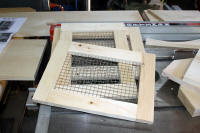
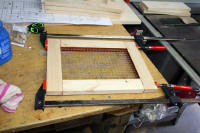
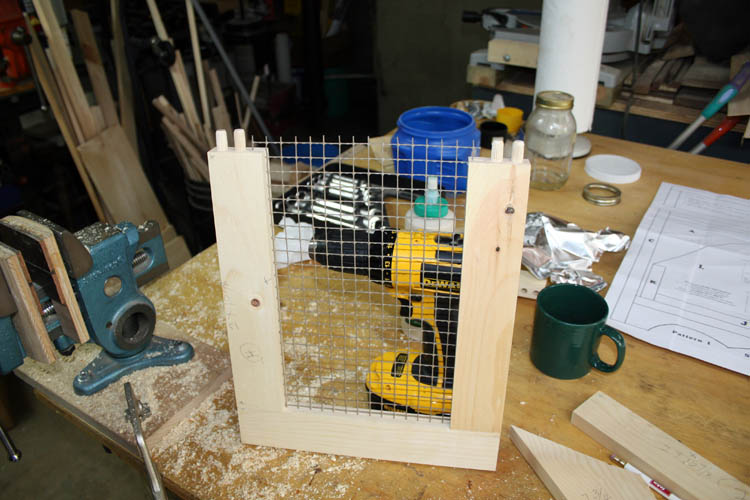
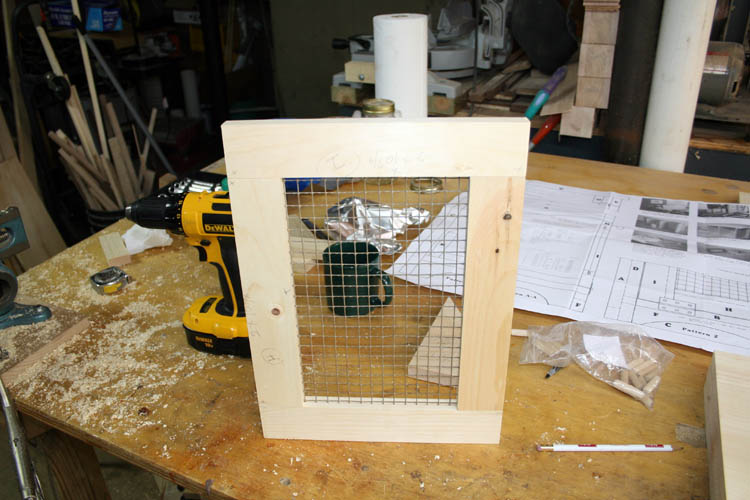
I glued the door frames together with the wire mesh and started
assembling one of the bins, since the other door frame glued last evening
was dry. The 1/2 inch square galvanized wire mesh was at least 25
years old. I purchased it to keep bats out of the attic by closing off
their access through the end gable vents, of which the regular screen wire
had rusted out. I can certainly see a
"pack rat" theme.
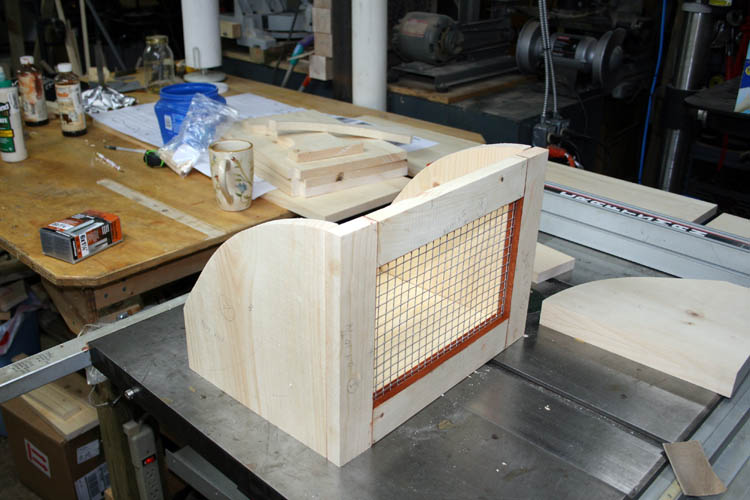
Did a trial fit and everything was ok and ready to spread some glue
and fire the nail gun. This nail gun is magazine fed; hope the
Liberals don't outlaw the 100 "round" nail magazine capacity......grin if you must!
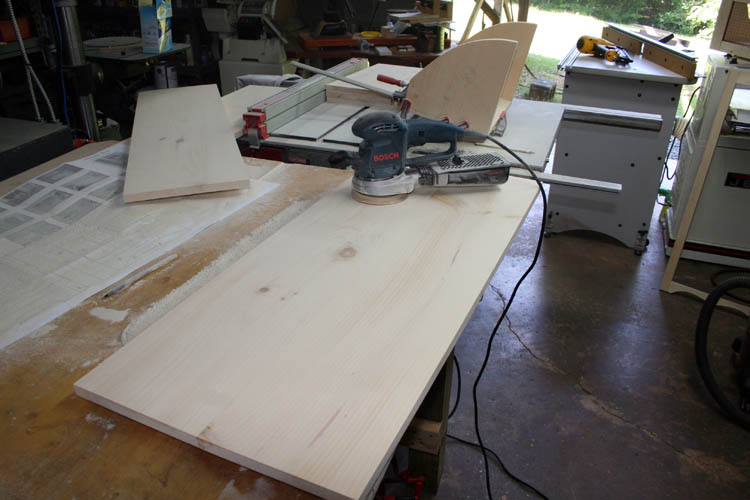
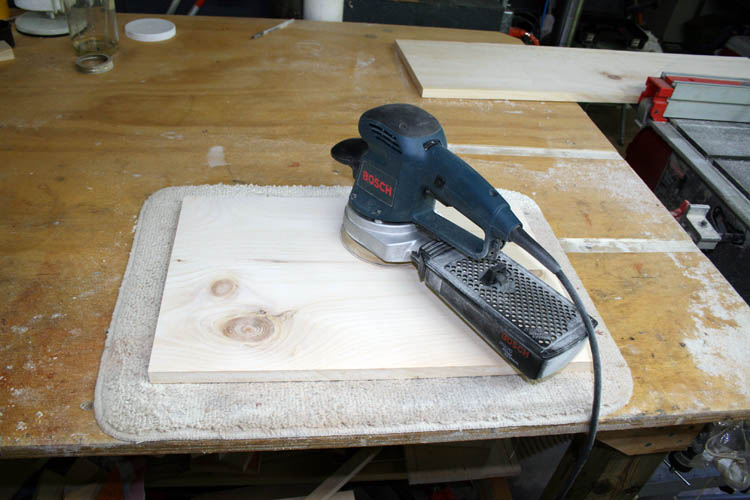
After the storage bin was glued and nailed, I sanded the back and the top
using an orbital sander. I have a belt sander but the orbital will do
just fine and I can locate it quicker than the belt sander, since I rarely
use the Porter-Cable 4 x 24 belt sander. On the pine boards, the 4 x
24 belt sander might be too aggressive on the soft wood unless you have a
delicate touch.
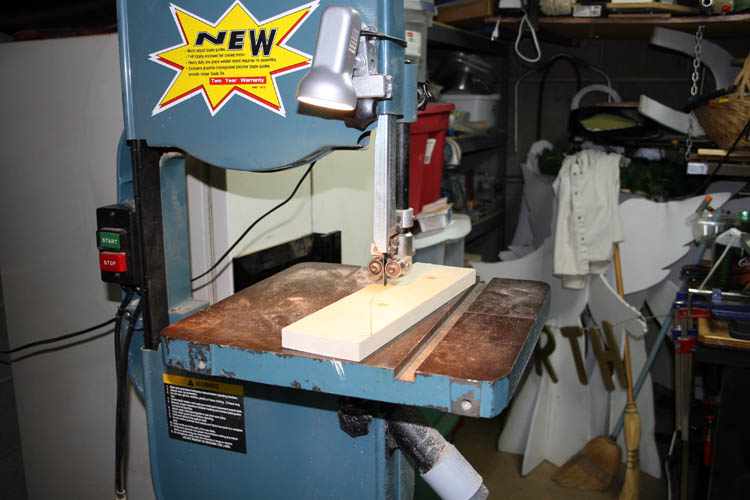
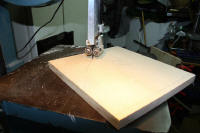
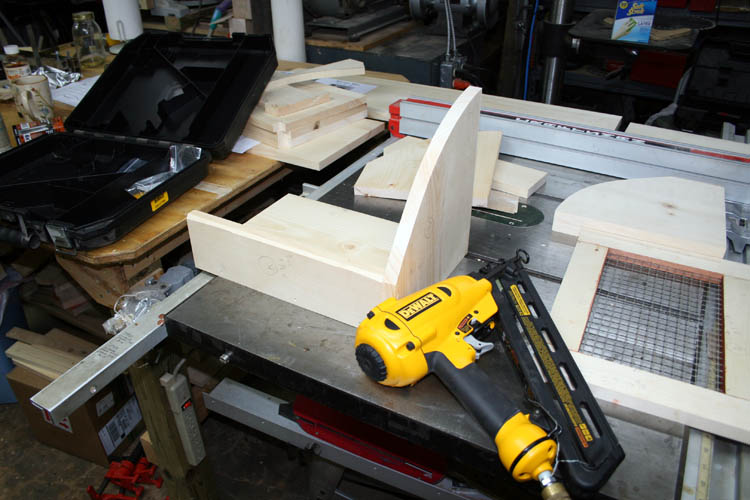
With the back and top sanded, I need to cut the detail out on the sides
using a jig saw.
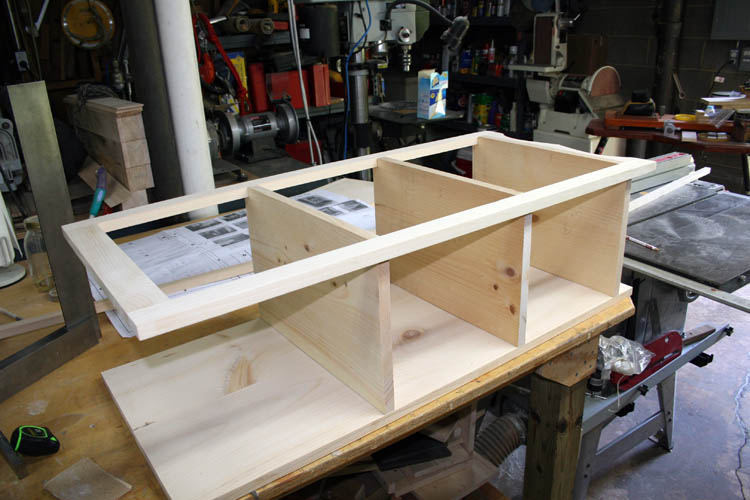
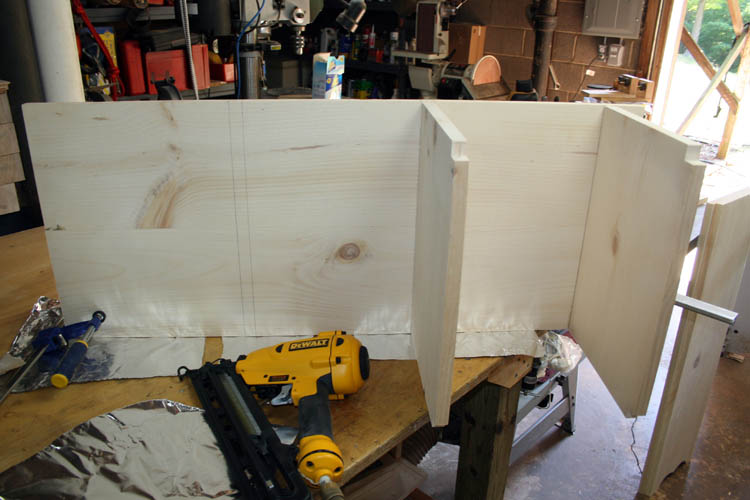
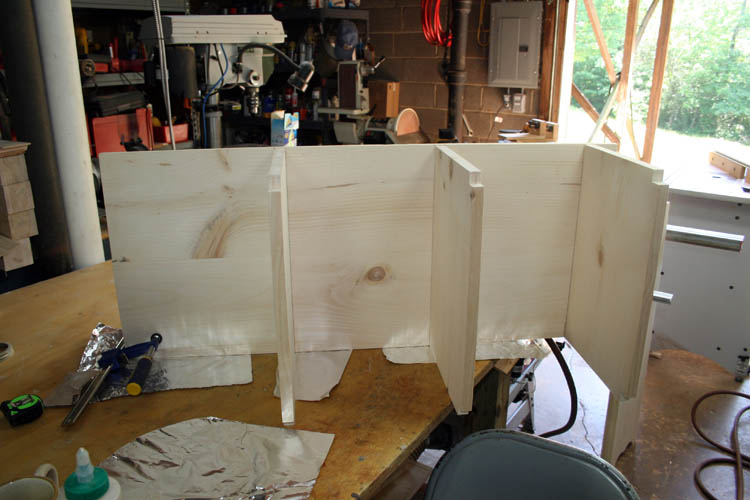
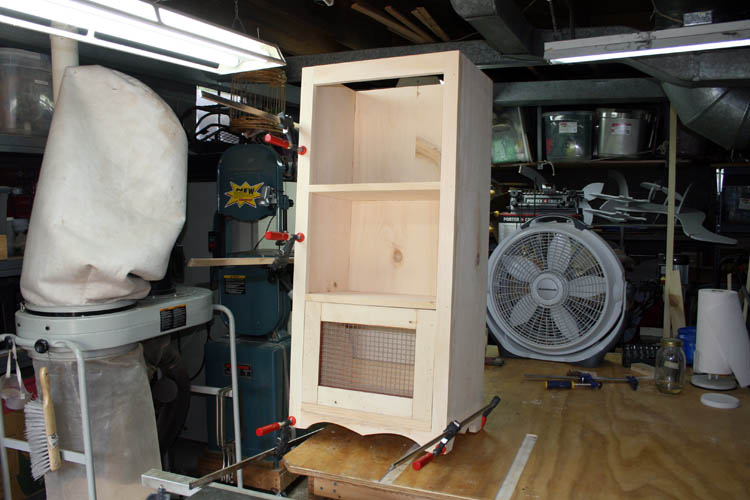
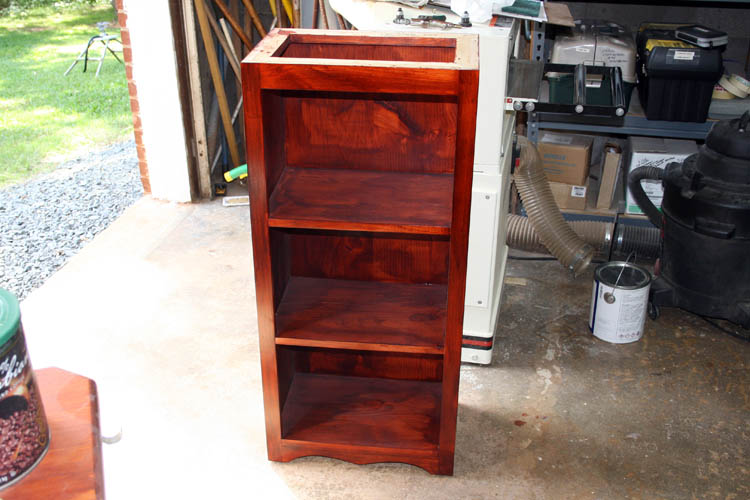
ASSEMBLY TIME
Since the project from now on will be glue and nails, I needed some
alignment marks on both sides of the back in order to get the three shelves
in the proper place and some witness lines to make certain the 1 1/4 inch 15
gauge finish nails will hit the center of the shelves.
I dry fitted the parts and everything looked pretty good and have to figure
out the easiest approach the aligning and nailing the shelves to the back.
The back member was held vertical with the aid of a large 4 inch block
of wood and a bar clamp. The glue was applied to each shelf member and then
nailed from the back side, whereas the witness lines worked great keeping
the nails into the center of the shelves and the shelves centered to the
witness lines.
You about need
Orangutan length arms to reach around to the back side of
the back with the nail gun and keep the shelves aligned. I had to
stand on a steel bottom chair to get the extra reach....a safety hazard for
sure.
ATTACHING THE SIDE MEMBERS
I used the same procedure for marking the sides with a pencil line to center the
nails into the shelves. The Starrett 18 inch machinists square below, is far too heavy for routine
work. I purchased it solely to
calibrate my jigs and fixtures with. I need
to purchase an accurate framing square that is much lighter in weight for
everyday usage!
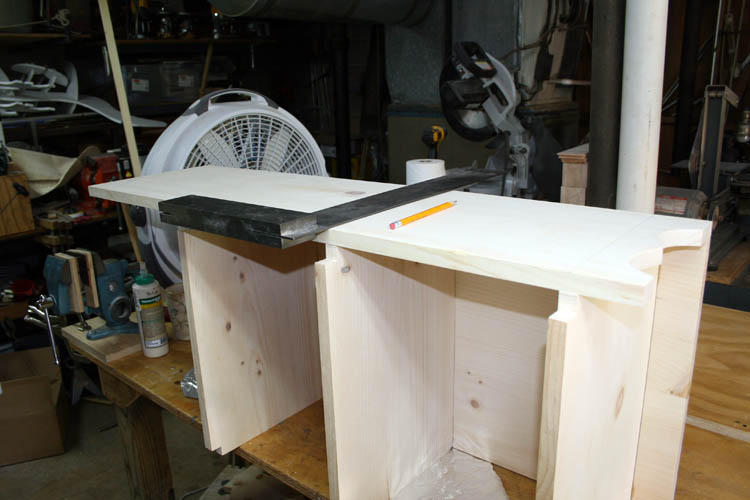
After the witness lines were drawn, it was time to glue and shoot some
finish nails.

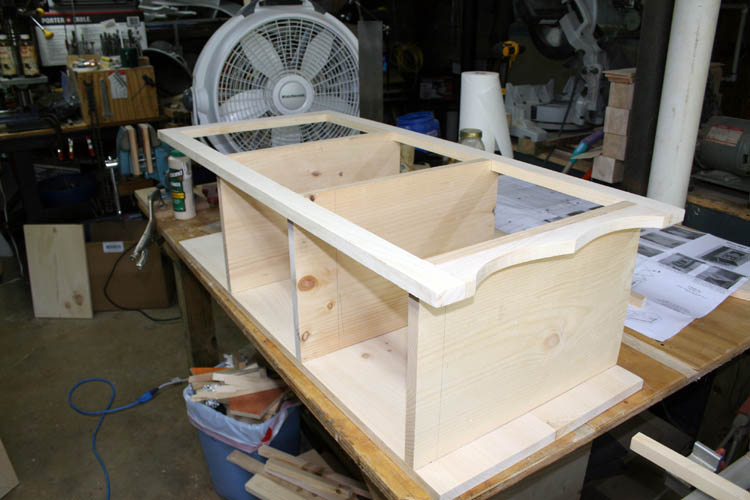
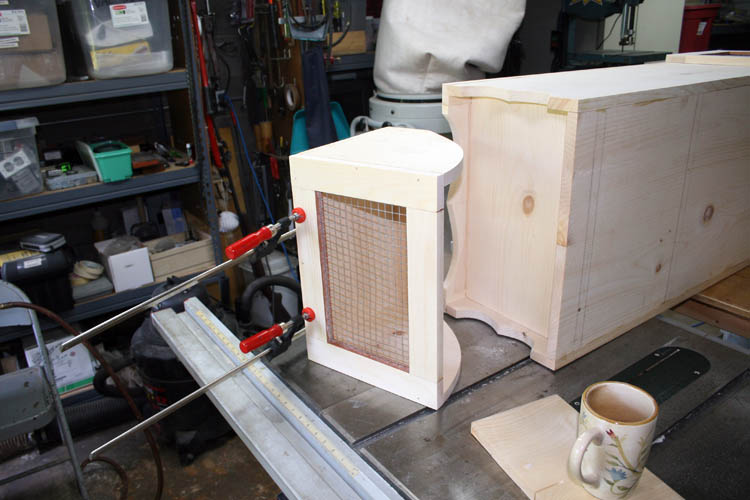
FACE FRAME INSTALLED
I inserted one of the completed storage bins to see what the project looks like
and pleased so far.
I order three pairs of hinges on line from Amazon and still waiting for
them. They were shipped GHL Global and probably coming from China,
etc. I couldn't find what I wanted within 20 +- miles and is the
reason for the internet order which most of the time is extremely fast.
SHOP WORK ON 05-11-17
This morning, I set my router table up with a decorative border bit to
route an edge around the top member of the potato and onion storage bin. The
plans do not call for a border, but I wanted to dress the top
edge up a little; remember my MO?
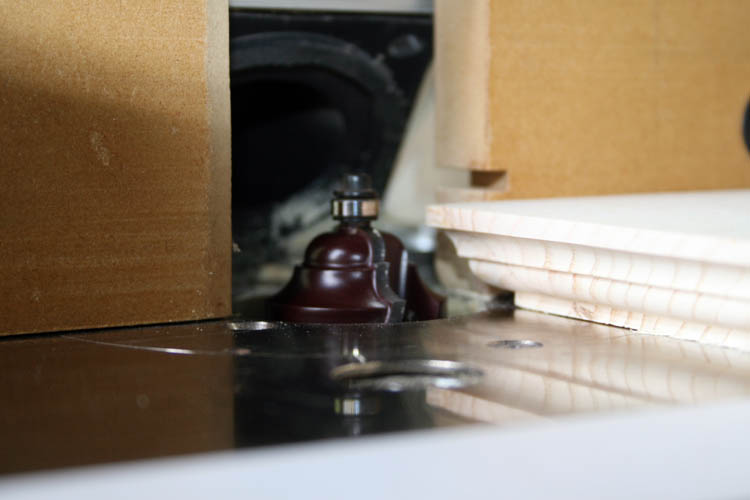
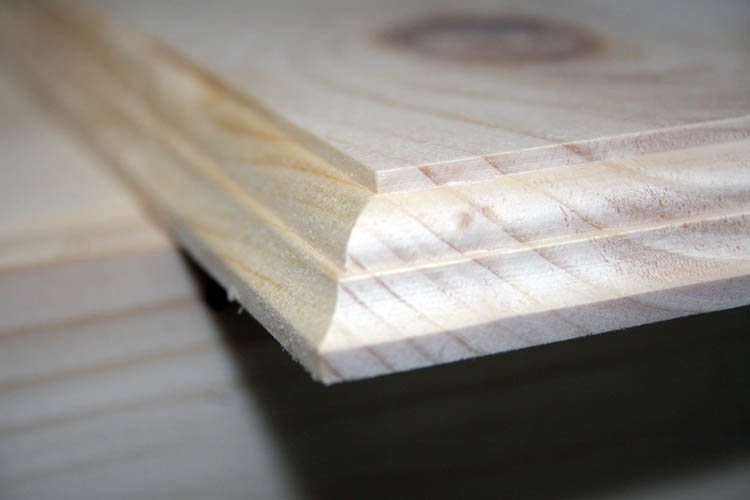
I like the decorative edge for the top versus the plain edge. It is
best to make several smaller passes instead of trying to remove all the wood
wood with one pass to prevent chip out and reducing the life of the router
bit.
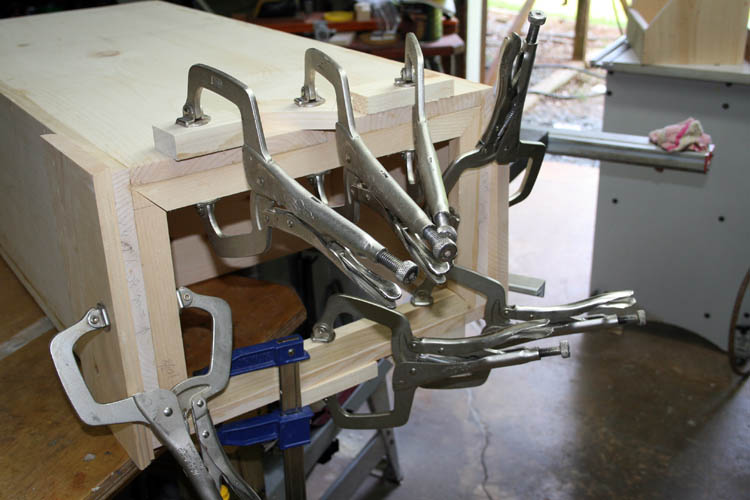
I finished up the other bin by installing the door front to sides, back
and bottom with glue and
nails. I used a couple clamps to help pull the glue line tighter
together before driving home the nails with the pneumatic 15 gauge finish nailer.
I had to laugh at myself; e.g., while gluing and nailing this bin together,
I was hammering away, not realizing the nail magazine was empty. The
piston aka plunger that drives the nails into the wood was still making an
indentation into the wood as if a nail was installed. The reason if
wasn't obvious at first, is because I used a couple bar clamps which held
the parts in place.... ......grin if you must!
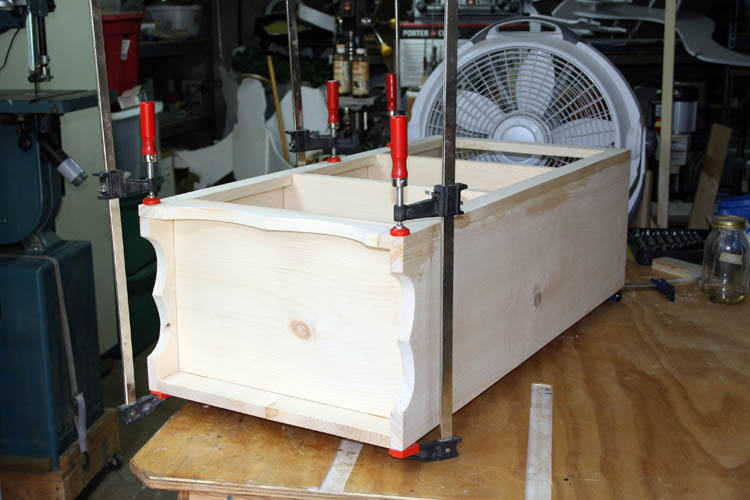
TOP INSIDE BORDER INSTALLED
The plans do not call for an inside border underneath the top, whereas
they have the top simply glued and nailed in place. From my personal
experience, end grain wood does not glue well to regular horizontal
orientation grain wood. Also, the top will contract and expand along
the width of the wood, depending on the humidity conditions and the width of
the top. In all probability, there would not be a problem, but might
as well plan for the top width expansion. The top inside border aka
band, will also supply support to the back, side members and face frame to keep them
from bowing in/out at the top. There are many ways to install
expansion brackets, etc., but will go as low tech as possible on this one
without purchasing additional hardware.
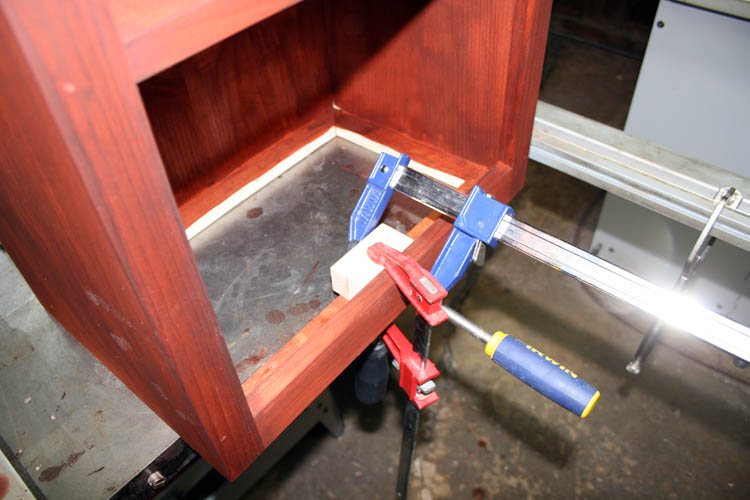
With the inside border installed, I will elongate the screw holes in the
border to allow for width wood expansion of the top and install the wood
screws from the bottom side of the border into the top.
Since the inner border will not be seen, I didn't use my dedicated miter
sled for the table saw to cut the angles, but used my cut-off saw which just
gets you close. It was calibrated for a hopper jig/fixture and left it
as it was set which is not a perfect forty-five degree calibration. I
will re-calibrate it at some point in time!
I plan to round up some pine colored wood filler this afternoon, fill all
the nails holes and tomorrow, start some sanding with the orbital sander and
finish up using a couple Porter-Cable Speed Bloc Palm sanders progressing up
to about 220 grit sandpaper. Sanding is good
personal therapy, but you have to contend with the dust generated and
the cleanup.
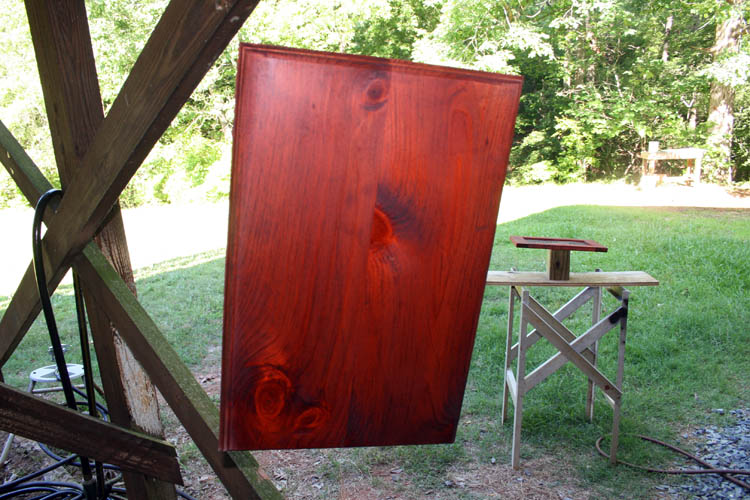
APPLYING STAIN
With the sanding completed, I applied a medium brown walnut alcohol based
stain, product name Behlen Master Solar-Lux, which is non-grain raising.
This product is compatible with using nitrocellulose lacquer, of which I
plan to use. Many States including California has strict regulations
on using a high VOC (volatile organic
compound) type lacquer such as the nitrocellulose, but water based
lacquers do not give the same results in my humble opinion. This is
speaking from my musical instrument finishing experience going back to the
late 1960s and continue to use that type of lacquer today when needed.
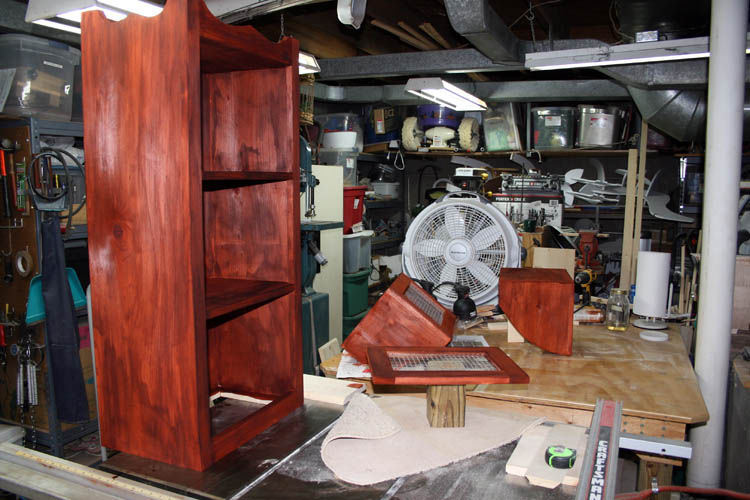
The inside of the potato bin, back and bottom will not be too visible,
but went ahead and applied stain to those areas. I also applied stain
to the top, which will be installed after the final finish. I went
back later and blended the stain more evenly on the sides of the main frame.
Above pix with the stain still fairly wet.
I need to install the wood support for the magnetic latch for the upper
door before spraying the sanding sealer and final top coats of lacquer.
The door hinges have not arrived yet and still have to obtain some type of
door support for the top compartment door.
After the glue dried overnight, I applied a coat of stain to the wood
support
for the magnetic latch.
In a few days, I will spray
a "wet" coat of Mohawk sanding sealer and then start applying a few finish
coats of the nitrocellulose musical lacquer. Updated 05-13-17.
FINISHING
My basement woodworking shop is too small to spray finishing materials
aka lacquer and without an exhaust system and/or spray booth, therefore I must spray
finishing materials outside, of which is not the ideal situation, but manage
nevertheless.
I have a link
which describes my finishing methods and will not re-invent the wheel on
this one, but will give a few highlights as I go along. I don't use my
spray gun regular enough to be proficient with it, but I do get by.
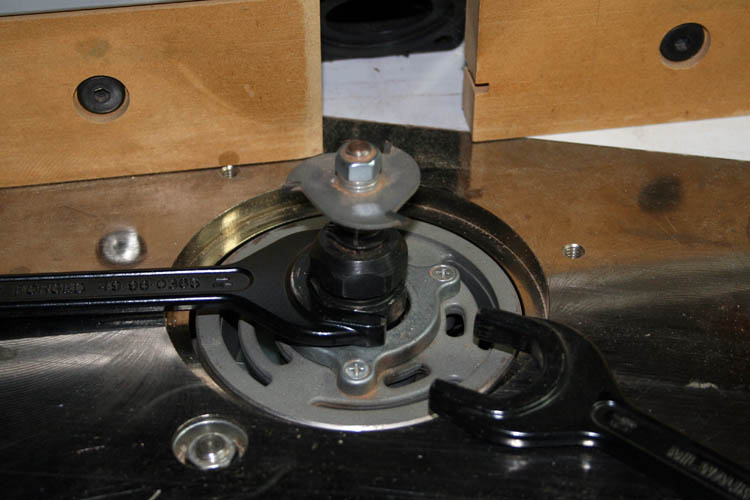
I will install a roofing nail in each corner of the base of the potato
and onion storage bin to keep the bottom off the surface I have the base
resting on. I will drill a pilot hole about the same diameter as the
roofing nail to keep from splitting the wood. I will remove the nails
after the project is finished.
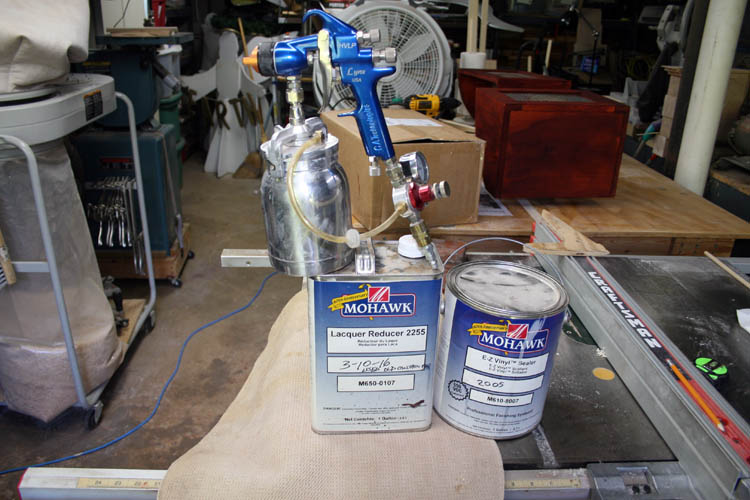
Lynx L-300H HVLP spray gun with lacquer reducer
and sanding sealer. Using 1 qt. pressurized can.
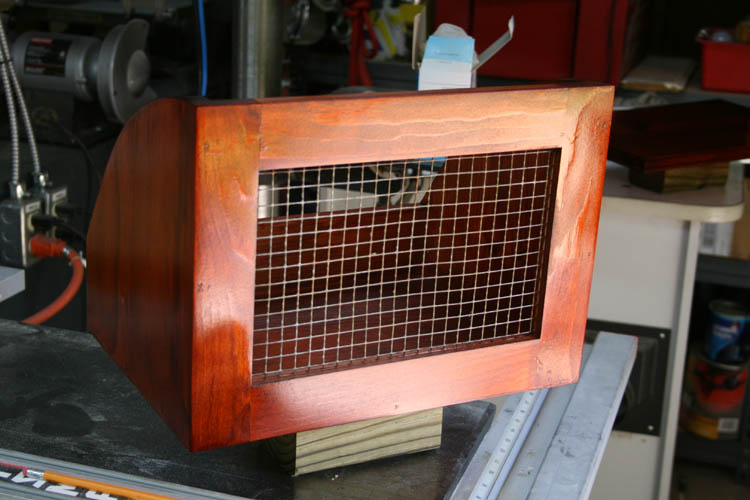
Top of the potato and onion storage bin with a coat of sealer and ready for a light sanding and then to the
lacquer. The knots give the top some character.
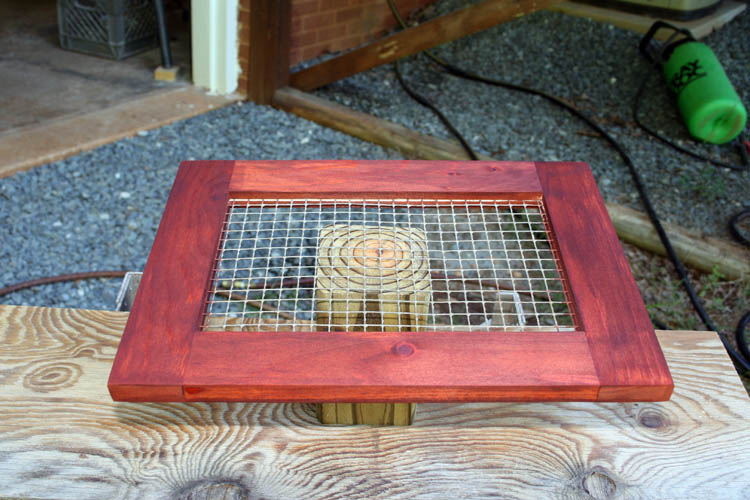
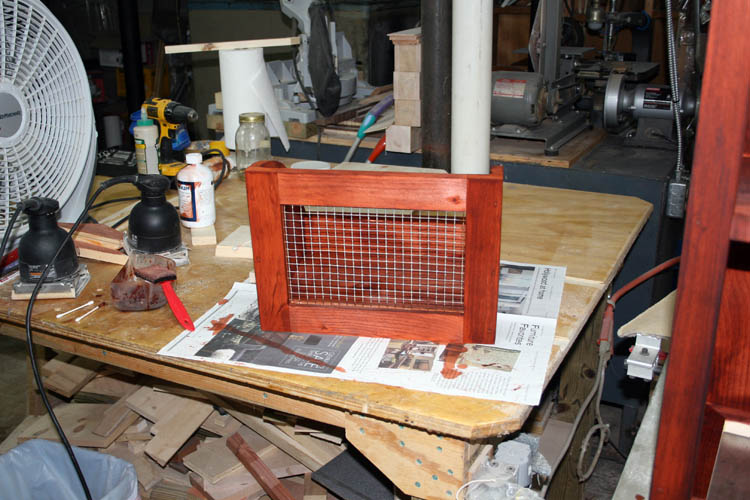
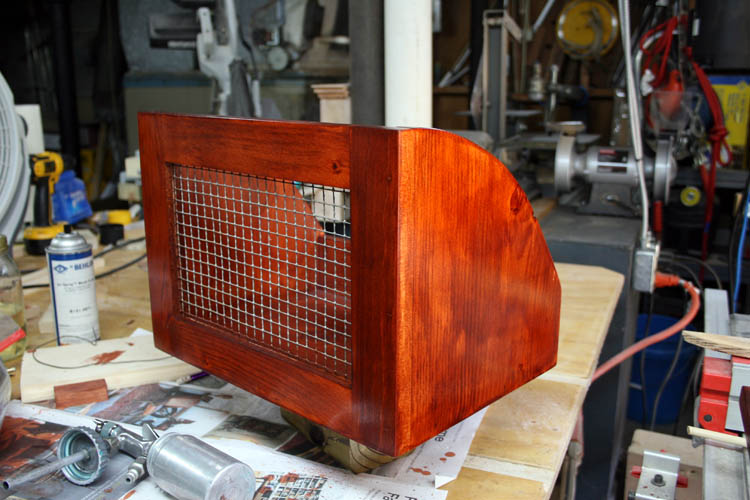
Above, the door frame for the top shelf compartment.
Storage cabinet/bin upside down and storage bins below.
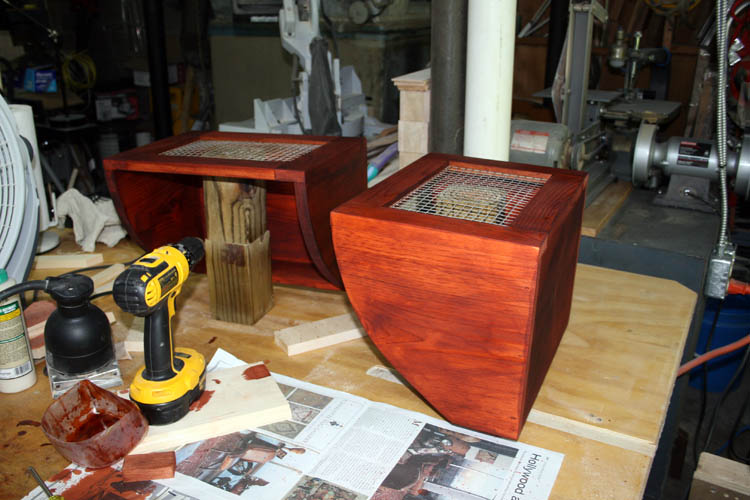
This afternoon, I will lightly sand the components down with a Scotch-Brite pad, remove the sanding dust and apply at least one
or two top coats of Mohawk brand nitrocellulose musical grade lacquer.
Web published update by Bill aka Mickey Porter on 05-15-17.
FINISHED FINISHING - NO PUN INTENDED
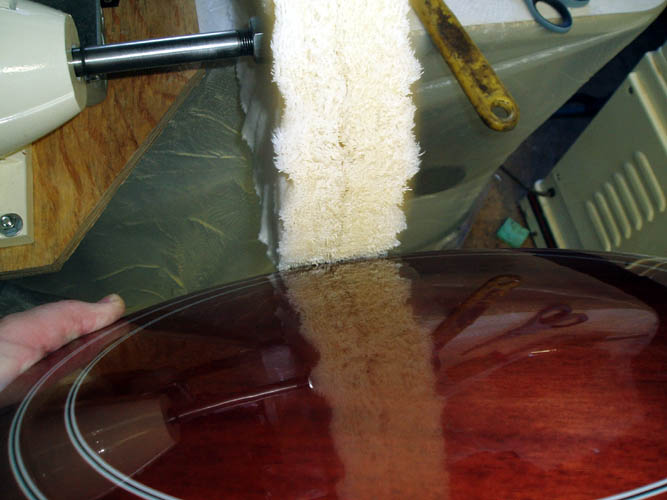
I put my last coat of finish on this project today, being May 19, 2007.
I have to keep reminding myself this is a furniture type project and
not a musical instrument that
requires about twenty (20) coats of lacquer, of which most of that type of
finish is wet sanded down to get rid of the so called orange peel effect and
then polished and buffed out to a literal "mirror
finish." See the banjo resonator pix posted below to
get my meaning of a mirror finish:
I had to re-order the hinges for the potato and onion storage bin the
third time, due to vendors too slow in their delivery and/or processing.
I ordered the last three pairs from Woodcraft, Inc. and they created the shipping label
on the 19th and ready for UPS to pick it up. Below pixs
of the parts waiting for the final assembly.
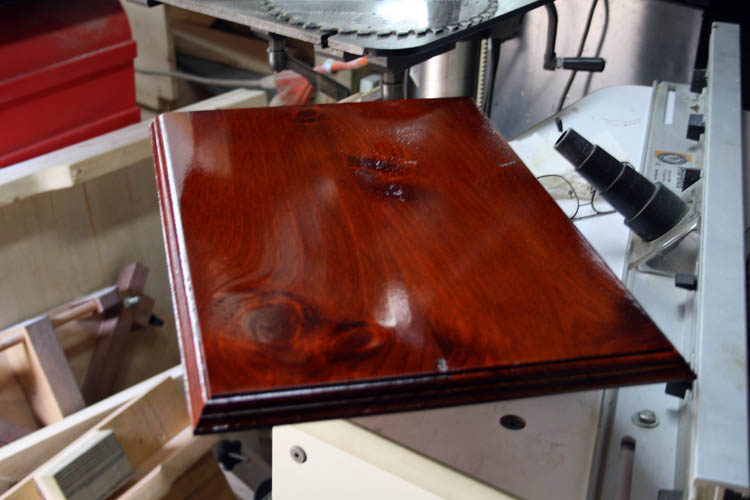
The above top has a lot of dings in it, but is Lowe's
"Top Choice" wood,
grin if you must. Nevertheless, it has plenty of character due to the
dings and knots present.
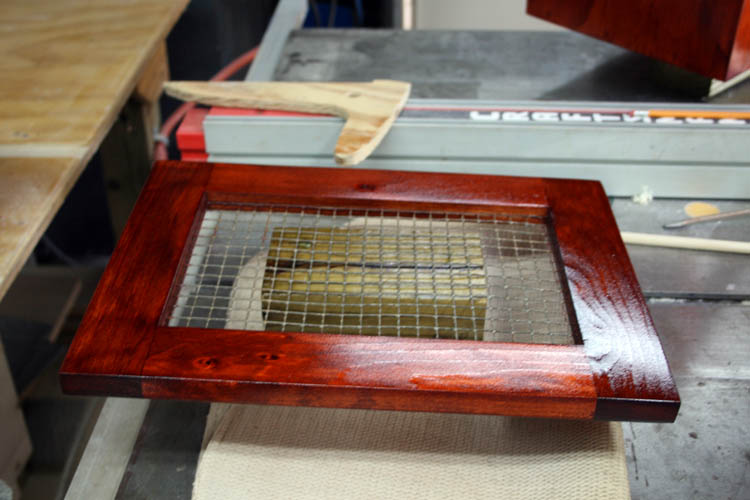
The top storage door.
I kept the basement shop door up and a large fan blowing out the
finishing vapors while the parts were curing out some. Luckily, I
didn't have any insects making a permanent home on the wet lacquer.
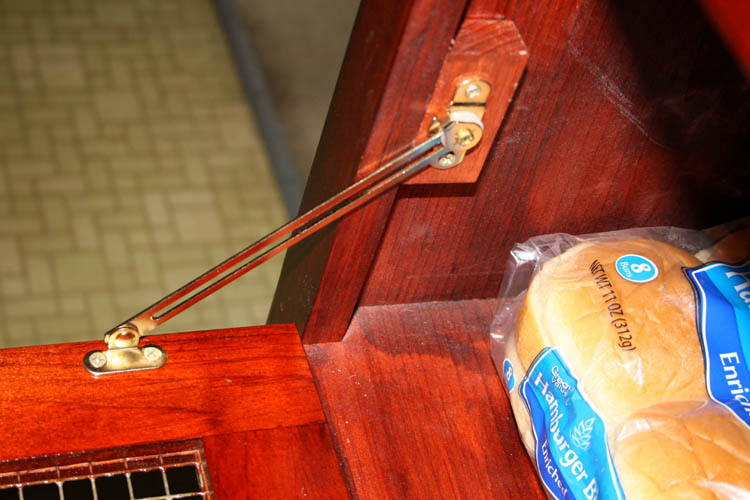
While waiting for the hinges to arrive, I will elongate holes in the top
inner band for attachment of the top with screws from underneath, of which will allow for any width
expansion due to changing humidity conditions. Tomorrow, I will see if
I can locate a friction latch for the top door to limit its travel to a
horizontal position when opened. I will install the magnetic latch to
the top door when I install the hinges.
This project is winding down and look forward to placing it in the
kitchen/dinning room beside the buffet and start
"field testing" it out with
some potatoes and onions. Probably store hamburger and hot dog rolls,
etc., in the top compartment, whereas regular loaf bread is stored in our
roll top bread box on top of the refrigerator. I normally keep New
York and/or Jewish Rye Bread in/or both our refrigerators.
I have to do some serious vacuuming and dust removal before my next
woodworking project!
Web published update by Bill aka Mickey Porter on 05-19-17.
WAITING FOR THE HINGES
Hinges were received and installed on 05-24-17, pixs below. I used
a scratch awl and a 3/32 inch bit in a portable hand drill. The pine
wood was soft enough that the drill was used very little.
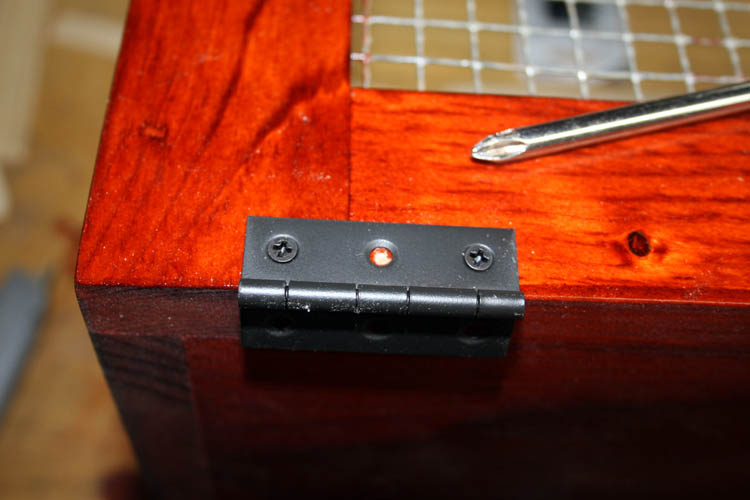
The 3/32 inch diameter pilot hole will definitely reduce the risk of
bursting out the edge of the wood.
Installed the friction lid spport.
This has been another one of my fun woodworking projects and still
thinking about doing a curly maple coffee table when I can locate the proper
thickness and length wood required.
TOTAL COST OF THIS PROJECT


