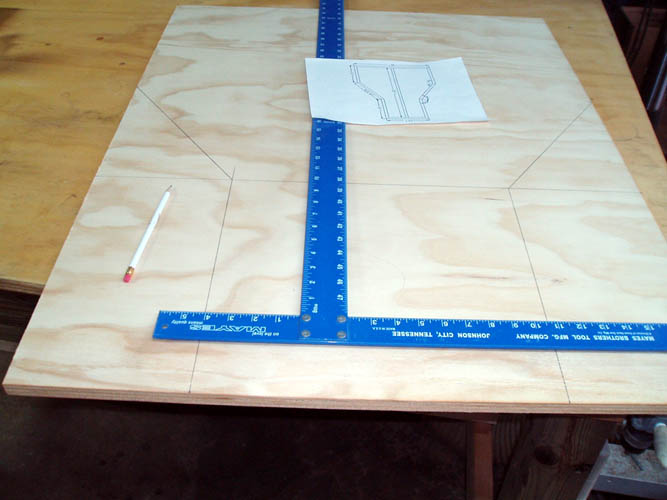
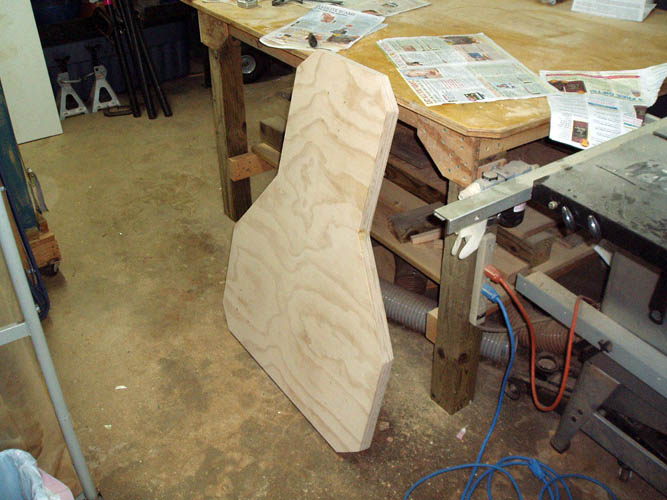
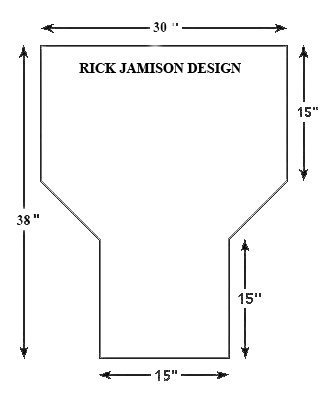
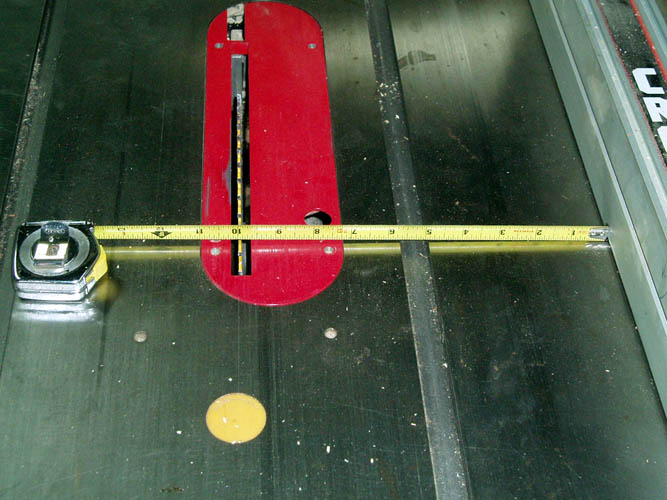
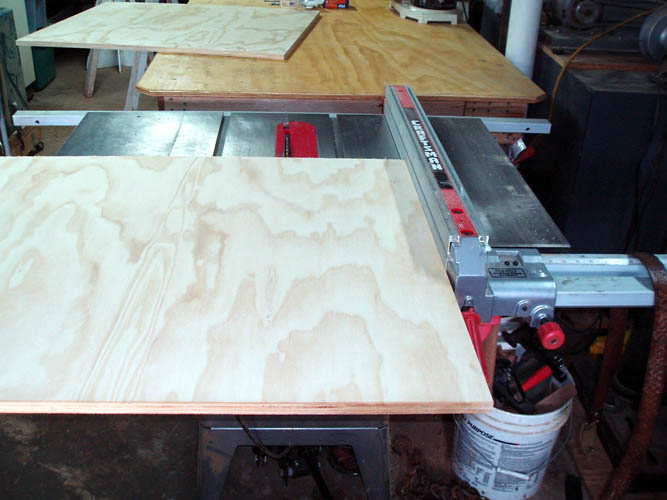
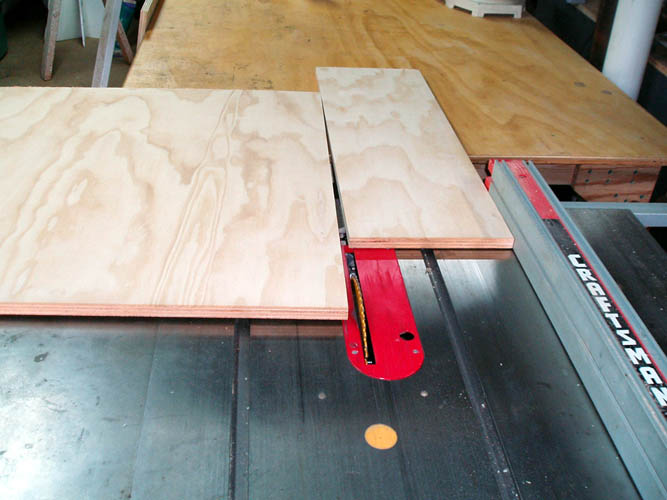
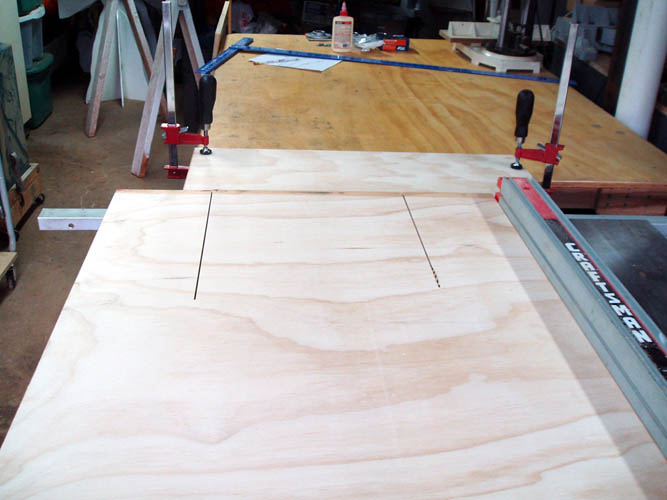
Below, the layout on the piece of plywood ready to cut the side pieces.
The blue aluminum drywall square isn't square but more or less used the long
blade as a straight edge.
 .
.
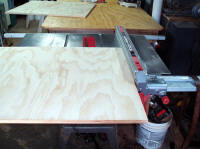
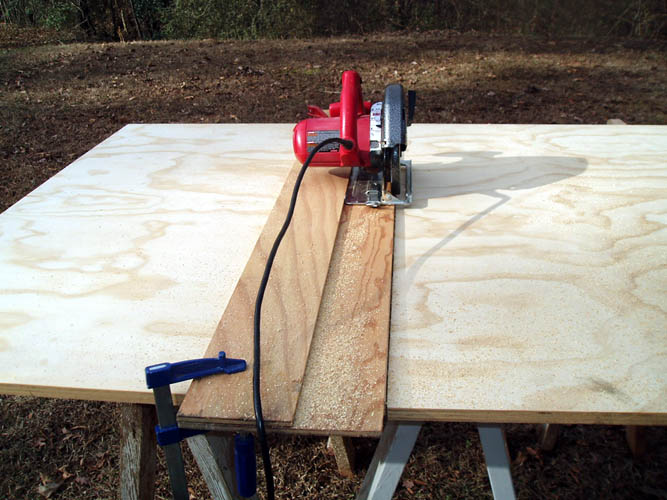
My next step was to cut the sides and used the table saw to make a couple
of the cuts but forgot that the table saw blade is 10 inches in diameter and
when you flip the material over, you have a different cut on the underside
and went to plan B and finished the cuts with a jig saw which was freehand
and not as accurate as the table saw:


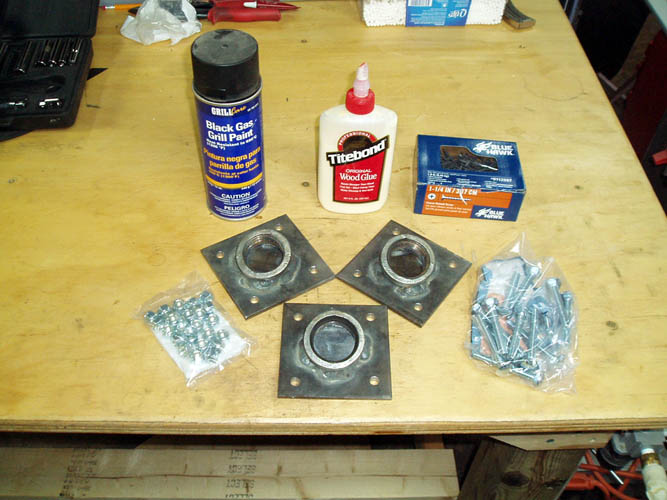
After sawing both pieces of the bench top to shape, glued
(sandwiched) together using Titebond Original glue and secured with 1 1/4
inch length drywall screws inserted from the bottom piece of plywood in conjunction
with the bolts that hold the leg pipe coupling and flanges, I started
construction on the couplings.
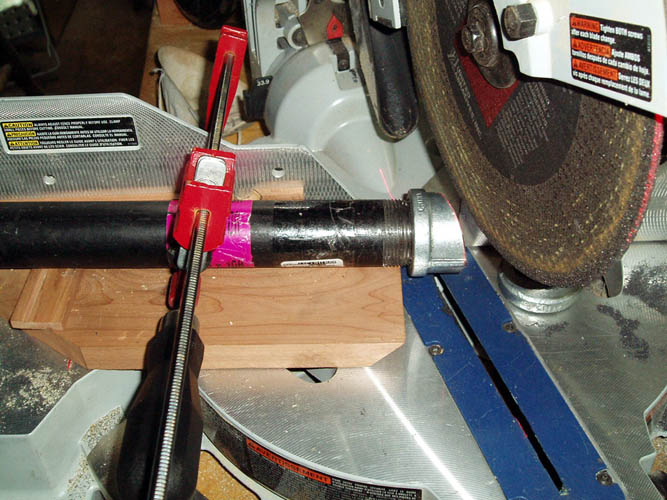
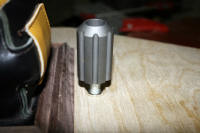
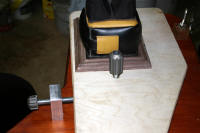
I decided to use my miter saw with a fiber reinforced metal cutting blade
since it would be more accurate in my hands than my PortaBand metal cutting
saw freehand. I secured the 1 1/4 inch coupling to one of the pipe legs;
adjusted the saw to 18 degrees and secured it in place with a Bar clamp.
The laser line really helps getting the pipe coupling centered since each
pipe coupling will yield two (2) complete units. I used three pipe
couplings which yielded six pieces; enough for another portable shooting
bench for my number one Brother-in-Law Douglas Pettigrew of Reidsville, NC. After cutting the 18 degree angle, I de-burred the edges. Pix below:
After cutting the couplings at an 18 degree angle and de-burred, I
took them to my friends John Hyatt and Rodney Caudle in Polkton, NC who
manufactures a top of the line Traditions grill and large competition
type grill/smokers; telephone 704-219-9433 of which I plan to do a
short story in the future of their operation when the weather is conductive.
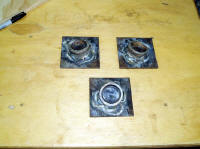
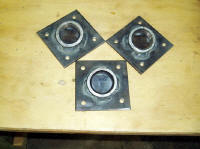
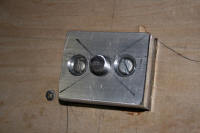
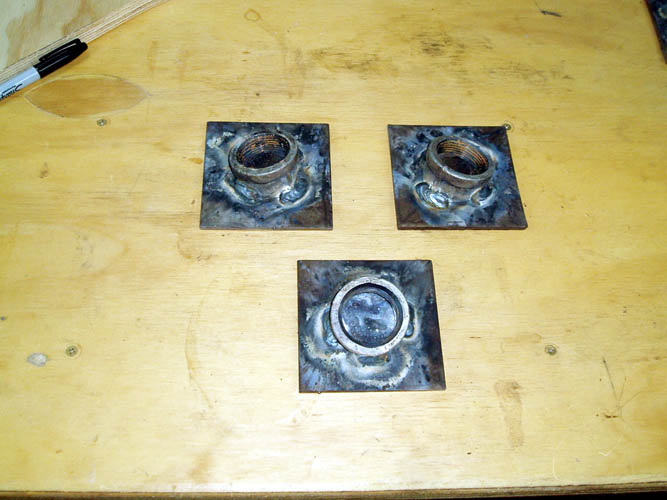
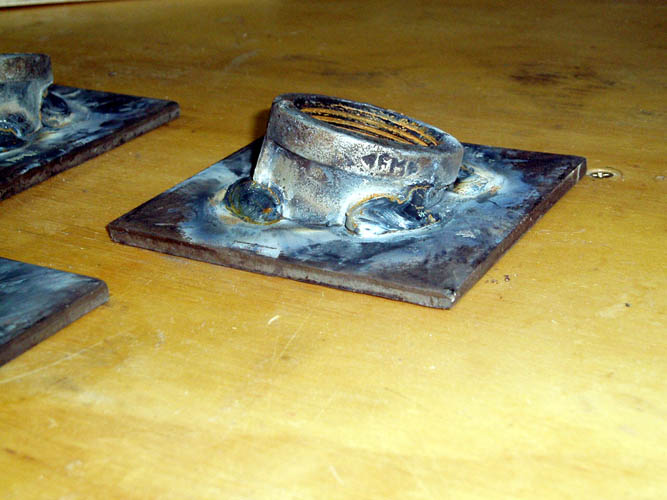
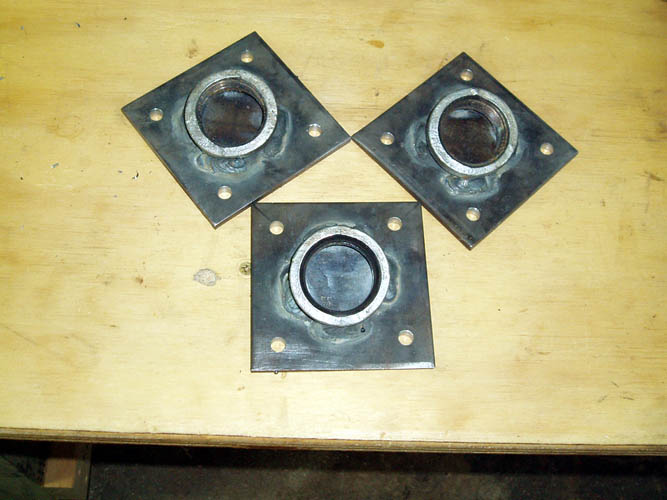
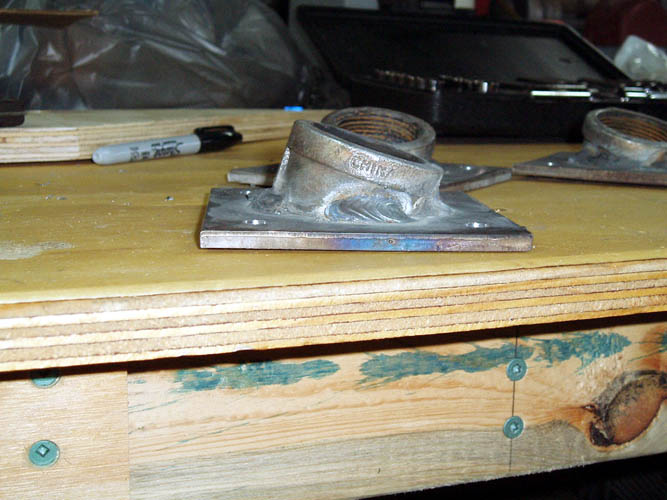
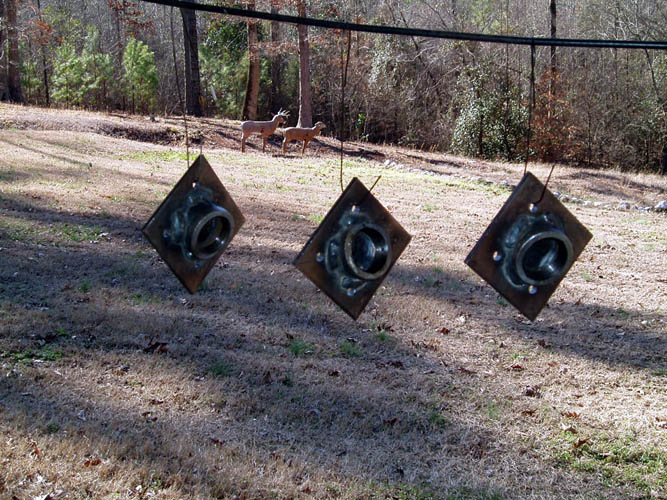
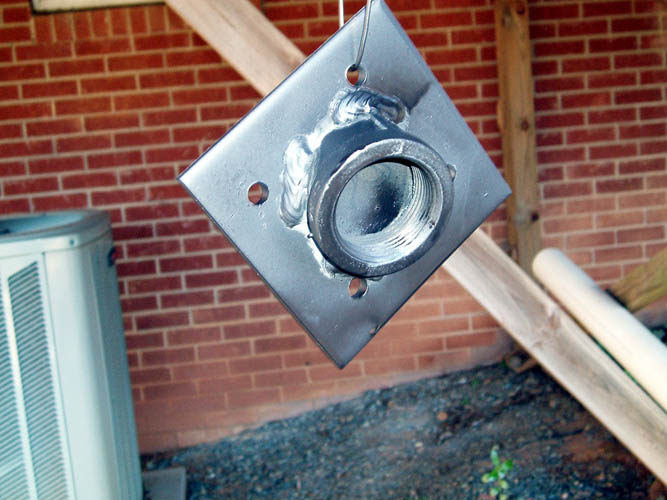
They sheared the required 4 inch square metal flange plate and welded
the couplings to the plates. Notice that the front two leg plates have
the coupling welded diagonally outward where the legs will be orientated
similar to a tripod configuration which is for stability. Pixs below of the finished welded
couplings/plates: Click on thumbnails for a larger screen view:

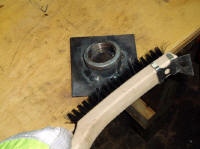

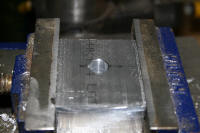
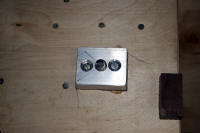
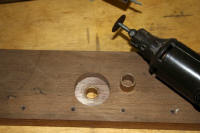
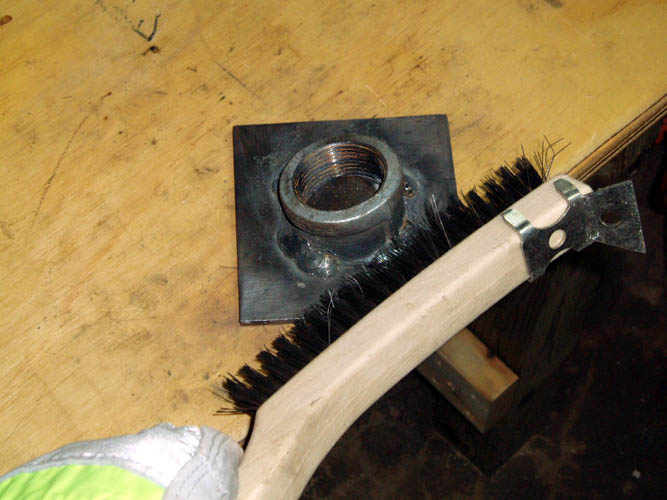
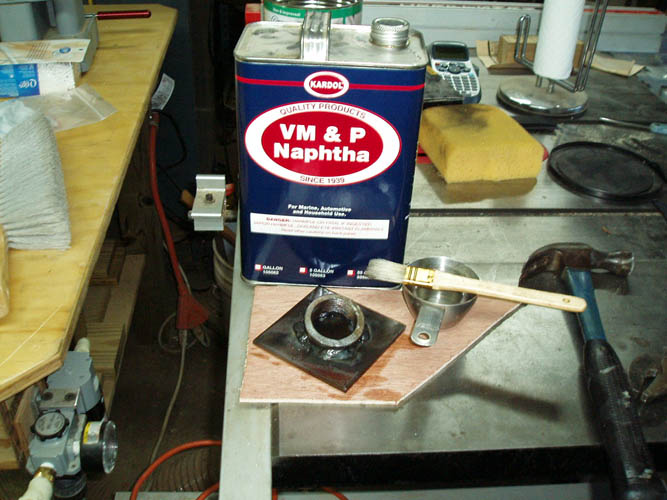
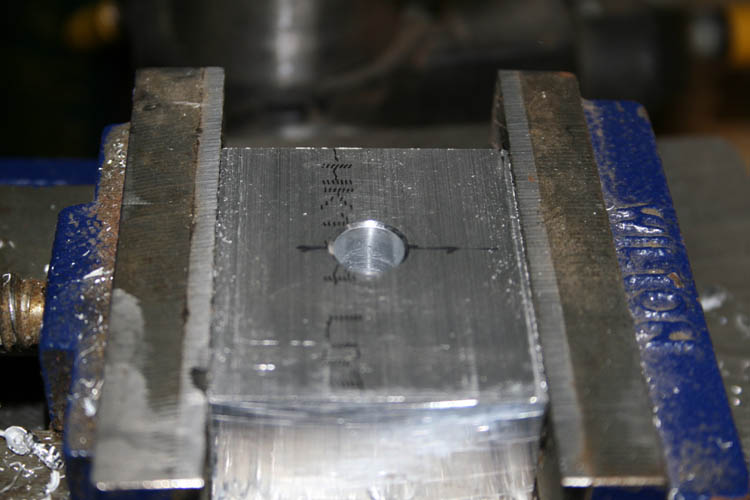
After wire brushing and degreasing the couplings/flange, four 21/64
inch mounting holes were drilled in each flange. I marked and center
punched each flange and used a countersink, 5/8 inch diameter x 120 degrees
as a starting pilot for a standard 118 degree drill bit which will align
itself in the 120 degree tapered hole.
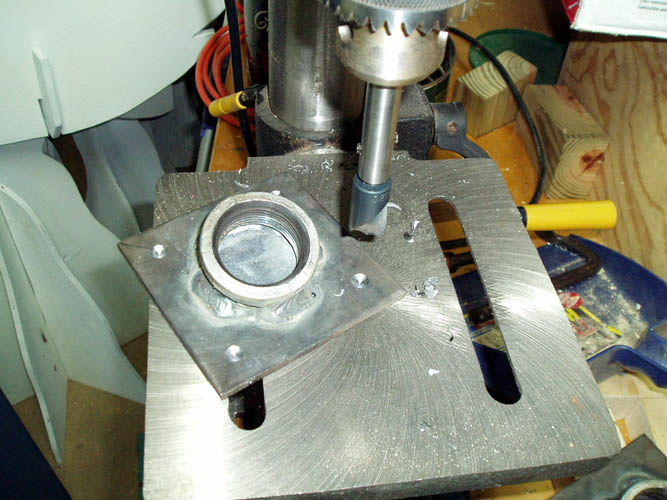
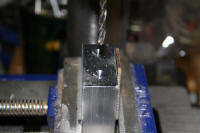
When using countersinks and other short shanked drilling bits, etc., most
of the time you have to re-position your drill press table height due to the
shortness of the countersink which is a pain in the rear if you have a
project that requires precision drilling of which this one did not, you
loose accuracy big time by having to lower the table to accommodate a
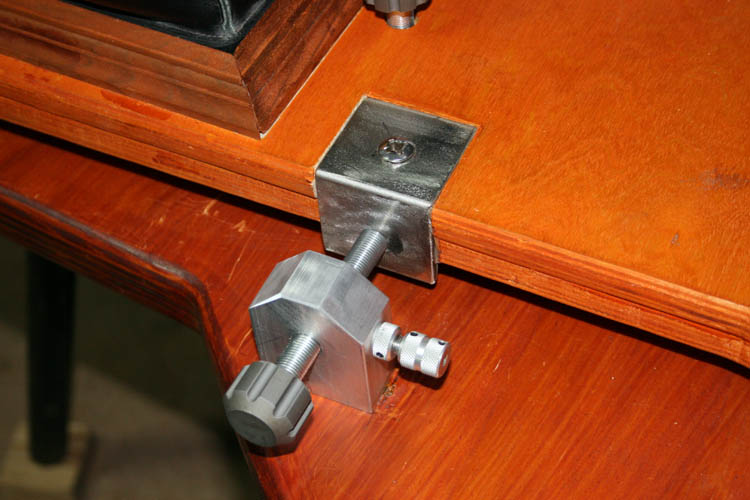
standard jobber length drill bit, etc. You can use a locator pin in
your drill press to aid in such realignment but it is time consuming. It
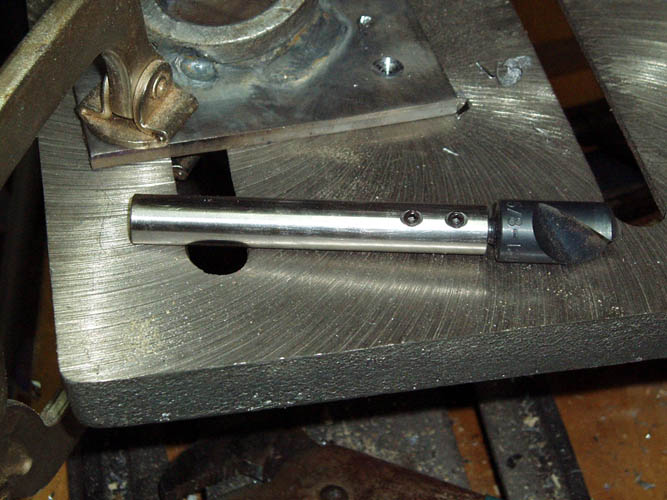
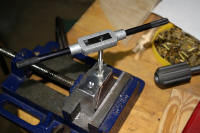
certainly is easier to use a special 1/2 inch diameter holder for the
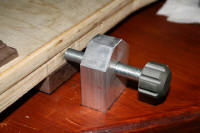
tool/bit which eliminates having to re-adjust the drill press table height. Below, pix of the countersink holder
which is 3.5 inches in length and precision made by Pat Warner of Escondido,
CA.
NOTE: Pat no longer supplies the countersink holders. I
used a little "Mickey Mouse" Harbor Freight table top drill press since this
project doesn't require any precision and heavy drilling.
NOTE: Pat Warner passed away on July 28, 2017. I met
Pat in 2008
and have several of his books and products. He was First Class
All-American all the way! Updated on 11-16-17.
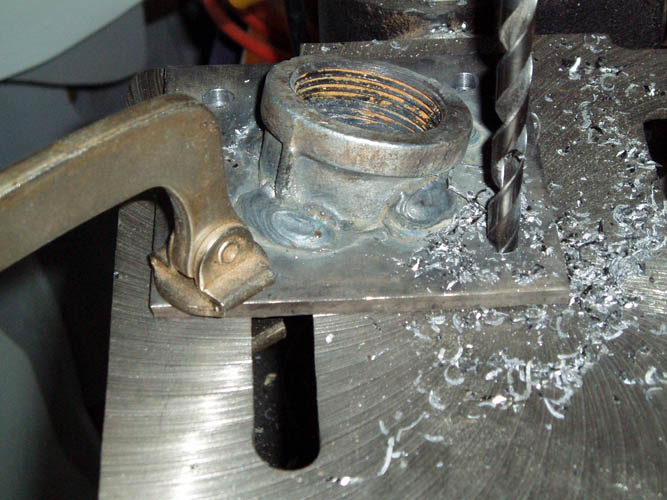
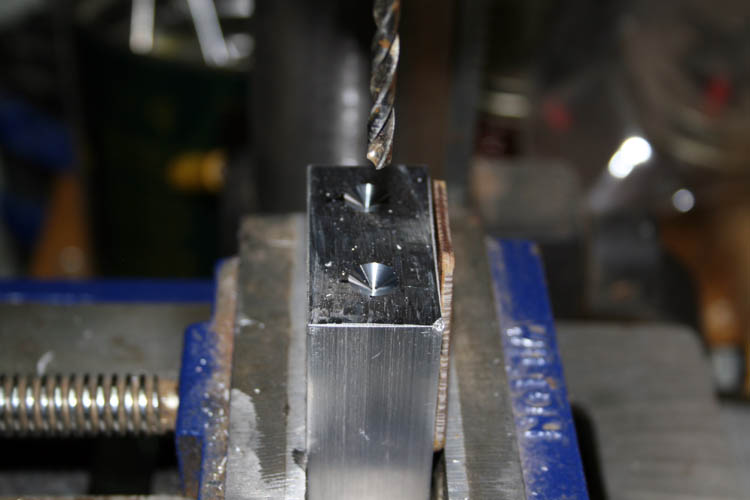
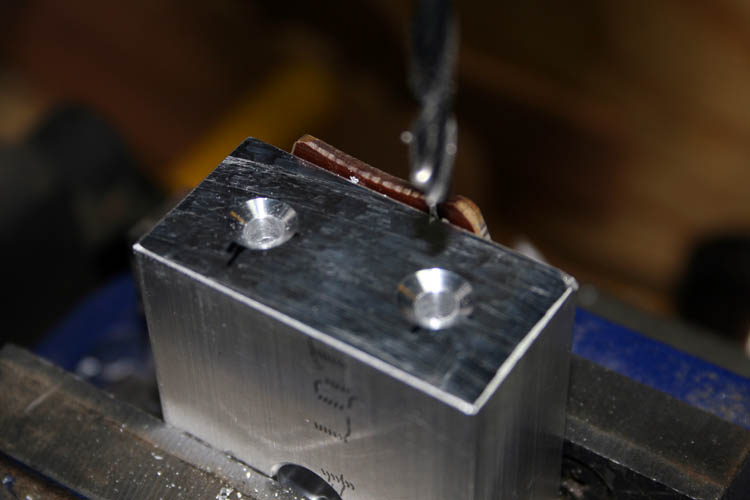
After the 120 degree countersink, I then bored the holes to 21/64 inches
without having to re-adjust the drill press table height:
A coat of black paint and ready to install the couplings/flanges.


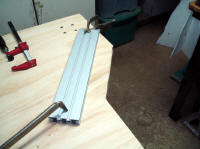
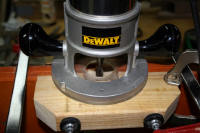
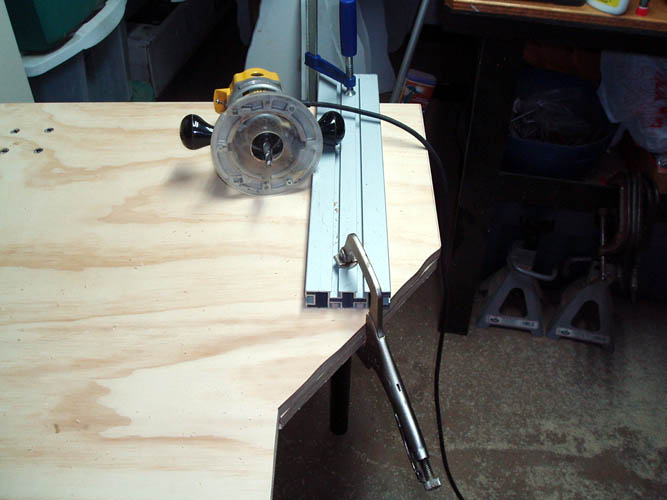
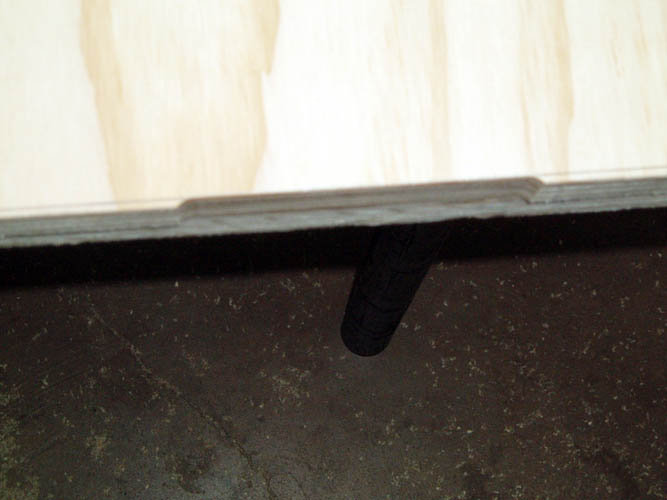
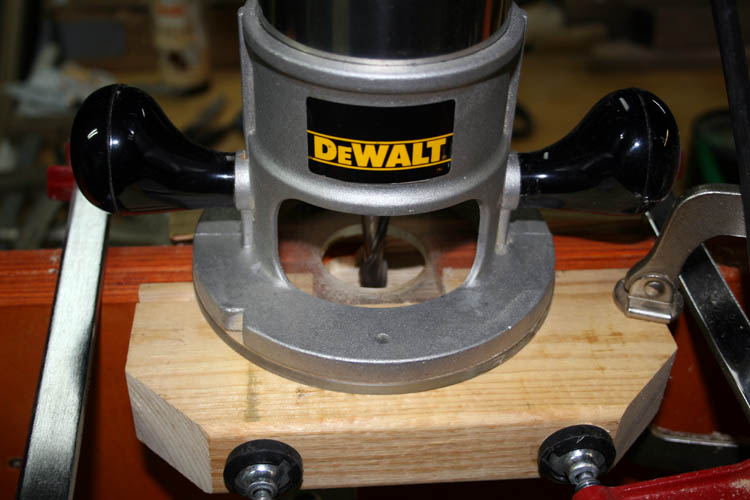
The glue was allowed to dry overnight and the following morning, I used a
DeWalt 1.5 HP router and a 1/2 inch diameter 2 inch length fluted carbide
bit to clean the edges of the two pieces of plywood that were glued together.
I used an aluminum straight edge to guide the edge of the router base
against to maintain a straight line cut. The guide was 2.75 inches
from the edge of the wood which was the necessary width for my router base
to the edge of the router bit. Pixs below:

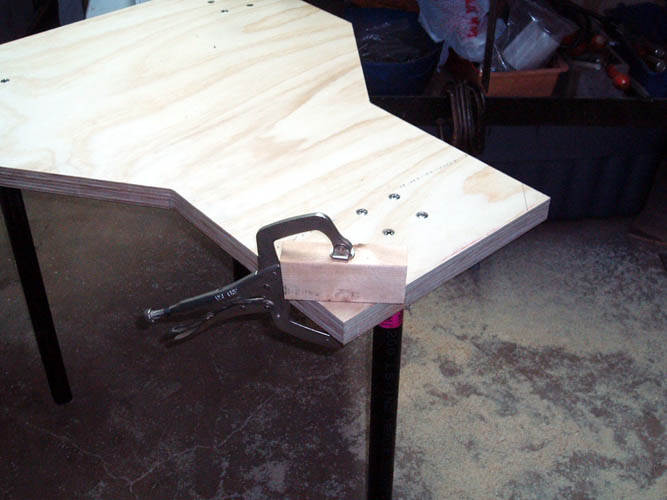
After cleaning up the edges of the plywood with the router, I used a block
of wood and a small Stanley hand finish trim saw to cut a forty-five (45) degree angle off each
bench top corner to have it a little more ergonomically designed.
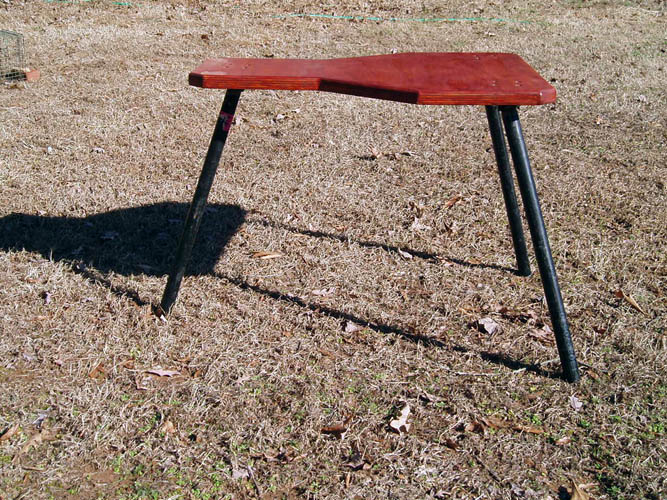
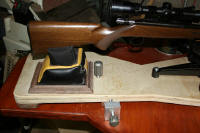
Below pix of the bench with the floor flanges I used instead of the couplings of which I
went back later and changed out to the couplings welded to the flat plate at
an 18 degree angle to maximize the stability. This
bench is solid as a rock:
I rounded over the top edge of the shooting bench using a 1/2 inch radius
two flute carbide router bit which had a ball bearing on the base to follow the
edge of the wood. I didn't route the bottom of the bench top but used
an orbital sander to round over and break the sharp edge. I was amazed
that the sheet of plywood didn't have any void or hollow places around the
edge of the plywood which is the norm rather than the abnormal as such as in
the case.
Below pixs of the portable shooting bench with a coat of
Cabot;
product Australian
Timber Oil in a Mahogany Flame color # 3459.

The underside of the plywood looks like
Rosie the Riveter from WWII factories worked on this piece of plywood
with screws instead of rivets.........grin if you must!; pixs below:
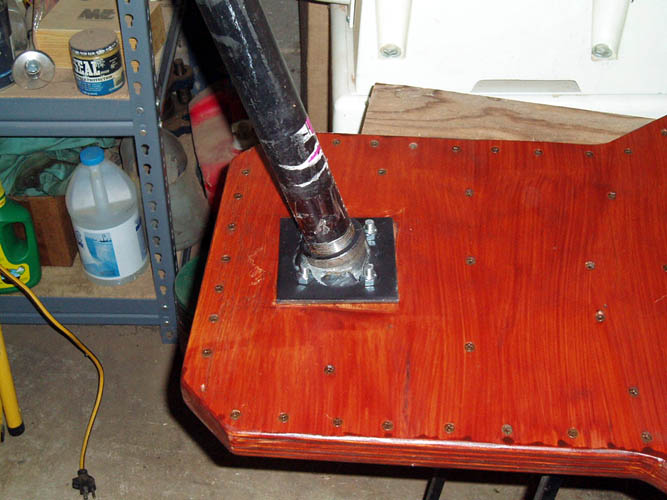
NOTE: I used floor flanges for the leg supports originally
and angled them away from the center of the bench with spacers but this is
not the best way to do it. Using the 18 degree angled welded couplings
is the correct way to do it and provides more stability. I had to rotate the coupling flange to align with
the holes in the bench that I had drilled earlier and then marked and
drilled the holes in this set of coupling flanges which is the hard way to
do it. It is best to do it right the first time. To quote Fred
Bear from one of his Archery Books, "Anything worth doing, is worth
doing right" and my
Grandma Coley used the same phrase back in
the 1930s when teaching her daughters to make dresses per my Aunt Mollie
Coley Bowers.
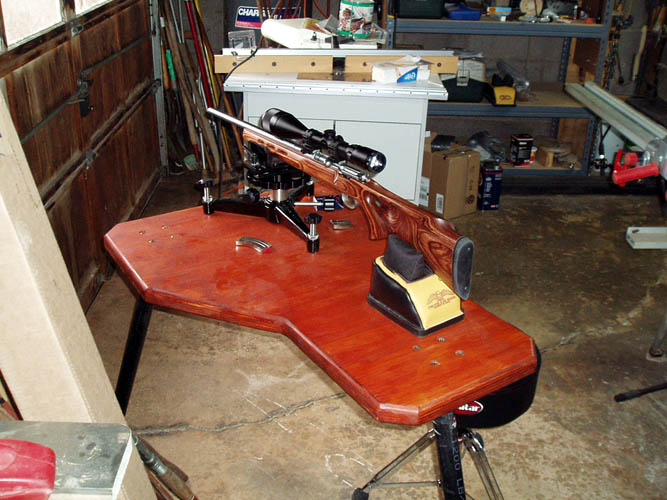
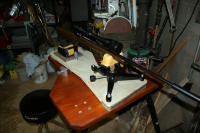
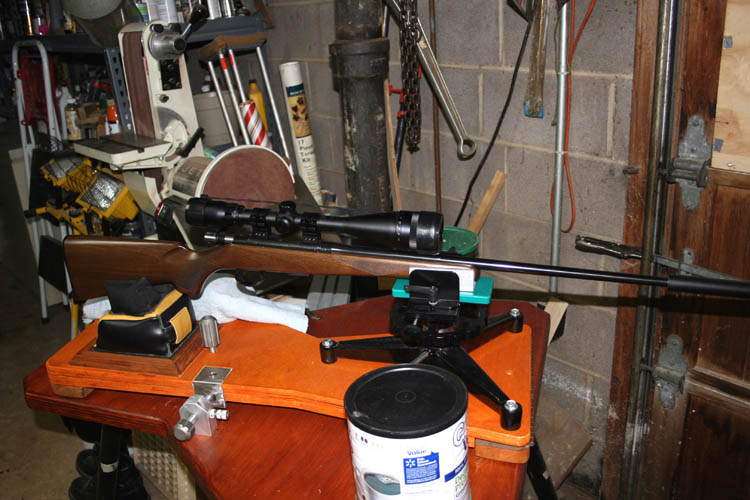
This is a very stable and steady portable shooting bench with plenty of real estate on the top for a
right hand or left hand shooter. You can transport this shooting bench
in the trunk of a car or SUV if desired; all you need to do is unscrew the legs. The total cost of this portable
shooting bench was in the neighborhood of $ 75.00 if you can do the cutting
and welding of the coupling/flange yourself and will cost more depending if you have to
"farm out" the welding. You cannot purchase a portable
shooting bench this stable for that amount of money either and will spend
upwards of $ 600.00 to get a
portable shooting bench this steady
commercially. I used stainless steel bolts and that was an additional
15 bucks for sure. The beauty part of a tri-pod shooting bench is the
self-leveling aspect of the design and the rear leg doesn't inhibit you from
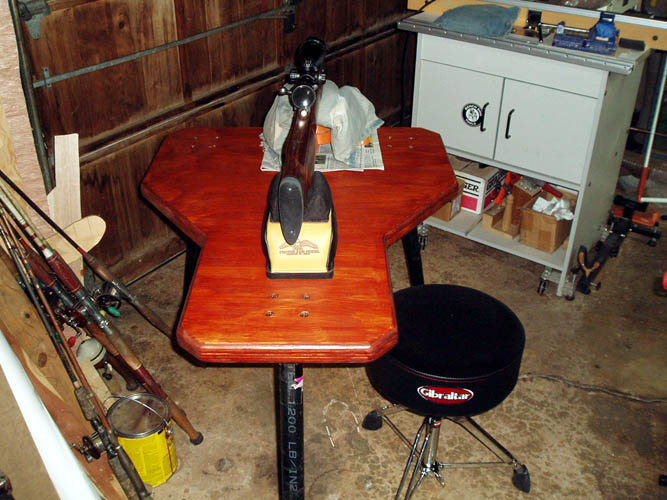
acquiring a comfortable shooting position. I have a
Gibraltar softy throne adjustable stool on order to go with the above
portable shooting bench. I looked at the five leg
Sinclair adjustable stool but didn't like the large platform of the legs
which might take some getting use to and a transportation issue since it
definitely isn't compact. Both adjustable shooting stools had very
good reviews and "six of one and half a dozen of
another."
I will plug or cap the pipe open ends to prevent the legs from sinking
down into loose dirt, sand, etc. I will probably cut a matching
18 degree angle on each leg so the legs perimeter will maintain 100 percent contact
with the floor/ground.
My Number One Brother-in-Law, Douglas Pettigrew of Reidsville, NC liked
the looks of this portable shooting bench and the next time I am at Lowe's
in Rockingham, NC, I will purchased the pipe, etc. and start
building one for him.
My Gibraltar softy throne adjustable stool came in and expecting my
Sinclair rest to arrive on Tuesday and it will be time to do some more
testing with the rimfire.
Web published on 01-10-14 by Bill aka Mickey Porter with updated pixs on
01-19-14.
My
Sinclair Heavy Varmint AP Windage Rest
Left-Hand # 749-013-852WS came in on 01-21-14, however the oversized
scalloped hand wheel and thrust bearing plate which controls the fine elevation adjustment were
missing, rendering the rest practically unusable. I called Sinclair and
they will ship the missing parts out. Below pix of what I received:
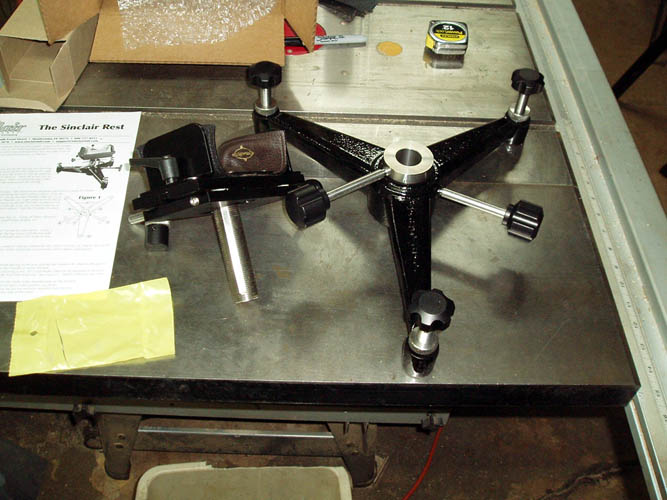
The little
Hoppe's gun rest I have used for decades
looks like a toy compared to this rest.
Web published update on 01-22-14 by Bill aka Mickey Porter.
DOUGLAS PETTIGREW'S PORTABLE SHOOTING BENCH
Douglas Pettigrew my Number One Brother-in-Law that I call Brother Doug,
liked the above portable shooting bench and decided to make him one for his
birthday but couldn't get the plywood locally and finally started the
project since I had some plywood left over from a couple sheets of exterior
that was used for our yard parties. I cut it into smaller sections for
storage under my table saw out feed table and had just about enough plywood
left over from the portable shooting bench that I made for myself.
Below is a pix of his portable shooting bench while in the white:
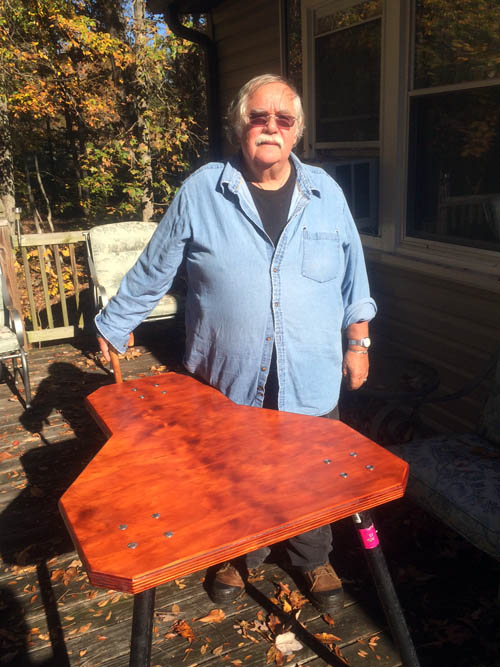
After some sanding, I applied a coat of walnut stain and finished with
Minwax Indoor/Outdoor Helmsman Spar Urethane Clear Satin over a coat of Spar Varnish, using left over finishing
materials I had on hand in the shop.......grin if you must! Below is a
pix of Doug with his early Christmas gift on his deck in Reidsville, NC.
Doug, SusieQ, my bride and I loaded up in SusieQ's vehicle and went to
Danville, VA for lunch of which we had a
wonderful meal and some great
fellowship:
Doug has a shooting lane at the end of his deck out into the woods and will use
his portable
shooting bench for hunting and target shooting.
Web published updates by Bill aka Mickey Porter on 10-31-14.
LOW TECH POABOY ONE PIECE SHOOTING REST 02-02-16
Several days ago, my rimfire shooting friend Robert Webster of Hamlet, NC
was doing an analysis of some of his rimfire targets fired and noticed that
his targets on the left side of the
PSL target, his groups were to the left
of center. The targets fired to the right of center, the groups were
to the right and the light bulb came on for him. We both have been
discussing the possibility of making a home made one piece shooting rest
utilizing what materials we have on hand and not trying to reinvent the
wheel.
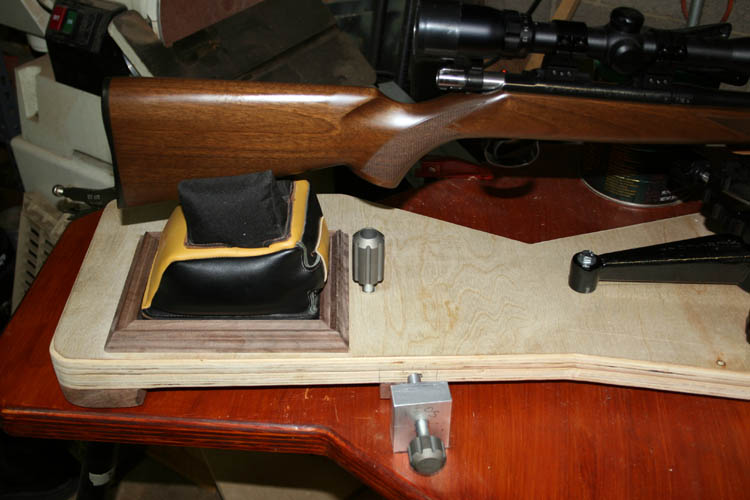
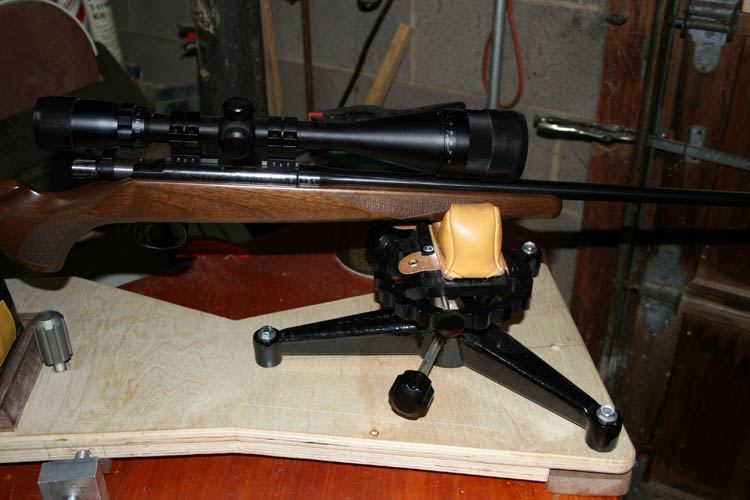
Below is my version off his
Gun Turret Model aka
POABOY one piece shooting rest under construction:
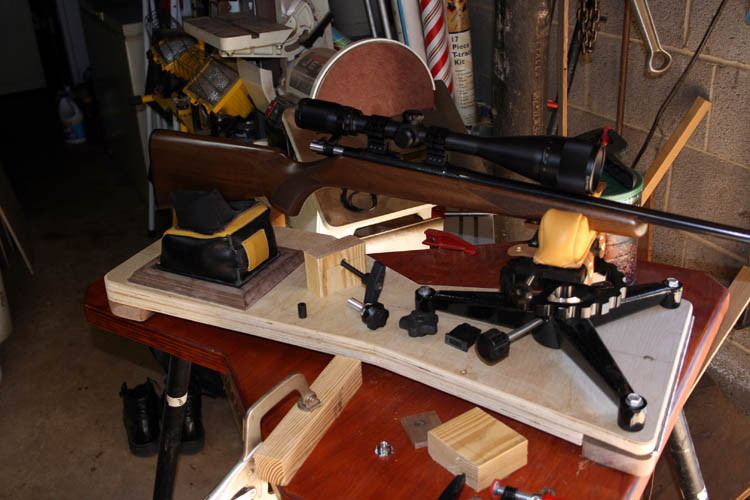
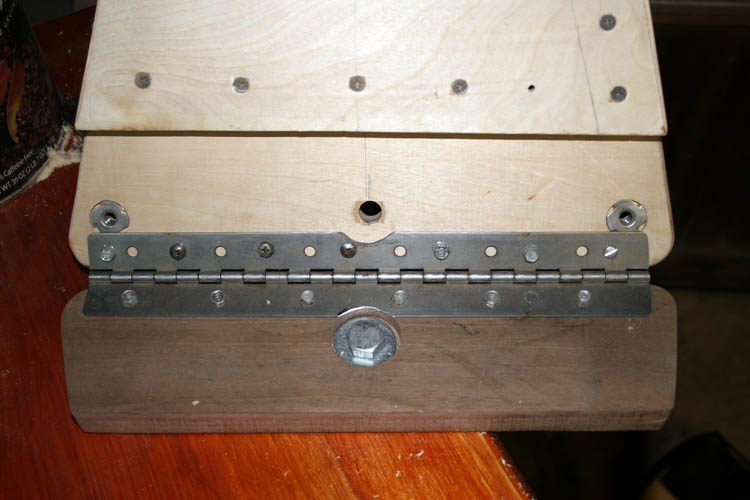
I installed a heavy duty steel piano type hinge on the front of the rest to allow
for fine tune elevation and also there is a 1/2 inch diameter smooth bolt
through the hinged walnut that allows for the entire one piece rest to rotate for
windage. I haven't installed the fine tune adjusters for the windage
and elevation yet due to awaiting on some aluminum bar stock and a 1/2 inch
x 20 tpi threaded rod to arrive. The Sinclair rest has both those features incorporated
into it but will only have the front bag aligned to the center of the base
and rear bag and use the coarse vertical adjustment only to level and center the rifle
on the target backstop. There will be a
spring installed underneath the base of the one piece rest pulling tension
against the right side fine tune windage adjuster since I shoot left handed.
The spring will be easier to install versus fabricating a custom spring loaded plunger. There will be an elevation screw adjuster for fine tune elevation adjustment
located in front of the rear sand bag on the center line of the rest.
Both adjusters will be operated with my right hand and will not require much
movement. I am using Bakelite material underneath the front and rear
of the rest to reduce friction and will locate a small thin thrust bearing.
This one piece shooting rest should remove some of the shooting error
caused by the improper alignment of the rear bag in relationship to the
front bag since it is very easy to torque either one which can cause flyers
other than faulty ammo and other variables too many to list.
To reiterate, I have a piece of stainless steel threaded rod 1/2 x 20 tpi coming and
also some 1 x 2 inch T6 6061 aluminum bar stock to fabricate the fine tune windage
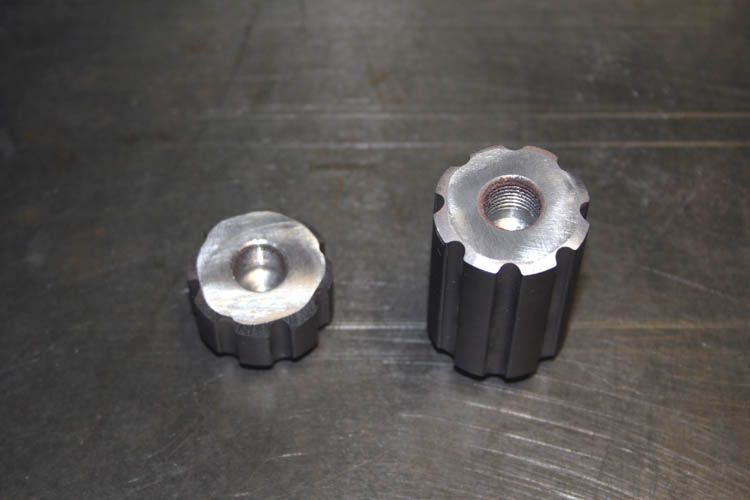
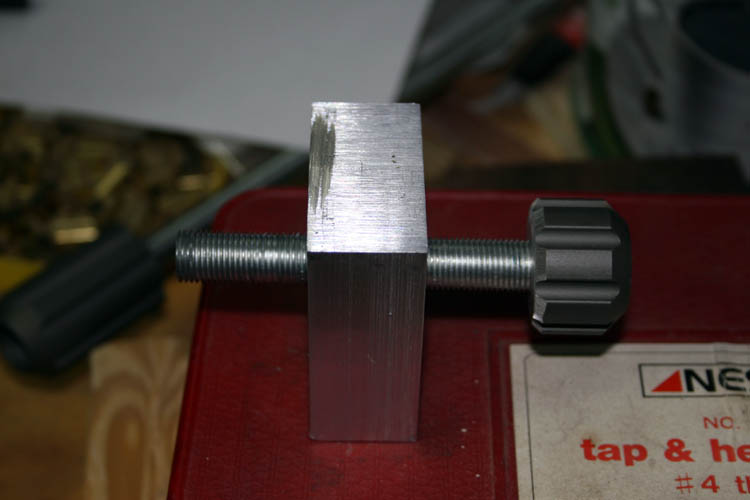
adjuster and the elevation fine tune adjuster. I modified an ole
aluminum archery stabilizer rod not used anymore by sawing the weighted section into two
pieces and drill and tapped it for the 1/2 x 20 tpi stainless steel
rod which will work for the adjuster knobs. Using a
Portable Band Saw leaves a lot to be
desired trying to make a square and plumb cut;
recycle is the word for today! I sold my small South
Bend 3 ft. bed lathe a good many years ago and it would
definitely come in handy now.
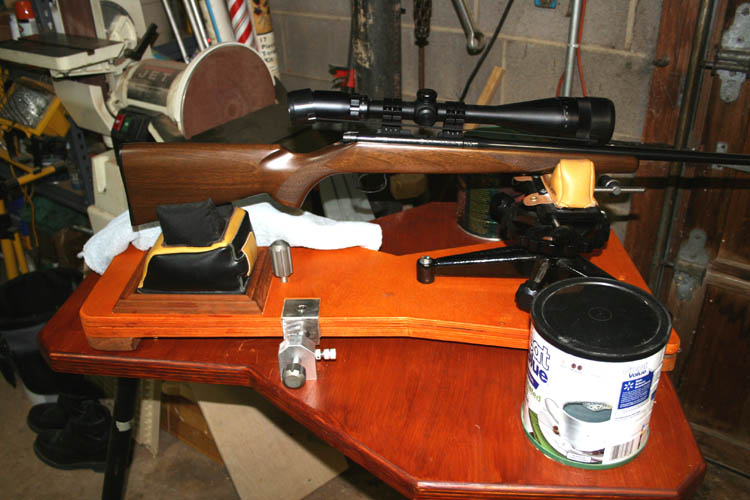
This shooting rest will basically remain where it is presently located
but you can move it depending on whether you have any Gorilla DNA or have
eaten your Wheaties on a regular basis. The Sinclair rest is easily removed from
the one piece base by removing three hex head bolts that are screwed into Tee Nuts
mounted underneath the plywood base plate. The rear sand bag is not
permanently attached to
the base but only "hemmed" in by the walnut molding frame.
The fine
tune elevation adjuster would still work but the fine tune windage adjuster
utilizes the portable shooting bench for its operation in conjunction with
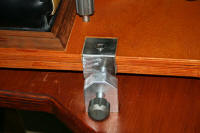
the spring. The entire one piece rest base plate is secured to the
portable shooting bench with a 1/2 inch diameter bolt used as the pivot point.
I might later install a bronze sleeve bushing but I doubt the rest will ever
wear enough to present a problem.
I will post additional pixs when I get the fine tuner adjusters
fabricated and installed and hope to catch the wind calm enough to do some
testing with the
CZ 452 American left-hand rifle.
Web published update by Bill aka Mickey Porter on 02-02-16.
THE LARGEST 1/2 INCH DIAMETER THREADED ROD I HAVE EVER
SEEN
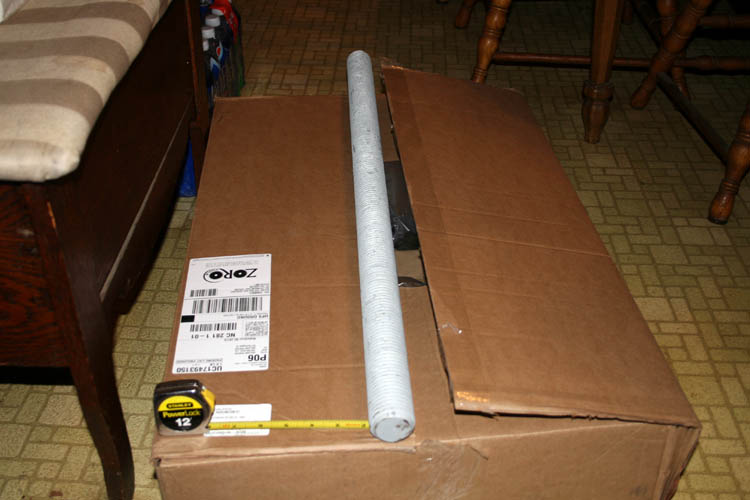
UPS delivered the threaded rod I recently ordered from
Zoro on line
(EBay) and
noticed that the UPS driver Phillip had the package on his shoulder as if it
were heavy. One end of the threaded rod was protruding from the
cardboard shipping box and that threaded rod was large enough in diameter to support
the base of the Eiffel Tower. We both got a big grin going when I told
him I had ordered a 1/2 inch diameter threaded rod. The person that
picked and packed that item must be on the Blue Cross Blue Shield of NC State Eye Plan for sure or
missed their recent eye exam appointment. Below a couple pix
of the threaded rod with my tape measure for size comparison:

I called Zoro and advised them they shipped a 2 inch diameter threaded
rod instead of a 1/2 inch diameter threaded rod and they did not show
another 1/2-20 x 36 inch length stainless steel threaded rod in their inventory and requested a refund. The packing list showed the right part number of
which the weight was 1.592 lbs. I am supposed to get a return
authorization via email to have UPS pick up the humongous size threaded rod
for return.
I will have to go to plan B and locate another 1/2 threaded stainless
steel rod or locate a regular UNF threaded bolt to make do until a stainless
one is located.
There is always some excitement to be had with some of the projects I
find myself into....grin if you must!
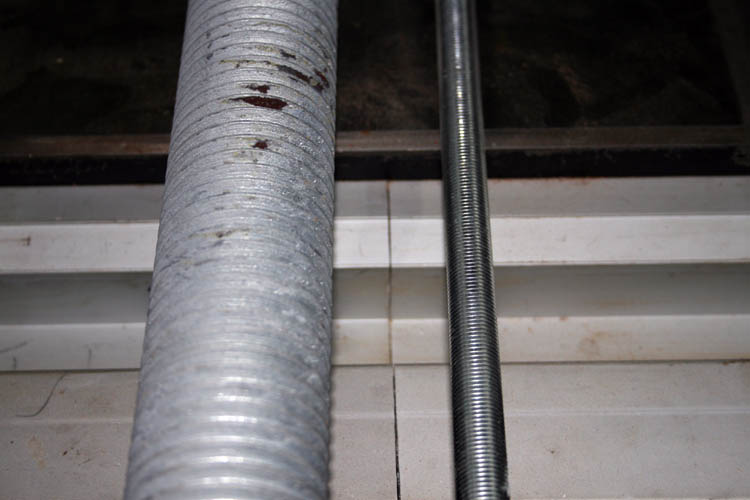
On 02-04-16, my friend Robert Webster of Hamlet, NC found a piece of 1/2
- 20 x 3 feet length of threaded regular steel rod at the Hamlet Hardware
Inc. and below a couple pix of the size comparison between the 2 inch rod
versus the 1/2 inch diameter rod. I have the recycled/fabricated knobs
on the ends of the 1/2 inch threaded rod.

I am still grinning about the rod Zoro shipped. BTW, I weighed it
on a scale and it was about 23 pounds in weight........another grin is in
order.
The aluminum alloy T6 6061 1 x 2 inch x 12 inch length bar stock came in
this afternoon and got a chance to fabricate the fine tune adjusters for the
windage and the elevation. I have to locate a piece of stainless steel
angle to place a pad in front of the windage adjustment screw and also
obtain a heavier return spring to keep tension on the windage adjuster.
Click on below thumbnail pixs taken for a larger screen view:


A spring will be purchased tomorrow and/or swap the ones I have that came
from Tractor Supply since they are not strong enough. The rest will
get a good test early tomorrow if the weather permits.
Robert Webster offered some regular angle for the windage adjuster
pressure pad but I told him I wanted to use stainless steel instead. He
said that I was more hard headed than himself and his Grand Daddy use to
say, "Save your breath to cool your grits"........that
is a classic for sure!
I plan to apply a coat of maple stain to the plywood top and brush a
clear coat of polyurethane over the stain around Spring when the weather is
warm and less humid.
A special thank you to my shooting buddy Robert Webster for planting the
seed for the one piece shooting rest and who knows what the next project
will be!
Web published update by Bill aka Mickey Porter on 02-04-16.
ADDING BRONZE BUSHING AND WINDAGE PRESSURE PAD
It has been far too windy to seriously test the one piece shooting rest
out for accuracy and did fire some rounds off to get some trigger time in
and not a valid test due to the conditions.
I am still waiting on one of my friends to get me a piece of 2 inch
stainless steel angle x 2 inches in length x .125 inches in thickness for
the windage pressure pad and decided to install a bronze bushing in the rest
and also the table to reduce friction. I plan to locate a
pressure sensitive Teflon pad to install under the front of the rest where
it hinges to help reduce friction in that area. The rear of the
shooting rest will be slightly elevated off the shooting bench using the
fine tune vertical adjuster which has a hard slick phenolic pad underneath
the elevation screw contact area and will reduce friction without inhibiting
overall stability.
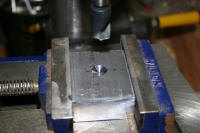
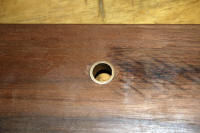
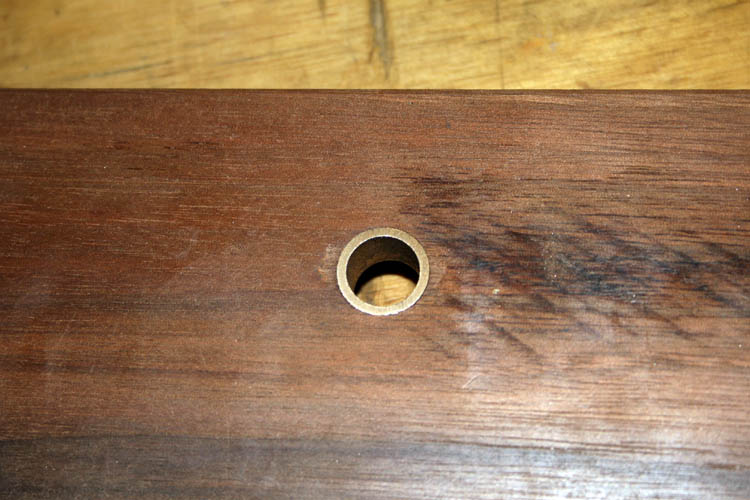
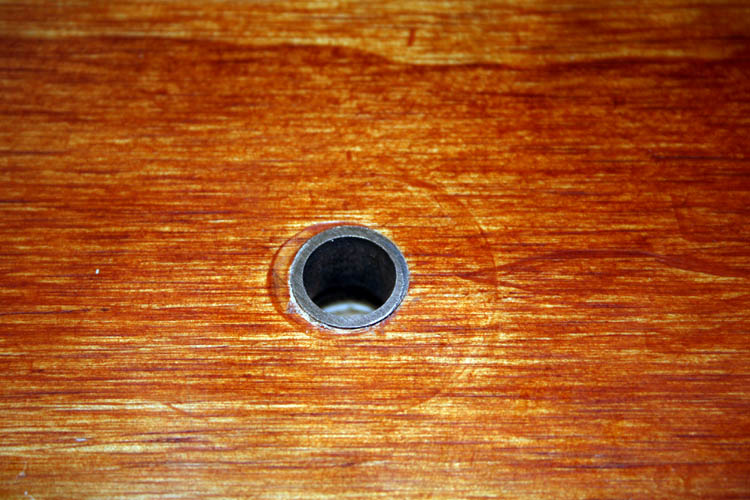
I removed the hinged walnut from the one piece rest base whereby I could
utilize the drill press to enlarge the .500 inch diameter hole to .625
inches for the bronze bushing. I used a 1/2 inch piece of
poplar wood dowel rod to align the 1/2 inch hole drilled with the drill
press and clamped the drill press vise down when it was centered with the
drill chuck. I removed the 1/2 inch dowel and inserted a 5/8 inch
diameter forstner drill bit and drilled the existing 1/2 inch diameter hole.
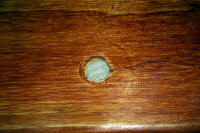
The bronze bushing was just a little over .625 inches in diameter and was a
good press fit in the 5/8 inch diameter hole drilled.
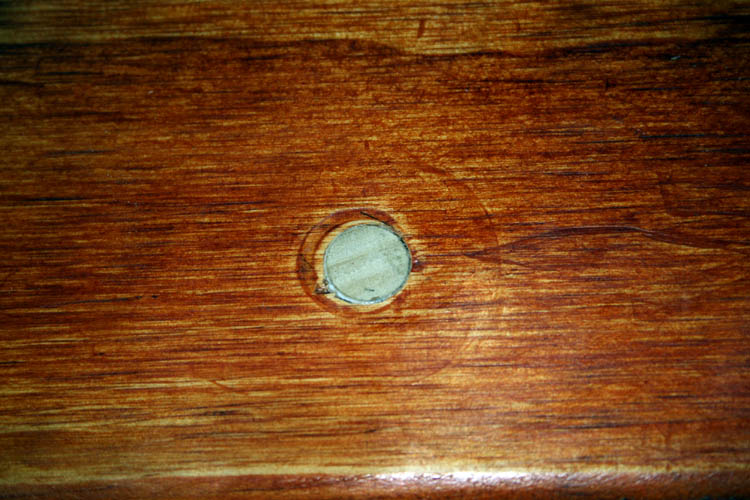
I did not do a complete sequence pixs of what I did but below are a few
thumbnails of the bushing installed in the one piece shooting rest and also
the portable shooting bench.

I used the Dremel tool and a small cut-off friction wheel to cut the
bronze bushing to length and ground it to the proper final length using a 1
inch x 42 inch bench mounted belt sander with an aluminum oxide 220 grit belt.
This bushing length was not that critical and a few thousands < minus total
length was what I opted for. My ole small South Bend lathe would have
been ideal for cutting the bushing to length. The owner of the lathe
is not using it and he said he would sell it back to me and might take him
up on the offer.
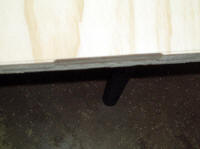
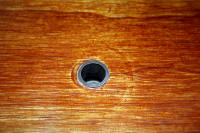
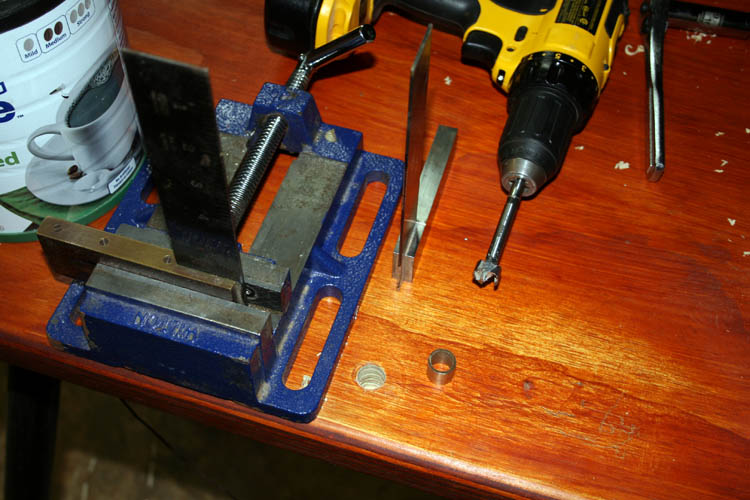
I glued a 1/2 inch diameter poplar wood dowel rod into the existing 1/2
inch diameter hole in the portable shooting bench to allow the 5/8 inch
diameter forstner drill bit tip to have something to center with. I
used a couple small right angle squares to get a visual aid to help keep the
hand held portable drill aligned.
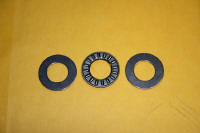
I will probably add a small low profile thrust bearing between the one piece
shooting rest and portable shooting bench at the pivot point which should
reduce friction there since the Sinclair rest is at least 17 pounds in
weight. I could have made a wood Tee support for the forward rest but
used what I already had in the way of a front rest.....a high dollar front rest to
not use the fine tune adjusters on it....grin if you must!
One of my friends should have the stainless steel 2 inch angle for me
tomorrow and will install the pressure pad adjacent the fine tune windage
screw adjustment. 02-07-16.
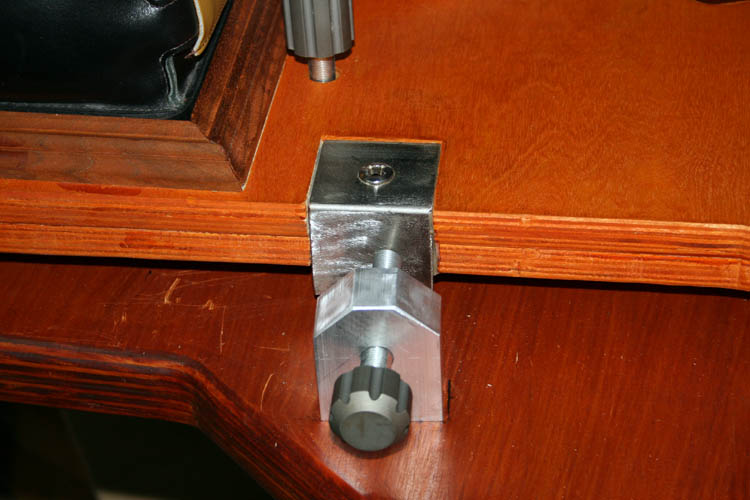
NOTE: I installed the stainless steel pressure pad on
02-09-16. I wasn't thinking ahead since I had to route the top of the
platform to
depth to fit the 1/4 inch thick stainless steel angle bracket of which I
asked for .125 inch thickness but "beggars" can't be too choosy. All
my routers had too large a foot print on the base to get the left hand
portion of the bracket routed out because of the walnut home made molding
already glued in place.....put the cart before
the horse on that one! I used a chisel to get about 1/3
of the wood portion cut out not accessible by the router.
LOW TECH POABOY ONE PIECE SHOOTING REST ABOUT READY TO
FIELD TEST
My next iteration of this low tech poaboy one piece shooting rest (if there
is a need) will probably be in T6 6061 aluminum flat bar
stock; totally portable
and independent of my portable shooting bench.
Web published update by Bill aka Mickey Porter on 02-14-16.
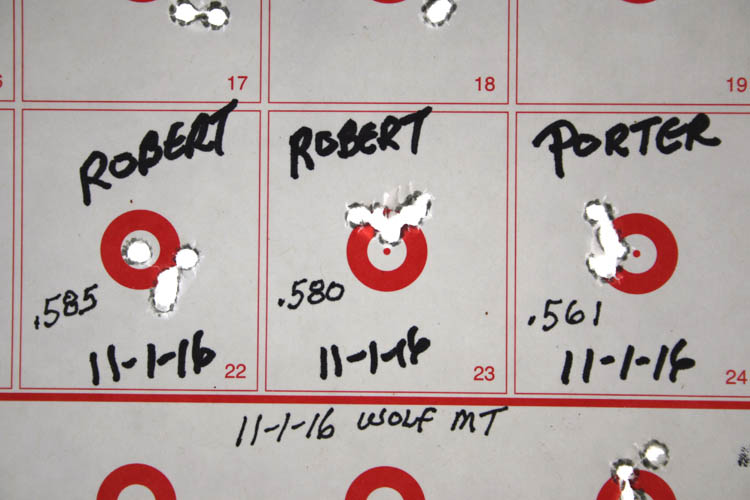
The above groups at 52 yards and will take a squirrel out all day long!
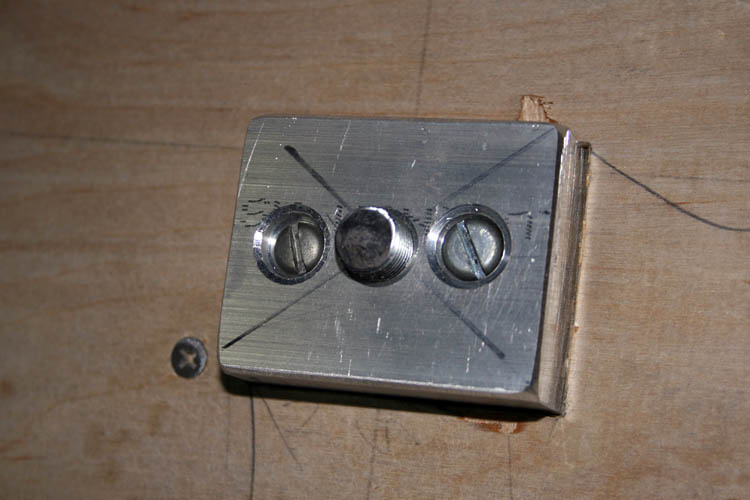
FINE TUNE WINDAGE ADJUSTER MODIFICATION
I wanted to take out some of the slack (movement) in the threaded bolt
windage fine tuner adjuster and drill and tapped a hole for a 5/16-24 tpi
spring loaded
plunger button that was used on my archery equipment back in
the mid 1980s. The plunger button came with several different
thickness springs and used the heaviest one which worked out perfect!
The plunger has a Delrin type replaceable tip and the plunger housing also has an
adjustment weight set screw that increases the tension on the inner shaft
(plunger) if
needed. I also repositioned the main body of the adjuster where the
1/2 inch threaded rod will contact
the center of the stainless steel pressure pad strictly for eye appeal.
Since there is an arch to the movement of the one piece shooting rest when
adjusting windage, the threaded rod contact at the pressure pad will move
in a slight East to West direction depending on which way you rotate the one
piece shooting rest. A steel split nut installed inside the aluminum
block for the stainless steel threaded rod to move through would work just
as well requiring a pressure set-screw to tighten the split
nut for any slack present:......six of one and half a dozen of another!
NOTE: The above fine tune windage adjuster has at least five
(5) times the windage adjustment needed for target shooting like the
PSL
and
ARA targets at 50 yards and with the extra
windage movement available, allows for a wide angle coverage of one of my
favorite squirrel hunting locations. This fine tune windage adjuster has two
(2) recycled archery components; Berger style plunger button and PSE stabilizer rod
weight. There just might be a little bit of an
overkill on the fine tune windage adjuster but that is
my nature. This has been a very fun and laid back project.
I am waiting on the weather conditions to get better before I start
burning up some ammo with the
CZ 452 American left hand rimfire rifle.
Web published update by Bill aka Mickey Porter on 02-14-16.
WEATHER CONDITIONS VERY WINDY AND VARIABLE
I can't seem to catch a good day yet to do some serious test firing but
fired a few rounds in the wind and just getting some trigger time in only.
I added a Sinclair
forend benchrest adapter to the stock of the CZ 452 American and
took the sand bag off the Sinclair rest windage top and it works pretty good.
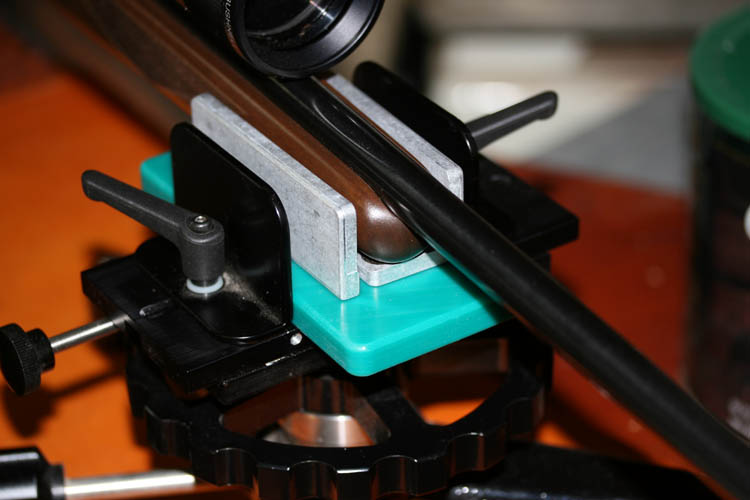
You loose some "man points" on
the pretty aqua blue color base though. The adapter is very easy to
set-up requiring only one screw supplied that fits like a glove in the
existing stock sling stud hole. The UHMW base material is
"slippery as an eel" and rides
effortless on the rest platform.
Web published update by Bill aka Mickey Porter on 02-18-16.
HARVESTING SQUIRRELS
When our annual squirrel season rolled around, I removed the Sinclair
forend benchrest adapter and went back to the leather and sand bag front
rest support. I disconnected the heavy spring return at the rear of
the benchrest where I can quickly move from right to left without having to
use the fine tune windage adjuster. When target shooting only, I
connect the spring back up. Seems like I keep changing things up, but
this set-up will no doubt remain the same for a while.....grin if you must.
Check out my
squirrel skinning 101 and
rabbit skinning 101 pages.
Web page updated by Bill aka Mickey Porter on 02-06-18.
LEAVING ON A
SPIRITUAL NOTE
If you do not know Jesus Christ as your Lord and Savior, please take
this moment to accept him by Faith into your Life, whereby Salvation
will be attained.
Ephesians 2:8 - 2:9 8 For by grace are ye saved through
faith; and that not of yourselves: [it is] the gift of God: 9 Not of
works, lest any man should boast.
Hebrews 11:1 “Now faith is the substance of things hoped for,
the evidence of things not seen.”
Romans 10:17 “So then faith cometh by hearing, and hearing by
the word of God.”
Open this
link about faith in the King James
Bible.
Romans 10:9 “That if thou shalt confess with thy mouth the
Lord Jesus, and shalt believe in thine heart that God hath raised him
from the dead, thou shalt be saved.”
Open this
link of Bible Verses About Salvation,
King James Version Bible (KJV).
Hebrews 4:12 “For the word of God is quick, and powerful, and
sharper than any two edged sword, piercing even to the dividing asunder
of soul and spirit, and of the joints and marrow, and is a discerner of
the thoughts and intents of the heart.”
Romans 6:23 “For the wages of sin is death; but the gift of
God is eternal life through Jesus Christ our Lord.”
Romans 3:23 “For all have sinned, and come short of the glory
of God;”
Micah 6:8 “He hath shewed thee, O man, what is good; and what
doth the LORD require of thee, but to do justly, and to love mercy, and
to walk humbly with thy God?”
Philippians 4:13 "I can do all things through Christ which
strengtheneth me."


