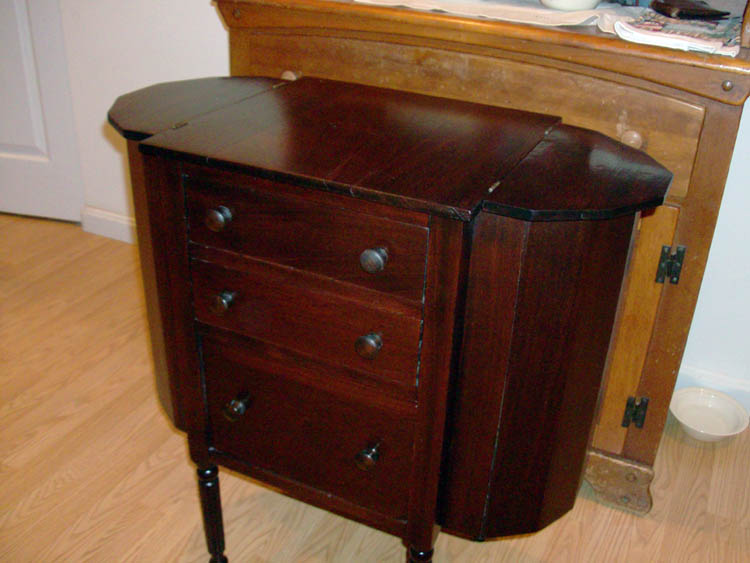
MARTHA WASHINGTON SEWING STAND TABLE
I recently received a call from Ms. Nanny Robinson, who allows me to harvest
Wild Persimmons from a tree in her yard, whereas she has an antique magazine
rack/end table in need of repairs. I told her I would come by
in a few days and take a look at it.
I visited with Ms. Robinson and surveyed the scene on the magazine rack which is made from
Honduras Mahogany.
Someone in
the past, did repairs on it which didn't hold. I told Ms.
Robinson it would take a few days, since there would be several gluing
operations, of which I usually let glue dry overnight and/or 24 hours to fully
cure.
PERSONAL SAFETY AND LIABILITY ISSUES
My goal will be to keep
Safety paramount because hand and power tools can
do serious bodily harm and death if not used properly, therefore these pages
are solely for entertainment purposes only from a personal
liability standpoint. Please read the
Legal Stuff
page for additional information concerning liability issues before going
any further. Safety glasses and hearing protection is a must, although
I do forgo the hearing protection many times; my bad!
RECON AKA RESEARCH
I emailed a friend Ralph Coble, owner of
Lord George Anson Antiques here in
Wadesboro, NC and a picture of the antique magazine rack/end table and he
said it was a
Martha Washington Sewing Stand Table.

Above pix of Ralph Coble in front of Lord George Anson Antiques taken on
04-22-17.
GETTING STARTED
I brought the
table stand home and the entire frame on one side was very
loose with some of the support members pulled apart. The main frame
assembly joinery were
tongue and groove, however most of the mortises were
dado slots the entire length of the member.
They were originally glued in place without any brads or dowels to secure
and lock the wood components together, other than the glue itself. At
the turn of the 18th century and earlier, animal hide glue was the glue of
choice; nothing like the high tech modern adhesives of today; e.g.,
cyanoacrylate (super-glue), epoxy, polyurethane, PVA, etc. I use
Titebond Ultimate III (Aliphatic resins) for applications where moisture might be a problem including
exterior applications.
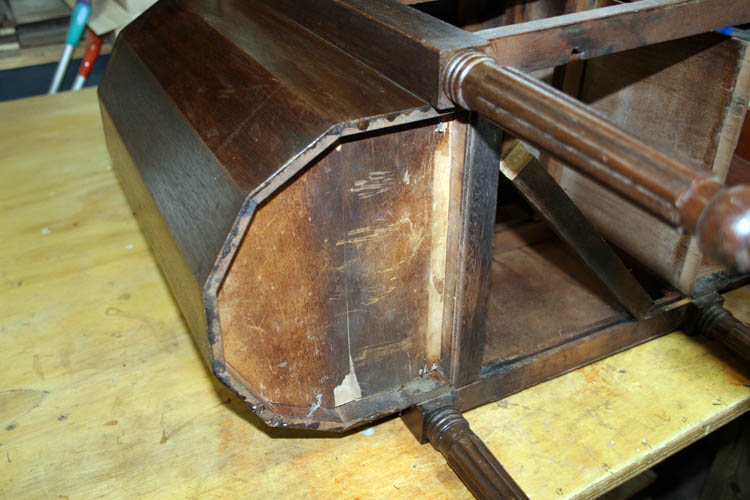
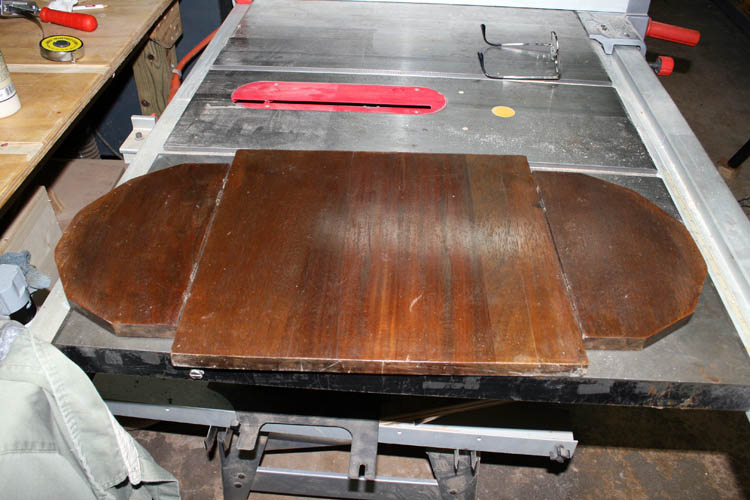
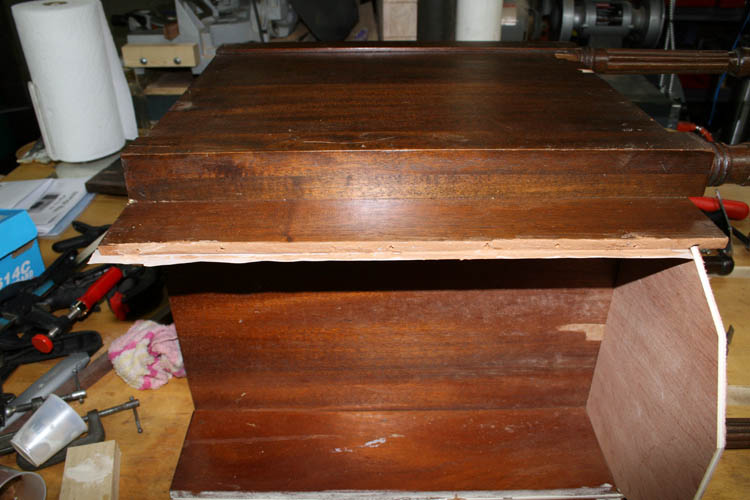
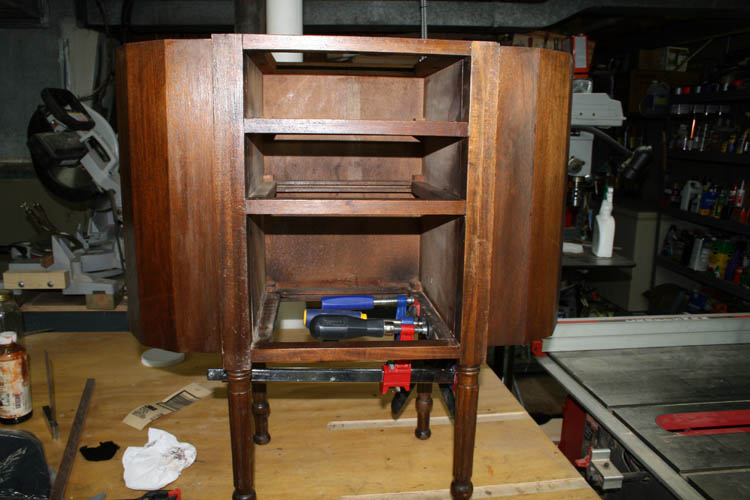
The right hand side of the table stand was
totally separated from the side of the table frame and someone had sanded it down
and tried to glue it back, of which the glue did not hold. The bottom
of the stand table was crudely made and did not fit the grooved slots
either. Also, a couple finish nails were driven into the left side
segmented compartment attempting to keep
the bottom in place.
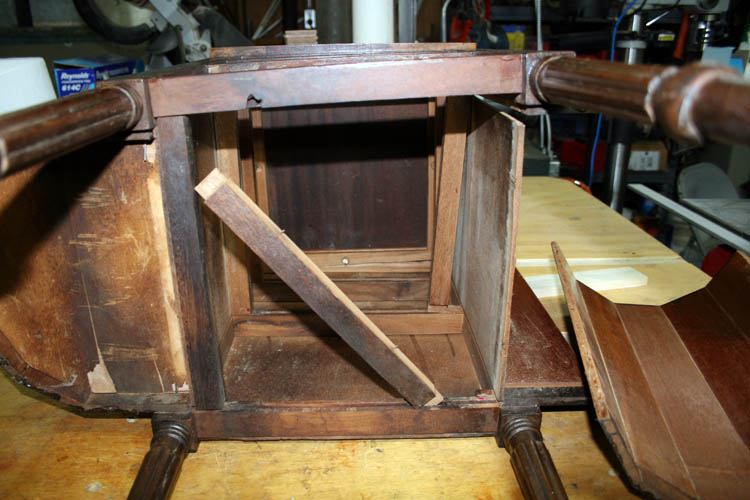
As evidenced by the pixs, the entire right hand side was totally loose
and the only thing holding it together was the top which has four (4)
countersunk flathead screws on the underside connecting the frame to the top.
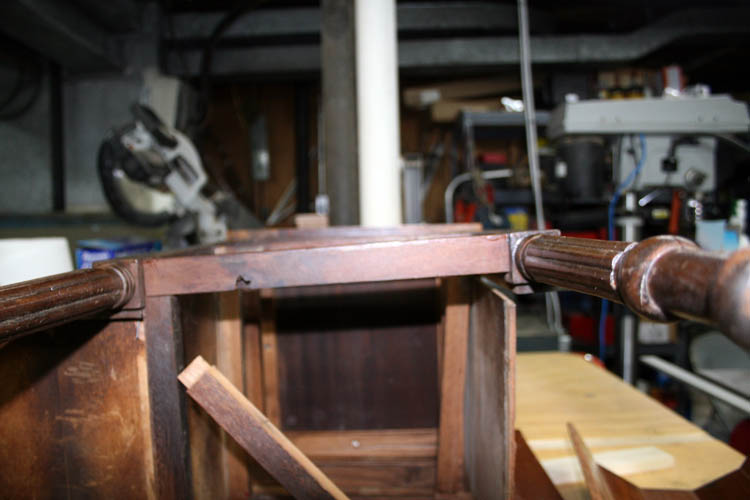
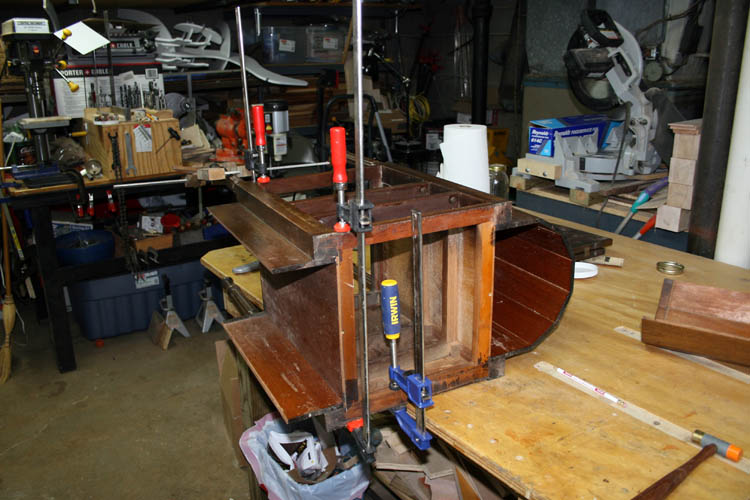
The first objective would be to get the frame back into alignment before
attempting to glue the members together.
The plywood bottom was held in place by a couple finish nails and decided
to add a border around the bottom, since there was no way to place a new
piece of plywood in there without trying to unglue the segmented section from the two side
members.
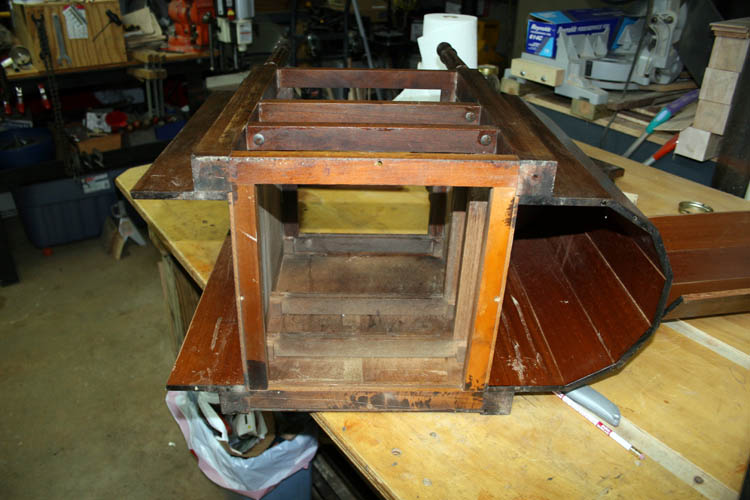
I removed the top and the frame was pulled back together before any glue
was applied, however the segmented section as depicted on the left side in the
pix, would not fit together because someone had removed wood from one of the
members leaving a 3/32 inch gap on the outer perimeter. The inside
joint fitted together much better. There was evidence of glue being applied at
some time not too far back which did not correct the problem. In a
production environment, a jig would be required to properly position and
hold the thirty (30) degree +- segmented pieces tightly together and then the entire
segmented
portion would be later attached to the table.

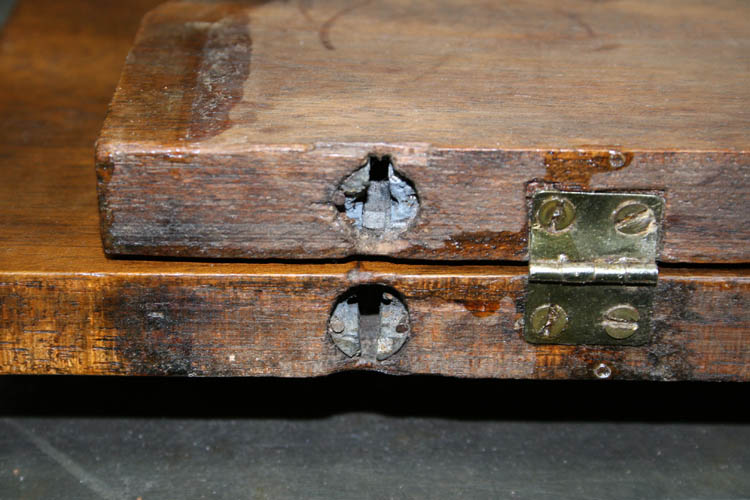
Someone in the past added hinges to the top leaf portion that covered the
segmented vertical storage "bins." I don't know what the original hardware looked like,
but probably a levered
Soss type hinge.
Below pix:
BOTTOM SHELF
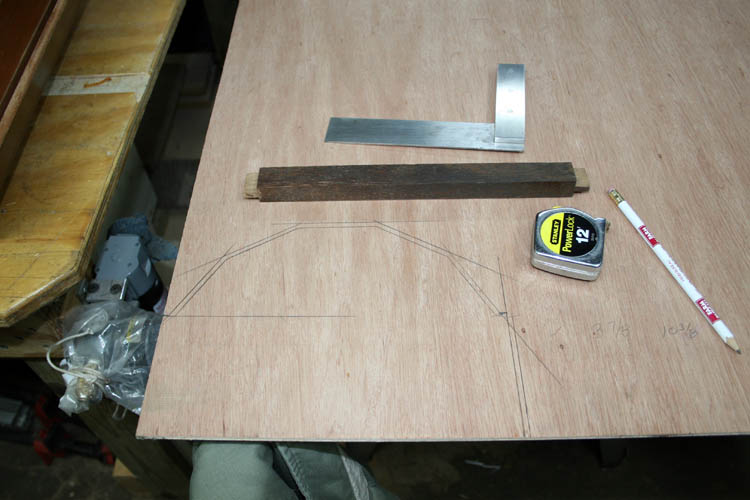
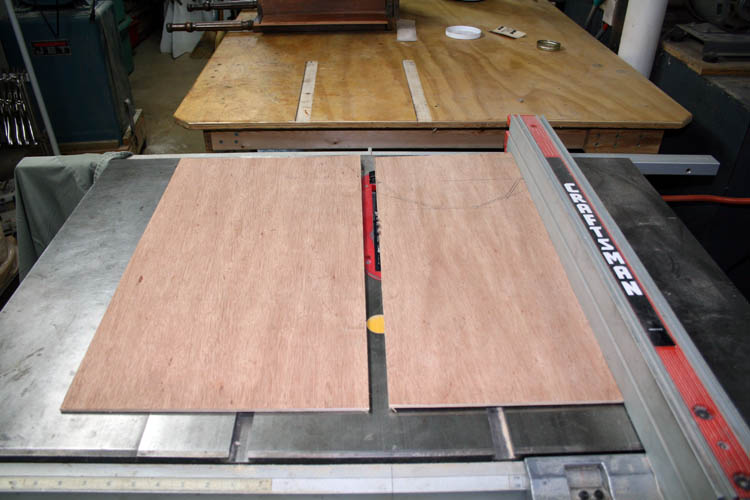
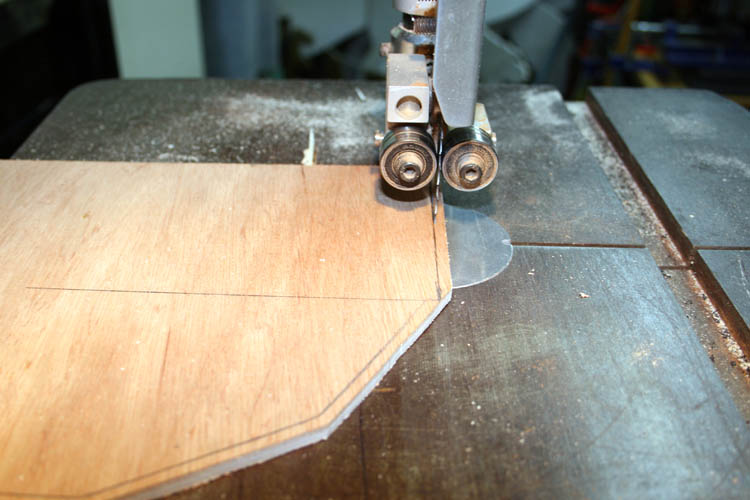
In the pix above, I got the measurements for the bottom of the segmented
section and transferred it to a piece of 3/16 inch plywood. Since the
bottom fits inside of a groove, there was some flexibility in fitting it.
Therefore, I used the table saw and band saw in combination with my 6 x 48
inch belt sanding machine to get a decent fit.
After getting the bottom dry fitted to the segmented vertical section that was
broken from the frame, I started making seven (7) segments for extra
support which were about fourteen (14) degrees at each end.
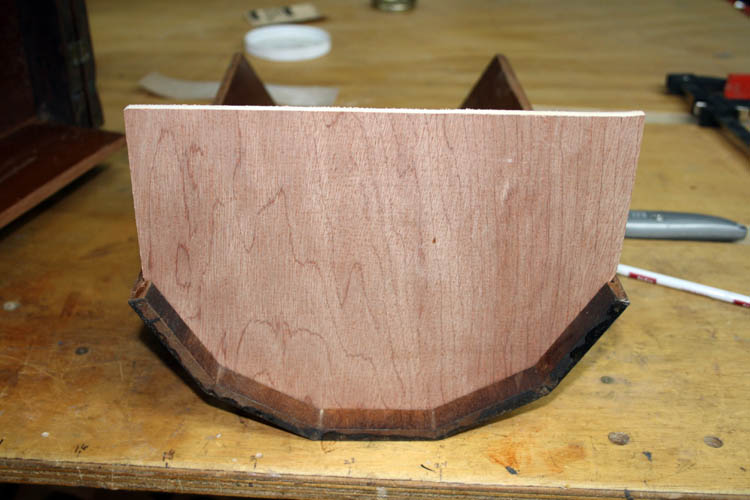
I also made seven (7) segments for the other side plus a member
for the back end of the bottom. I had some scrap black walnut about
the right size and used the miter chop saw to get the correct angle and
length for each piece. Since, this area is on the bottom, I didn't
worry about a musical instrument grade fit, but it was definitely close
enough for government work....grin if you must!
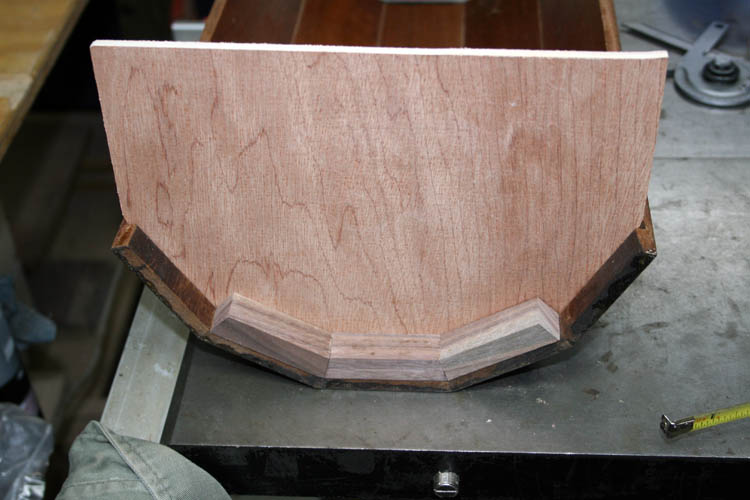
After the bottom was secured, it was time to do the first glue up for the
frame, which included three side members and gluing back together a section
of the top frame that was severely cracked and just about in two pieces.
Since this piece had been prior refinished and a somewhat butchered repair, the
value was diminished as far as an original antique, therefore I didn't have
a problem with adding the lower segmented supports for the plywood bottom.
This job was a repair and not a full blown historic restoration. A
full restoration would cost more than what the antique value would be.
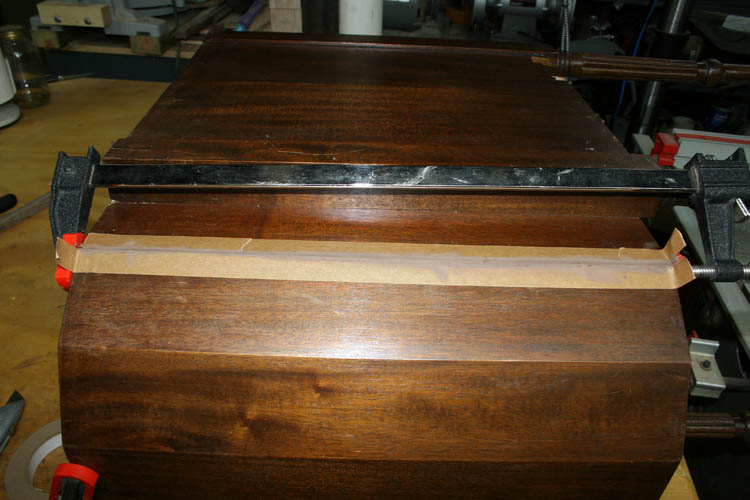
MAIN FRAME GLUE UP
I used Titebond Ultimate III glue and clamps to pull it back together.
FYI, the Titebond glue is actually stronger than the wood itself.
Believe me, I have tested, it that statement is a FACT.
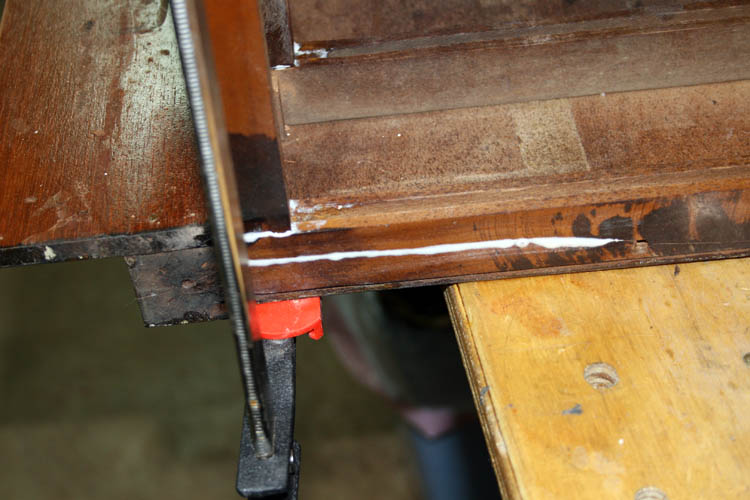
Final clamp added and excess glue wiped off with a damp cloth.
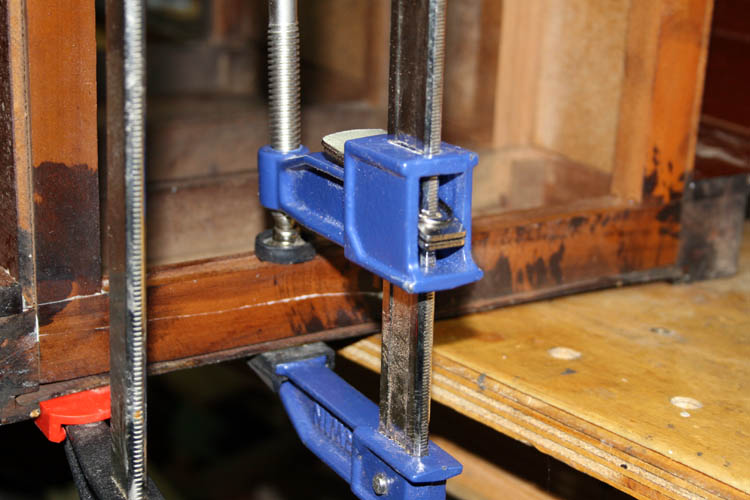
The main frame loose components were placed back into the proper
position, glue applied to both the tongue and groove and clamping pressure
was applied using bar clamps and allowed to cure 24 hours.
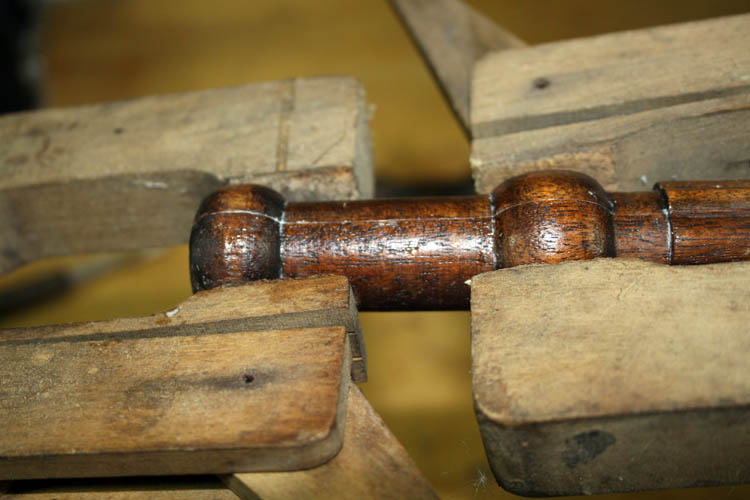
LEG REPAIRS
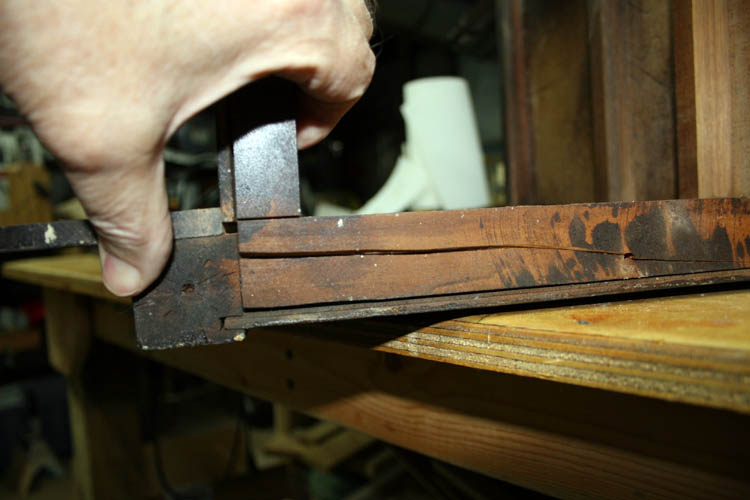
All four legs were made by gluing up two segments of wood together and
turned on a lathe, whereas one of them had a very large crack at the glue
joint which had failed. I used a couple guitar makers wooden cam
clamps to pull the joint back together after working glue into the crack.
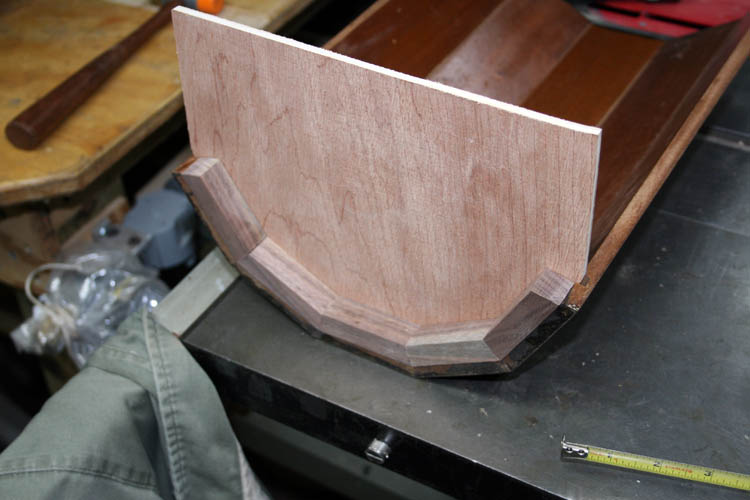
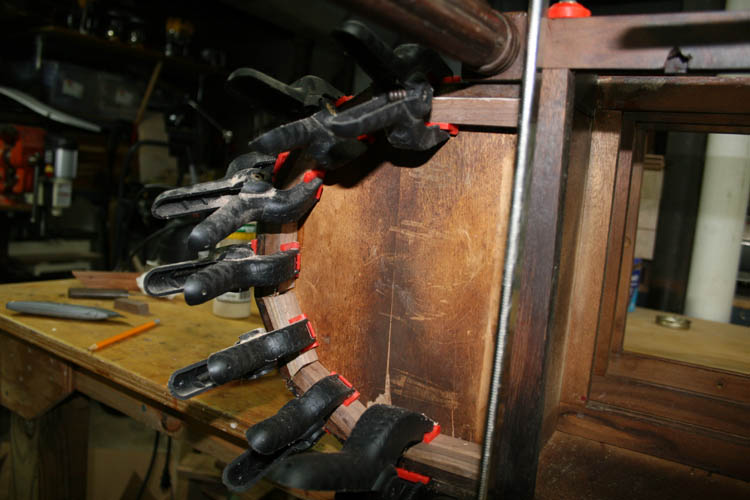
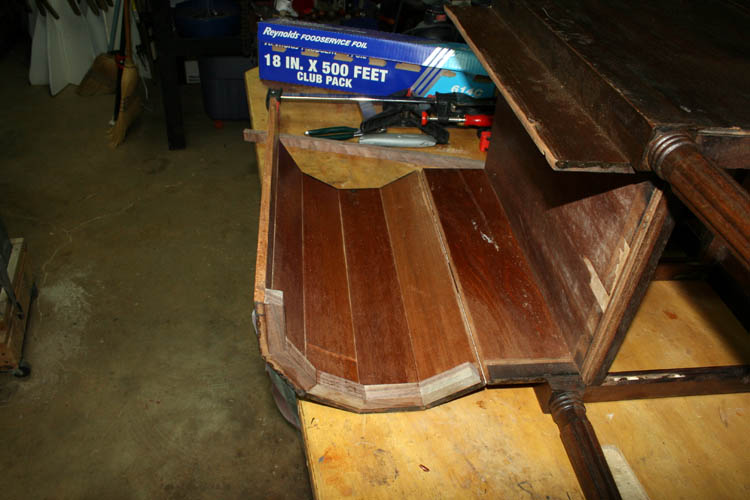
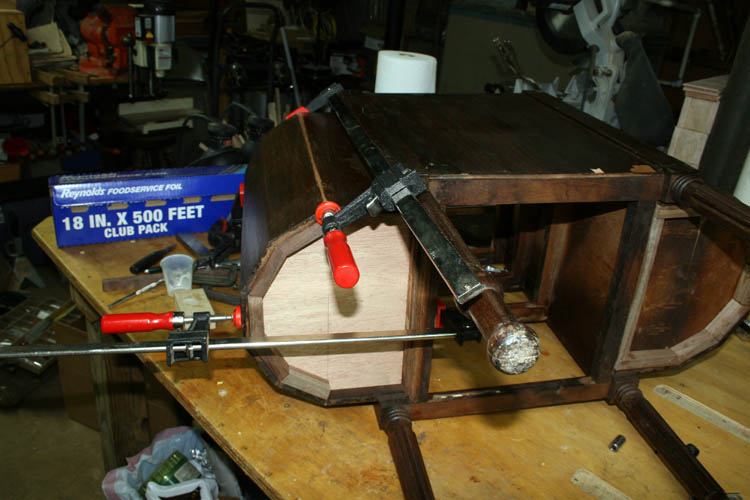
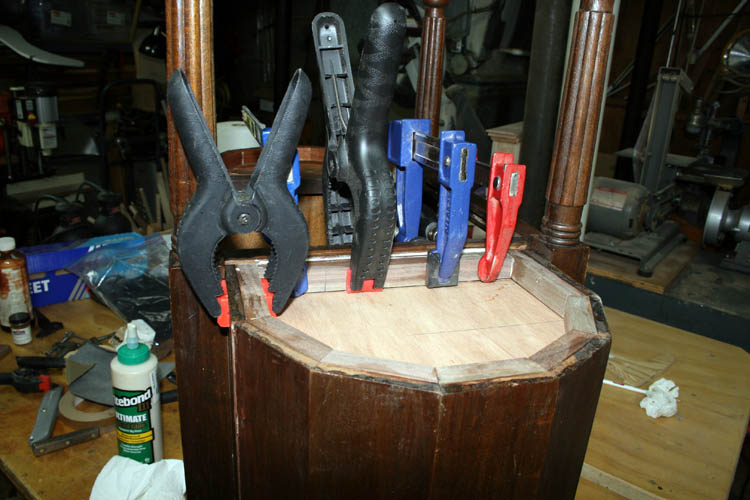
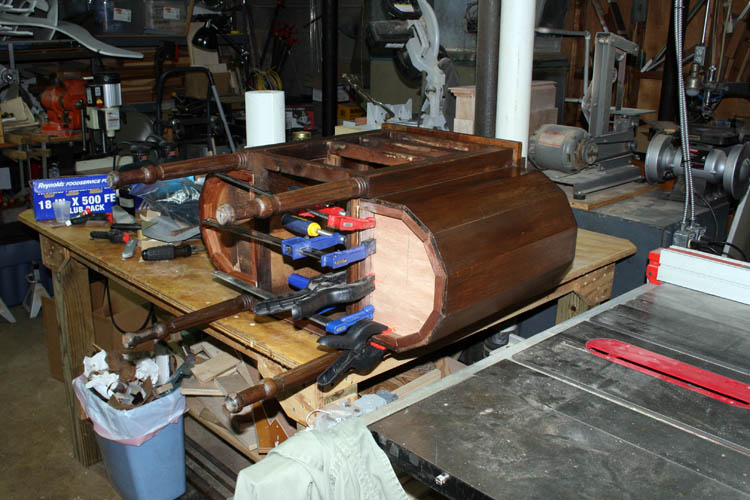
SEGMENTED SECTION GLUED TO THE TABLE
The hardest part of this repair was the half round segmented vertical storage section
which had come un-glued in two places. As I stated earlier, someone in
the past had attempted to glue it back together and had sanded down one side
of the segmented section and the outer portion was about 3/32 inch open at
the outer edge. The inside portion of the angle fit fairly good.
I dry fitted the half round segmented vertical section and there was not much room for
clamping. I tried a band clamp but it would not pull both sections
together. One of the sides fit together nearly perfect and a good
strong masking type tape used to hold musical instrument binding/trim around
the top and bottom edges of a guitar would be adequate enough pressure.
The other side would take a little more persuasion with a couple regular
long bar clamps. Since the seam would depend on the strength of the
glue, I drilled a few holes into the segmented vertical section and the
table vertical section to allow glue to get into both pieces of wood for a
better bond. I mixed up a wood filler using fine sawdust, coloring
agent and the Titebond Ultimate III glue for this section to be glued.
My friend Calvin Jones, noticed the aluminum foil in the background as
asked what it was for. I told him, "I used it to cover the new bottom
to prevent the glue from sticking to it, since I wanted it to
free float in the slotted
segmented section." I removed the aluminum foil from the bottom
before I did the final glue up of the segmented pieces to the table
segmented members.
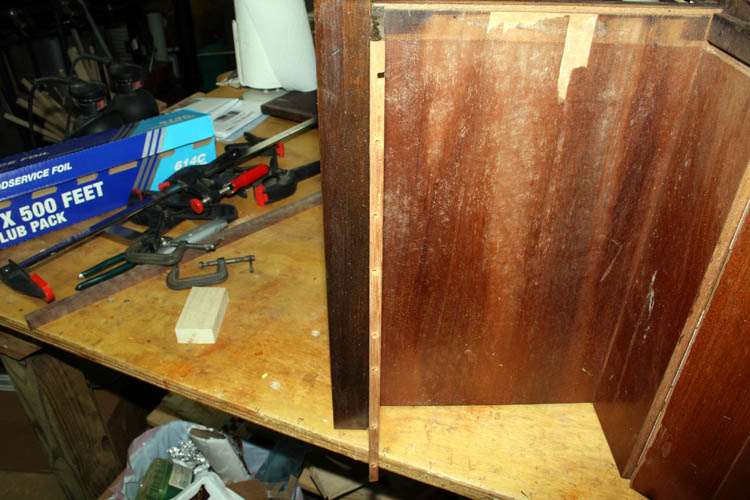
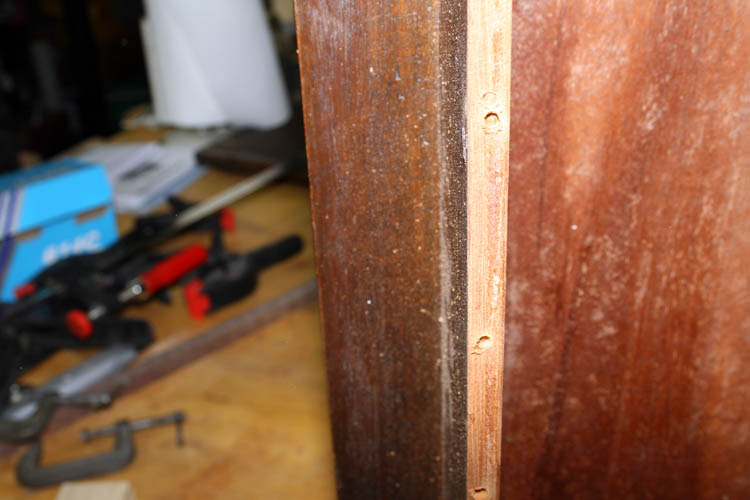
The vertical segmented pieces were about 3/8 inch thick and too thin to
attempt a spline or wood dowels and if attempted, might burst the wood open.
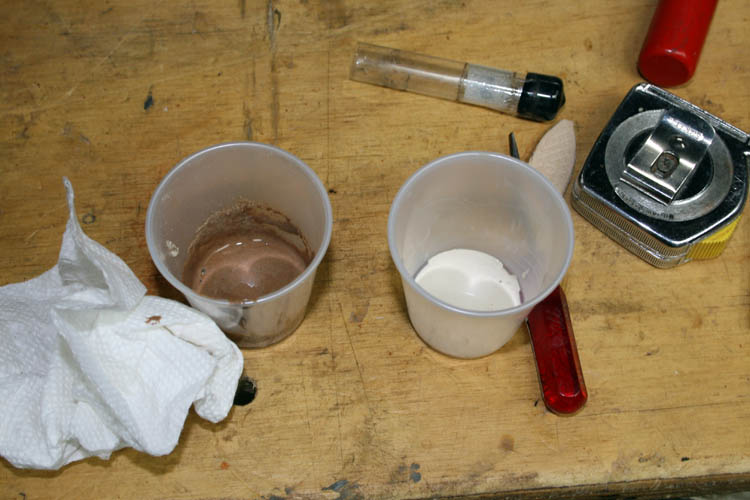
Glue/wood filler mixture and regular Titebond Ultimate III glue on the
right.
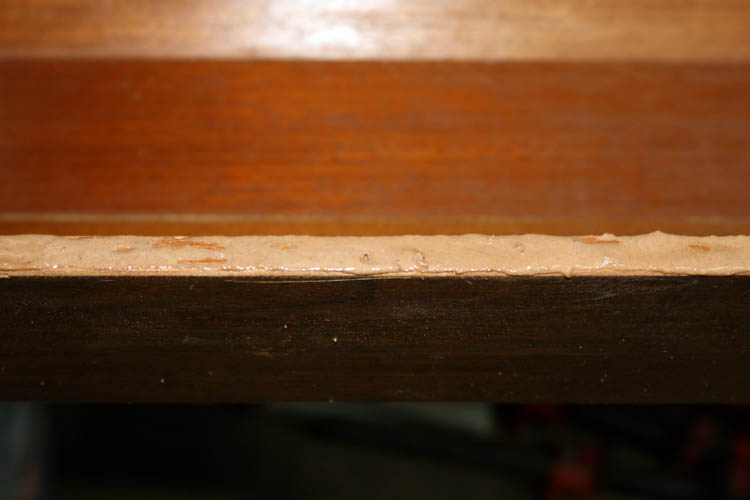
The above joint fit together fairly well, but the other side was a "dawg"
to fit.
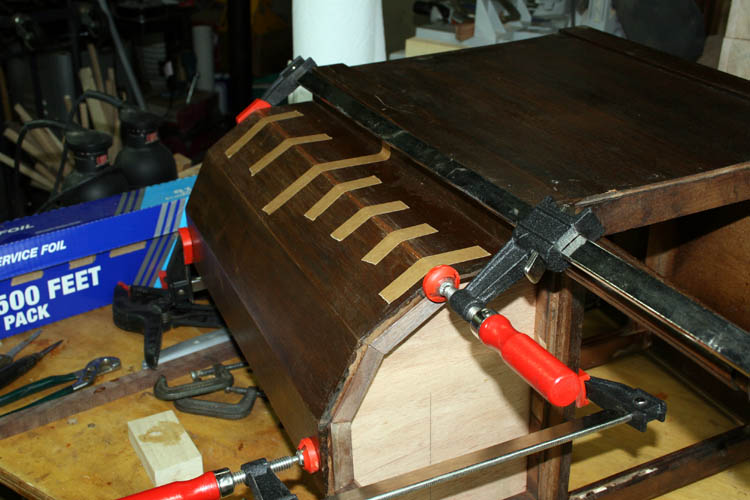

Tomorrow 04-20-16, I will check the glue up fit and apply additional
homemade filler to the seam where the tape is and let it set an additional
24 hours. I noticed the filler had shrunk some and will get it leveled
up by sanding and then match some stain to the area that had been prior
sanded down by the earlier failed repair attempt.
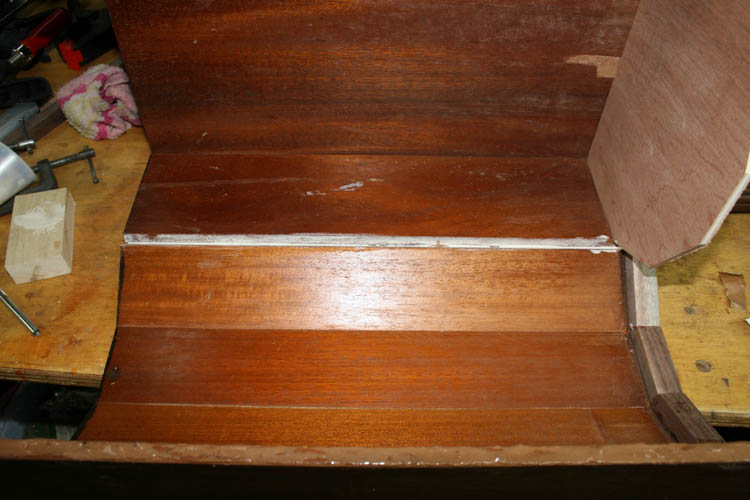
I glued in the additional segmented pieces for the bottom of the
segmented storage area and applied a dark stain to the new wood bottom and segmented
pieces added and re-installed the top.
I applied a dark walnut stain to the "new construction" members above,
not normally seen.
The segmented vertical side storage bins look pretty good now.
COMPLETED PROJECT
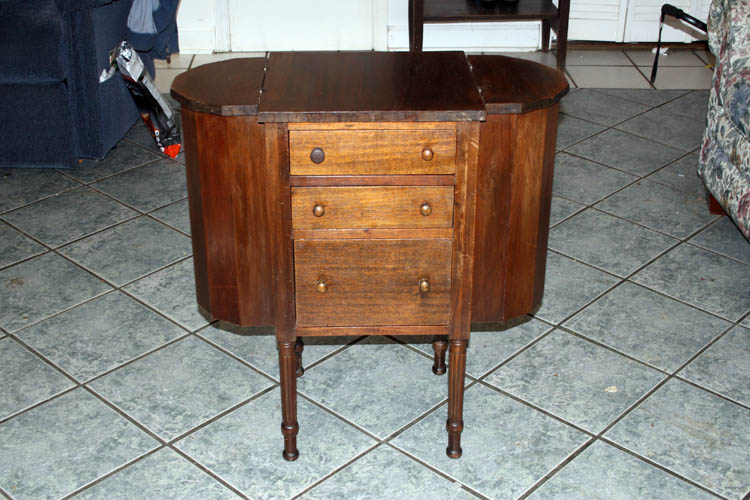
I delivered the Martha Washington Sewing Stand Table to Ms. Robinson and
we installed the three drawers. By the appearance of the drawer
colors, someone had removed the original finish since the
drawers did not match the rest of the sewing stand table.
Nevertheless, it is a lovely piece of historic furniture from the past.
As I stated earlier, a full blown historic restoration would cost more than
what the antique retail value would bring. She asked me what it cost and
I told her it didn't cost her anything. I told her this was payback
for some of those "beautimous"
persimmons harvested from her tree.
We chatted for a long time and she promised to let me take a picture of herself
when she gets prettied up......grin if you must!
It is rewarding to do things for other people and return a kind favor not
expecting anything in return by a simple, "Thank You."
I equate that with, "doing to others as you would have them do unto you!"
Does, the
golden rule sound familiar?
Web published by Bill aka Mickey Porter on 04-19-17, updated on
04-20-17 and 04-22-17.
LEAVING ON A
SPIRITUAL NOTE
If you do not know Jesus Christ as your Lord and Savior, please take
this moment to accept him by Faith into your Life, whereby Salvation
will be attained.
Ephesians 2:8 - 2:9 8 For by grace are ye saved through
faith; and that not of yourselves: [it is] the gift of God: 9 Not of
works, lest any man should boast.
Hebrews 11:1 “Now faith is the substance of things hoped for,
the evidence of things not seen.”
Romans 10:17 “So then faith cometh by hearing, and hearing by
the word of God.”
Open this
link about faith in the King James
Bible.
Romans 10:9 “That if thou shalt confess with thy mouth the
Lord Jesus, and shalt believe in thine heart that God hath raised him
from the dead, thou shalt be saved.”
Open this
link of Bible Verses About Salvation,
King James Version Bible (KJV).
Hebrews 4:12 “For the word of God is quick, and powerful, and
sharper than any two edged sword, piercing even to the dividing asunder
of soul and spirit, and of the joints and marrow, and is a discerner of
the thoughts and intents of the heart.”
Romans 6:23 “For the wages of sin is death; but the gift of
God is eternal life through Jesus Christ our Lord.”
Romans 3:23 “For all have sinned, and come short of the glory
of God;”
Micah 6:8 “He hath shewed thee, O man, what is good; and what
doth the LORD require of thee, but to do justly, and to love mercy, and
to walk humbly with thy God?”
Philippians 4:13 "I can do all things through Christ which
strengtheneth me."


