FINGERBOARD AND PEGHEAD PATTERN TRANSFER AND INLAYING
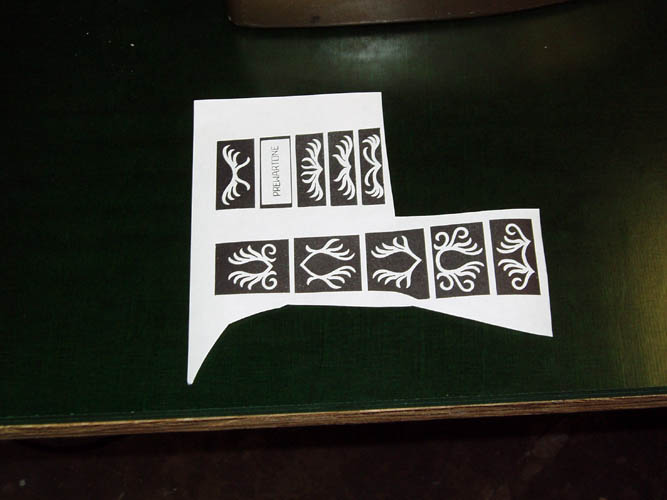
Today's project will be to transfer the paper pattern to the peghead and
fingerboard and will use the preprinted pattern and double stick tape it to the
peghead and fingerboard, however I wasn't happy with a couple ebony peghead
overlays that I had purchased and decided to dig one out that I had stuck
back since the mid 1970s. Pixs below:
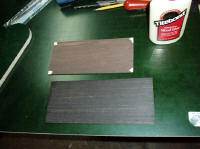
You will notice that on the upper left pix, one piece of overlay looks
like the color of rosewood, however it could be stained black and the
overlay below it was darker but wanted to warp and turn up like a boat when
removed from between a couple scrap boards I used to keep it flat. The
second pix is a piece of Gaboon ebony with streaks but the grain is very
tight and still remained pretty flat after all these years of which it was
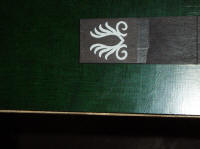
stored in a file folder. I removed the mother of pearl fern inlays and
had used the script Gibson when I mounted some of my master inlay patterns
under glass and had no use for the fern pattern since it was done in mother
of pearl instead of abalone for a camera ready pattern only. I glued
all three pieces of the peghead overlays (7/32") total thickness securing
them with a heavy drop of Titebond glue in each corner and placed between a
couple flat boards, clamped and allowed to dry overnight.
Gibson prior to WWII used dyed pear wood veneer around .035 inches
thickness (approximately 1/28 of an inch) which was fairly generic in
thickness as their standard peghead overlay material. Around 1925 to
1927, they used the dyed pear wood in shades of brown without the black lacquer
but more commonly sprayed the peghead overlay with black lacquer and later
scraped the black lacquer from the inlays only prior to finishing the
instrument. The thickness of their precut inlays were flush with the
peghead overlay material and I had in my possession one of their inlaid
pegheads that was never installed on a banjo and the peghead still had the
paper backing glued to the front side of the peghead material and the filler
was applied from the rear. I am pretty sure it was Gibson's peghead but
not absolutely sure due to being so far back in time but it was their
identical method of inlaying and it could have been from Bacon & Day,
nevertheless, it was the identical Gibson technique! Gibson and/or
their vendors stacked up
a dozen or more dyed pear wood veneers and glued and/or pinned the corners
and cut the entire stack the way I am cutting the peghead overlays on
this project. I have no concrete evidence from George Hall, Gibson
pre-war employee from 1927 to 1933 to support that Gibson stacked and
cut fingerboard inlays since their fingerboard mother of pearl inlays had
the poplar wood veneer backing and it would be about impossible to stack
inlays glued to the substrate poplar wood with enough precision. I have
personally cut multiple inlays glued together and it just doesn't work that
well with a jewelers saw blade. On the larger block inlays for guitar
fingerboards and even on the RB7, 12 and 18, it is easy to stack and
actually band saw those patterns because their design lends itself to such
but not with a jewelers saw blade. I have known several post-war
companies that have supplied mother of pearl, precut and inlaid to Gibson
using a variety of techniques. They were using the post-war inlay
designs and later when the RB800 came on scene, they supplied Gibson with
the "cookie cutter" looking inlays to mimic the pre-war inlay
patterns which is ok if you have never experienced and owned the real deal!
David E. Markle of Mar Pearl supplied
Gibson with inlaid fingerboards and pegheads using his own designed
production routers. So much for the history lesson....grin if you must!
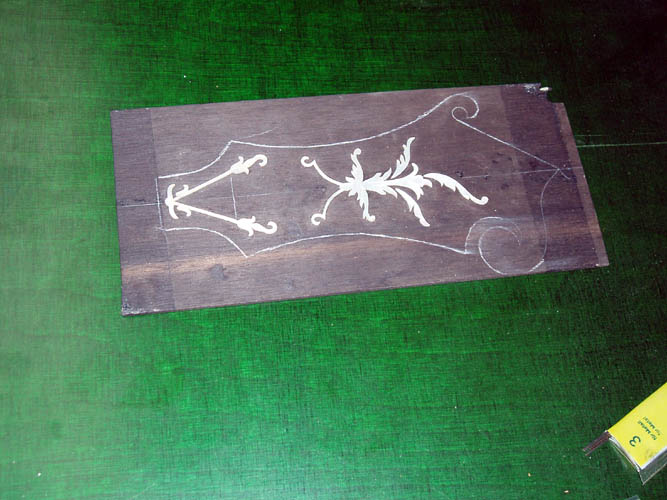
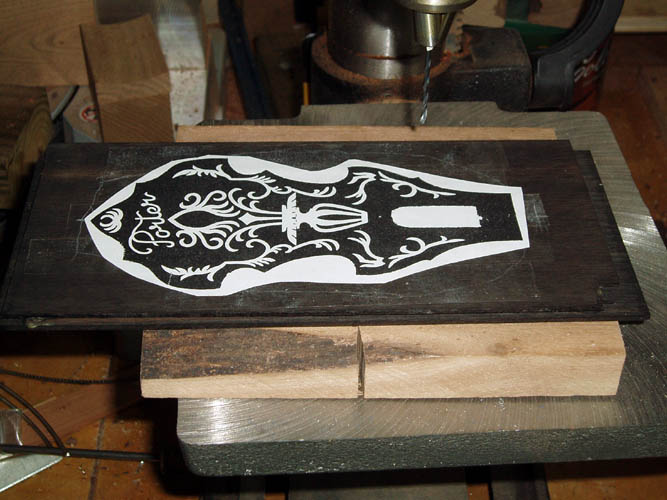
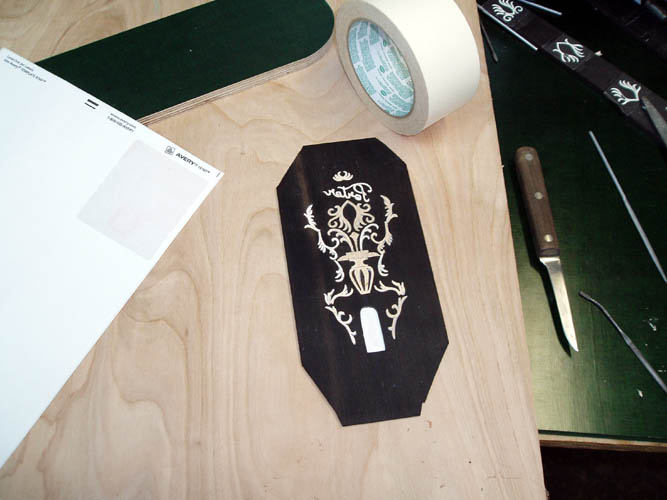
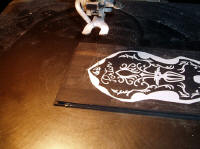
After the glue was allowed to dry overnight, double stick tape was placed
on the peghead and fingerboard with the pattern affixed in place.
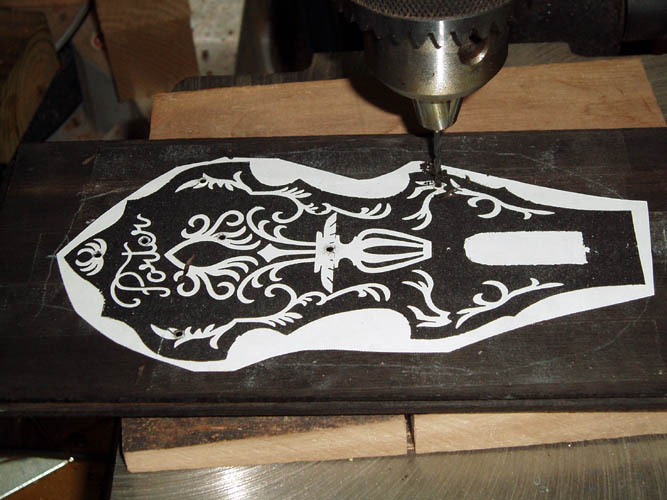
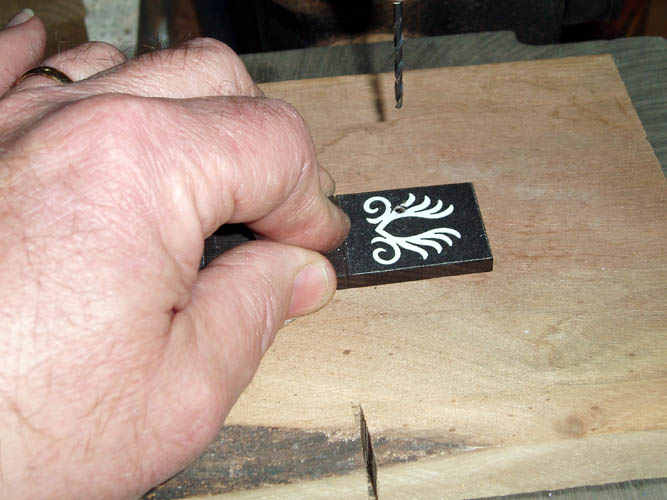
Next, I drilled a 1/16 inch diameter hole in each inlay design element
and on the peghead there were several inlays that were directly connect and
required only one hole to be drilled. My small drill press has a 1/2
inch diameter chuck capacity and had to do a Rube Goldberg quick fix by
wrapping masking tape around the drill shank so the chuck would close on the
small drill bit. I do not have a chuck adapter for the smaller drill
and had to make do with what I had....no precision drilling but not needed
in this case.

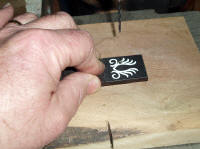
Above pixs are straight forward showing drilling the hole in the peghead
and fingerboard to allow access entry for the jewelers saw blade.

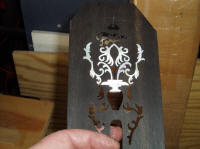

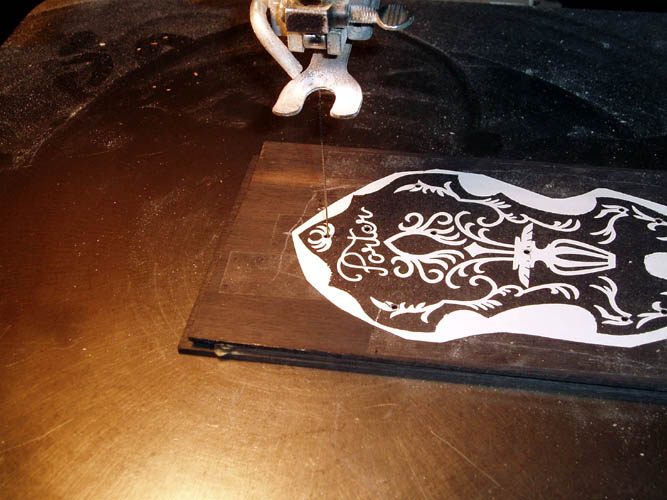
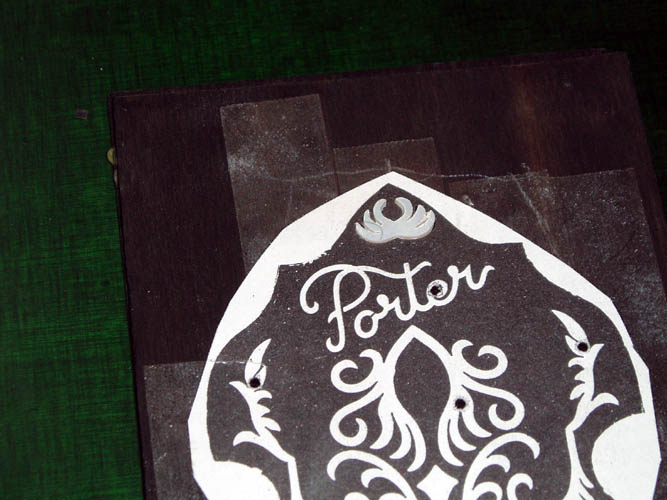
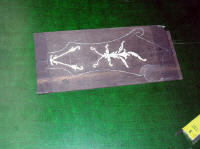
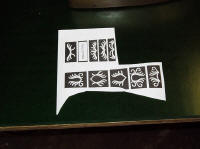
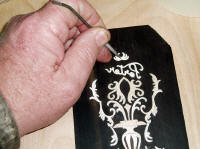
The left pix depicts the peghead overlay material after cutting the inlay
pattern out. It is not necessary to do all the back cutting as with
cutting the inlays since you need some clearance for the inlays....if you
were able to cut a one to one perfect pattern, it simply would not go into
cut out area because it would require forcing the inlay into the cut out and
would break a fragile design. You want to leave some clearance
between the inlay and the cut out, but definitely not as much as the pre-war
Gibson instruments normally have. I used the larger # 6 jewelers saw
blades, Laser brand but I really couldn't tell any difference. I guess
I got spoiled to the Vigor brand blades and after looking very close at the
Laser blades, the blade teeth are definitely not as long as the old Vigor
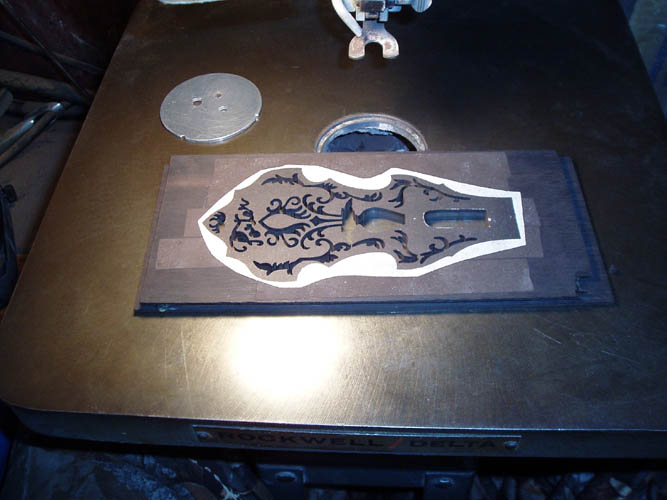
brand and the angle seems a little different also. The second pix from
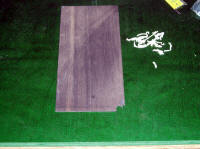
the left is removing the cutting pattern from the peghead overlays. I band
sawed the glued portion of the corners from the pegheads and separated them
and used the top peghead inlay material for this inlay project. The
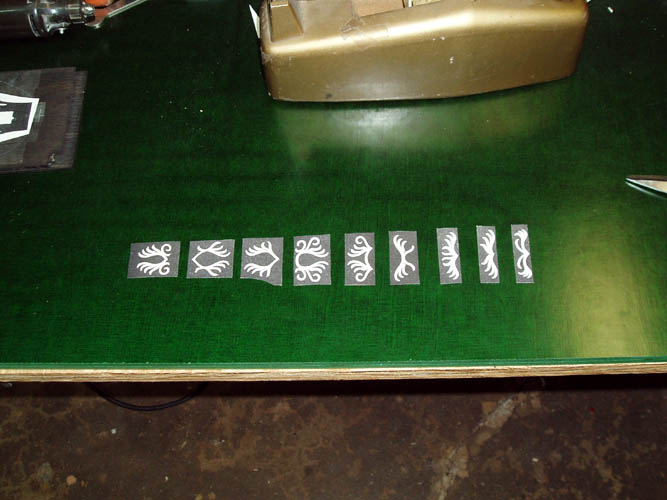
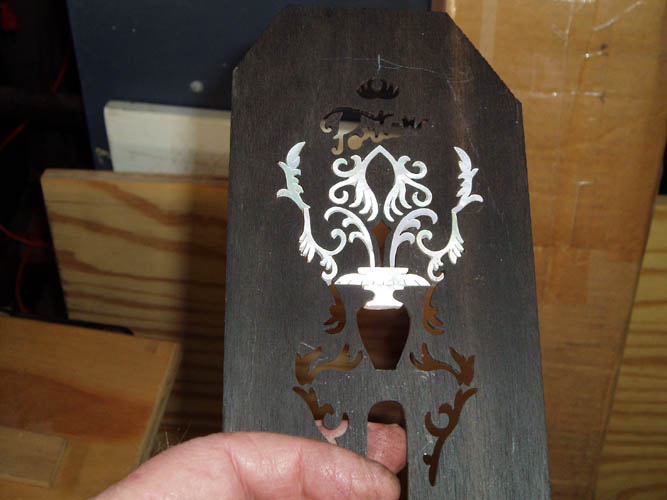
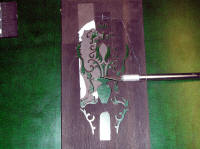
third pix from left shows the precut inlays being "dry fitted"
into the cut outs. It has been ten (10) years since I inlayed using
this technique and must say that fitting the pre-cut inlays into the peghead
was very laborious, time consuming requiring a tremendous amount of
adjusting the cut-out holes with tool and die makers needle files which was
very, very tedious. I took many breaks through the course of the day
fitting those inlays and should have cut with more tolerance since the ebony
material hides the epoxy/filler mix very well. I left the balsa wood
backing on the pre-cut inlays while drying fitting and would hold the
material up to the light to see where I needed to make an adjustment.
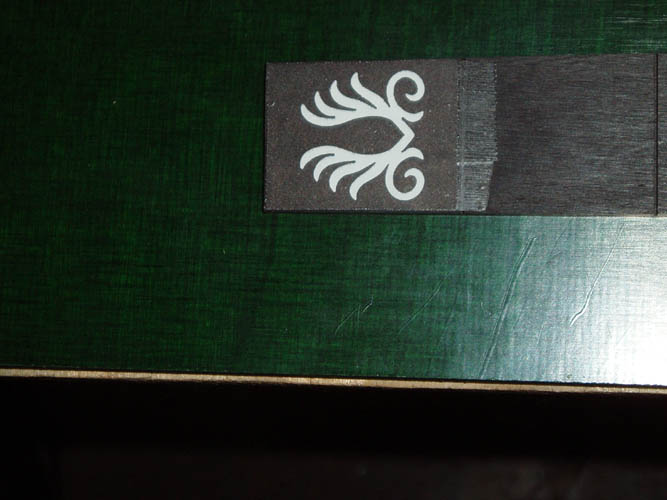
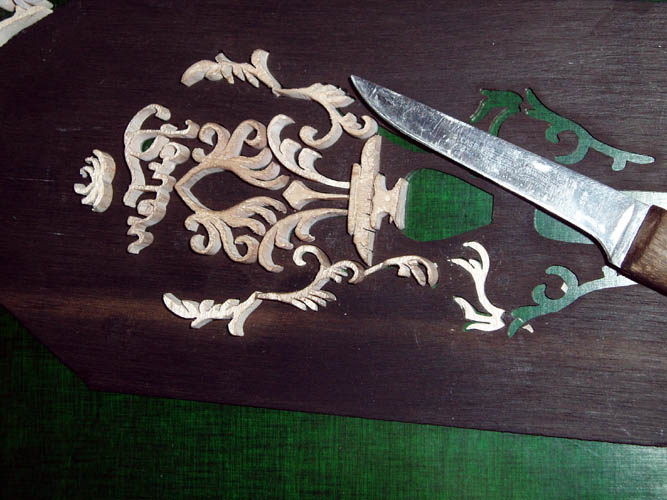
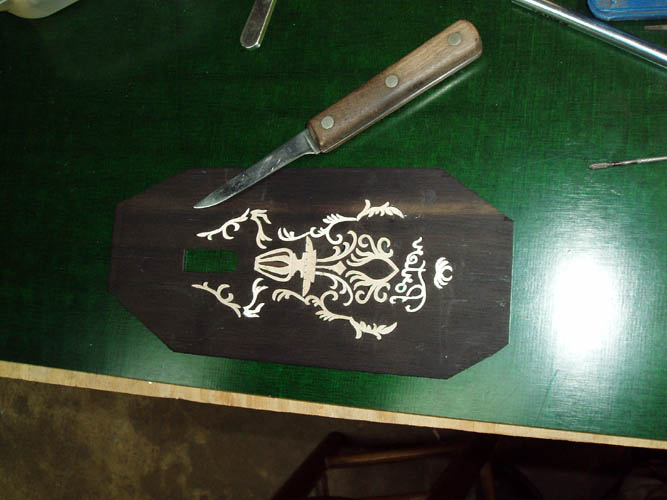
The last pix on the right shows the mother of pearl pre-cut inlays after
they all have been dry fitted into the cut outs in the peghead and the
excess balsa wood is being trimmed flush to the thickness of the ebony
peghead. I am using an old kitchen paring knife which has a very thin
blade and try and keep it razor sharp. When cutting the balsa wood,
press down on top of each balsa wood inlay backing with your non knife
yielding hand and make a smooth clean cut keeping the knife flat and tight
against the peghead material using a lot of finesse. Don't
aggressively cut into the material "Like a bull in a china shop",
otherwise you might break a delicate inlay design.
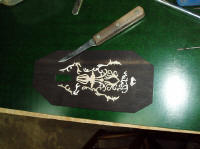

Above pix on left shows the balsa wood inlay backing cut flush with the
peghead. Before proceeding to the next step, make certain that no
small piece of balsa wood backing has worked its way between the inlay and
adjoining peghead material, otherwise it will show up when you fill the void
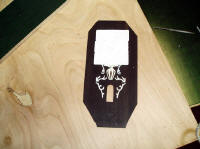
spaces between the inlay and peghead. Using a piece of flat material,
lay on top of the dry fitted inlays and flip the entire piece over and check
that all the inlays are flush the peghead as in pix two from the left.
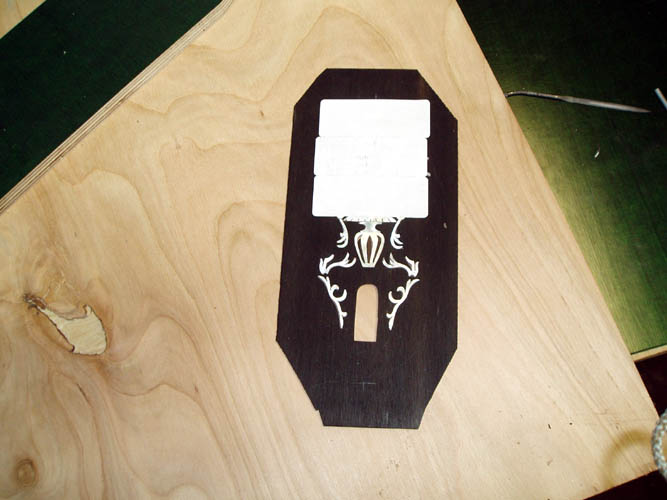
Use regular mailing labels or a good strong masking tape and place it on top
of the peghead making sure to cover the entire inlay pattern.


Use a J rubber roller and in my case I used a roll of 2 inch wide masking
tape as a roller and pressed the mailing labels to adhere to the inlay and
the peghead. The purpose of this is two fold; 1) It keeps
the inlays flush with the peghead material and 2) keeps the epoxy glue/filler
trapped where it is supposed to be. In the pix above left, the peghead
can now be flipped over without any extra support since the pressure
sensitive mailing labels have adequately secured the inlays in place.
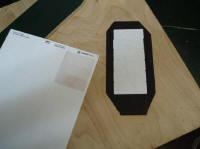
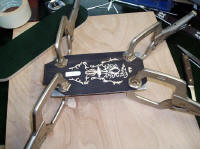
In pix two from upper left, press each individual inlay downward tightly
against the mailing label backing to ensure the inlay is flush with
the peghead material. I used the tip of a small needle file to
accomplish this. Transfer the peghead onto a flat clean piece of
aluminum or other flat material with the balsa wood backing side facing upward and
secure with clamps to make certain the peghead and inlays are flat.
Now comes the filling of the voids between the pre-cut inlay pattern and the
peghead material and this also will secure the inlays in place.
My all-time favorite epoxy for use as a filler is Epoxy 330
manufactured by Hughes Associates and available from most Hobby/Craft shops
that deal with lapidary equipment and also jewelry suppliers. This
epoxy is crystal clear, has a 15 minute pot life and when unopened,
packages have lasted for decades without the short shelf life as some of the
newer epoxies. I planned to use a current epoxy product called
Kwik-Set manufactured by Sig Manufacturing Co, Inc., Montezuma, IA and
available from most hobby shops that sell model airplanes and parts.
David Nichols at
Custom Pearl Inlay, has this
product for sale also. The Kwik-Set epoxy that I had on hand had
part A set up hard as a rock even in the unopened container and failed to
read a small tag affixed to the label stating, "If product hardens, put in
microwave till liquid state approximately 5 to 15 seconds", so much for
reading instructions. I dug around in my shop until I found some of
the Epoxy 330 that I must have had on hand for 35 years that was still
unopened. I did a test run on a scrap piece of wood yesterday evening
and let it sit overnight and checked it this morning and it set-up perfectly
and filed it down to be sure and it was still good after all those years
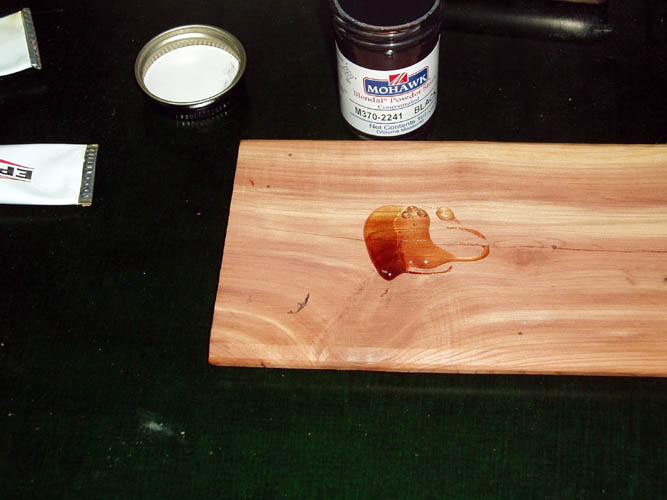
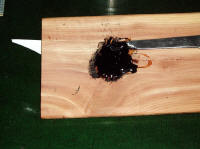
which is amazing! Right hand pix above shows the one to one mixing of
a small amount and I am using the Mohawk brand of Blendal Powder stain
product M370-2241 Black which is a dry fine ground powder and mixes
well with clear epoxy for inlaying into ebony wood. Mix only small
amounts of the epoxy because it begins to thicken in 15 minutes (Epoxy 330)
and the Sig Kwik-Set has a pot life of only 4 minutes in 1 oz. mass and
begins to set in approximately 4 to 5 minutes. I mixed at least three
batches of the above Epoxy 330 on a piece of scrap cedar wood, although
cardboard works extremely well and used the thin paring
knife to work the epoxy/filler mix into the peghead.
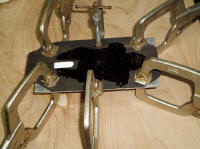

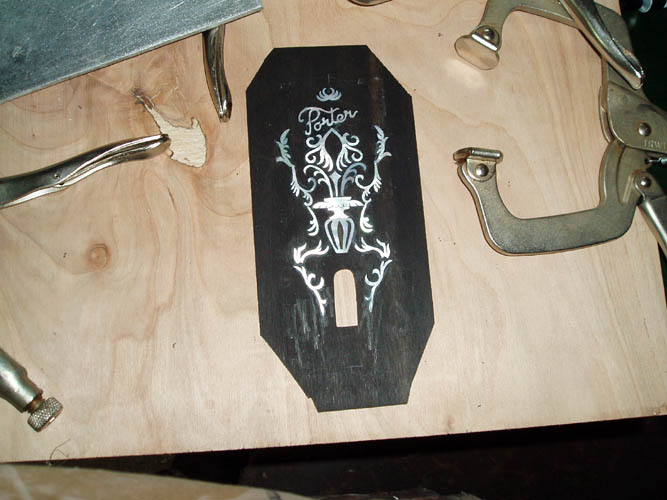
After working the epoxy/filler into each inlay of the peghead, a couple
extra clamps were used to secure the center portion of the peghead to make
sure it remained flat.
The disadvantage to this inlay technique, sawing versus
routing the inlay pocket; it is very easy
to get an inlay that is not flush with the peghead veneer and/or fingerboard and if
bad enough, you will have to drill out the below level inlay which is time consuming
to repair. I have seen at least one Gibson inlay on a pre-war
Mastertone banjo peghead #3 late that had the inlay slightly below the
level of the dyed pear wood overlay and they did not remove the black
lacquer from the inlay because of their production environment and/or it
could have been one of those Mondays we are all familiar with....grin if you
must!
I will allow the epoxy/filler dry for a couple days, although you can
sand it within 10 hours but the longer the better as you can have a very
miniscule amount of shrinkage but in most cases, the fingerboard inlays want
to rise above the fingerboard a few thousands as crazy as it may sound.
In the next segment, I will inlay the fingerboard using the same basic
procedure above with a few modifications and apply epoxy/filler mix to the
front side of the above peghead.
Bill aka Mickey Porter 03-07-10.
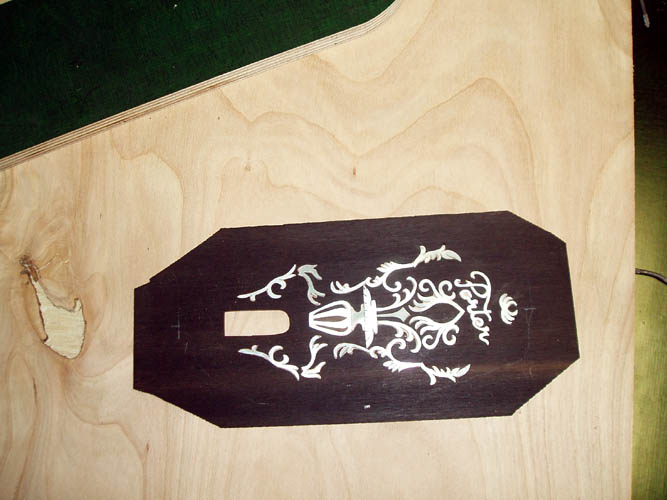
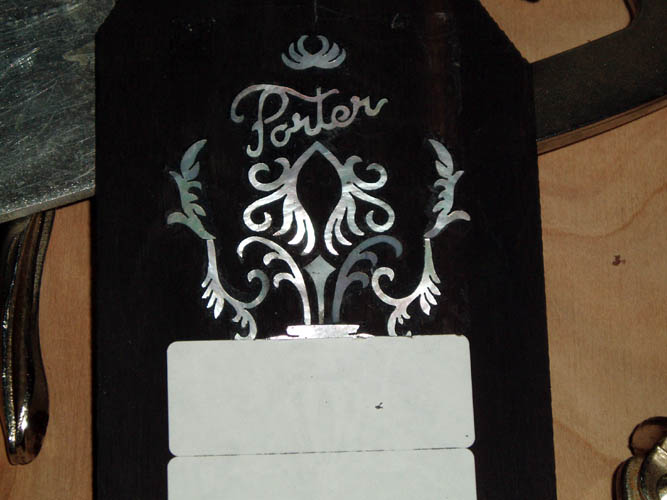
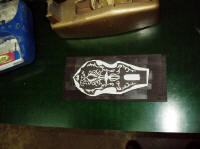
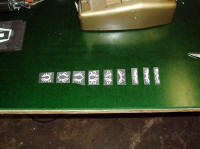
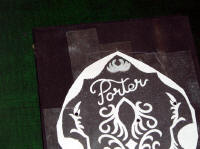
The upper pix third from left has the mailing labels removed exposing the
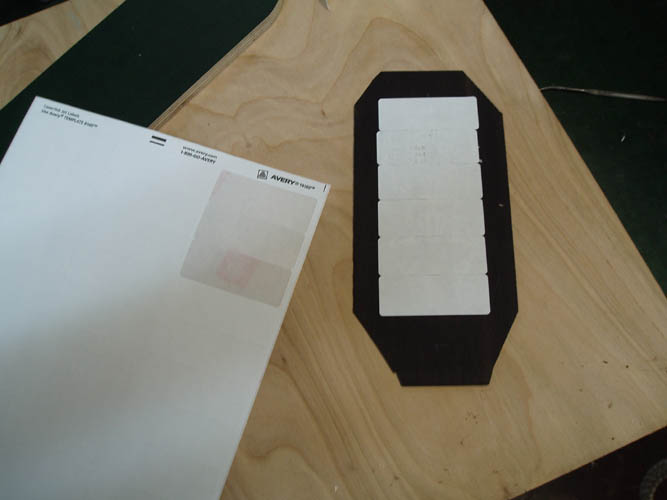
inlays on 03-08-10. Using the white mailing labels by Avery product #
18160 was very difficult to remove from the peghead after the epoxy filler
mix had dried for 24 hours. The original mailing labels I used back in
the 1970s were about three times as thick as these and would simply peel off
with ease. I had to scrape the mailing labels off the peghead due to
their thinness and epoxy filler mix absorbed into the labels which is not
good. For the fingerboard inlaying, I will use a good quality masking
tape to keep the inlays flush with the fingerboard. If your inlays are
tight enough fit, they will remain flush with the wood and the masking tape
only serves to contain the epoxy filler mix. On the above peghead, the
four inlays around the 1st and 4th tuners were loose and the mailing labels
were definitely needed to ensure the inlays were flush with the peghead.
I will let the peghead sit for another day or two and sand the back side of
the peghead down with a 1 inch by 42 inch length 80 grit aluminum oxide belt
band sander and then wash the front down with thinner to remove any residue
of the mailing labels and apply additional epoxy filler mix as needed and
allow to cure a few days. There were only a few places that actually
will need filler since the epoxy filler mix worked its way to the front side
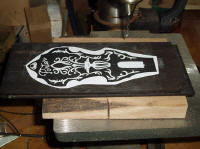
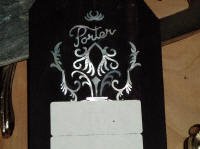
of the inlays and peghead. The Porter "Flaming Claw"
inlay design will be more photogenic once it is sanded down and cleaned up
but want to take as many pixs along the way as needed.
LEAVING ON A
SPIRITUAL NOTE
If you do not know Jesus Christ as your Lord and Savior, please take
this moment to accept him by Faith into your Life, whereby Salvation
will be attained.
Ephesians 2:8 - 2:9 8 For by grace are ye saved through
faith; and that not of yourselves: [it is] the gift of God: 9 Not of
works, lest any man should boast.
Hebrews 11:1 “Now faith is the substance of things hoped for,
the evidence of things not seen.”
Romans 10:17 “So then faith cometh by hearing, and hearing by
the word of God.”
Open this
link about faith in the King James
Bible.
Romans 10:9 “That if thou shalt confess with thy mouth the
Lord Jesus, and shalt believe in thine heart that God hath raised him
from the dead, thou shalt be saved.”
Open this
link of Bible Verses About Salvation,
King James Version Bible (KJV).
Hebrews 4:12 “For the word of God is quick, and powerful, and
sharper than any two edged sword, piercing even to the dividing asunder
of soul and spirit, and of the joints and marrow, and is a discerner of
the thoughts and intents of the heart.”
Romans 6:23 “For the wages of sin is death; but the gift of
God is eternal life through Jesus Christ our Lord.”
Romans 3:23 “For all have sinned, and come short of the glory
of God;”
Micah 6:8 “He hath shewed thee, O man, what is good; and what
doth the LORD require of thee, but to do justly, and to love mercy, and
to walk humbly with thy God?”
Philippians 4:13 "I can do all things through Christ which
strengtheneth me."
PREVIOUS PAGE
NEXT PAGE
BANJO CONSTRUCTION HOME PAGE