DSLR SENSOR CLEANING
I purchased a used 35mm DSLR Canon 30D camera off EBay a couple years or
more ago and have had a tremendous amount of fun using this camera.
Prior to the Canon 30D, our son Bill, Jr. upgraded his Canon and I got his
Canon 20D and accessories as a gift. I used that camera for at least a
year and the electronics went out and unable to get Canon to repair it due
to its age and non-availability of
replacement parts.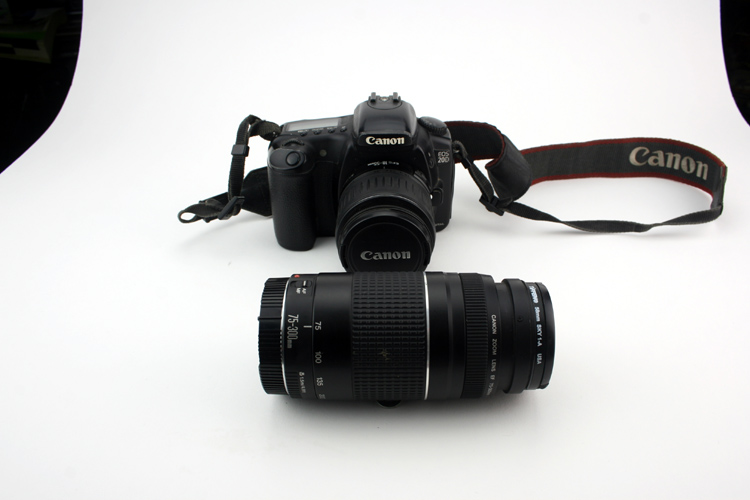
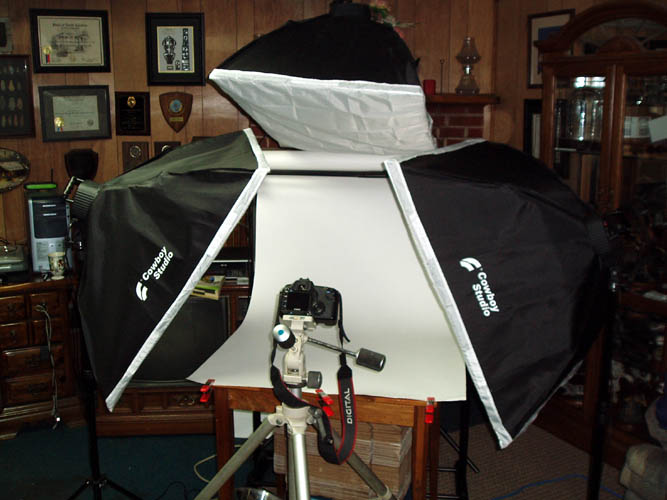
A few weeks ago, I noticed some small spots on my digital images especially
against the
white background while using my soft light boxes. I
thought it might be the lens and swapped lens and the spots were in the
same place on the frame and knew it had to be the camera. I checked
the mirror and didn't see any visible dust specks and only one place left;
the sensor.
I Googled DSLR camera sensor cleaning and there is a ton of stuff on YouTube
and other websites detailing how to clean the sensor. Most will
let you know that camera manufacturers do not recommend home cleaning of the
sensor since improper cleaning can damage the sensor which is a serious
outlay of cash to have the sensor replaced. Also, the camera warranty
is void if the manufacturer ascertains that you attempted the cleaning
yourself and damaged it.
Since my used Canon 30D is not under warranty and is about obsolete as far
as replacement parts, I feel confident that I can clean the sensor myself
without damaging it. The area that you are cleaning is not the sensor
itself but a filter that is mounted on top of the sensor.
After viewing many videos and reading articles, the sensor cleaning process
is broken down into a three stage cleaning process. The Canon 30D has a
sensor cleaning option from the main menu which when activated, locks the
mirror up allowing access to the sensor. Make certain you
have a fully charged battery when you activate the sensor cleaning mode and
when finished turn the camera to the off position and the mirror will
retract to its normal position. You need to be in a dust free
environment as possible when removing your camera lens and doing the sensor
cleaning procedures.
Below is test pix taken prior to cleaning the sensor
with some serious dust spots visible:

I use the Canon 30D DSLR regularly in my basement woodworking shop to
document some of my
woodworking projects which is a very dusty environment
as evidenced by the pix above. The inside of the camera is a magnet
for collecting dust and zoom lens aids in the dust collection along with
changing your lens in a dusty environment.
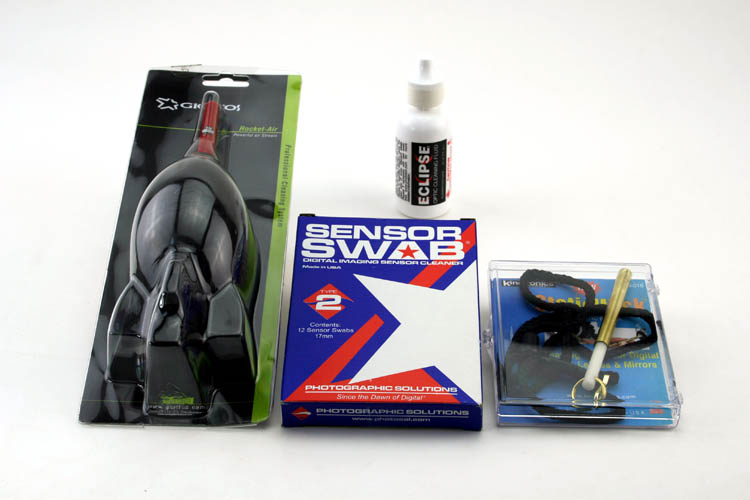
Below are the products I will be using. Added pix on 08-16-16 after
receiving the Eclipse solution:
STAGE ONE SENSOR CLEANING
After the camera is placed in the sensor cleaning mode, remove the lens and
invert the camera upside down and blow air onto the sensor filter without
touching the tip of the blower to the sensor filter. A
Giottos Rocket-Air Blaster creates a powerful air stream and the
only non-contact method
recommended by Canon. Replace the lens and turn the camera off.
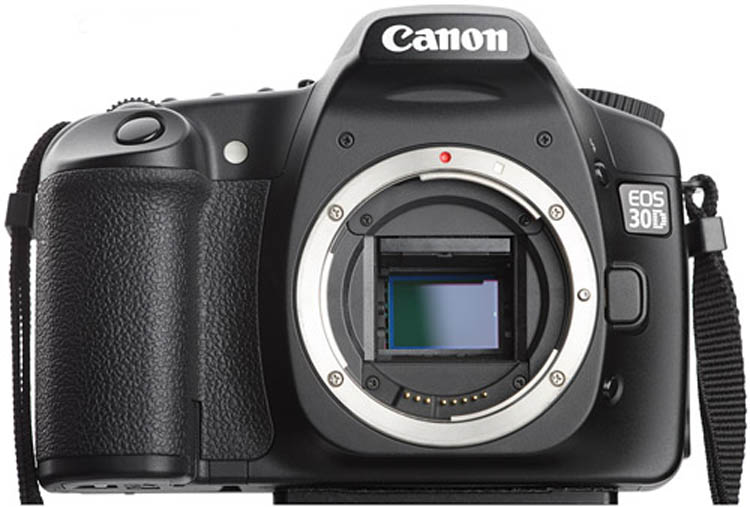
Above internet stock photo showing the mirror locked up aka retracted
with the sensor in view.
Take a test shot against a
white background or the sky with the
aperture set at F22 or higher and focus at infinity. Download the image and
see if blowing air onto the sensor filter removed the dust spots. If blowing
air onto the sensor removed the dust spots, do not go any further. If
blowing air onto the sensor filter didn't remove the dust spots, it is time
to go to stage two.
Below is pix after blowing air onto the sensor. It did remove a
major portion of the dust spots but need to proceed to Stage Two Cleaning.

STAGE TWO SENSOR CLEANING
Again, set the camera to the sensor cleaning manual mode which will retract
and lock the mirror upwards exposing the sensor. Remove the lens.
Using a specifically designed brush for lens, mirrors and sensors such as
the
StaticWisk # SW-010, charge the brush by
blowing air onto the soft bristles for a few seconds using the
Rocket-Air Blaster. Gently brush across
the sensor being careful not to come into contact with the mirror mechanism
which could contain lubricants such as grease and try and stay away from the
outside edge or border of the sensor. Attach lens and turn camera
off to allow the mirror to return to its normal position. Take another test
image as above and see if dust spots were removed. If the spots were
removed, do not go any further with the sensor cleaning. However, if
using the StaticWisk didn't remove all the dust spots, it is time to go to
Stage three sensor cleaning which is a wet cleaning process.
Below is pix after using the Static Wisk and it removed nearly all the
troublesome dust spots. I don't think it is necessary to proceed to
the Stage Three Sensor Cleaning at this time.

I increased the brightness and contrast settings of the image taken using PhotoShop CS2 to help
identify any dust spots and impressed with the results using the Static Wisk
#SW-010. There are a few very small dust spots but are not troublesome
enough at this time. Those spots are most likely from my PC monitor
screen and it needs cleaning too......grin if you must! Besides, my Eclipse sensor cleaning solution has
not yet arrived, otherwise I probably would have given it a field test.
The vendors using
DHL E Commerce shipping is about like the
Mayflower crossing the Atlantic as far as I am concerned. I have a
package that was received in Raleigh, NC destined for the USPS on the 10th
and it hasn't arrived at our local post office yet which is only 117 miles
distance! The
Pony Express was faster than DHL E
Commerce.
Recent pix
showing a good clean bill of health for the sensor.
STAGE THREE SENSOR CLEANING
For stage three cleaning, you will need a sensor cleaning solution such as
Eclipse and swabs specifically designed for
sensor cleaning and the correct width of your camera sensor. I will be
using Photographic Solutions
Sensor Swab type 2 which is 17 mm in width
which is correct for the Canon 30D sensor. The sensor swabs come in a
sealed package and are used only once. The swabs are not cheap; averaging 3
dollars or more each but are
definitely worth the extra expense. Place your camera in the sensor
cleaning mode and remove the lens. Remove a swab from its protective
wrapper and apply two or three small drops of cleaning solution across the
tip of the swab and wait about 10 seconds to allow the solution to wick
around the swab tip. Starting from the left to right, place the swab tip
onto the sensor tilting the swab handle to the right and firmly drag the
swab across the sensor to the right edge of the sensor being careful not to
touch the mirror mechanism to contaminate the cleaning swab. Without
moving the cleaning swab from the sensor, lean the cleaning swab handle to
the left and drag the swab firmly from right to left which will use the
other side of the cleaning swab flat tip portion. Remove the swab from
the sensor and discard. Replace the lens and turn the camera to the
off position to allow the mirror to retract to its normal position. Take
another test pix and download the image to ascertain if the dust spots are
removed. If they are removed, you are finished. If some
troublesome spots still remain, repeat this stage three sensor cleaning
with a fresh swab until the dust spots are removed. Remember, use the
cleaning swab only once.
There are other
techniques and products available to clean the sensor and
it depends on how deep your pockets are as far as the cost of the air
blower, cleaning
brush, swab and cleaning solution. The above products I use are not
cheap but an investment to keep your DSLR camera operating at peak
performance. The above hyperlinked video using Copper Hill Products
are currently not available but the video details the stage three cleaning
procedure very well. I believe the
Sensor Swab might have helped antiquate
their own swabs.
Web published by Bill aka Mickey Porter on 08-14-16 and updated on
08-16-16.LEAVING ON A
SPIRITUAL NOTE
If you do not know Jesus Christ as your Lord and Savior, please take
this moment to accept him by Faith into your Life, whereby Salvation
will be attained.
Ephesians 2:8 - 2:9 8 For by grace are ye saved through
faith; and that not of yourselves: [it is] the gift of God: 9 Not of
works, lest any man should boast.
Hebrews 11:1 “Now faith is the substance of things hoped for,
the evidence of things not seen.”
Romans 10:17 “So then faith cometh by hearing, and hearing by
the word of God.”
Open this
link about faith in the King James
Bible.
Romans 10:9 “That if thou shalt confess with thy mouth the
Lord Jesus, and shalt believe in thine heart that God hath raised him
from the dead, thou shalt be saved.”
Open this
link of Bible Verses About Salvation,
King James Version Bible (KJV).
Hebrews 4:12 “For the word of God is quick, and powerful, and
sharper than any two edged sword, piercing even to the dividing asunder
of soul and spirit, and of the joints and marrow, and is a discerner of
the thoughts and intents of the heart.”
Romans 6:23 “For the wages of sin is death; but the gift of
God is eternal life through Jesus Christ our Lord.”
Romans 3:23 “For all have sinned, and come short of the glory
of God;”
Micah 6:8 “He hath shewed thee, O man, what is good; and what
doth the LORD require of thee, but to do justly, and to love mercy, and
to walk humbly with thy God?”
Philippians 4:13 "I can do all things through Christ which
strengtheneth me."


