DOGWOOD PRONG SLINGSHOT - OLD SCHOOL
As far back as I can remember, I have loved the outdoors; rambling the
hillsides, fields, wet weather branches, small stream beds and a few of the larger
creeks. I have some of the ramblings documented on one of my short
stories titled, Brownie,
of which my travel range by foot would normally be within four or five miles of our home on Maple Lane,
Wadesboro, NC.
I also had a passion for capturing, crows, hawks, foxes, squirrels, song birds, etc.
and raised the young ones trying to make pets out of them. I didn't
think there was a tree too large or too tall that I couldn't climb.
Sometimes, I had to use a knotted rope with a grappling pronged hook on the
end in order to snag the closest limb to the ground when the tree was too
large in diameter to get my legs and arms around part of it. The
grappling hook and rope added much more safety to climb to the first limb
and then it was fairly easy from then on. The
Lord really looked after us young boys,
because one slip could have been disastrous for sure. Take a look at
the safety gear
I currently use to ascend and descend a tree which has a metal silo type
ladder attached to it.
I taught myself to use a cheap
Shakespeare fly rod with level line and a
Pflueger single action reel by
reading magazines such as Outdoor Life and Field and Stream that my Uncle
Doug Coley subscribed to. My favorite writers were;
Joe Brooks,
Grits Gresham,
Jack O'Conner and Corey Ford who had a column
for Field & Stream called,
"The Lower
Forty", a fictional group of folks who were avid outdoorsmen and fly
rod enthusiastic. That stemmed a desire to own an
Orvis Battenkill
Impregnated Split Bamboo fly rod and a
Hardy single action reel
(way out of my shallow pockets purchasing power back then), of which it
was many decades later before I owned one that was used and it was
built in 1965 for a law firm in NY. Any fly rod purists will tell
you, there is nothing like a matched slow action spilt bamboo fly rod for
the ultimate feel in landing a fish. I gave that fly rod SN 39969
manufactured on March 31, 1965 that came
with a spare tip section to our son
Bill, Jr. during one of his latest visits. Over the decades, I have
caught my share of fish using a
Fenwick graphite fly rod and the Scientific
Anglers single action fly reel made by Hardy
Brothers in England. Decades ago, I switched fly lines to
Scientific Anglers and use mostly their bass bug taper in weight # 9 and
have used Orvis fly lines as well, keeping a DT fly line on my spare spool
for the Hardy Brothers reel. I got a little side tracked there going
back into the past, but I am back on track now........grin if you must!
For decades, I have been wanting to construction an ole timey slingshot
which consists of a forked prong, preferably made of
Dogwood and our youngest grandson, Xander
McKnight Gonzales prompted and
motivated myself to get into gear and get a couple of them
put together for him and myself. Dogwood
tree limbs usually fork out into at least two small branches aka limbs, but
finding a perfect match in the correct diameter and shape is hard to come by. To
go along with the Dogwood prong, there has to be some type of gum rubber or
latex which generates the propulsion needed to launch a projectile, which
could be a small round rock, marble, steel ball bearing, etc. To hold
the projectile, a leather pouch is needed which is attached to the rubber
bands with the two rubber bands terminating onto each end of the fork of the Dogwood
prong.
Many, many decades ago, one could find some old red rubber that would stretch and
return to its original shape which came from tire inner tubes. A-model
tires which are about extinct, had excellent rubber. I know, I have
made slingshots that the rubber bands would not propel your ammunition;
e.g., rock, marble, steel ball bearing, etc., too far at all.
Sometimes, we would luck out and get a good tire
inner tube that would stretch and last awhile. Modern tire inner tubes
are useless for a home made slingshot. Later, we used the large 5/8
inch width office supply rubber bands and cut them in half to make a longer rubber
band suitable for the slingshot, however they are not currently suitable
since they don't have the power of the ones way back when.
My first cousin,
Johnny Ray Coley, (now deceased) who lived about 1/4 mile from
our home on Sikes Avenue was my favorite pal and we made many slingshots,
homemade bows and arrows and all kinds of stuff that young boys back in the
middle 1950s constructed. We were proficient at throwing knives,
hatchets, axes, home made spears, rabbit boxes aka traps, etc., the things that young boys would do
back then. We also made
David slings,
Bolas,
boomerangs, homemade wagons,
bullwhips, telephones using
tin
cans and a string and skateboards (scooters) using the old timey lock on metal
roller
skates which was tightened with a key. I can't remember if
it was myself or others in our neighborhood that made the skateboard
scooters, but we shared riding them. Metal cans were stepped on the
middle and formed around the heel of our shoes in order to make a sound when
we were walking on the street pavement. Lard tin lids were nailed to a
piece of wood and rolled around pretending all kinds of things while drive
the Lard tin lid.....grin if you must! It was unreal, the things kids
made back in the 1950s to keep entertained!
During the time we made those slingshots, we also had our first BB air
rifles and not long after, we had our own .22 caliber single shot rifle, but
still fabricated a slingshot. I still have the ole
Winchester model 67
.22 caliber rifle to this day. My Uncle
Doug Coley pawned it off while I was
overseas in the US Navy and I found a couple of the same model in Deese's
Beer Joint and Pawn Shop here in Wadesboro, NC, being one of Uncle Doug's
hangouts. I am about certain, the one I purchased
was the one I originally had that was given to me by Uncle Doug when I was
eleven (11) years old. It was beat and banged up some but still shot
true.
I know I am rambling quite a bit, which you know this is my
modus operandi (MO).....grin
if you must!
RAW MATERIALS NEEDED FOR THE SLINGSHOT
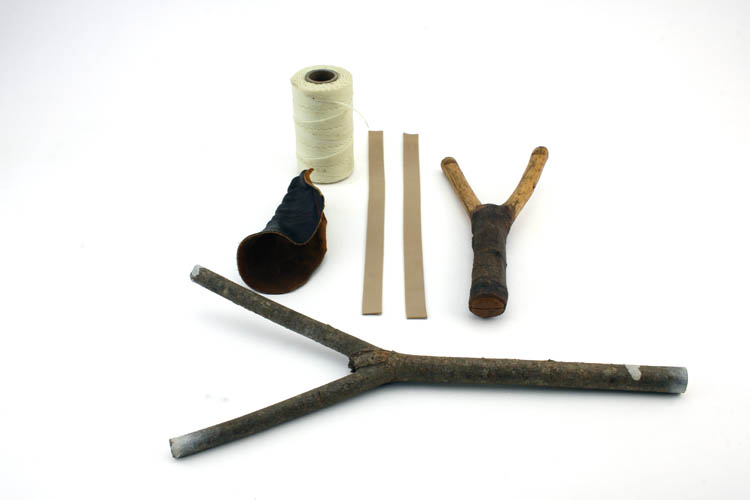
The Dogwood prongs are a little on the smaller diameter side than I
prefer, but I got what I could find at the time. I cut that set down
and had them in my basement, as I said for many decades. Normally,
we would use our pocket knives to harvest a good set of slingshot prongs and
go ahead and cut them to length and add the string/rubber band notches.
It certainly was fun making those slingshots and believe me, it takes four
hands to get the rubber bands attached to the leather pouch and to the tips
of the prongs.
In the above pix, I have a set of prongs that might be American Hornbeam
which we call
Ironwood here in North Carolina that I
cut and shaped while the wood was still green. The butt of the handle
cracked but it is still useable and will add a set of gun rubber bands to it very
soon for a spare.
The roll of nylon waxed string is what is used to tie down cable runs in
the telephone equipment offices. I had a friend,
Bill Escott,
(deceased) who was contracting for the
telephone company, get me a roll of the material. There is a special
knot we used to start the cable run when lashing cables down and when pulled tight, will not release
itself which will work great for doing the slingshot.
RAW GUM RUBBER BAND PROCUREMENT INFO
I purchased a couple sets of gum rubber flat band sets from Thomas Nelson
at Burdett, NY via the internet and disassembled one set, removing the ammo leather
pouch, since I wanted to show how the leather pouch is made from a leather
shoe tongue and tied to the
rubber bands. You can contact Nelson at:
t3wheel@htva.net
to purchase a set of gum rubber flat bands with the leather pouch attached.
Also, check his webpage at:
www.bunnybuster.com
The gum rubber bands supplied from Thomas Nelson are way too heavy and
thick in my
humble opinion, unless you have some Gorilla DNA present! His standard
bands are .065 inches thick and pull 35 lbs. +- at 29 inches.
CUTTING THE PRONGS TO LENGTH
The first order of business was to cut the Dogwood prongs to length using
the bandsaw and then file a notch on each side of each prong to help retain
the rubber band to the prongs.
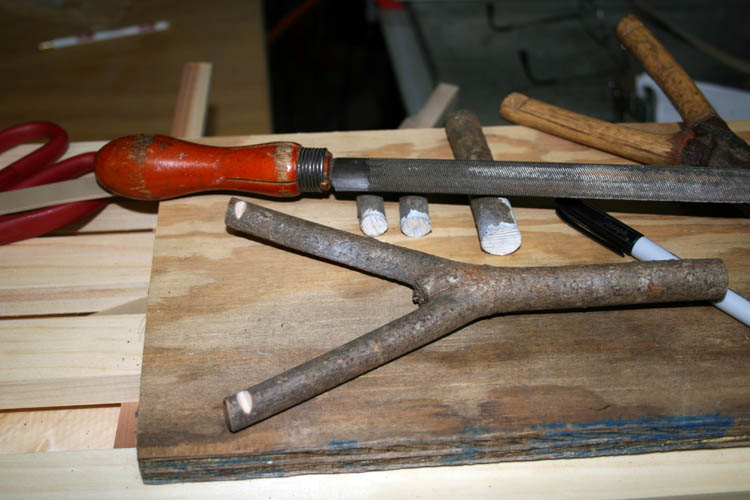
With the prongs ready for the gum rubber bands, it was time to
fabricate the leather pouch that holds the ammunition you plan to shoot;
e.g., ball bearings, marbles, round musket balls, rocks, etc.
POUCH FABRICATION
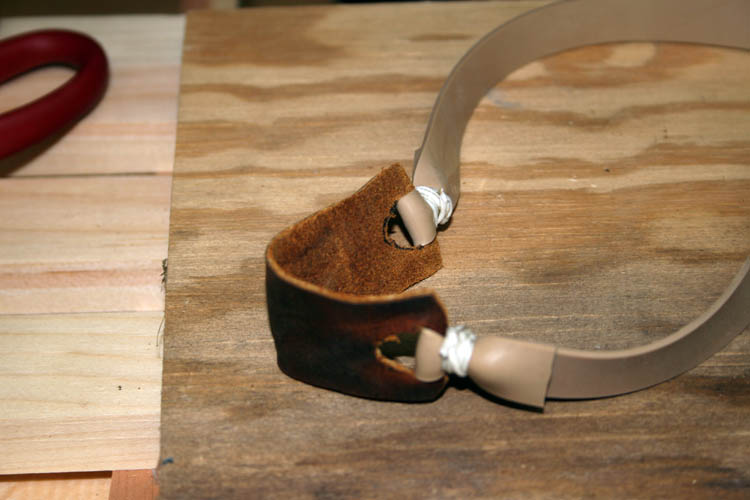
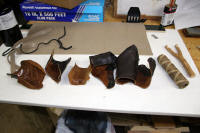
I saved the leather tongue and sides off a pair of worn out boots just
for this project and like the prongs, had the leather stashed back for a
very long time. In our youth, we used a pair of scissors and/or our
pocket knives to fashion the leather into the shape of the pouch which was
rectangular with a hole in each end for the rubber bands to fit into.
Most of the time we used rubber that was cut into strips anywhere for 1/2 to
5/8 inch width and 11 to 12 inches in length or longer.
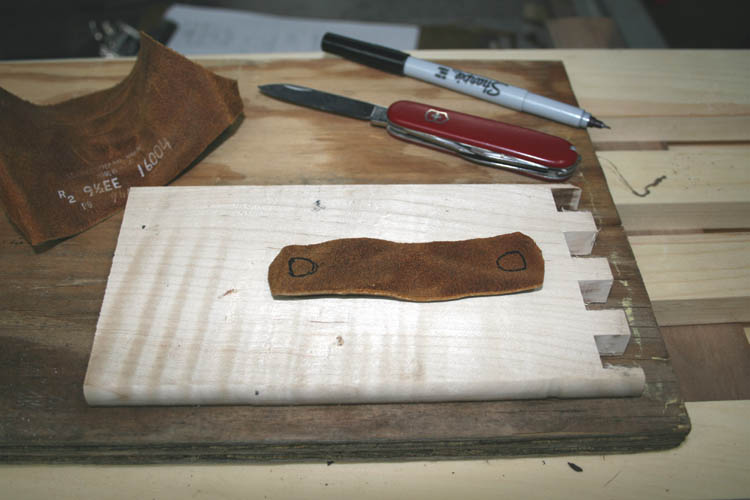
The rubber band hole is shaped more like the letter D and used a
razorblade utility knife to cut the hole out. When we were boys, we
simply folded the shoe tongue leather and used our pocket knife or a pair of
scissors to make a basically round hole for the rubber band.
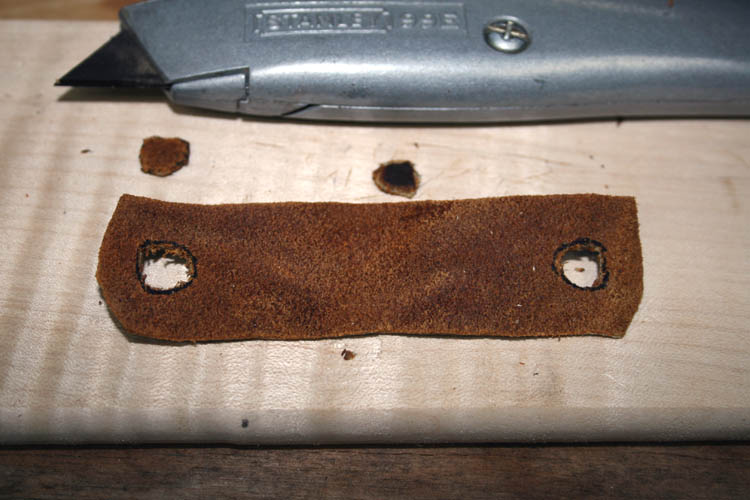
The above leather pouch is approximately 1 inch wide x 4 inches in
length x .072 inches thick.
FOUR HANDS NEEDED
I had to put my thinking cap
on to get the rubber band stretched tight and wrap the waxed nylon cord
around it tight to where it will not pull lose when stretched. I
fabricated the two extra hands by using my large vise, a couple pieces of
board to protect the leather, a C clamp and another piece of wood to keep it
into position, once the rubber band was stretched tight.
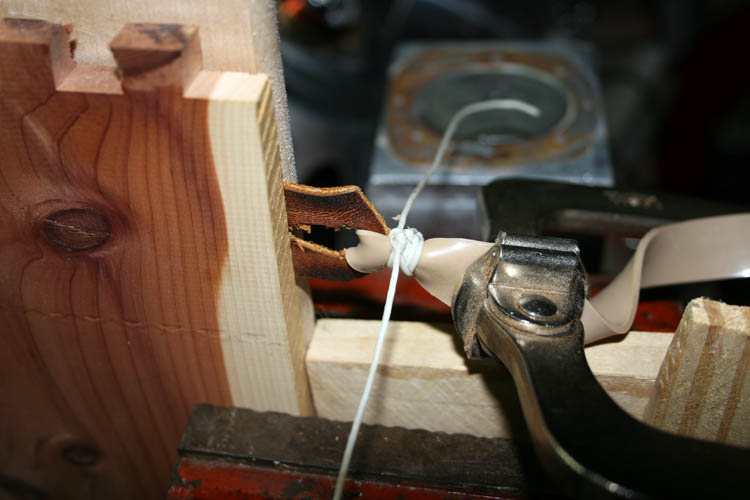
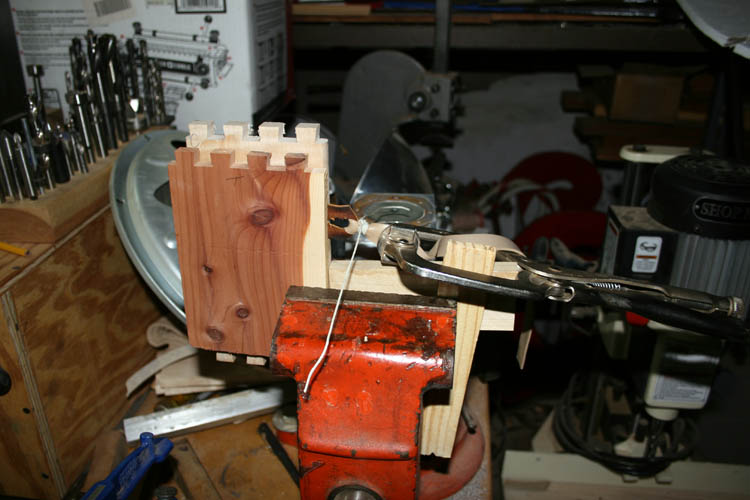
The above jerry rig worked like a champ. I used the special
friction knot and finished the tie with a
surgeon's knot which is a square knot with
an extra first wrap. If I did a number of these, I would make a holding
and stretching jig, but not for one or two items.

I don't have a clue as to what the above knot is called, but with the
waxed nylon cord, dental floss, etc., when you pull it tight it will hold and not slip.
Once you pull the slip knot tight, you tie a regular
overhand knot with the two loose ends which secures the tension
created by the slip knot.
You then make two or three wraps of each end of the cord going in opposite
directions and finish off by tying a surgeon's knot.
You have to have at least a working man's GED to create the extra
two hands needed....grin if you must! Of course, you can tie the
rubber without stretching it, but that is the way I did it as a young boy
and I guess, it is still hard to break old dormant habits.
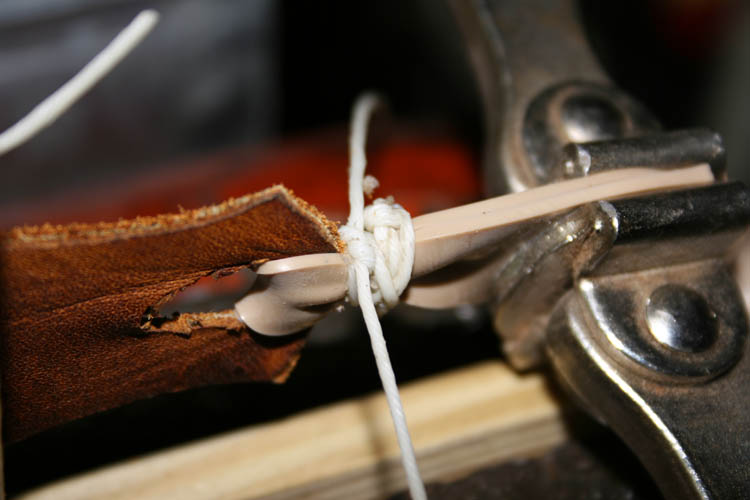
I finished the surgeon's knot by putting a little bit of Krazy Glue on
the knot, being sure to not let it get onto the rubber band, otherwise it
will soften and/or weaken the rubber band causing it to fail.
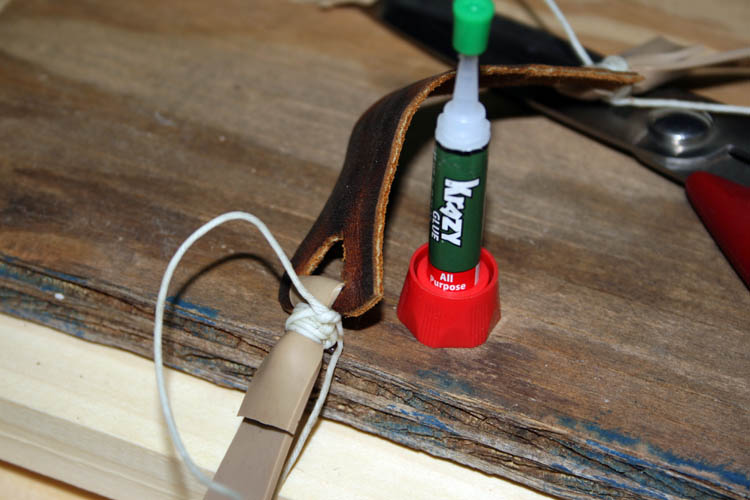
Let the glue dry a minute or two and trim the ends....ready for the other
side of the rubber band to the pouch. I love what the manufacturers
tell you when you are assembling their products; e.g., doing the opposite
side of their product, whatever it might be; Example: Repeat steps 1 thru 5,
etc......another grin is in order if you must!
RUBBER BANDS TO THE PRONGS
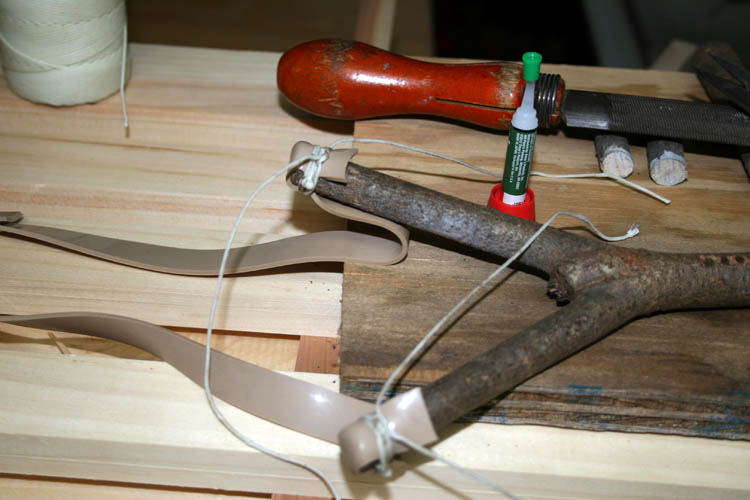
I held the Dogwood handle section in the vise by the butt and it
was easy to stretch the rubber band over the end of the prong, holding it in
place with the thumb and forefinger. I already had the special slip
knot ready and placed it around the rubber brand and prong with the other
hand. The slip knot was pulled tight and then wrapped the cord around
the prong while continuing to keep tension on the rubber band and prong
while wrapping the cord. Once a couple wraps was in place, I released
pressure from the rubber band and prong and used that hand to finish tying
off the cord with a surgeon's knot.
Again, Krazy glue was applied to the surgeon's knot and the cord ends were
trimmed.
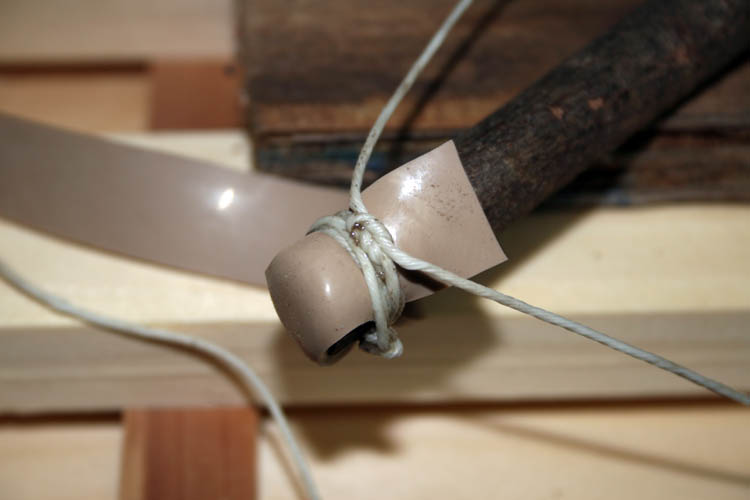
The tying of the pouch and the bands to the forks is an overkill for
sure....grin if you must!
READY FOR FIELD TESTING
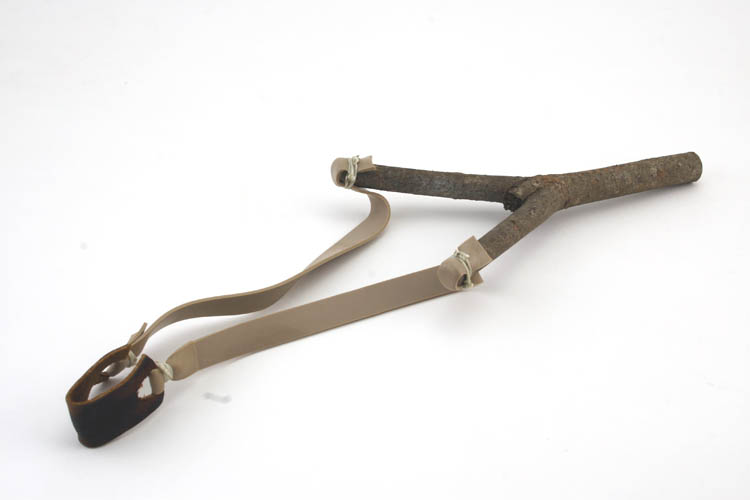
Tomorrow, I will see if I can still shoot a slingshot
instinctive and if I was a gambling man, I
believe with a little practice, it will be like riding a bicycle. One
of the hazards of shooting this type of slingshot is, don't place your thumb
off the handle or side of the prongs, otherwise it will be in the line of
fire and that is definitely not a good thing.......been there, done that.
Then, there is the ever present hazard of one of the rubber bands breaking
while at full draw, therefore it is best not to try and sight it like
shooting a rifle, but shoot it at about waist to chest height, purely
instinctive. You simply look at what you want to hit and pull the
loaded pouch back and let it go. It is akin to throwing a rock or
baseball.
SAFETY ALWAYS FIRST
Shooting the slingshot with any type of anchor; at the corner of your
mouth, cheekbone, under the eye, etc., one should always wear a pair of
safety and/or shooting glasses for eye protection in case of a band failure
and/or prong failure, etc. Safety always
has to come first!
If one is savvy and accurate enough, small games such as rabbits,
squirrels and even quail can be harvested with the ole slingshot. I
think we more or less worried the song birds to death with those slingshots,
along with tin cans, and yes, we burst our share of glass bottles, etc.; not
worried about anyone later getting cut on the broken glass, but that is youth for
you.
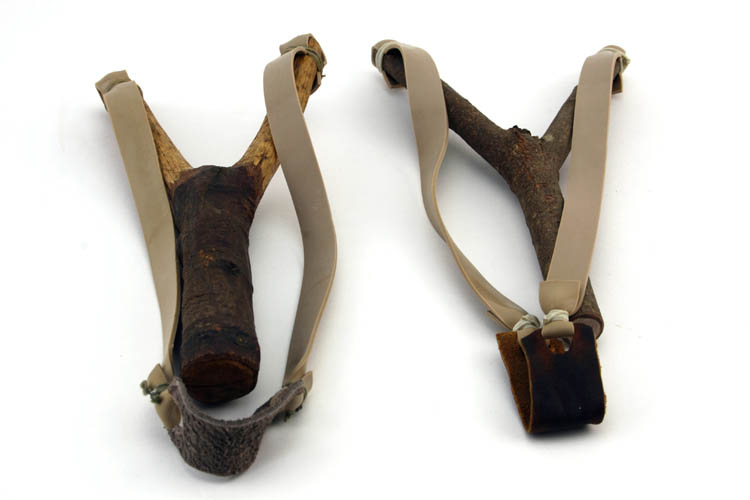
I got the ole Ironwood set of prongs rigged up and Xander and myself will
have some serious fun this coming Saturday, if the weather is conducive.
We
recently had a gulley wash of a rain on 05-04-17 and the morning of
05-05-17, hopefully it will remain dry on the 6th. As the country folks use to say,
"It was raining cats and dogs."
UPDATE ON SHOOTING THE SLINGSHOT
I got around to launching about 10 or more rocks through the slingshot
and I was definitely surprised in a somewhat non-positive way.....grin if
you must! I hit the target which was an oil
filter can only one time at about 21 feet. I forgot to take into account
that date on my birth certificate. However, I believe with a good
amount of practice, I will be able to hit some targets on a regular basis.
This slingshot is a lot more powerful than the ones I made back in the
middle to late 1950s due to much better raw gun rubber bands of today and
this particular rubber is about .065 inches in thickness.
I definitely had a tremendous amount of fun trying to get back into the
groove. I don't think I need to take a trip to Las Vegas no time soon.....grin if
you must!
Web published update by Bill aka Mickey Porter on 05-05-17.
RUFUS HUSSEY "THE BEAN SHOOTER MAN"
Rufus Hussey (deceased) from Seagrove, NC was probably the
best of the
best around NC as far as making and shooting the ole timey dogwood handle
slingshot aka bean shooter. He was interviewed by Carolina Camera years ago and
there are several
videos of
him on YouTube. I couldn't get the direct link to work, but if you
type in his name on YouTube search, several videos will be available to view.
The first link in this paragraph to Rufus Hussey, Wikipedia, has several of
the links active.
I watched one video where Rufus Hussey showed how he tied off the rubber
to the prongs and the leather pouch. Rufus used a # 32 rubber band for
the prongs and a # 16 rubber band for the pouch connection and easily tied
them without any trouble. Of course, he tied # 9512 in the video and
that is a humongous amount of slingshots aka bean shooters as he calls them
since he was 10 years old. He started selling and giving them away
starting in 1952 and one reference had him making over 15,000 bean shooters
aka slingshots. Most of his tricks shots were at about 20
feet and closer and he was totally awesome.
Rufus shot purely instinctive and noticed he used some good sized rocks
in the leather pouch, of which in the archery tournaments would be line
cutters for sure akin to a 2512 aluminum arrow!
Rufus is buried in the
Smyrna United Methodist Church Cemetery in
Moore County, Robbins, NC.
TOM ALLEN WEBSITE
Tom Allen, a friend and hunting companion of Rufus Hussey has the
procedure that Rufus Hussey used for making his beanshooters at this
link. Tom has some good short
stories and excellent photographs on his website as well.
IN CLOSING
Youth of today, don't have a clue what we did growing up making our own
"toys" and things to keep ourselves entertained. Now with all the modern
technology and gadgets, I believe the brain power and creativity is being
diminished or should say, not being used to its potential. Technology is
doing a tremendous amount of thinking for us currently. For example: How many people dial telephone numbers from
memory? Technology does it for us. I make it a point to dial
some numbers from memory to keep the brain active.....guess I am still
old school! The old saying,
"If you don't use it, you lose it"
and how true indeed!
This was a fun project and it certainly brought back a lot of good memories
from the past. I don't mind going back in time reflecting on
the wonderful and simple things of Life.
I plan to get our youngest Grandson,
Xander McKnight Gonzales over and give him
some lessons on shooting the slingshot. He just turned eight years old
and about the right age to have some fun besides video games, etc. I
don't think I will let him take the slingshot home with him, but he will use
it under my immediate supervision at our home where there is plenty of space
to send some rocks airborne ......grin if you must!
I let Xander shoot a more modern
Wrist-Rocket slingshot that has a handle
and frame formed from a sold aluminum rod, with a plastic handle insert and
surgical tubing for the rubber bands. We used fired .22 caliber
rimfire spent cases for ammo and he did very well. Personally, they are more
powerful than the old style slingshots we made, but with the extended
forearm piece resting on top of your slingshot forearm, they don't seem to
allow you to shoot instinctive as good as the old style of slingshot.
I have owned at least two of the modern Wrist-Rocket type slingshots and
still have one.
Web published by Bill aka Mickey Porter on 05-02-17 and updated on
05-05-17.
BABY BOY SLINGSHOT
A few days ago, my friend Robert Webster visited me along with his Dad
and I got out the two slingshots I put together above.
All three of us shot my two slingshots, of which Robert's Dad stated they
looked like something
Dennis the Menace had in his back pocket
when they were traveling back home......another grin is in order. All
of us had trouble pulling the slingshots back to our normal full draw; the
bands are too stout!
We were shooting at a Vienna can that was on top of a 1.5 inch diameter
pipe at about 45 yards +- and Robert's Dad just about hit it a few times
after he go the elevation figured out.
Robert came back yesterday and had several Dogwood prongs that his Dad
had made and let me choose the one I wanted and below is the one I picked:
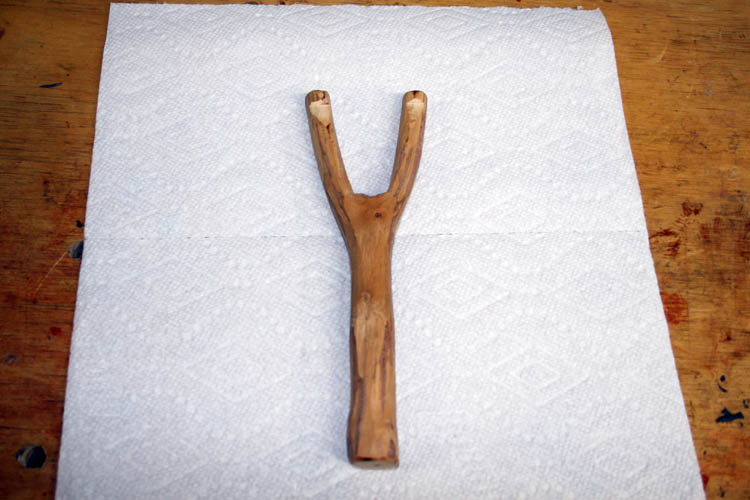
All the prongs were narrow and decided to find the raw gum rubber material I had
stored and band the prongs up.
Click on the below thumbnail pixs for a larger screen view:

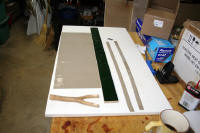
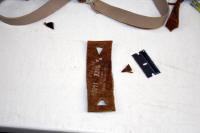
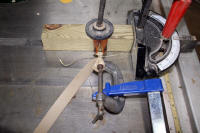
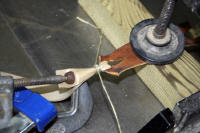
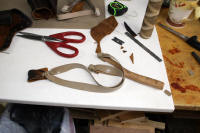
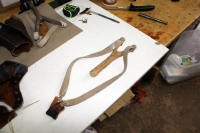
I left the bands long to start with at 14 inches in length, but they were
fine for getting at full draw length pull at least 30 inches, but there
wasn't any velocity to the 3/8 inch diameter steel projectile. I
reduced the length to 12 inches and it was still difficult to pull back at
full draw.
I put the slingshot on my bow scale and it read 35 pounds pull at 30
inches. Without a good grip on the handle and resting your thumb on
one of the forks, I could not pull it back to full draw. I bounced one
of the steel balls off the left fork right about my right thumb and it was
time to retire baby boy before I damage part of my thumb.
With the narrow forks, you definitely have to shoot over the top style
and not cant the prongs, however you could shoot the prongs at ninety
degrees, but the prongs have to be parallel to the target, otherwise the gap
between the prongs will get narrower if the prongs are not parallel to the
target.
Robert saw the above Rube Goldberg method I used to hold the leather
pouch and band in place while I tied it and I reminded him of his favorite
saying for something called,
functionality which is his saying!
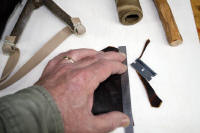
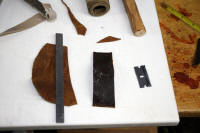
I will definitely purchase a cutting matt and roller cutter to utilize a
better and easier method of cutting the latex bands.
ORDERED BILL HAYS HATHCOCK TARGET SNIPER
Robert was all fired up about constructing a slingshot using a laminated
frame, of which I wasn't interested and told him I wasn't going to take on
that type of project, since I have a
curly maple coffee table in the making as soon as the weather
turns warm allowing me to do some serious sanding with my basement
woodworking shop door open. He kept on and on about making a laminated
frame slingshot which has a carved handle and has viewed untold numbers of
video clips off YouTube. I finally told him
"I had an ace in the hole", and wasn't making one, of
which he later called back and said he wouldn't be able to go to sleep
unless I told him what I meant. I finally got weak and told him I had
ordered one of Bill Hays
Hathcock Target Sniper model slingshots and
didn't want to re-invent the wheel. He said, he told his wife he bet I
had ordered a slingshot; grin if you must!
When I emailed and ordered the Hathcock Target Sniper slingshot at
www.pocketpredator.com I sent a link to this web page and Daranda
Hays emailed me back and here is what she said,
"Looks like a good frame. Good for the Dennis the Menace shoot at the ECST."
Robert and his Dad will certainly get a good grin out of that.
Web page updated by Bill aka Mickey Porter on 02-12-18 and 02-13-18.
UPDATE ON BABY BOY SLINGSHOT
I installed another set of weaker bands on the
Baby Boy Dogwood slingshot
prongs which are Sparco Rubber Bands # 107 being 7" x 5/8" and cut them in
half and was able to stretch them out to my full anchor draw at the corner
of my mouth being 26 to 27 inches with no trouble. With the narrow width forks, you have to
hold the slingshot prongs parallel to your target, otherwise you will glance
a ball bearing off one of the prongs and in my case it appears to be the
left prong. It is no fault of the slingshot prongs, but my
inexperience in shooting a narrow fork prong slingshot. Practice will
take care of that I am sure.
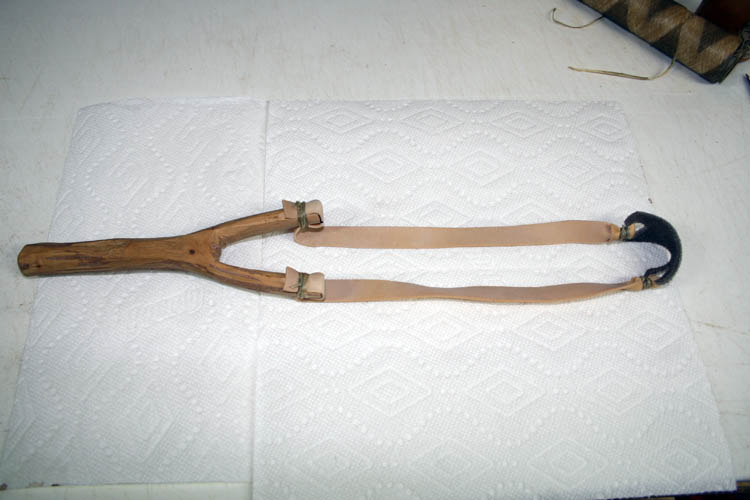
With that said, my friend Robert Webster of Hamlet, NC who is depicted in
many places on this website especially in the
Fishing Story web folders gave me some
"chin music" for the Rube
Goldberg contraption I used to hold the bands to the ammo pouch while tying
them in place. Since it appears that both him and myself will be
rigging up some slingshots, I decided to make a fixture to hold the bands to
the pouch to facilitate the typing process; e.g.,
"Work Smarter Not Harder." I
didn't want to re-invent the wheel so to speak and used a couple
DeStaCo
225U toggle clamps I had on hand, along with some
EZ inserts. I had
scrap aka unallocated wood and it didn't take too long to fabricate a
fixture to hold bands in place while tying them to the ammo pouch.
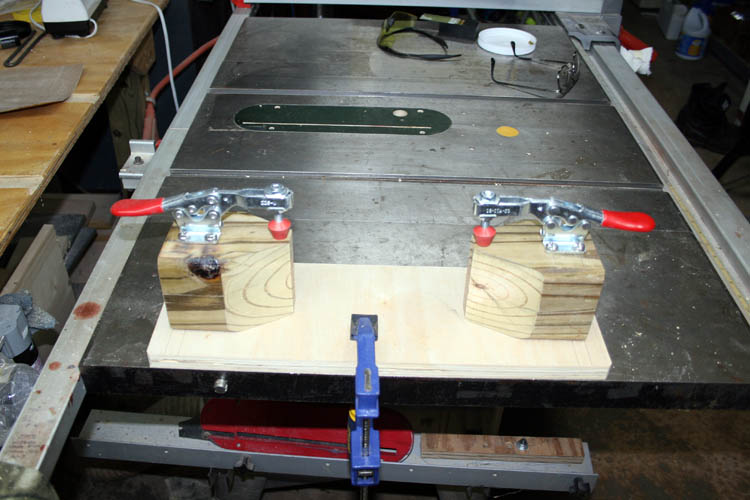
I used four 1 1/4 inch length flat head screws to secure each wood block to the
base. Since I set the separation between the two clamps for a 5 inch
length pouch, I will have a placement for using the shorter pouch which is
around 3 inches +-.
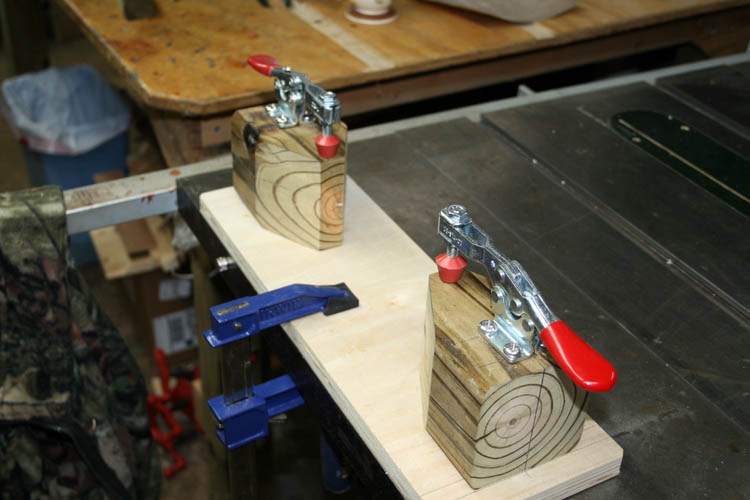
When, I do another slingshot band/pouch, I will add pixs of the fixture
in operation.
The fixture is portable and when not needed will be stored out of the
way.
Web page updated by Bill aka Mickey Porter on 02-14-18.
ANOTHER UPDATE ON BABY BOY SLINGSHOT
I removed the bands on Baby Boy slingshot and rigged them up for true OTT
shooting. I am still using old school tying methods and string, such
as waxed nylon that was used in the telephone industry for tying and/or
lashing down the ends of cables to terminal equipment back in the early
1970s, etc.
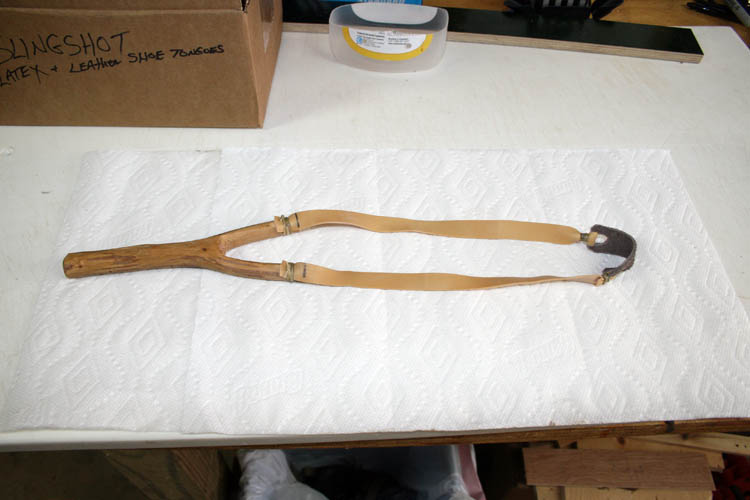
One of the bands to the pouch is twisted and will retie it later.
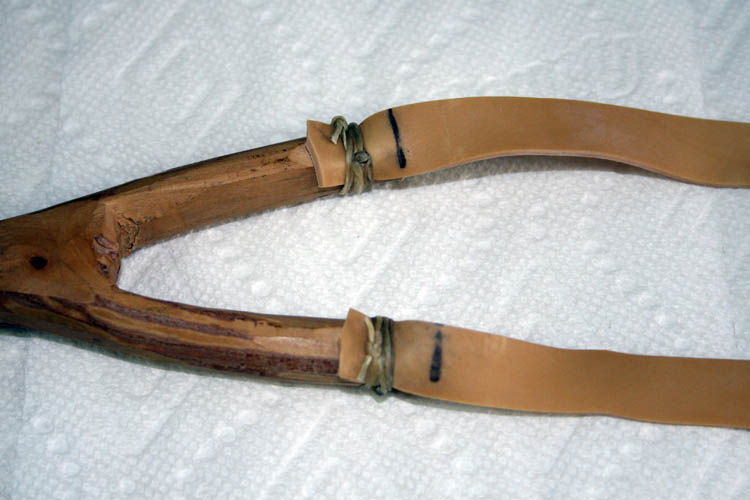
I rounded over the tops of the forks on the 1 inch width band sander.
I also checked the distance between the top of the inside forks aka prongs
and it was 1.5 inches and you now see why I call him
Baby Boy........grin if you must!
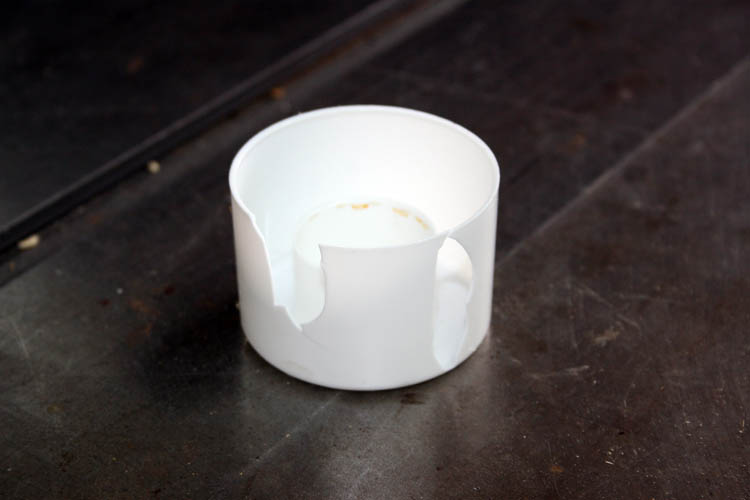
I set a 2.5 inch diameter aerosol paint can top/lid on my skinning table at my
deer hanging tree I nicked named Tom Dooley aka Dula; stepped off 10 yards
and nailed the plastic can top/lid with the second shot. I was surprised
at the difference the OTT makes as far as not bouncing/glancing ammo off the
prongs versus the Dennis the Menace type attachment. I took several shots from about 20 yards and was able to
hit the aerosol can top/lid, but it took several tries.
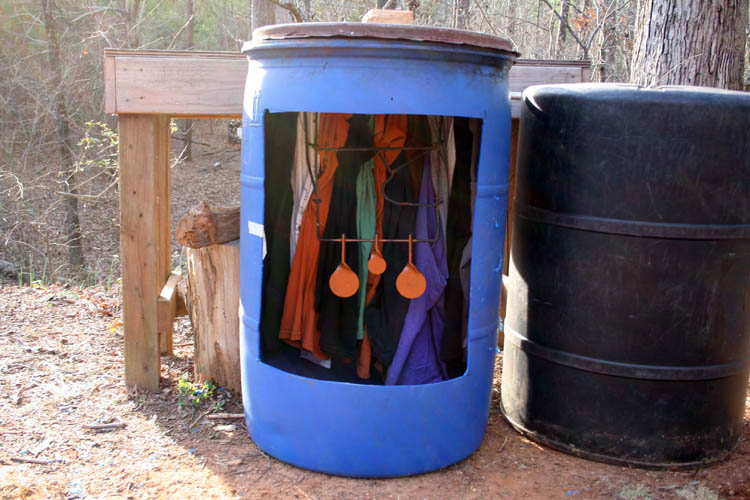
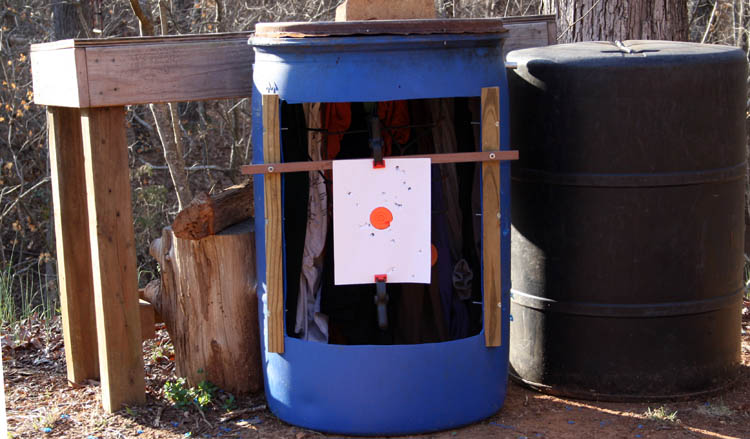
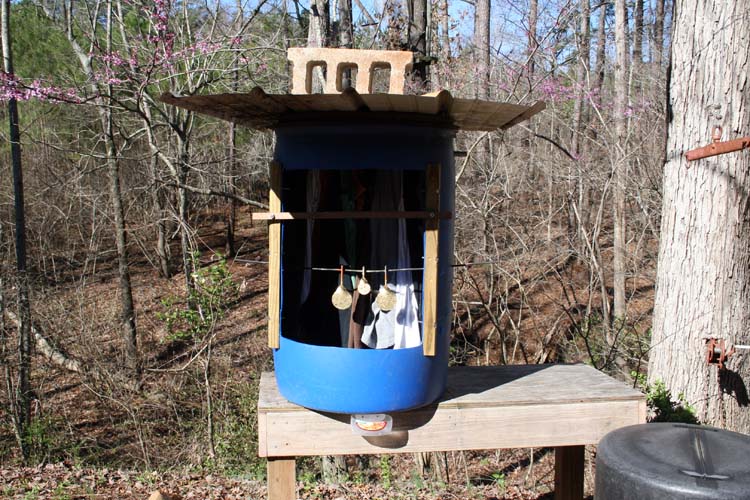
SLINGSHOT CATCHBOX CONSTRUCTION
Since those steel balls cost money, I decided to make a simple ammo
catchbox using a heavy gauge 55 gallon plastic barrel which already had the
top cut out of it. All I had to do was cut the front out, drill a
couple holes for a 1/2 inch EMT rod to pass through. I also drilled
holes for a hitch pin on each end, since I plan to thread cloth, rags,
whatever I can find onto the rod and leave the stuff hanging down like
drapes. I also drilled 3/16 inch diameter holes in the bottom of the
plastic barrel for drainage. My friend Robert Webster stated I could
put the piece of material removed and add it back to the barrel with hinges
and I might do that to help keep the rain out.
I plan to secure a metal 55 gallon drum lid for the top.

I might have to move the metal rod further back into the drum, but will
give it a field test when the rags, etc. is installed. I could have
built a wood frame around it, but trying to keep it as simple as possible.
There are plenty of methods to hang and/or mount targets to and in front of
the catchbox.
Web page updated by Bill aka Mickey Porter on 02-15-18.
CATCHBOX FINISHED
I found a bunch of tee shirts that are sizes 2x and 3x that were given to
me, of which are too large for myself and hung them onto the 1/2 " EMT rod.
I threaded the tee shirt sleeves onto the rod and bunched them together like
hanging drapes or curtains.
I also re-banded the larger set of slingshot prongs which I believe is
native
Ironwood instead of Dogwood with a longer set of 3/4 x .065 latex
rubber bands with a static length of 11 inches which gave me a draw weight
of approx. 20 pounds of pull at 30 inch length draw.
I did some test firing at 10 yards and I could hold the slingshot fairly steady with
my left thumb anchored in the corner of my mouth. With the 3/8 inch
diameter steel balls, the velocity was good too. Later, I will set my
Chrony up and see what the velocity of the 3/8 steel ball is.
Robert Webster came by for a visit and brought a set of steel targets and
we rigged them up in the catchbox. We shot at them with Baby Boy and
the HTS and my Ironwood slingshot and hit them fairly regular. Robert
finished up shooting Baby Boy and I told him,
"He was the Man" since he called his last couple shots on the
smaller diameter target. I later sprayed a coat of fluorescent
orange paint on them and will sling a few steel balls at them in the
morning.

The
Hathcock Target Sniper slingshot ordered,
arrived in the mail this afternoon and shot some 3/8 inch diameter steel
balls, but the bands slapped the web near the base of my thumb on a regular basis. I
will have to do some research and find out what the problem is. The
HTS doesn't fit my hand and is awkward after using the regular Dogwood
Dennis the Menace type slingshots off an on since my youth. One thing
is for certain; the Theraband gold bands which is installed on the HTS
being 1 inch in width and 8 and 1/4 inches inches in static length, is easy to draw at 29 inches
and is around 12 pounds pull, plus or minus and sends a 3/8 inch diameter steel
ball down range at a good rate of speed. The band length, might be too
long for my 29 inch draw length anchoring in the corner of my mouth and could
contribute to the hand slap, but is probably something else.

I ordered a spare set of Theraband Gold bands and the Titanium band
holders.
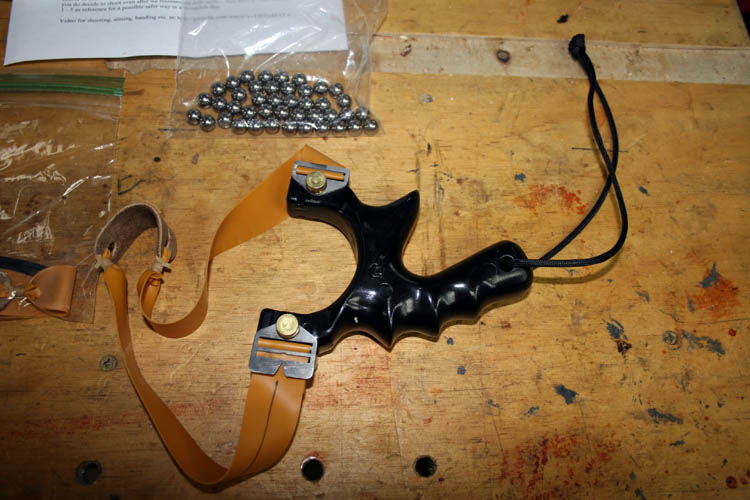
I am going to get some serious practice aka
"practising" in with the Hathcock Target
Sniper before I look at another set of prongs.
Web page updated by Bill aka Mickey Porter on 02-16-18.
HATHCOCK TARGET SNIPER UPDATE
After a couple days of shooting the above HTS, I quickly found out
that it doesn't
fit my hand and to me is very, very awkward. I have gotten a lot of
hand slap resulting in bruising on the web of my hand which appears to
be a problem with my shooting technique; e.g., speed bump, hand hold
(flipping sytle), etc. I
guess I am still old school as
far as holding the slingshot and old habits are hard to break. I
want to shoot TTF (gangster style), but will rig it up for OTT and see if I
still get rid of the hand slap.
I am shelving the HTS at this time and going back to a more traditional
handle such as the Simple Shot
Scout model which is more versatile.
The HTS is a little too large for my hand and like I said, is
extremely awkward for myself personally. I guess it is all about
personal preferences and what one likes and is more comfortable with. If
something is not a pleasure to use, you are wasting your time.
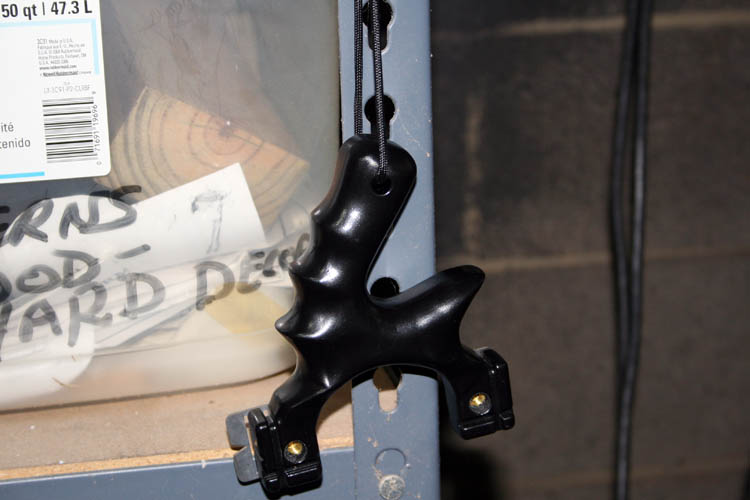
I will use the band set on another slingshot prong. That is one
"high dollar" band set for
sure....grin if you must! The HTS above looks like
Tom Dooley aka Dula headed for the White Oak hanging tree.
Web page updated by Bill aka Mickey Porter on 02-18-18.
BANDS AND POUCHES
Using my game processing cutting board, razor blade and utility knife is
not the ideal method for cutting latex bands and it wasn't expensive to
upgrade to something much better to do it right. Our local Walmart had everything
needed; e.g., cutting matt, ruler and rotary cutter. I had a stainless
steel 18 inch ruler with a thin cork backing on it, but don't have a clue
what happened to it which would be great for this type of project.
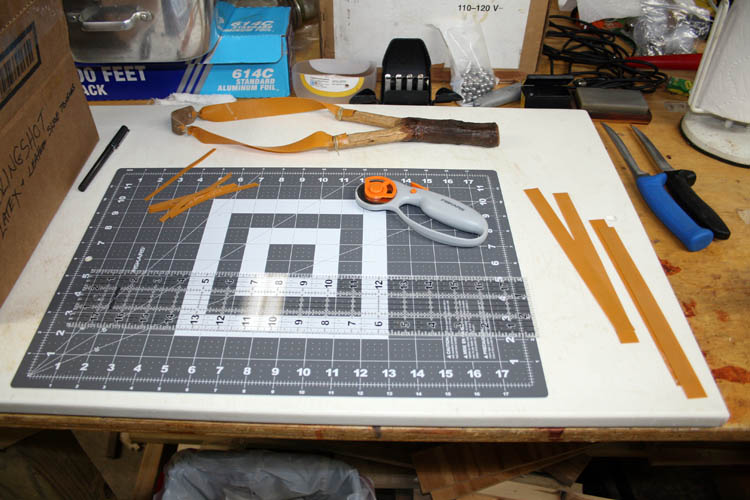
I purchased 5 feet of Theraband Gold off EBay and it was a breeze to cut
a 10 inch length into 3/4 inch wide strips which yielded 6 bands and had
some excess for attaching the bands to the pouch and/or prongs.
I plan to use a standard length pouch instead of the 4 inch length ones I
made to "chunk" rocks out of the Dogwood and Ironwood traditional Dennis the
Menace prongs. I changed the spacing between the two DeStaCo 225U
clamps to accommodate a 3 inch length pouch to allow for a little stretch of
the bands.
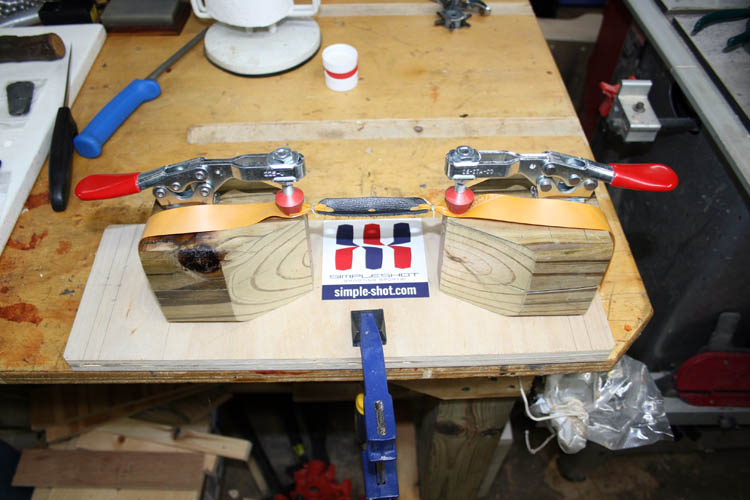
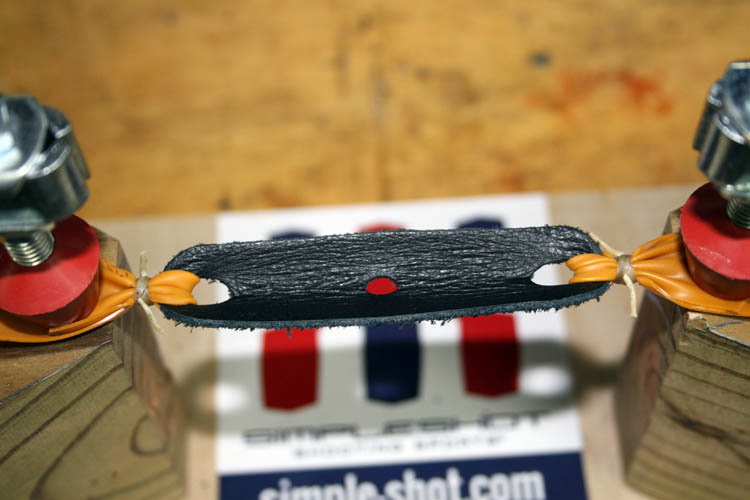
Close up view below of the band to pouch attachment using a
constrictor knot and
Simple Shot
pouch.
Web page updated by Bill aka Mickey Porter on 02-20-18.
SIMPLE SHOT SCOUT SLINGSHOT
I received the Scout model slingshot in this afternoon (02-22-18) and
used a half round rasp, round file, sandpaper and a Scotchbrite pad to
relieve the sharp edges on the upper handle. I rigged the bands up for
TTF shooting and shortened them to around 8 inches. Simple Shot has an
excellent video showing the modification
here.
Click on thumbnail pixs for a larger screen view:
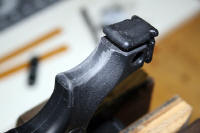
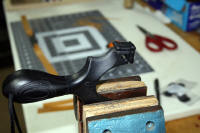
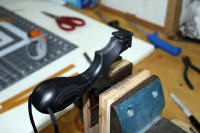
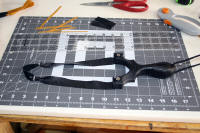
I didn't go overboard with rounding over the sharp edges; just enough to
where it felt comfortable.
The Scout fit my hand real well.
I did some shooting from 5 to 20 yards TTF
(gangster style) and was getting a little hand
slap every once in a while, glanced one off the forks and then got a good
solid hit on the web of my hand with a 3/8 inch diameter steel ball.
OUCH! This is FIRST BLOOD for sure!
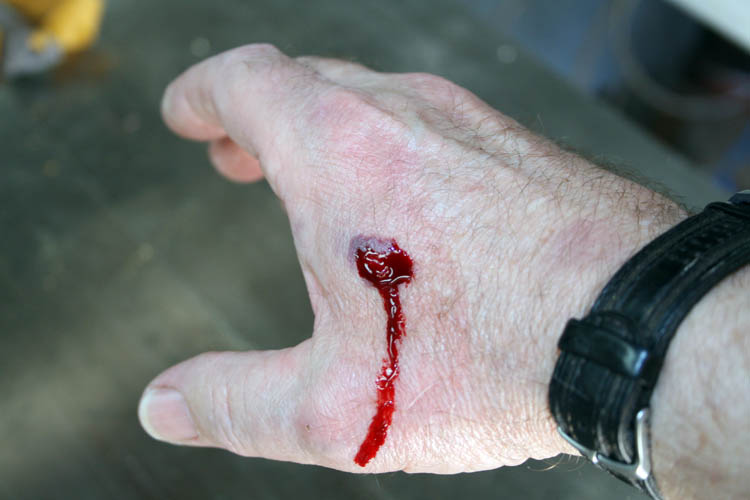
Those 7/8 inch wide black latex bands has some power in them for sure as
evidenced by the above pix. It took a good 1/2 inch diameter patch of
hide aka skin from my hand. With my hand position on the Scout, the
above was a glancing strike. I cleaned the wound up, placed some
Neosporin on it, followed up by a waterproof Band-Aid.
BACK IN THE SADDLE AGAIN
I rigged the Scout up for OTT aka (over the top) with vertical
prong orientation and did some shooting with it and didn't
have any problem with hand strikes. BTW, just for a little more
protection of the hand and my mental attitude, I wore a heavy cotton
glove.....grin if you must! I had better stick with vertical prong
orientation OTT style
shooting versus the horizontal prong TTF aka Gangster
Style.
Most of the top shooters are using the Gangster Style which allows the top
band to be used like a rifle barrel sight, but I guess I am
"broke from sucking eggs"
with that style of shooting for the time being!
Whatever I was doing wrong, I was consistent with both the awkward
Hathcock Target Sniper
and the Simple Shot
Scout slingshot as
far as hitting the web of my hand.
So far, I am well pleased with the Scout even with First Blood being
drawn. My right hand web area is beginning to turn yellowish/green
since it has been about three (3) hours since the blood letting. My
right hand is my guitar picking hand and use my thumb, index and middle
fingers for playing my
resophonic guitar.
Our Church group is
playing and singing at the Ambassador Rehabilitation and Healthcare
Center here in Wadesboro, NC this evening around 6:30 P.M. and trust the fingers will be
ok, of which I believe they will.
Web page updated by Bill aka Mickey Porter on 02-22-18.
ANALYSIS OF HITTING THE WEB OF MY HAND
I released the bands of my slingshot without a ball bearing and noticed
upon release my slingshot hand rotated forward placing the web of my hand
more in the line of fire, of which is probably the main culprit.
According to the slingshot experts, a very bad release (speed bump) can also
direct the ammo aka ball bearing toward the web of your hand and also
attributes to fork hits.
Currently, I am not using the
gangster style of shooting which is far superior in accuracy compared to
shooting purely instinctive.
Web page updated by Bill aka Mickey Porter on 03-10-18.
SHORTENED PRONGS ON IRONWOOD AND DOGWOOD
I shortened the prongs on both the Ironwood and Dogwood prongs.
Since the wood was dried and hard as a rock, I used the bandsaw to take
about an inch off them. I used a handsaw to cut the notches on them
and used a utility knife to open and blend a taper to the notches.
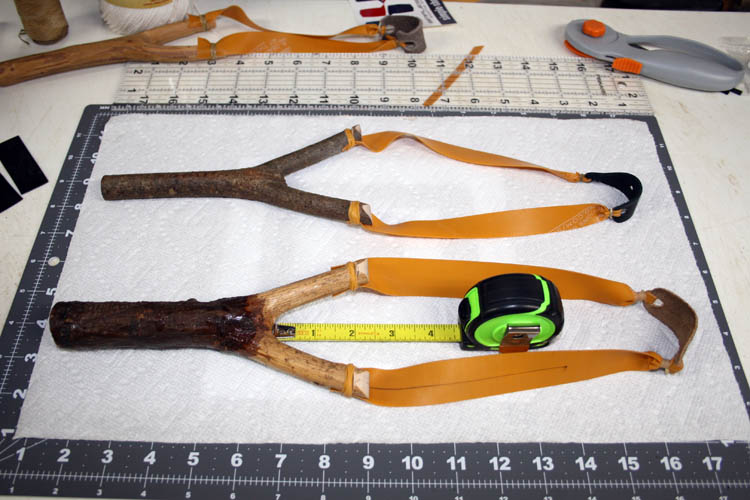
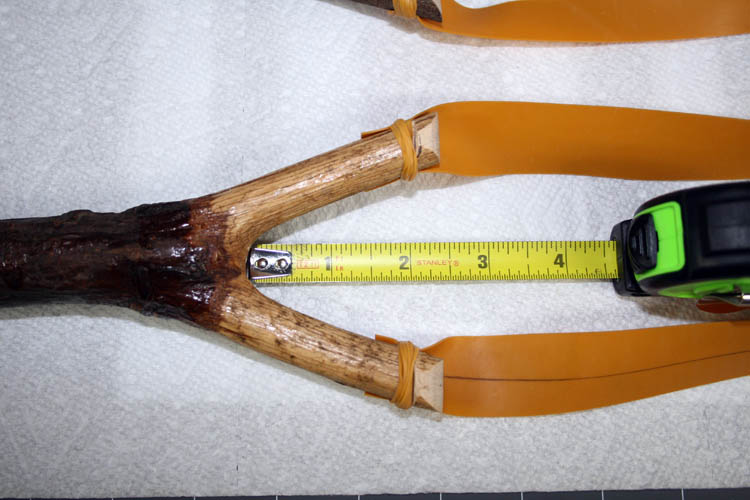
Web page updated by Bill aka Mickey Porter on 02-24-18.
CHRONOGRAPH TESTING ON 02-23-18
I got out my Shooting Chrony model F-1 and shot several 3/8 inch diameter
steel balls across it to ascertain the speed of the Ironwood, Dogwood and
Scout slingshots.
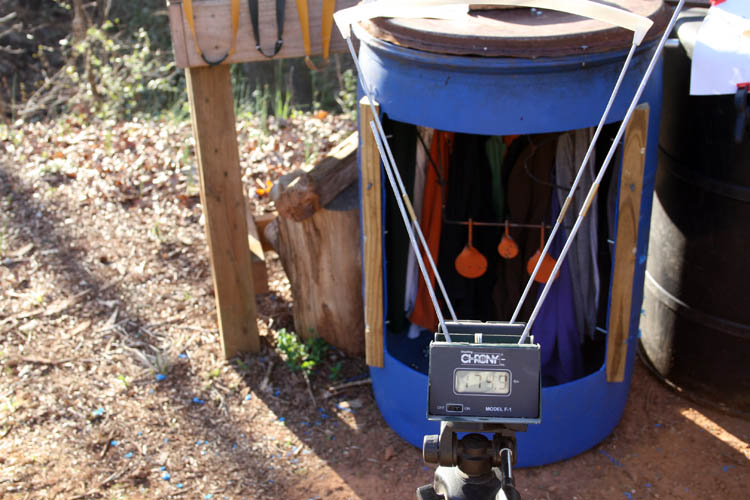
Close up of the Shooting Chrony in action below:
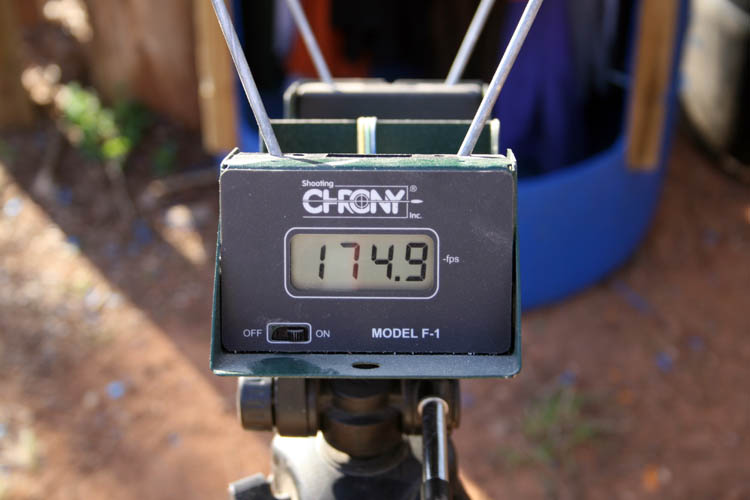
All three slingshots has an active band length (ABL) of 7.5 inches
and will give the variables for each slingshot.
It should be noted that my actual draw length is
26.5 inches at the corner of my
mouth....guess I have short arms.....grin if you must!
The Ironwood has 1 inch width Theraband Gold bands and pulls 12
pounds at 29 inches. Recorded velocities are: 183, 187 and 184
feet per second. I didn't record the decimal fps.
The Scout has 7/8 inch wide black latex bands from Simple Shot and
pulls 11 pounds at 29 inches. Recorded velocities are: 178.3,
175.5 and 177.5 feet per second.
The Dogwood has 3/4 inch wide Theraband Gold bands and pulls 10
pounds at 29 inches. Recorded velocities are: 177, 174.7 and
177.7 feet per second.
The guys with the Orangutan arms with a draw length from 40 to 50 inches
using the butterfly and modified butterfly draw will definitely get the speeds around 250 fps and upwards.
I will give a velocity test on Baby Boy slingshot tomorrow, if the
weather is conducive.
Web published update by Bill aka Mickey Porter on 02-23-18.
CHRONOGRAPH TESTING BABY BOY
Pix of Baby Boy with 3/4 wide Theraband Gold bands with active band
length of 7.5 inches.
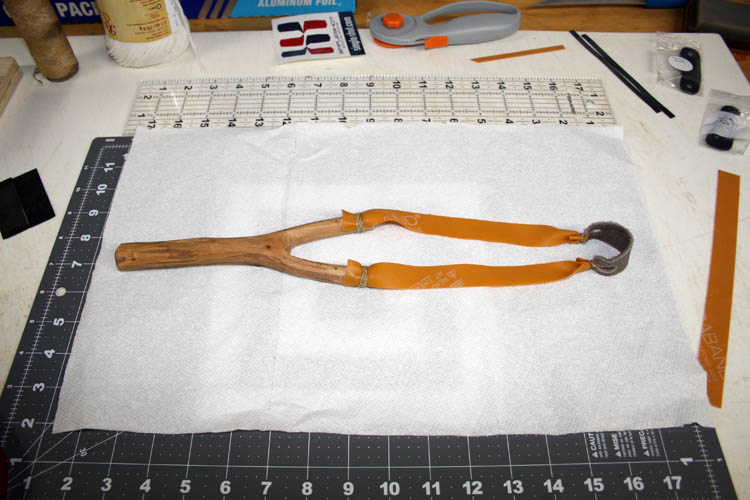
The following are the results of shooting 3/8 inch steel balls across the
Shooting Chrony; 179.1, 182.2 and 175.7 feet per second. I am sure I
wasn't hitting the same anchor point each time.
NOTE: Using the Theraband Gold latex, with my 26 inch to 27
inch draw length, I need to have the
active band length around 5 inches which is
for an elongation factor of 5 for the Theraband Gold latex which allows you
to get the best performance from the bands; e.g., speed versus band life.
All my bands (active band length) are much longer than the optimum and will
later shorten them when I get settled in to a consistent anchor point.
Web page updated by Bill aka Mickey Porter on 02-24-18.
CONSTRICTOR KNOT
My friend Robert Webster and his wife Sandra came over for a visit this
afternoon and while the girls were hanging out topside, Robert and myself
did some practice tying the Constrictor Knot in my basement woodworking shop. We had to watch a
video
to get it right. We had previously viewed several YouTube videos
showing how to tie the constrictor knot using various techniques, but we settled on the version
below which has sequence pixs posted.
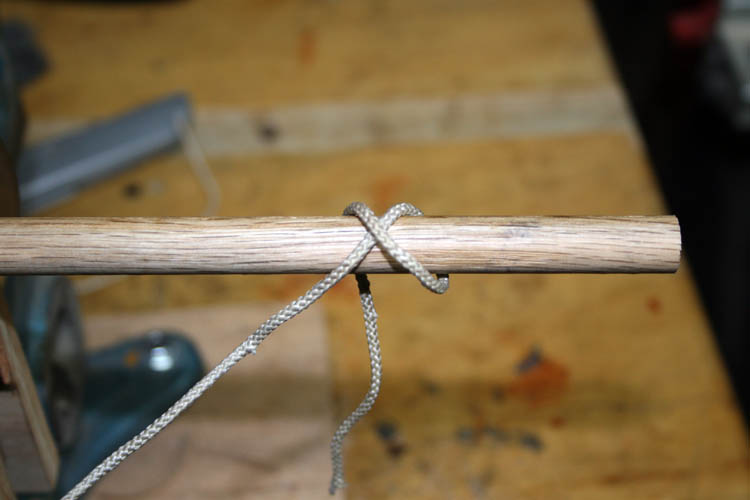
Make an overhand loop with the tag (short end) hanging down.
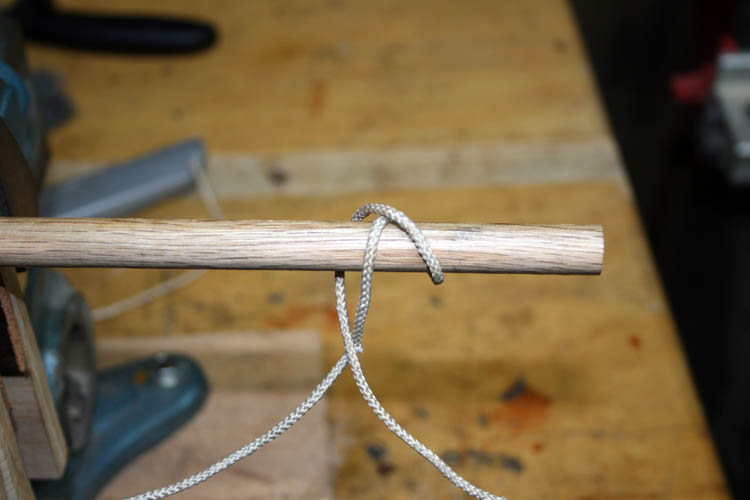
Pass the tag (short end) over the long end as shown above.
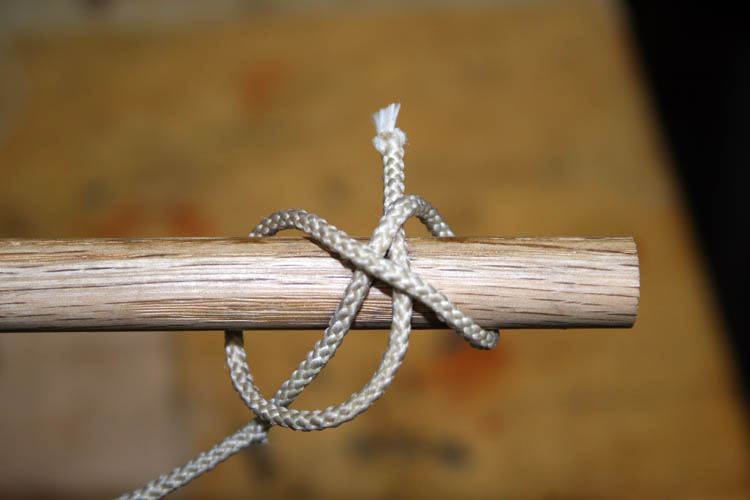
Pass the tag (short end) underneath and between the X created as shown.
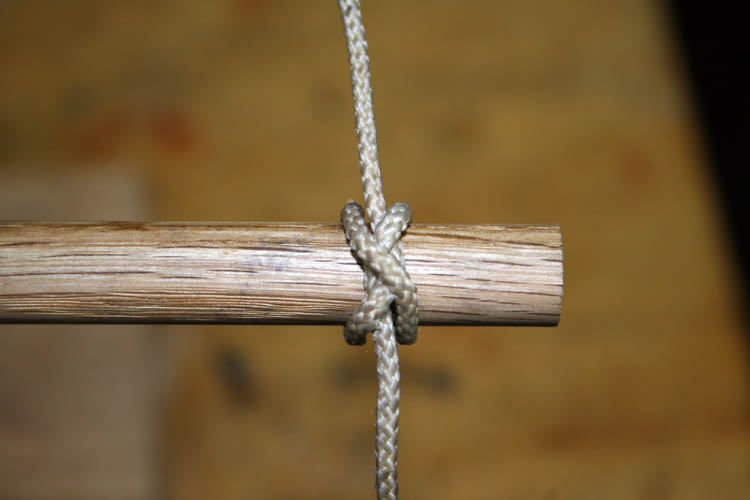
Pull both ends tight which completes the constrictor know. You can
use the knot to tie the bands to the pouch if desired, however a # 32 rubber
band or narrow width of scrap Theraband Gold wrapped and the end pulled through
using a loop is secure also.
Simple-Shot has an excellent
video showing two alternate methods of
tying the constrictor knot also.
Robert and myself got some serious practicing in using our slingshots
too.
Web page updated by Bill aka Mickey Porter on 02-25-18.
RELOCATED SLINGSHOT WORK STATION
I relocated my slingshot work station to my archery corner in the
basement "Man Cave" which
frees up my work/outfeed table in my woodworking shop which has served as a
temporary work place to mess with the slingshots.
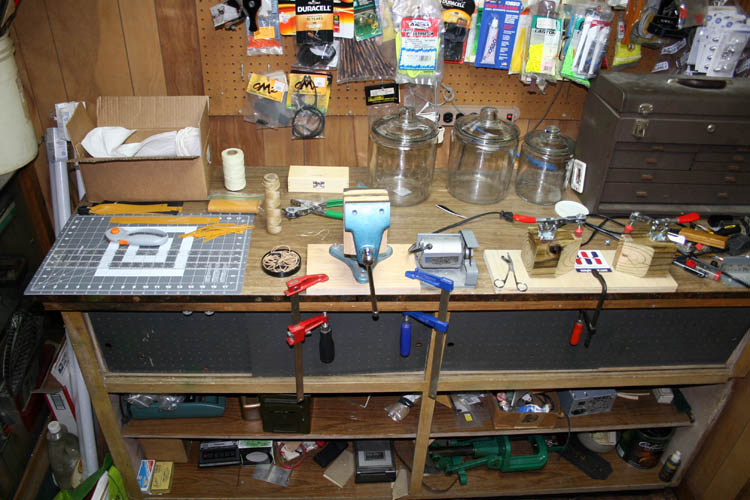
The above showcase was purchased from
C. E.
Ward of Ward's Musical Instrument Repair in Charlotte, NC back in
the mid 1970s when he closed his repair shop and moved to Concord, NC.
The glass front of the showcase is toward the wall. I later removed
the glass top and added a
heavy 2 x 6 wood construction top and 3/4 inch plywood, of which Bob Efird (deceased) of
Albemarle, NC, laminated Formica on the top and edges for me. That
showcase top triples as my arrow making station and reloading station as
well. A lot of
my musical instrument friends
and customers have departed to the next life and certainly do miss
them. Time waits for no one!
I took my RCBS Big Max reloading press off the top and it is shored on the
bottom shelf.
Web page updated by Bill aka Mickey Porter on 03-01-18.
CATCHBOX AMMO TRAP
On 03-02-18, I drilled a 1 7/8 inch outside diameter hole in the front bottom
portion of the catchbox barrel to collect ammo shot. The catchbox if
fairly level, therefore the steel balls are raked into the opening leading
to the plastic recycled catchbox tray. I could tilt the barrel forward
to let gravity take its course, but the bottom of the plastic barrel has
some high places in it due to its manufacture.
Click on below thumbnail pixs for a larger screen view:


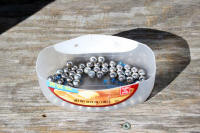
The plastic container aka ammo trap is a recycled pancake syrup bottle.
With the elevated catchbox, you don't have to bend down much to retrieve
your ammunition and your slingshot arm is more level too. This ammo
trap will work much
better and faster than using a magnet to remove the ammo in my humble opinion.
When our annual deer hunting season comes in, I will remove the screw
that has the bottom of the plastic barrel secured to the top of the deer
skinning/quartering table to allow full usage of the table. I will be
thinking about the easiest way to have the catchbox elevated off the ground
as above.
Web published update by Bill aka Mickey Porter on 03-02-18.
WEBSTER'S PINK PANTHER
Robert Webster stopped by for a short visit on 03-03-18 while in route to
Lake Tillery, NC. He brought his Dogwood slingshot I nicknamed The
Pink Panther because of the pretty rubber band wrapping on the upper prongs.
He shot the Pink Panther at 10 meters and nailed a small metal target 3 out
of 4 times! He should have quit while he was ahead.
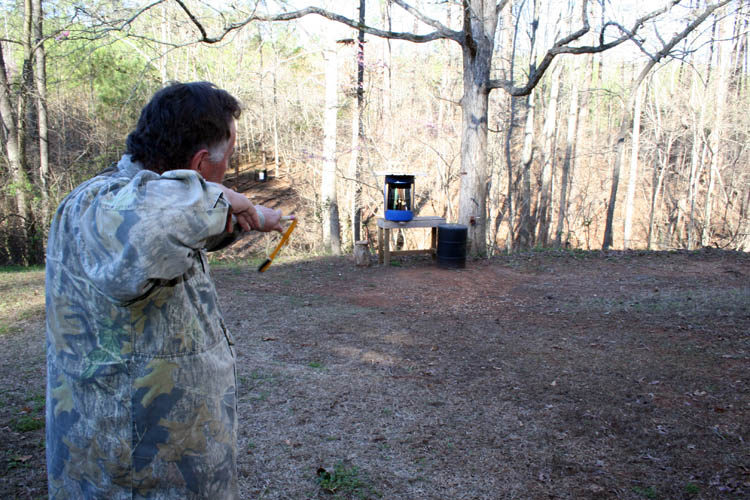
Ten (10) meters looks a far piece off using the 18 to 55MM zoom lens at a
wide angle.
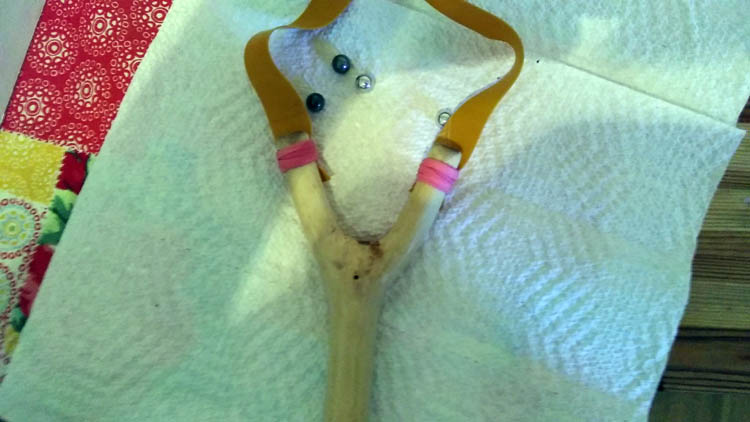
Pix above that Robert sent me from his
Obamaphone a day or two ago before he "slicked" it up.
Now you see where the Dogwood prongs got its name from......grin if you
must!
Web published update by Bill aka Mickey Porter on 03-03-18.
MAPLE WOOD NATURAL SLINGSHOT PRONGS
I took a short stroll behind our home looking for natural slingshot
prongs and cut a couple from Maple tree limbs. Didn't see any Dogwood trees
on our property that I wanted to harvest a set of prongs from, but will keep
my eyes peeled before all the tree sap rises.
The prongs I cut will definitely need some serious trimming on the
prongs, especially the pair on the left in the pix below. They would
be fine for Bigfoot as is, but I plan to trim them down and leave the handle
as depicted, except remove a couple small knots. I haven't decided if
I want to trim the bark from the handles or not. I do like the
character and appearance of the natural bark on the handle, however
sometimes the bark will not stay attached during the drying/curing process.
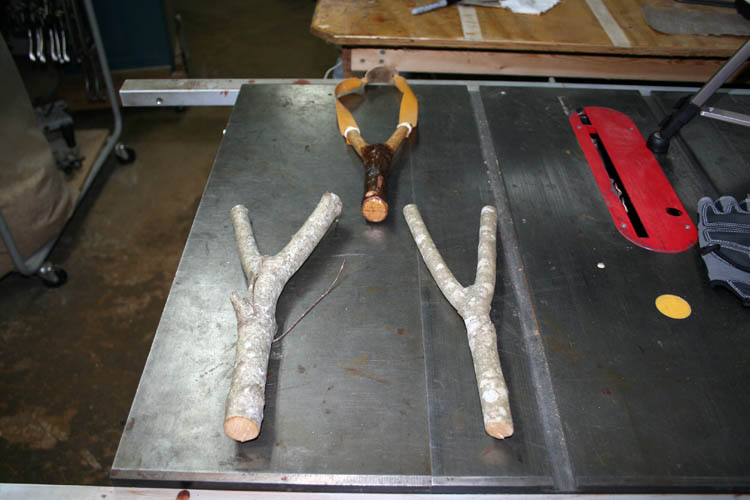
The slingshot prong on the left, I named Bigfoot.
I sealed the ends with lacquer and hope it will slow down the drying process
to prevent any serious cracks/checkering, etc. I don't have any of the
high tech chemical stuff such as
Anchorseal and
Pentacryl to seals the ends with. I
am in no hurry and will let them cure (air dry) on their own.
Web published update by Bill aka Mickey Porter on 03-03-18.
MOISTURE CHECK
I checked the moisture content and it was about twenty-three (23) percent
on both the prongs on 03-03-18 and will check them every week or two and see
how much moisture evaporates.
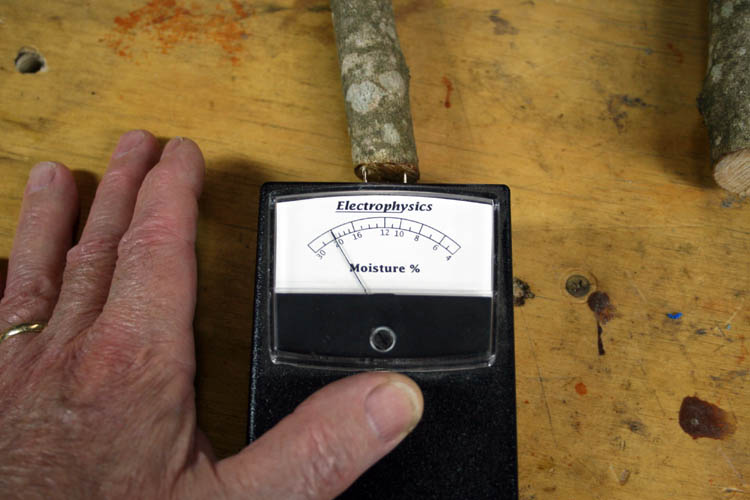
Above pix taken on 03-04-18 and the moisture content was reading around
twenty-one (21) percent. I checked the Ironwood slingshot and the
moisture content was between six (6) and seven (7) percent. I don't
have the conversion scale handy for the above meter for the different
species of wood, but this inexpensive meter will give you a good
ball park estimate of the
moisture content. As stated in the beginning of this short story,
those Ironwood prongs have been inside for many decades and also have been
lacquered over as well. The Ironwood prongs probably date back to the
mid 1970s.
Web page updated by Bill aka Mickey Porter on 03-04-18.
WEBSTER KLAN SHOOT OUT
Robert Webster sent me a couple pixs from his
Obamaphone of the Webster Klan getting some slingshot
shooting time in. An excellent pix of Robert's Dad, Robert Junior
Webster who shoots left-handed.
Wesley and his nephew Jeremiah Stewart were slinging ammo fast and furious along with ole Daddy Rab.

Daddy Rab Webster having to bare down and displaying pretty good shooting
form!
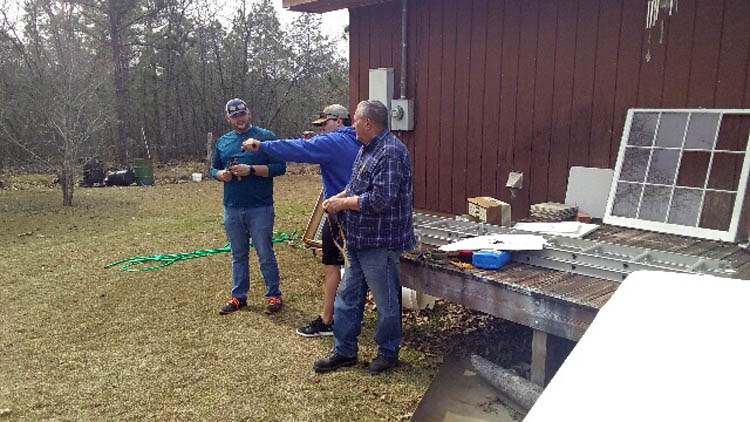
The way I have been shooting lately, I need to get a 11 meter funnel
tapered down to about a one inch opening and place it in front of my target in
order to make a bullseye hit....grin if you must!
Web published update by Bill aka Mickey Porter on 03-10-18.
LEAVING ON A
SPIRITUAL NOTE
If you do not know Jesus Christ as your Lord and Savior, please take
this moment to accept him by Faith into your Life, whereby Salvation
will be attained.
Ephesians 2:8 - 2:9 8 For by grace are ye saved through
faith; and that not of yourselves: [it is] the gift of God: 9 Not of
works, lest any man should boast.
Hebrews 11:1 “Now faith is the substance of things hoped for,
the evidence of things not seen.”
Romans 10:17 “So then faith cometh by hearing, and hearing by
the word of God.”
Open this
link about faith in the King James
Bible.
Romans 10:9 “That if thou shalt confess with thy mouth the
Lord Jesus, and shalt believe in thine heart that God hath raised him
from the dead, thou shalt be saved.”
Open this
link of Bible Verses About Salvation,
King James Version Bible (KJV).
Hebrews 4:12 “For the word of God is quick, and powerful, and
sharper than any two edged sword, piercing even to the dividing asunder
of soul and spirit, and of the joints and marrow, and is a discerner of
the thoughts and intents of the heart.”
Romans 6:23 “For the wages of sin is death; but the gift of
God is eternal life through Jesus Christ our Lord.”
Romans 3:23 “For all have sinned, and come short of the glory
of God;”
Micah 6:8 “He hath shewed thee, O man, what is good; and what
doth the LORD require of thee, but to do justly, and to love mercy, and
to walk humbly with thy God?”
Philippians 4:13 "I can do all things through Christ which
strengtheneth me."


