CHANGING JET 13" PLANER/MOLDER JPM-13CS KNIFES
I purchased a Jet 13" Planer/Molder over seven (7) years ago and a set of
special molding knives to form the radius on my
turkey box call lids.
That planer/molder has gotten a serious workout, not only with turkey box
call lids but some of my projects such as
heirloom boxes,
napkin holders,
serving trays,
hanging porch swing,
banjo construction, etc., of which a good amount of the surface planing was on
hard curly maple wood which takes a toll on dulling the planer knives very
quickly.

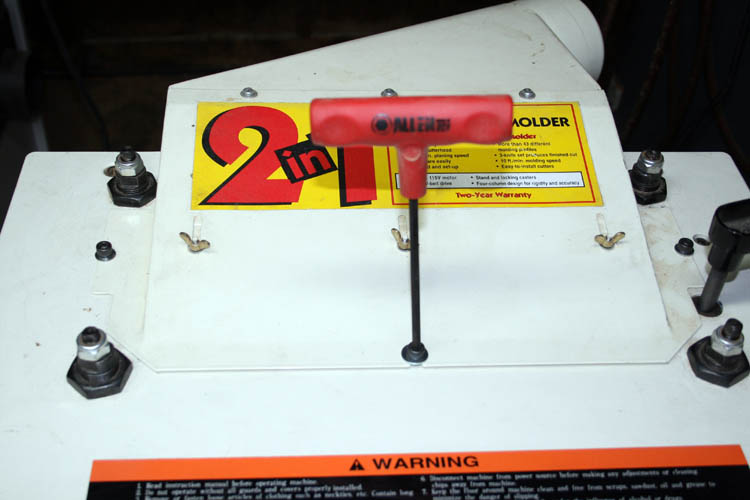
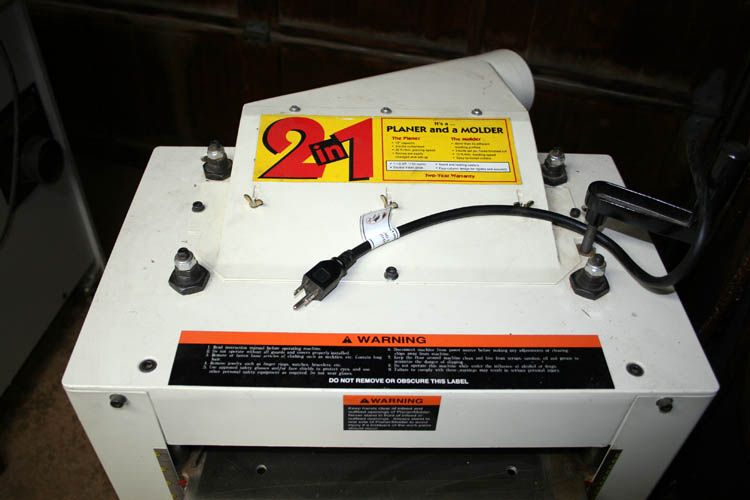
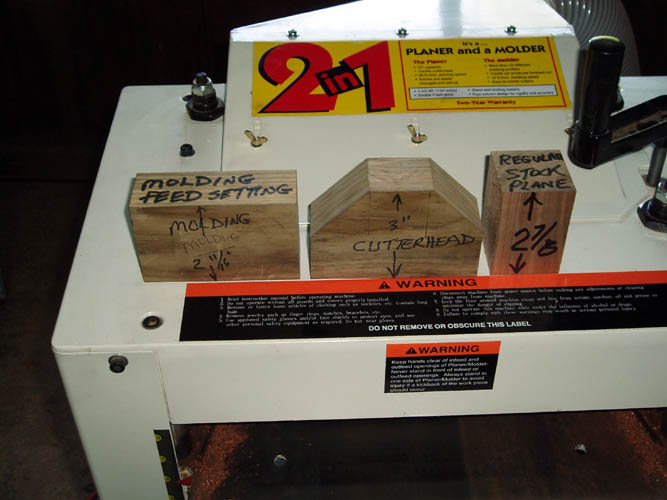
Above is an internet stock photo of the Jet 2 in 1 planer/molder.
After looking at what a replacement set of planer knives for the Jet 13"
planer cost, it was definitely cost effective to have them re-sharpened at this
time; at least that was surmised.
I carried the knives to a a facility that specializes in sharpening saw blades of all types
and of course planer knifes. The turn around is around a week.
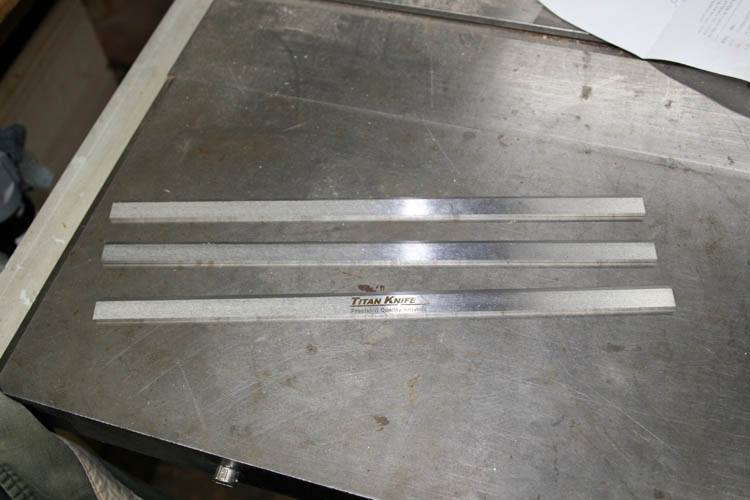
I did internet searching and found several companies offering replacement
knives for the Jet 13 inch planer/molder and they priced in range from over
100 bucks directly from the Jet distributor to 39.95 for a set of
Titan Knives. There were cheaper
knives, but when the shipping was factored in, the Titan Knives were the
best bang for the buck. I ordered a set of the
Titan Knives from Oella Saw and Tool located in Elliott City, MD and the
knives arrived on 04-12-17, which excellent quick service.
PERSONAL SAFETY AND LIABILITY ISSUES
My goal will be to keep Safety
paramount because hand and power tools can do serious bodily harm and death
if not used properly, therefore these pages are solely for
entertainment purposes only from
a personal liability standpoint. Please read the
Legal Stuff
page for additional information concerning liability issues
before going any further. Safety glasses and hearing protection is a must,
although I do forgo the hearing protection many times; my bad!
SAFETY FIRST - DISCONNECT POWER SOURCE
Safety has to be first, therefore unplug the power cord to the machine.
If directly hard wired, flip the breaker switch to the off position and secure
breaker panel where no one else can flip the breaker switch back to the on
position. This is mandatory in a work environment!
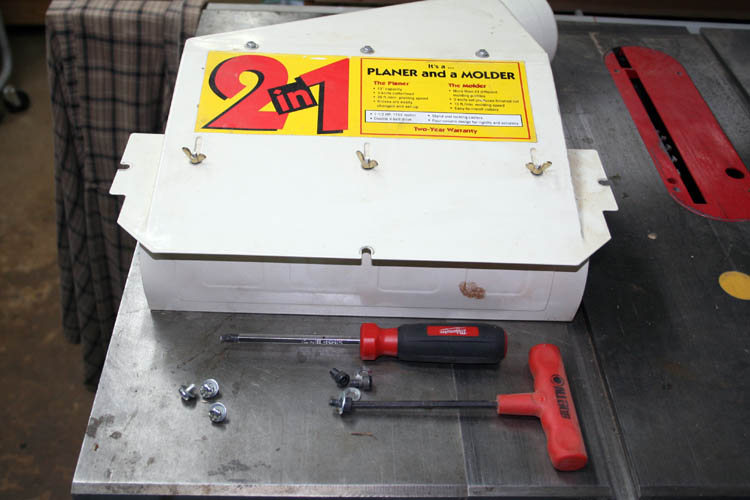
In order to remove the planer knives, there are three (3) hex socket head
cap screws on top of the dust hood dust chute and three Phillips head screws
on the rear of the dust chute.
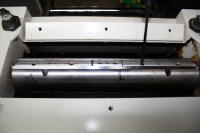
After removing the three hex socket head cap screws and three Phillips
head screws, the dust cover and chute can be removed by pulling the cover
upward, allowing access to the cutterhead assembly which contains the three
knives, long and short lock bars.
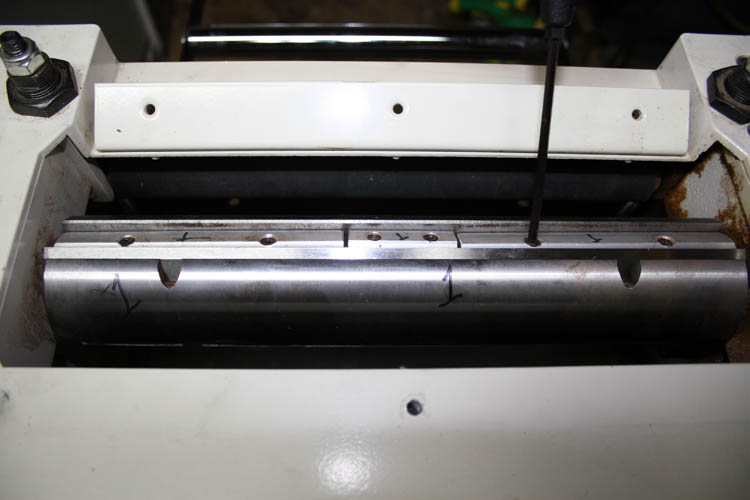
Exposed cutterhead assembly below.
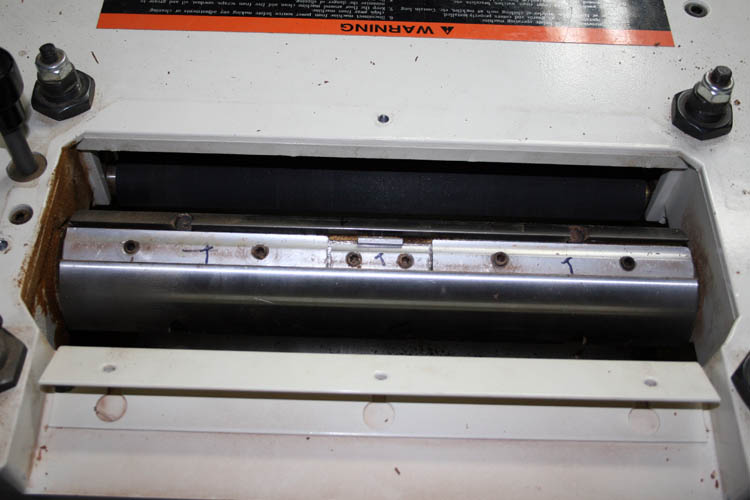
With a marking pen, label each knife on the cutterhead one, two and three
for easy identification. I went ahead and labeled the lock bars for
each knife also.
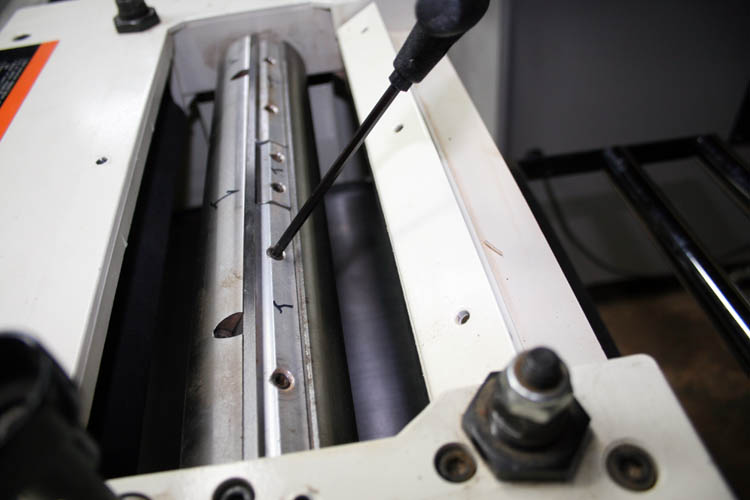
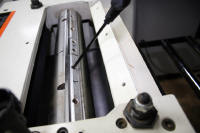
Loosen all lock bar set screws on knife number one. With the brass
rod that is provided in the tool kit with the machine; using a mallet,
carefully tap on each end of the outside of the set screws for all three
lock bars on knife number one in a downward direction. This loosens the taper fit of the lock
bar causing the lock bar to go downward into the slot of the cutterhead
assembly removing tension against the knife and the side of the cutterhead
slot. Carefully remove knife. Remove lock bars. Clean all
surfaces of the cutterhead, slot, gibs, locking bars, etc. Repeat the
same for knives two and three.
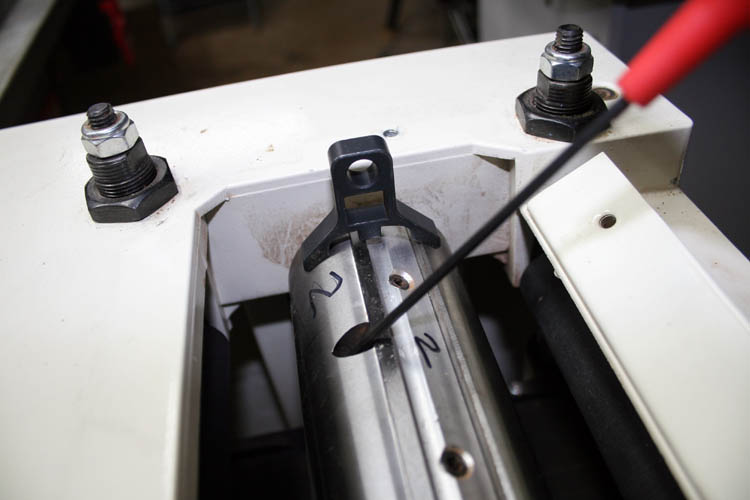
AUXILIARY PLATFORM
The center short 2 inch length lock bar is for special molding of which
the molding cutter knife will be at least 1/8 inch higher than the regular
cutterhead knives and requires a special trough to be made to center the
wood in line with the molding cutter knives. Also, the in-feed and
out-feed rollers have to be re-adjusted when using molding knives.
There is a lot of set-up involved to use the center slot for molding knives
and a dedicated molding machine would be highly desirable. With the
molding knives in place, you are limited to the width of material you can
plane and also you are limited to a 2 inch wide molding cutter which worked
fine for my turkey box call lids since they were a little less than 2 inches
in width. I used the above machine mostly for making turkey box call
lid radius cuts and did many years supply of the lids at one set-up before removing the
special molding knives and trough/auxiliary platform. I currently, use
the planer just for surface planing instead of making box call lid radius
cuts.
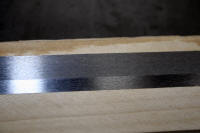
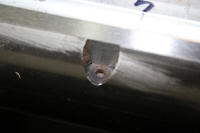
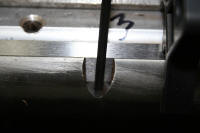
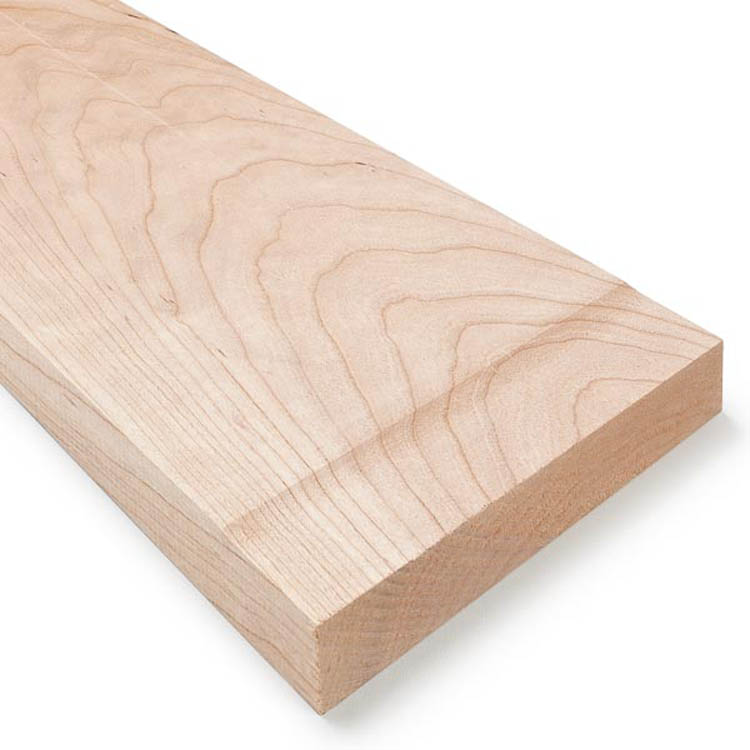
Below a pix of the auxiliary wood platform removed from the planer with a Eastern
Red Cedar board that had been planed using the special set of radius knives
in the molding cutterhead.
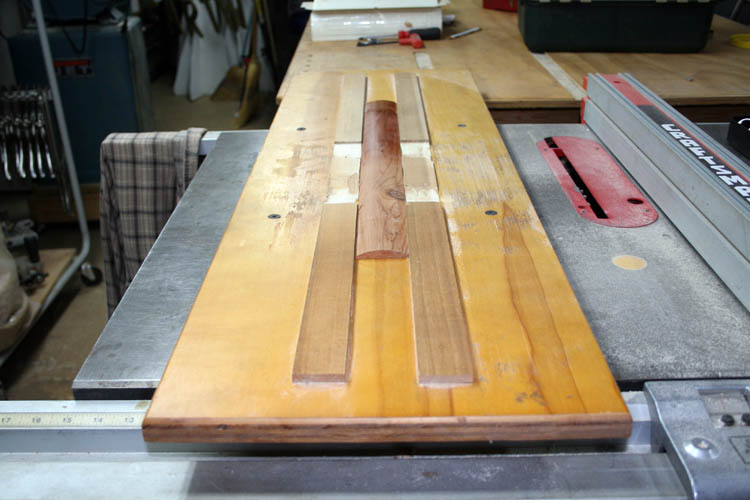
The little Jet 13 inch planer/molder did a great job cutting the radius
for the turkey box call lids.
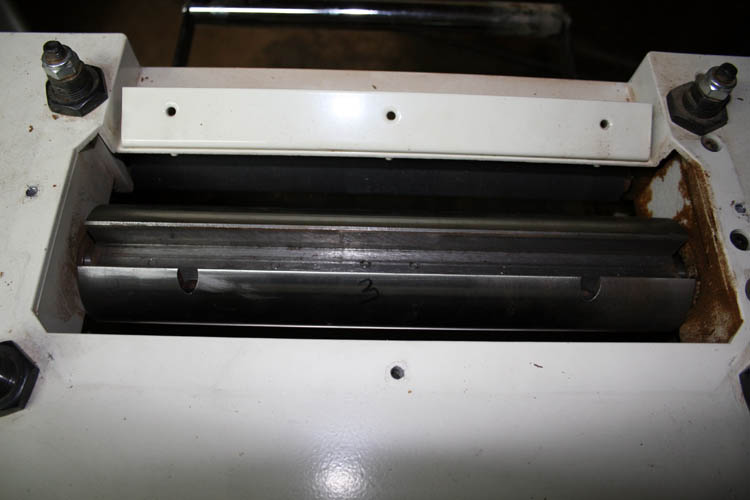
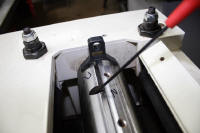
Above is pix of the cutterhead assembly with the knives and lock bars
removed.
You repeat the above steps for knives two and three.
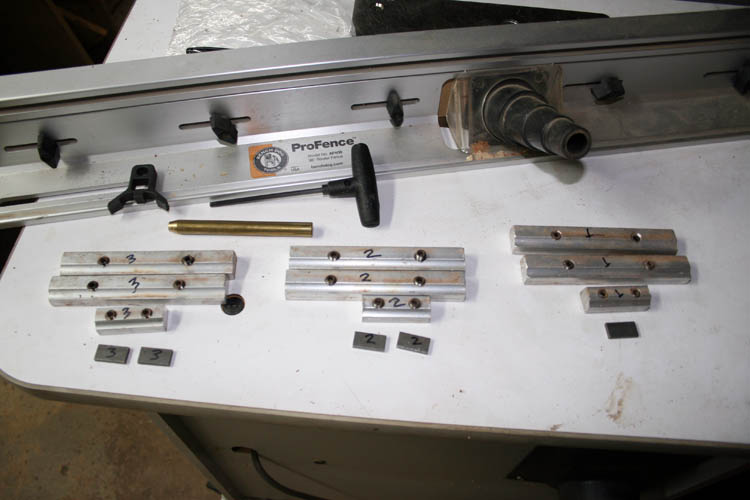
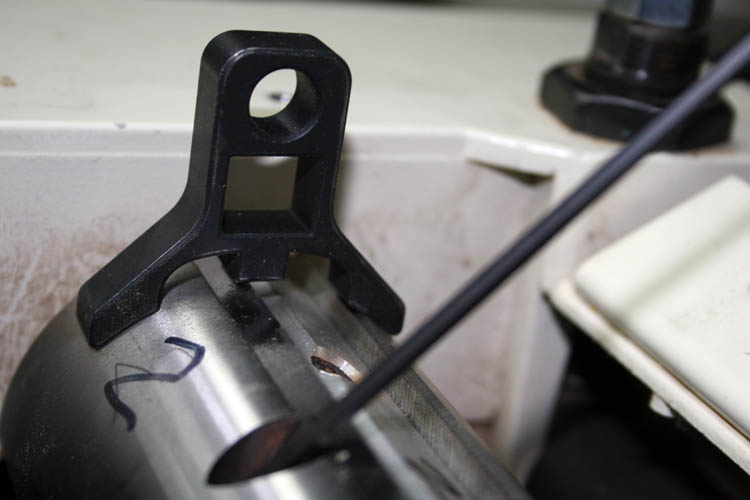
Above pix of the lock bars, brass rod, Allen wrench and the adjustment
height tool for the cutterhead knives.
I will post pixs of installing the sharpened knives into the cutterhead
when I receive them back from.
INSTALLING REPLACEMENT KNIVES
I received the reground knives on 04-11-17 and
was not impressed with the
regrind. The knives would definitely not shave any hair off my arm and
only one knife would begin to cut a regular piece of paper. I could
see the knife edges and they were basically a little blunt. Apparently, there
was a two stage grinding done and the second final grind did not come to the
edge of the knife to produce a razor edge, even though around a 40 degree
angle and a little bit of a hollow ground instead of a flat ground was
present on the knives.
Also, I put my calipers on the width of the blades and they varied from .618
to .625 which is not precision grinding in my book. Although this is not a big issue,
since each knife can be adjusted to Jet's standard using the set-up tool
provided with the machine. The regrind was a wasted
$ 16.05 in my humble opinion, therefore I did not install the original Jet reground
knives. I am sure I could sharpen the dull knives on a flat surface
using conventional techniques without any expensive equipment, but will
chalk this one off to experience.
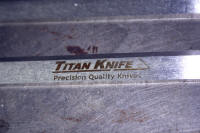
Instead, I installed a replacement set of planer knives manufactured by
Titan Knives and they were razor sharp. Those knives were flat ground
to an excellent smooth finish, whereas the original Jet knives were vertical
ground which will leave a micro serrated edge since they appeared to be
ground to about a rough 100 grit.
Click on the thumbnail pixs below for a larger screen view:


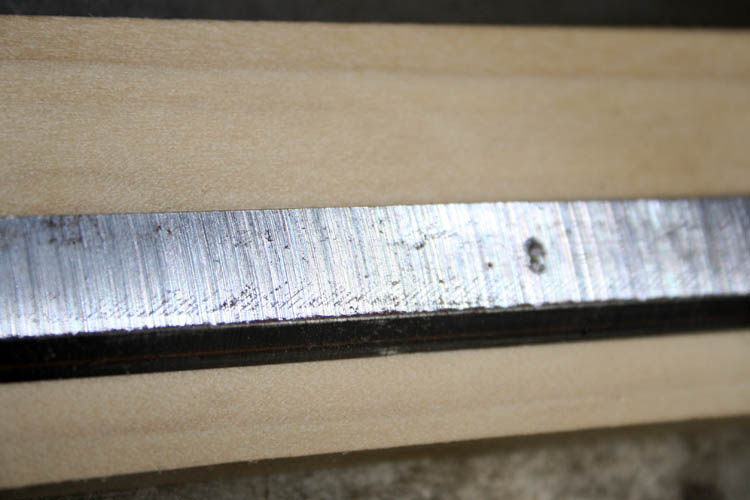
Below is a close-up pix of the back side of one the original Jet knives that
came with the machine. As evidenced by the rough vertical
manufacturing grind lines, the knife edge will be somewhat serrated if
viewed under magnification. The original blades performed pretty good
until they of course got dulled from usage over the years on very hard woods.
The planer hasn't been in much of a production environment as far as
continued usage and the reason the knives lasted as long as they did.
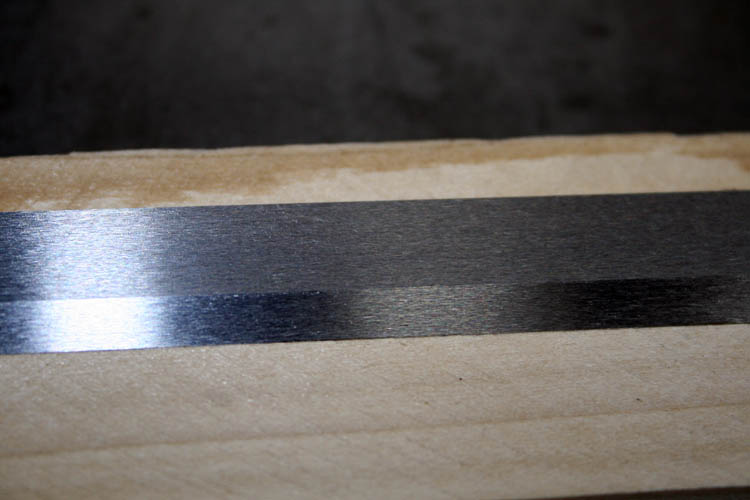
The
Titan Knives are precision made of T1 HSS with a
smooth flat horizontal ground finish on all surfaces of the knifes with the
grind lines running parallel to the length of the knife and to reiterate,
razor sharp.
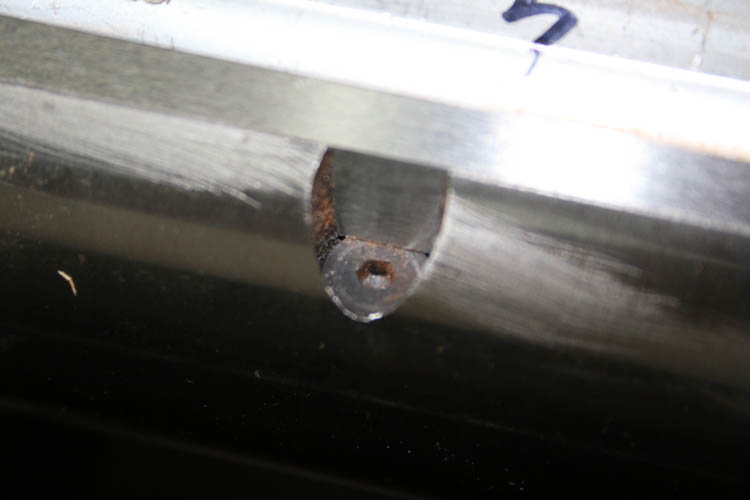
To install the knives, you place all the lock blocks in the cutterhead
slot along with the spacers for the short molding lock bar for knife # 1. The knife will rest on top
of
a portion of two flat
head Allen head machine screws which are for adjusting the height of the
knives. You
tighten each lock bar to take out the slack and using the height gauge for
the knife; raise or lower the knife blade until it contacts the gauge,
checking the knife height at both ends. You could set up a
dial
indicator gauge and do the same thing with more precision if
desired.
You then tighten all the set screws pulling the tapered lock bars tight
against the knife and the cutterhead slot.
You do this for all three knives. It was a little trouble keeping
the knives flush against the height adjustment machine screws since the
blades wanted to ride upward when tightening the locking bars. I used
a hammer and wood block to tap the knives tight against the machine screws
when the knife would ride up off the flathead machine screws that control
the knife height.
After the knives were installed, the dust chute and dust cover was
installed. I will give the planer a test run before too much longer.
My next woodworking project is a
potato and onion storage bin cabinet for
the kitchen.
IN-FEED & OUT-FEED ROLLER ADJUSTMENTS
While waiting for the cutterhead knives to be re-sharpened, I adjusted
the spring loaded feed rollers. In essence, you want the spring loaded
in-feed and out-feed rollers to be about 1/8 inch downward from the
cutterhead which keeps adequate pressure onto the material you are planing,
allowing the in-feed roller to pull the material into the cutterhead along
with the out-feed roller to keep the material flat against the bed of the planer.
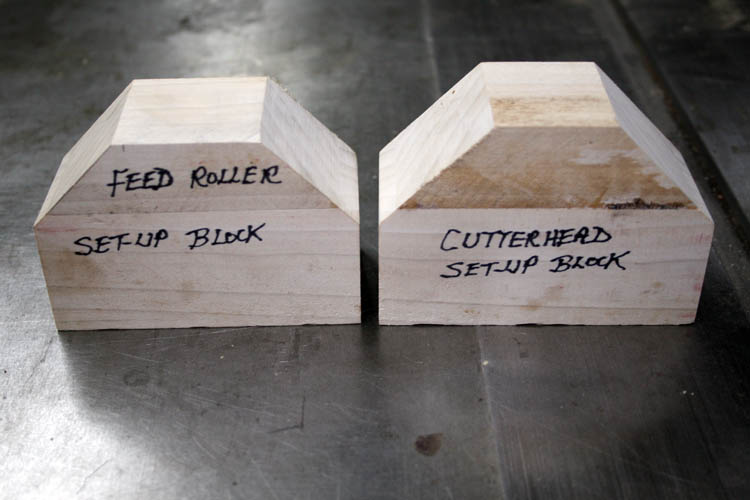
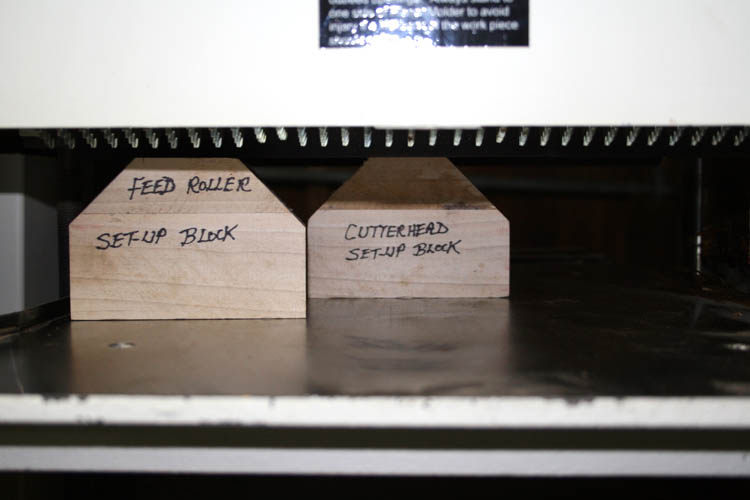
When I first got the machine, I made three set-up blocks, however I could
not locate them and made another set of two blocks only. Below is an archived
pix of the original set-up blocks:
Click on thumbnail pixs below for a larger screen view:
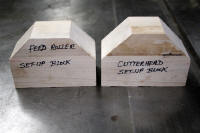

The purpose of the set-up blocks will position the in-feed and out-feed
rollers as stated above in the proper relationship to the cutterhead.
Too little pressure and the board will not be pulled through the machine and
if the feed rollers are too low, it will overload the machine and/or not
allow you to feed the material into the machine.
As a general rule of thumb, the in-feed and out-feed rollers are set 1/8"
below the cutterhead (not the knives). Make certain the power to the
machine is off!
Lower the work table to allow the cutterhead block to slide freely between the
table and the cutterhead. NOTE: Cutterhead may have to be
turned by hand to rotate a knife out of the way....in this case, I already
had the knives removed.
Adjust the table height so the cutterhead block can be inserted between the table and
the cutterhead with minimum resistance.
Remove the cutterhead block. Do not raise or lower the table at this
point. It will affect the final result.
Insert the block labeled "Feed Roller" into the planer opening.
Raise or lower the in-feed roller until it rests on top of the block end to
end. To adjust the in-feed roller, loosen the jam nut on both sides of
the in-feed roller. Turn the threaded bushing counter clockwise to
raise the roller and clockwise to lower the roller. Raise or lower the
roller until it contacts the top of the block equally on both ends of the roller.
Block should be slide in and out with minimum of force.
Repeat the process with the out-feed roller.
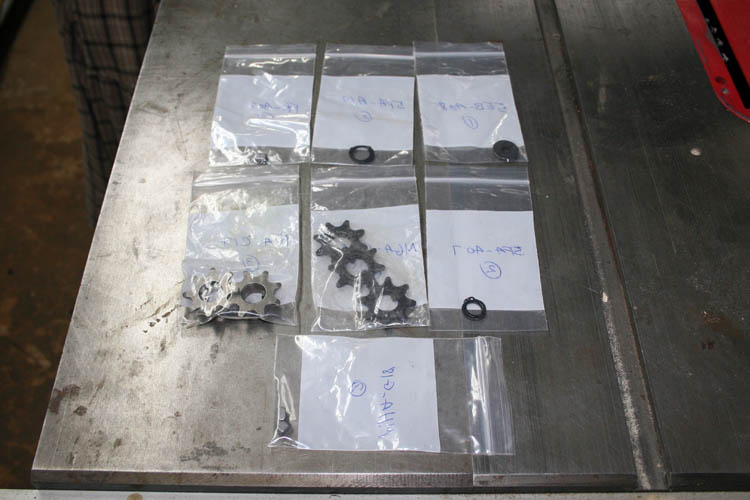
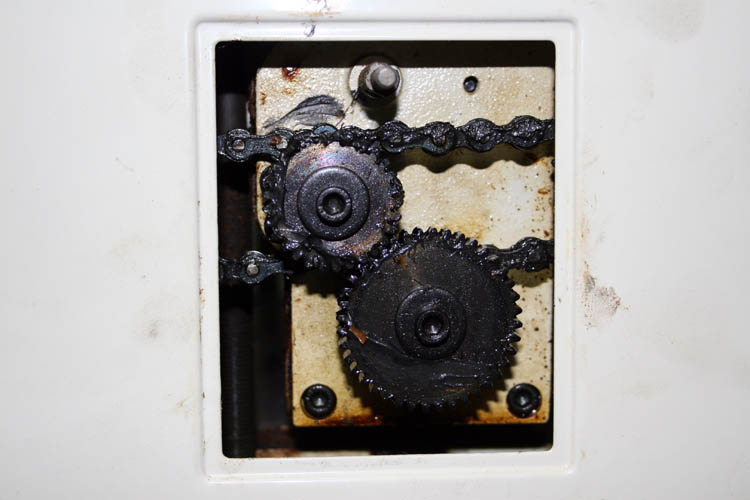
PRIOR MAINTENANCE
In the years using the above planer/molder, I have experienced only one
equipment malfunction around March 2010 and that was brought about by taking
to deep a cut
off a wide board which had a tapered thickness. Before I could cut the machine power off, the
machine bogged down and one of the two chain drive sprockets broke along
with shearing a keyway or two. Those sprockets appear to be cast
and/or
Metal Injection Molding technology rather
than machined from a billet of steel. It didn't take too long to get
replacement parts on line. I ordered a couple spares of each, since the shipping
was more than what the parts cost or close to the amount anyway.......don't
remember exactly the amount of shipping, but it was very excessive. Shipping
and Handing charges are a big profit for some companies.
Below pix of the spare parts:
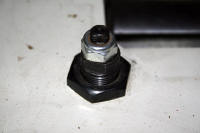
Pix below of what the gear feed roller assembly looks like:
Web published by Bill aka Mickey Porter on 04-06-17.
WHAT IS PLANER SNIPE
Those that are senior citizens probably remember about going
snipe
hunting, either holding the bag or participating in the drive. In a
nutshell, an unsuspecting young person and maybe a little on the gullibility
side, would agree to go snipe hunting which was after dark in some remote
location. The idea was to hold a burlap sack in a small creek bed and
the party of several would go upstream and drive or flush the snipe down to
where the person holding the bag would be able to catch him in the burlap
sack. Once the person holding the bag was at the proper location, the
other party would actually leave and not return, leaving that person alone
waiting on the snipe.....grin if you must!
Well, planer snipe is not that kind of snipe, but a malady common to the
usage of a small planer and/or the bench top type of planer which leaves one
or both ends of the planed board a little thinner than the rest of the
board. To some degree, snipe happens on much larger planers too but
not as pronounced. The effect is usually quite subtle, but if you run
your fingers along the board, you can usually feel a slight step.
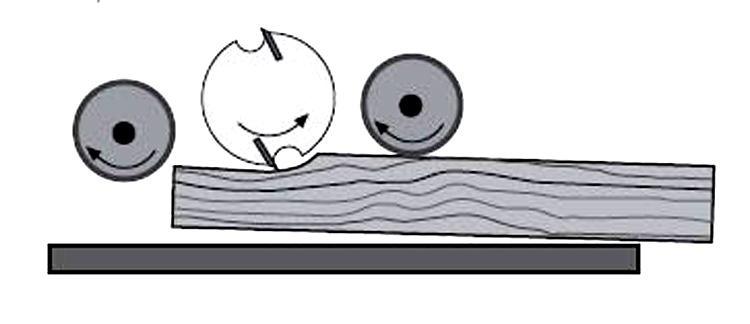
Shining a light on the board at a low angle also reveals it. Below is a pix screen captured from the internet
showing what snipe looks like:
The principle cause of snipe is the unbalanced pressure exerted by the
rubber rollers, which is normally experienced at both ends of the work
piece. When the work piece is introduced to the planer, the blades
work on the piece while held by only one rubber roller (in-feed) which pulls
the board upward slightly, after which
it is held by two rubber rollers (in-feed and out-feed) and thus equal
pressure at both ends of the work piece. This ensures that a uniform surface
is realized after the nearly invisible groove. In contrast, at the
out-feed, a situation arises when wood is held by only one rubber roller and
hence unbalanced pressure which ultimately results into a planer snipe.
GETTING RIDE OF PLANER SNIPE
It is possible to eliminate or reduce the planer snipe by applying upward
pressure on the end of the board once the in-feed roller contacts the board
holding the work piece firmly on the table during the in- feed and when the
board is about to exit the cutterhead. Alternatively, use a discarded
piece of wood in front of the actual work piece so that it takes the brunt
of snipe at both ends. This method always works, but applying upward pressure
works fine in my humble opinion.
Snipe can be sanded out in most cases, but it is best to eliminate it
altogether. In the past, if snipe was a little too deep to sand out
and there was spare material, I simply cut the end portion off of the
material that had the snipe, but that is a wasteful, when you are frugal and
using "high dollar" wood.
JET PLANER/MOLDER PERFORMANCE
For the money, this has been an excellent 13 inch planer/molder and would
recommend this machine to anyone that needs a planer with a little more
power than the bench top models. It will work in a semi-production
environment for a small shop, but a larger cabinet shop would need a much
larger and more powerful machine. Most of these types of machines are
no longer manufactured in the USA, whereas Delta, Powermatic, DeWalt,
Craftsman, etc. were once manufactured here in the USA and high
quality machines. A Grizzly planer is a comparable machine to the Jet
brand. Most of the time, you get what you pay for!
It is sad, the Cooperate Greed of America has sent many of our
manufacturing jobs to foreign countries for the sake of the all mighty
dollar! See scriptures below.
Web published updates by Bill aka Mickey Porter on 04-09-17 and updated
on 04-12-17.
LEAVING ON A
SPIRITUAL NOTE
If you do not know Jesus Christ as your Lord and Savior, please take
this moment to accept him by Faith into your Life, whereby Salvation
will be attained.
Ephesians 2:8 - 2:9 8 For by grace are ye saved through
faith; and that not of yourselves: [it is] the gift of God: 9 Not of
works, lest any man should boast.
Hebrews 11:1 “Now faith is the substance of things hoped for,
the evidence of things not seen.”
Romans 10:17 “So then faith cometh by hearing, and hearing by
the word of God.”
Open this
link about faith in the King James
Bible.
Romans 10:9 “That if thou shalt confess with thy mouth the
Lord Jesus, and shalt believe in thine heart that God hath raised him
from the dead, thou shalt be saved.”
Open this
link of Bible Verses About Salvation,
King James Version Bible (KJV).
Hebrews 4:12 “For the word of God is quick, and powerful, and
sharper than any two edged sword, piercing even to the dividing asunder
of soul and spirit, and of the joints and marrow, and is a discerner of
the thoughts and intents of the heart.”
Romans 6:23 “For the wages of sin is death; but the gift of
God is eternal life through Jesus Christ our Lord.”
Romans 3:23 “For all have sinned, and come short of the glory
of God;”
Micah 6:8 “He hath shewed thee, O man, what is good; and what
doth the LORD require of thee, but to do justly, and to love mercy, and
to walk humbly with thy God?”
Philippians 4:13 "I can do all things through Christ which
strengtheneth me."